The “Alpina” that wasn’t
May 13 – Jun 2, 2026The car turned up as an IAAIIAAI Insurance Auto Auctions — a salvage and used-vehicle auction. This car was a lot at the Sacramento yard. lot in Sacramento: a white 2012 BMW 750Li, 80,474 miles, “Normal Wear” with front-end damage as the secondary note, keys present, and a start code of “Stationary”stationary Auction start code meaning the vehicle didn’t start or run during inspection. It says nothing about why.. It ran through the auction three times in May without selling — high bids of $1,100, $925 and $900. 1Sale history as shown on the stat.vin page for VIN WBAKB8C5•••••5359, saved by David: IAAI, May 13, May 20 and May 27, 2026, all “Not sold”, seller “Dealer”.
The VIN decode on the listing page showed ‘750Li, Alpina B7’, and the broker’s invoice repeated it. 2stat.vin decode for VIN WBAKB8C5•••••5359: Model “750Li, Alpina B7”, Trim “750Li/Alpina B7”, Note “Alpina B7 LWB (500 hp)”, Engine Brake (hp) “for 750Li = 400, for ALPINA B7 = 500”.
It wasn’t one. The decoder lists both cars only because the VIN pattern is shared, and its own engine line shows the difference: 400 hp vs 500 hp. What arrived was a regular F02F02 Chassis code for the 2009–2015 long-wheelbase BMW 7 Series (the F01 is the standard wheelbase). 750Li750Li The V8 long-wheelbase 7 Series: 4.4 L twin-turbo N63, 400 hp in 2012. Not to be confused with the Alpina B7, a 500 hp car built from the same platform. with the ordinary 400 hp N63N63 BMW’s 4.4-litre twin-turbo V8 (2008–2013; this car has the N63B44A). Its turbos sit inside the “hot-V” between the cylinder banks. Rated 400 hp in the 750Li. — built in Dingolfing, Germany, 4.4-litre V8, 4,395 cc. Tip: verify the model independently; a VIN decode isn’t a spec sheet.
I bought it through SCA AuctionsSCA Auctions A Florida-based broker/dealer that lets members bid on Copart and IAAI lots. It invoiced and shipped this car., a Florida-based broker, on June 2, 2026 — $4,693 delivered: $3,355 for the car including auction fees, $840 for transport from the Rancho Cordova yard to Redding, plus $299 and $199 in transaction and documentation fees.
- Sale history as shown on the stat.vin page for VIN WBAKB8C5•••••5359, saved by David: IAAI, May 13, May 20 and May 27, 2026, all “Not sold”, seller “Dealer”.
- stat.vin decode for VIN WBAKB8C5•••••5359: Model “750Li, Alpina B7”, Trim “750Li/Alpina B7”, Note “Alpina B7 LWB (500 hp)”, Engine Brake (hp) “for 750Li = 400, for ALPINA B7 = 500”.
| Auction | IAAI · Sacramento (CA) yard · seller: Dealer |
|---|---|
| Vehicle | 2012 BMW 750Li, white, sedan · VIN WBAKB8C5•••••5359 |
| Decoder said | Model “750Li, Alpina B7” · Trim “750Li/Alpina B7” · Note “Alpina B7 LWB (500 hp)” |
| Engine (listing) | 4.4L V8 FI DOHC 32V · 4,395 cc · decoder hp: 750Li = 400 / Alpina B7 = 500 |
| Plant (decoder) | Dingolfing, Germany |
| Odometer | 80,474 mi (Actual) |
| Damage | Normal Wear · secondary: Front End · airbags intact |
| Start code | Stationary · keys: yes |
| Sale doc | Clear (California) |
| Retail value shown | $3,300 |
| Sale history | May 13 · $1,100 · not sold — May 20 · $925 · not sold — May 27 · $900 · not sold |
| Invoice | SCA Auctions LLC #175707 · Jun 2, 2026 · “2012 BMW 750Li / ALPINA B7” |
|---|---|
| Winning price + auction fees | $3,355 |
| Transport | $840 · Rancho Cordova, CA → Redding, CA |
| Transaction + documentation fees | $299 + $199 |
| Total delivered | $4,693 · paid Jun 2–3 · sold “AS-IS WHERE-IS” |
Seized, and rolled off in neutral
Jun 5 – Jun 15, 2026The listing’s start code was ‘Stationary’stationary Auction start code meaning the vehicle didn’t start or run during inspection. It says nothing about why.; on arrival the crankshaft was fully seized — it would not turn by hand at the crank bolt, never mind start. Because the engine could not rotate, the transmission had been put into neutral by releasing the park lockpark lock The parking pawl in the automatic transmission. With a seized engine it can be released manually so the car can roll (“forced neutral”). with the screw on the underside of the transmission, so the car could roll off the trailer. 3The DMV paperwork describes this as “forced neutral”: a manual override of the automatic transmission’s park lock, used when a car with a seized engine has to be moved.
It was delivered on Friday, June 5, 2026. 4The DMV statements give June 11 as the delivery date; the photo dates show it was June 5. The truck couldn’t get up the steep driveway, so the last stretch involved a come-along, wheel dollies and a lot of pushing. Then the car went into the garage bay, and that’s where it has stayed.
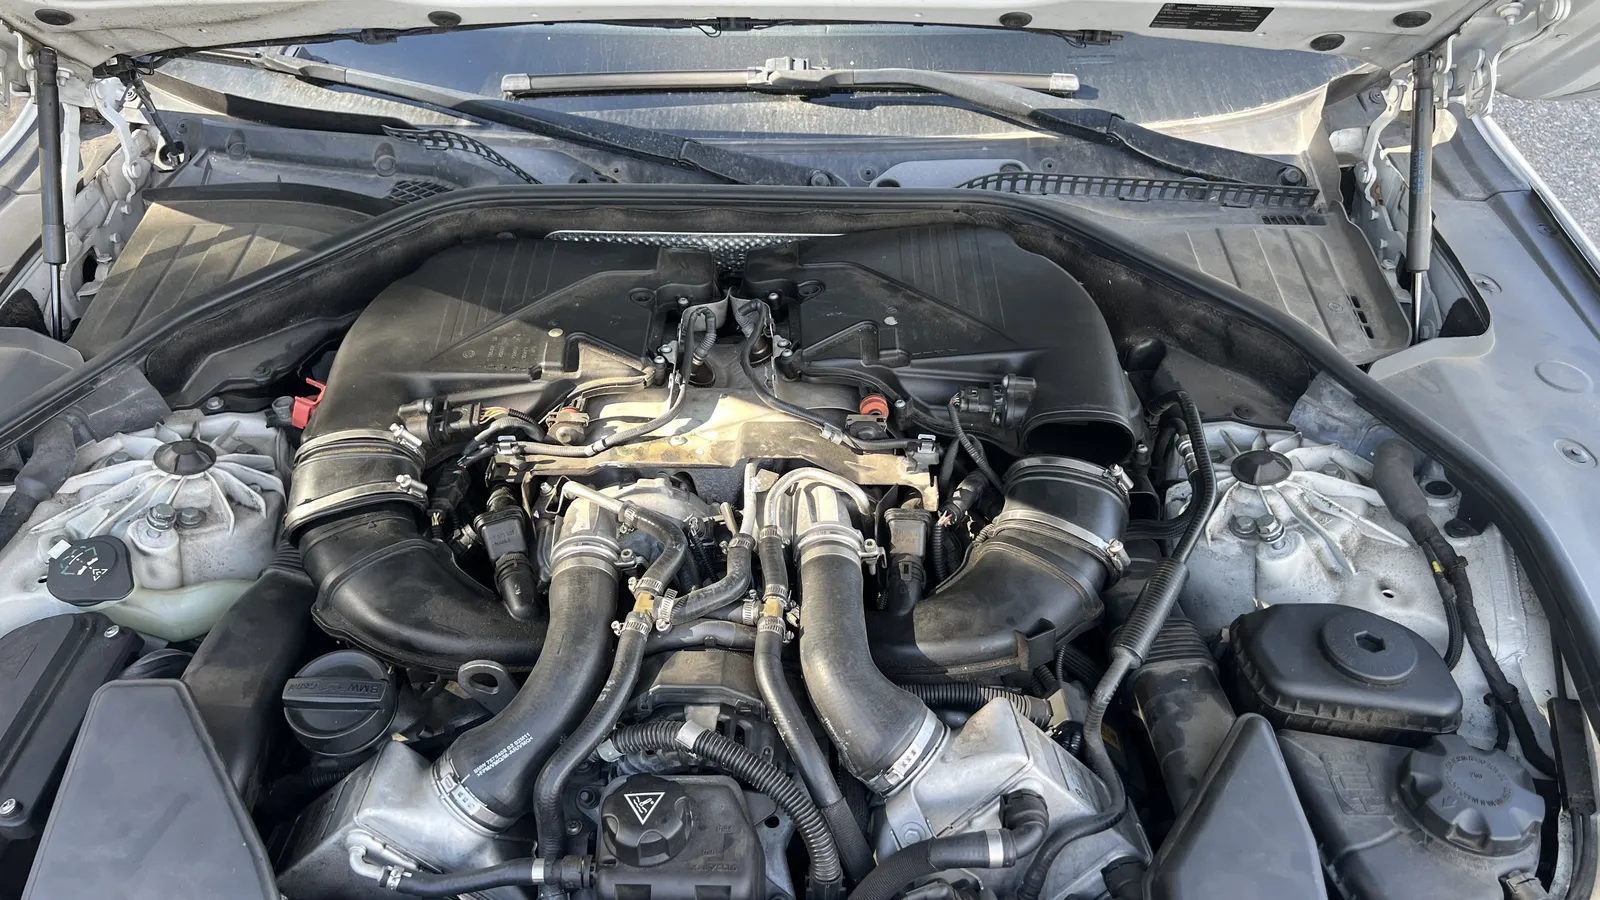
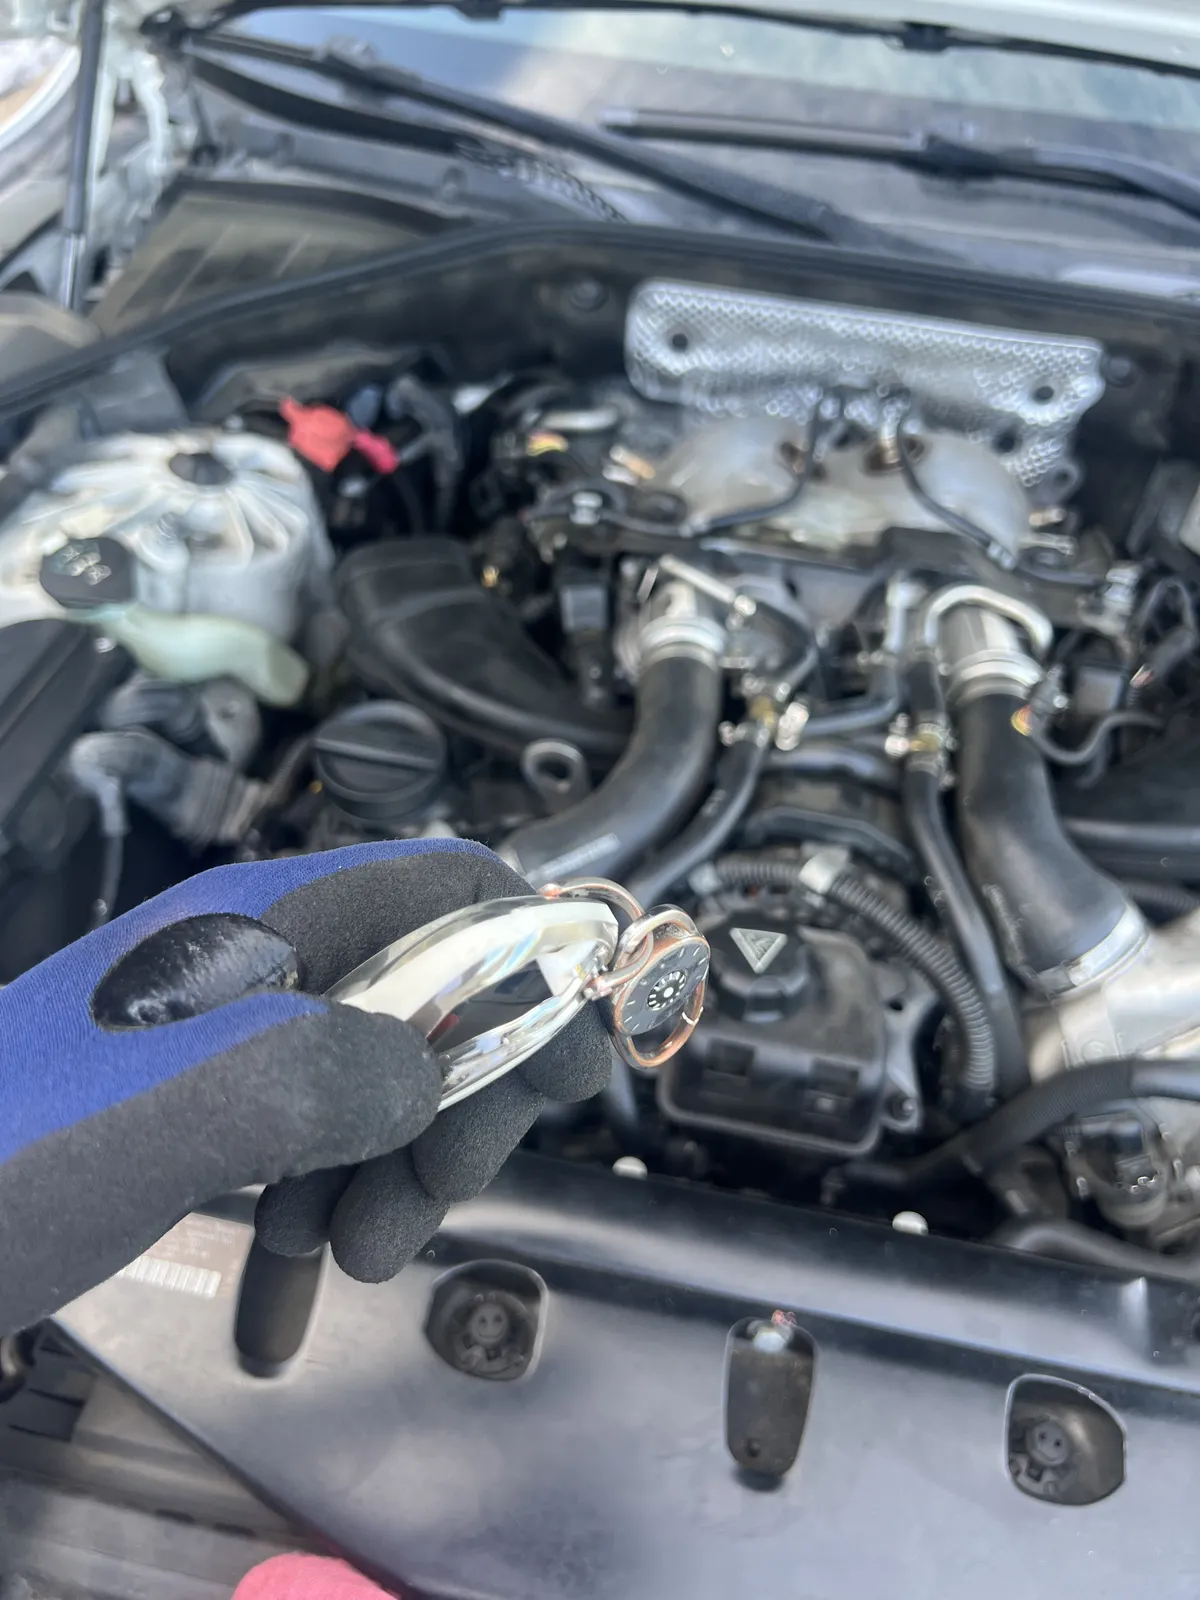
From the top the bay looked surprisingly normal. Underneath was a different story: lots of oil.
- The DMV paperwork describes this as “forced neutral”: a manual override of the automatic transmission’s park lock, used when a car with a seized engine has to be moved.
- The DMV statements give June 11 as the delivery date; the photo dates show it was June 5.
Doing my own detective work
June 2026The listing didn’t state why the car didn’t run, so all the diagnosis was up to me. The parts ledger shows the order of attack: first a gallon of Marvel Mystery Oil “used to try and unseize the engine”, then a borescope (and spark-plug sockets to get the plugs out) to look inside the cylinders — and then the decision to pull the engine.
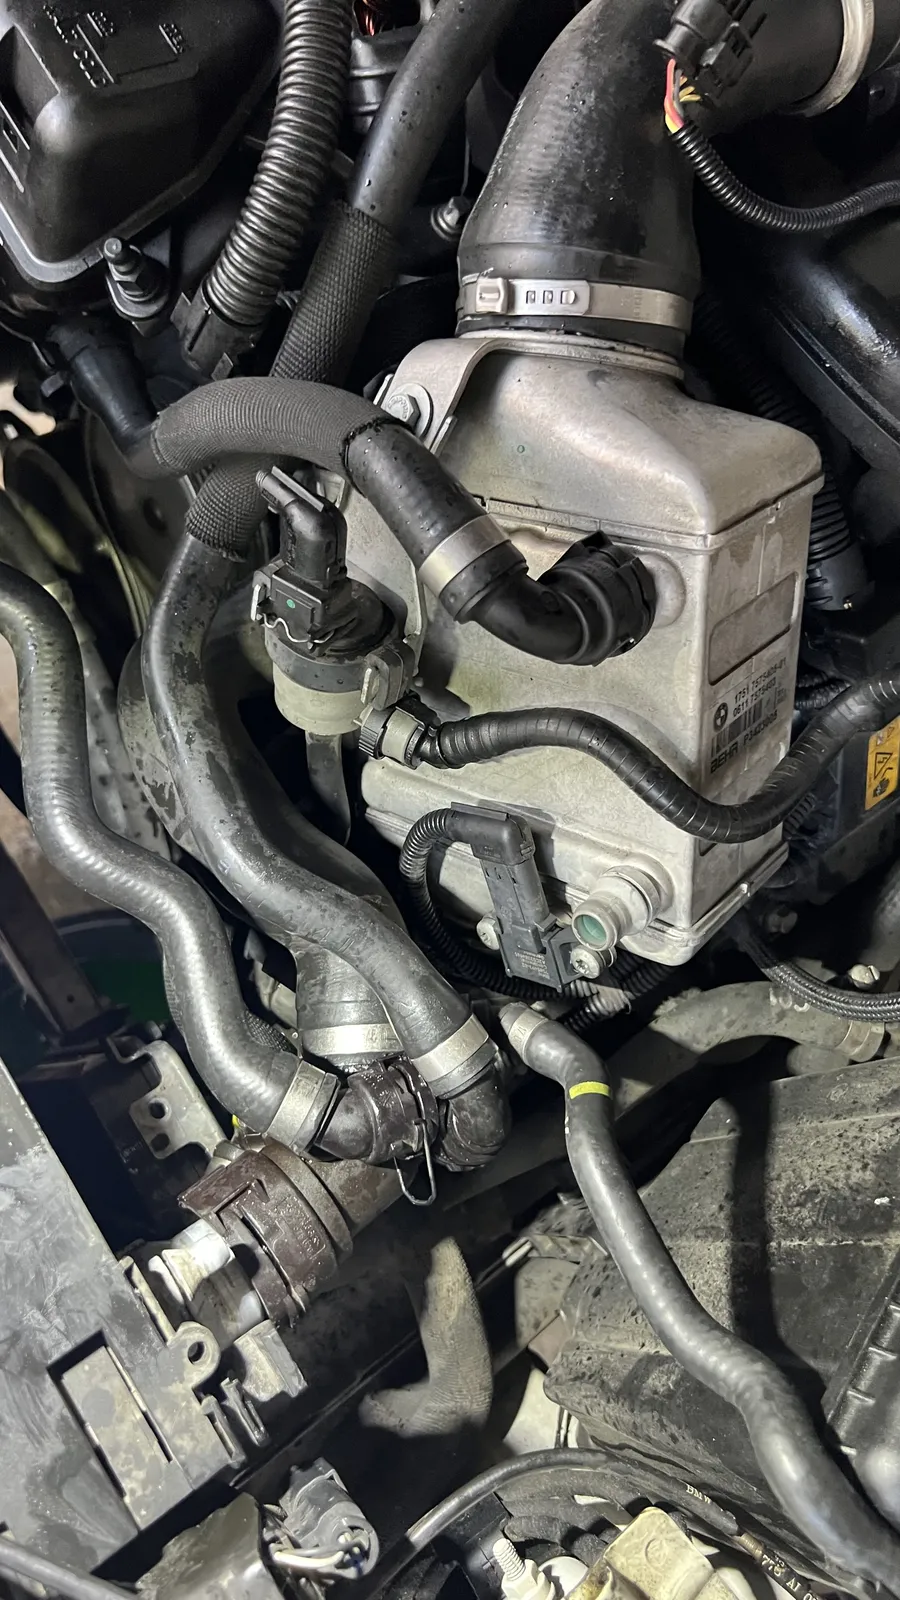
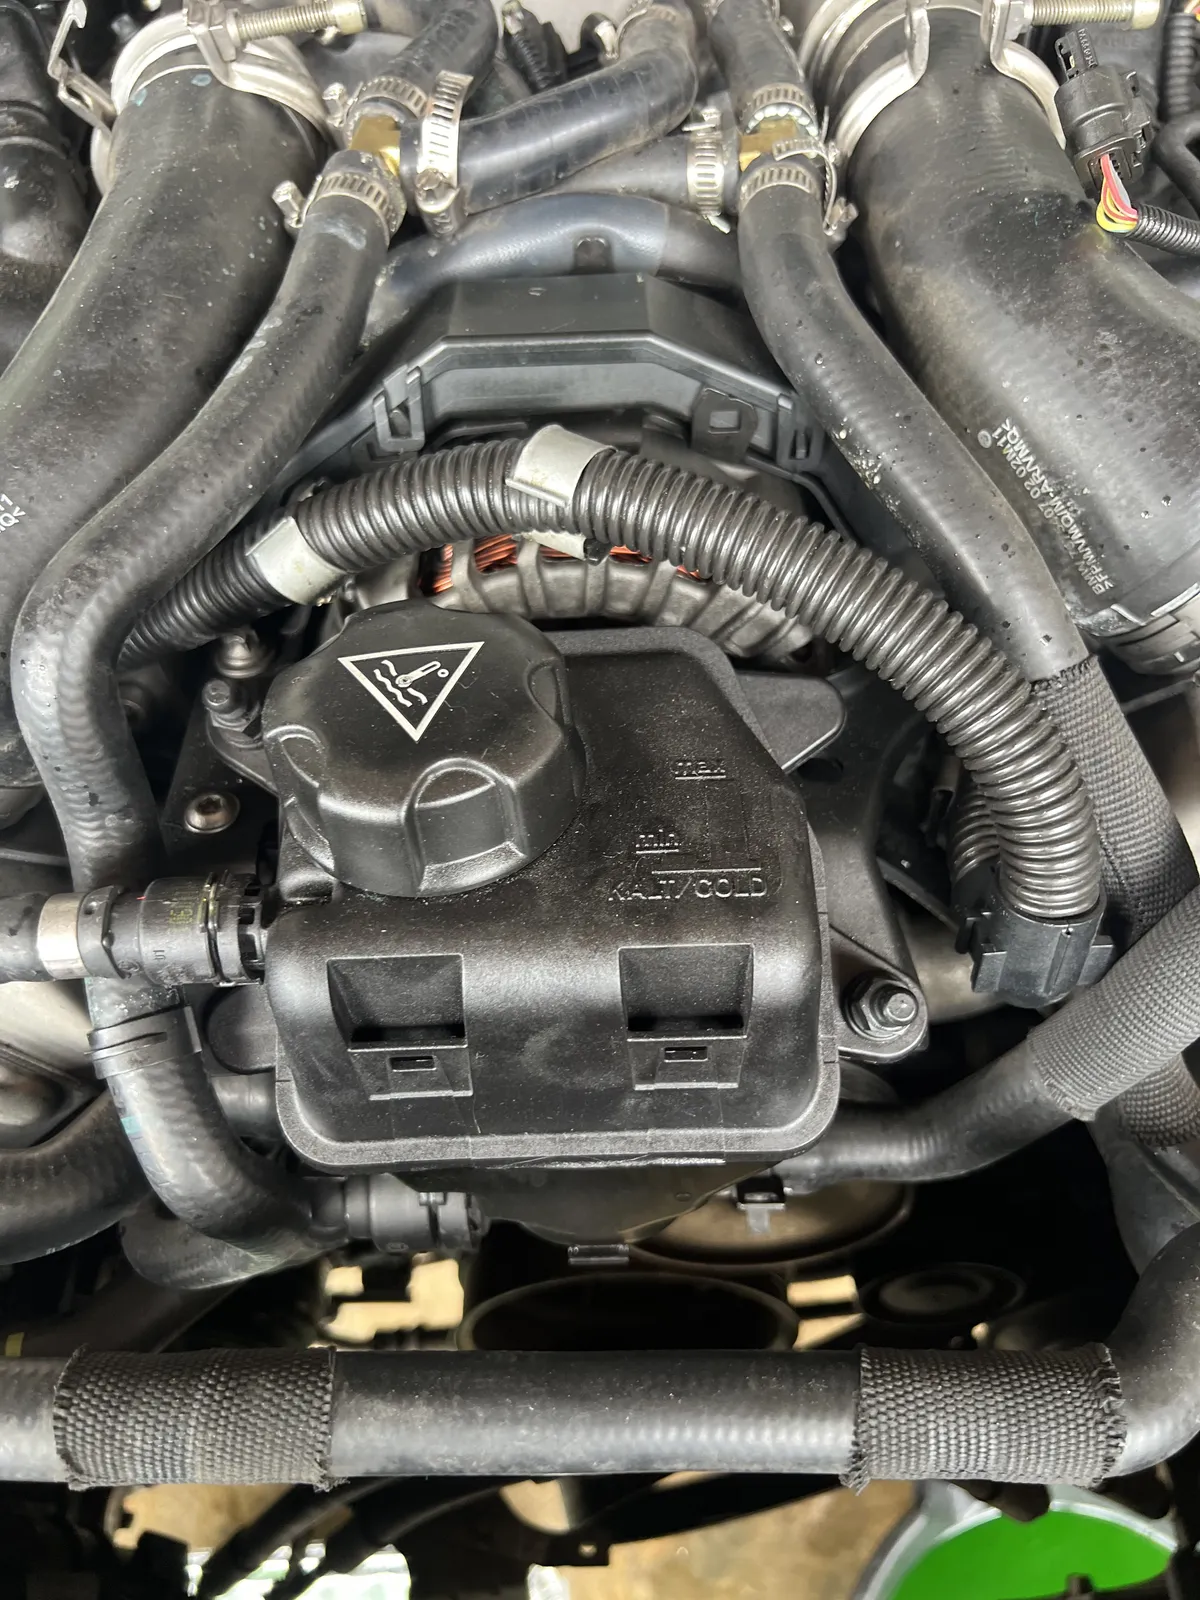
I also started documenting everything as found — the oil cooleroil cooler The engine-oil heat exchanger at the front of the car. On the N63 its lines and seals are well-known leak points. nest, the expansion tank and hoses, the high-pressure fuel lineHPFP High-pressure fuel pump, which feeds the direct-injection fuel rails at very high pressure. — because a car you’ve never seen run has no “before” to go back to.
The DMV detour
Jun 2026 onwardBefore going much further, the car had to be legally mine in California. SCA’s paid invoice is the commercial bill of sale. The DMV required a seller-signed REG 262REG 262 California DMV form: Vehicle/Vessel Transfer and Reassignment, which includes the odometer disclosure., which the Florida dealer said it couldn’t supply. So I wrote it all up: a vehicle evidence statement and a REG 265REG 265 California DMV form used to support a title application, here alongside a statement of facts.-style statement of facts, both dated July 11, 2026, with photos showing the car could never have been driven, plus a request for Planned Non-OperationPNO Planned Non-Operation: a California registration status for vehicles kept off public roads. status and a smog deferral until the car runs. 5Both documents are kept private. Only non-identifying facts from them are used here.
My first DMV visit was a bust. The first set of documents didn’t include the signatures and mileage the DMV needed, so nothing could be finished — but the DMV still collected a lot of fees.
The second visit, with the Florida paperwork in hand, worked: the title was issued. Because the car is non-op — title only, no plates — much of the fees were refunded. The odometer currently reads 80,473 miles. 6The auction listing showed 80,474 miles and the title reads about 80,479; the title is the official figure.
Next steps: get it running, pass smog, then back to the DMV for registration and plates.
- Both documents are kept private. Only non-identifying facts from them are used here.
- The auction listing showed 80,474 miles and the title reads about 80,479; the title is the official figure.
Pulling the motor
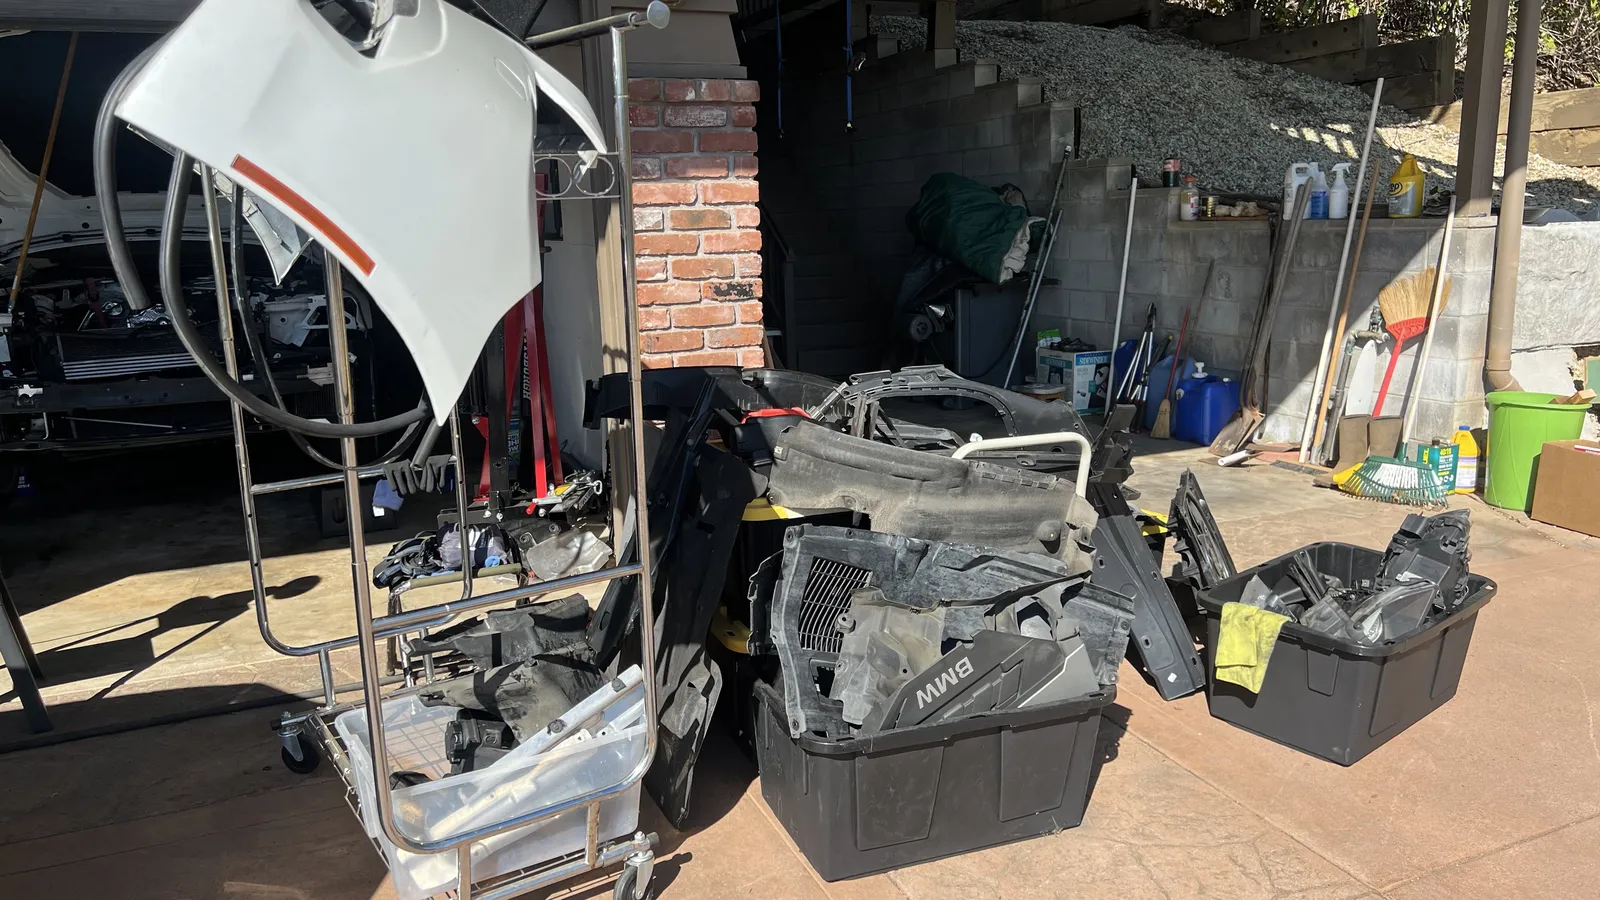
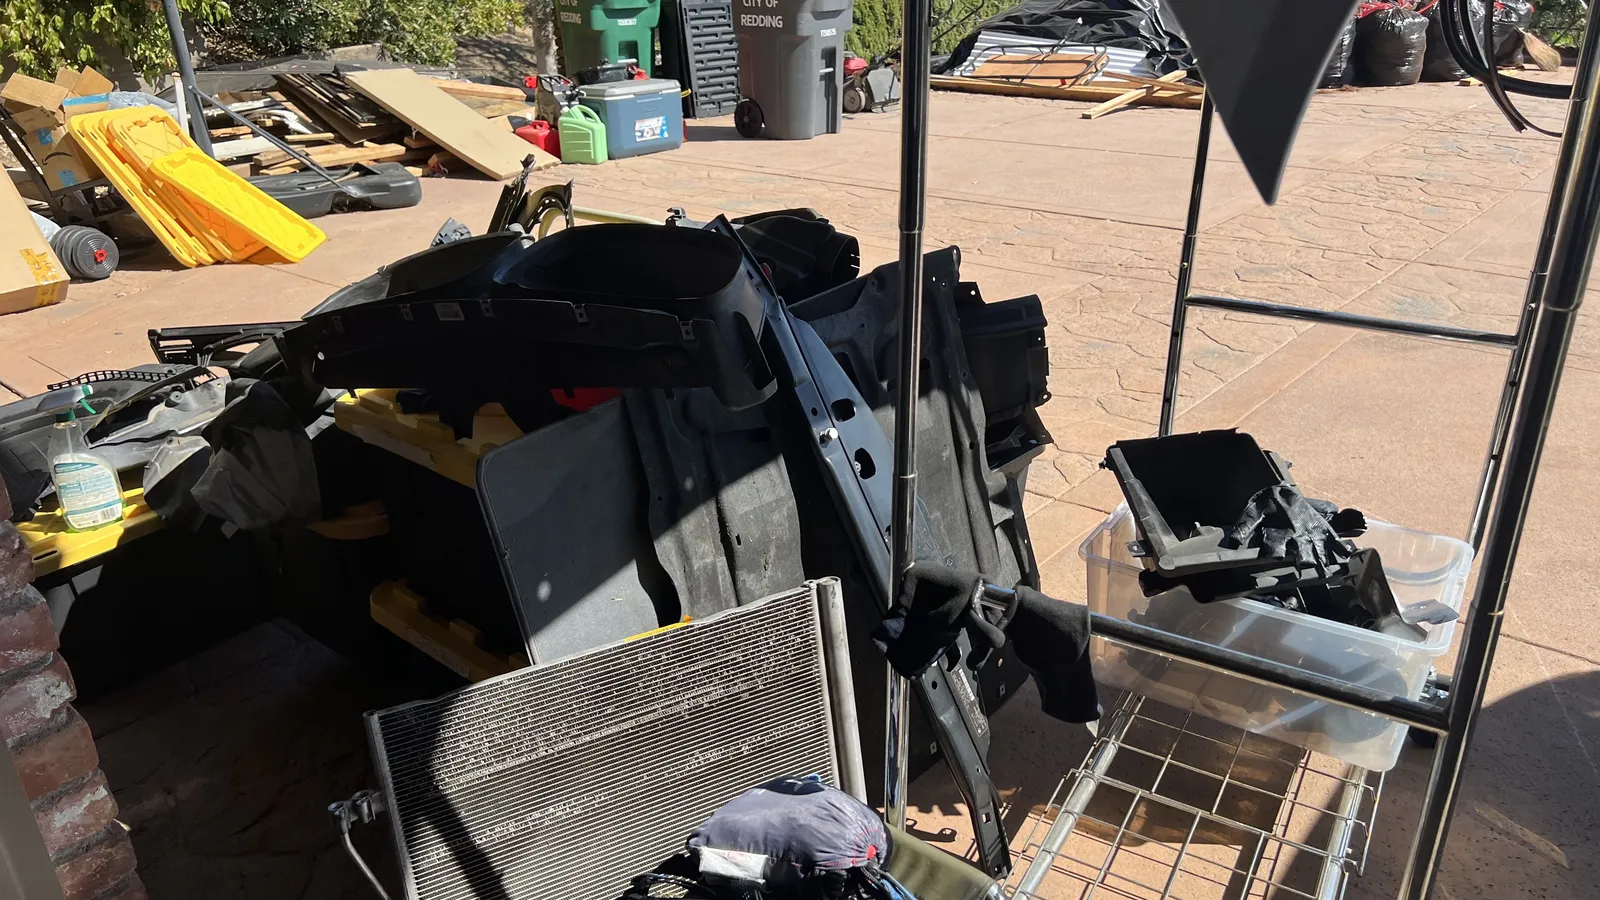
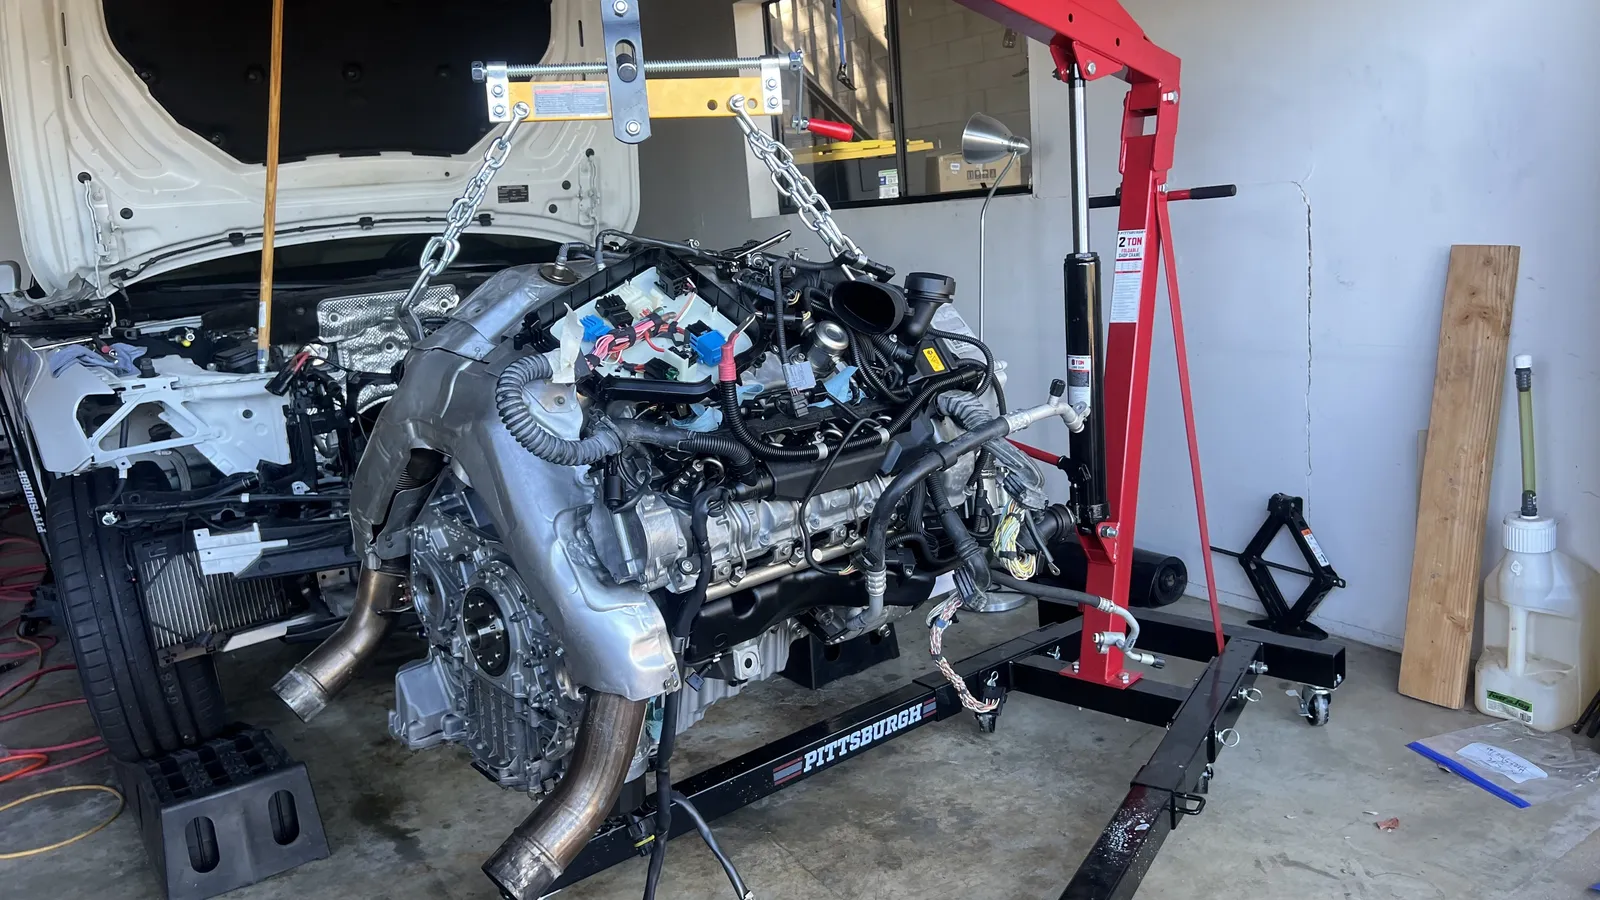
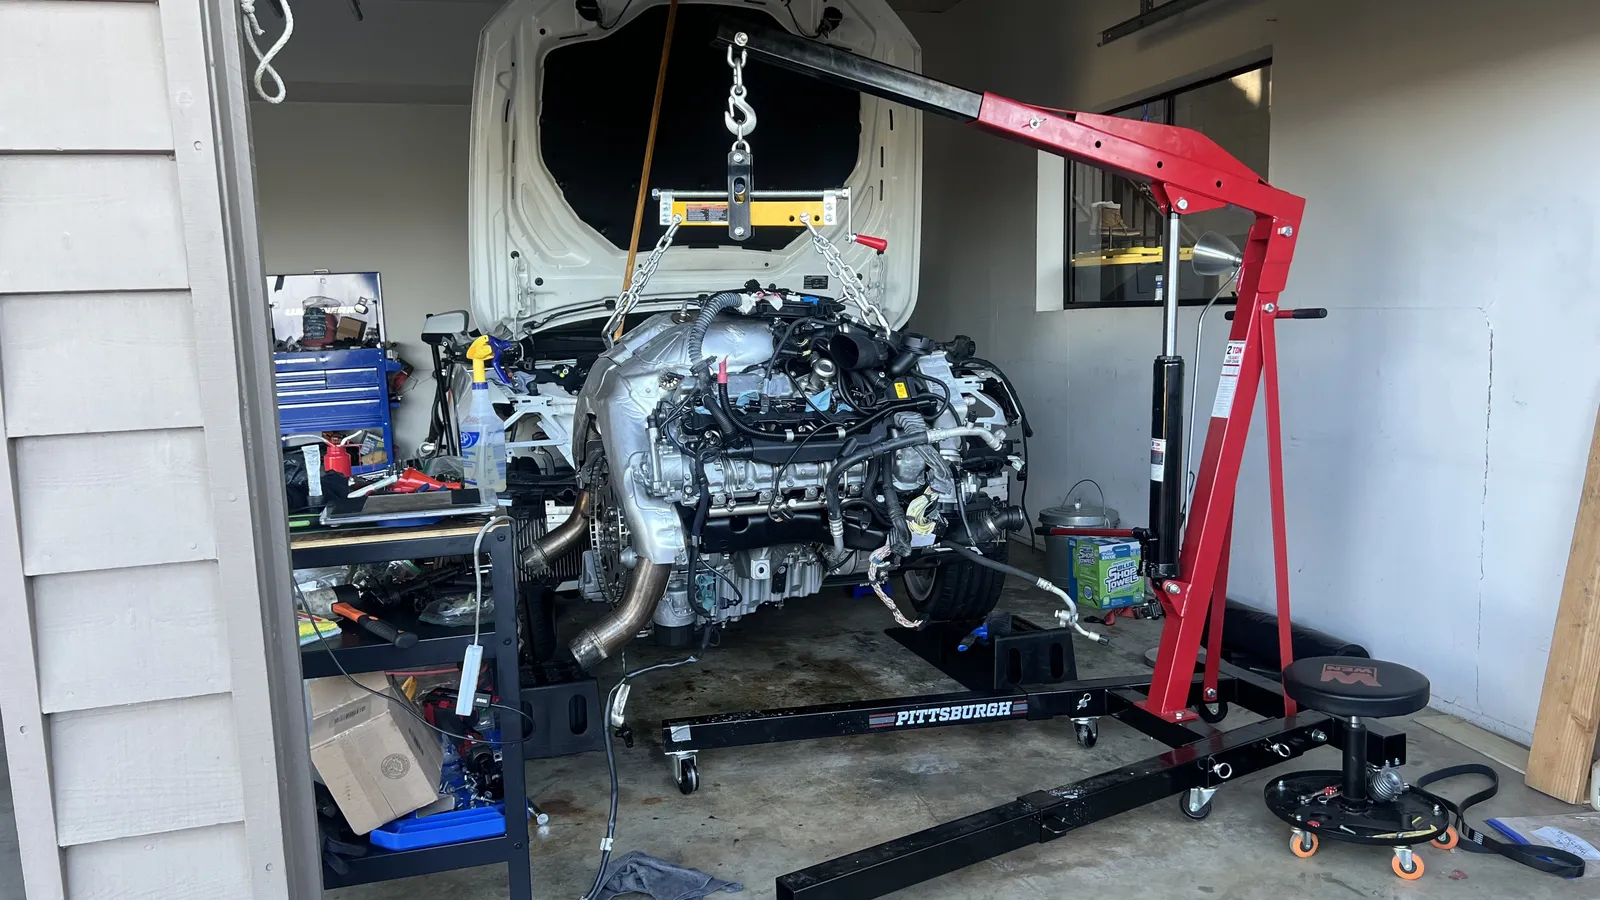
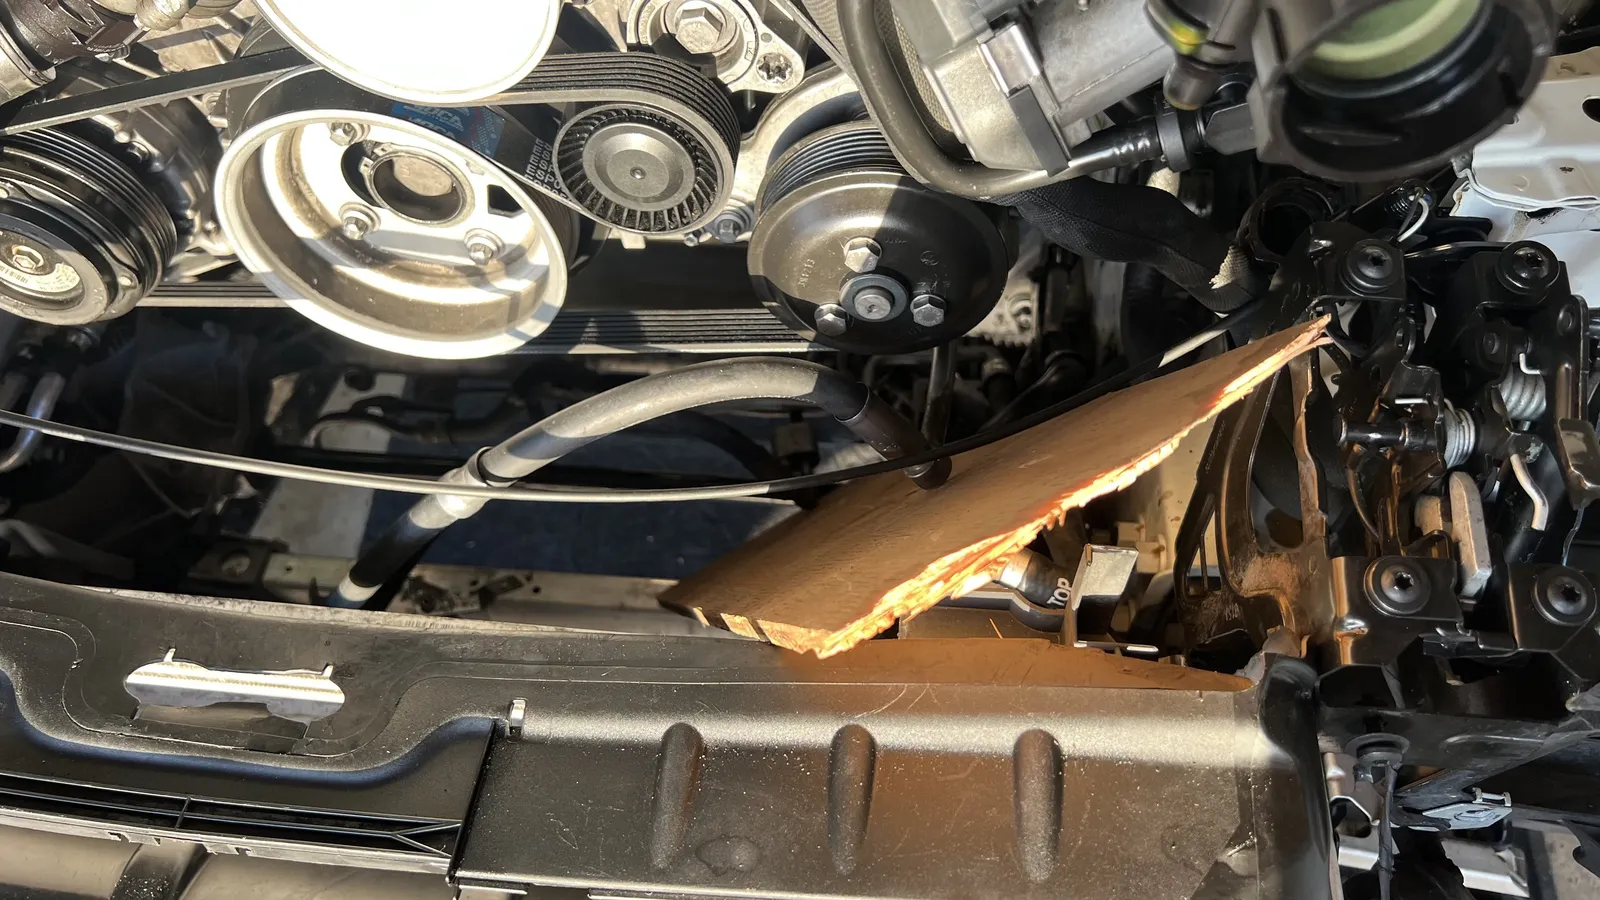
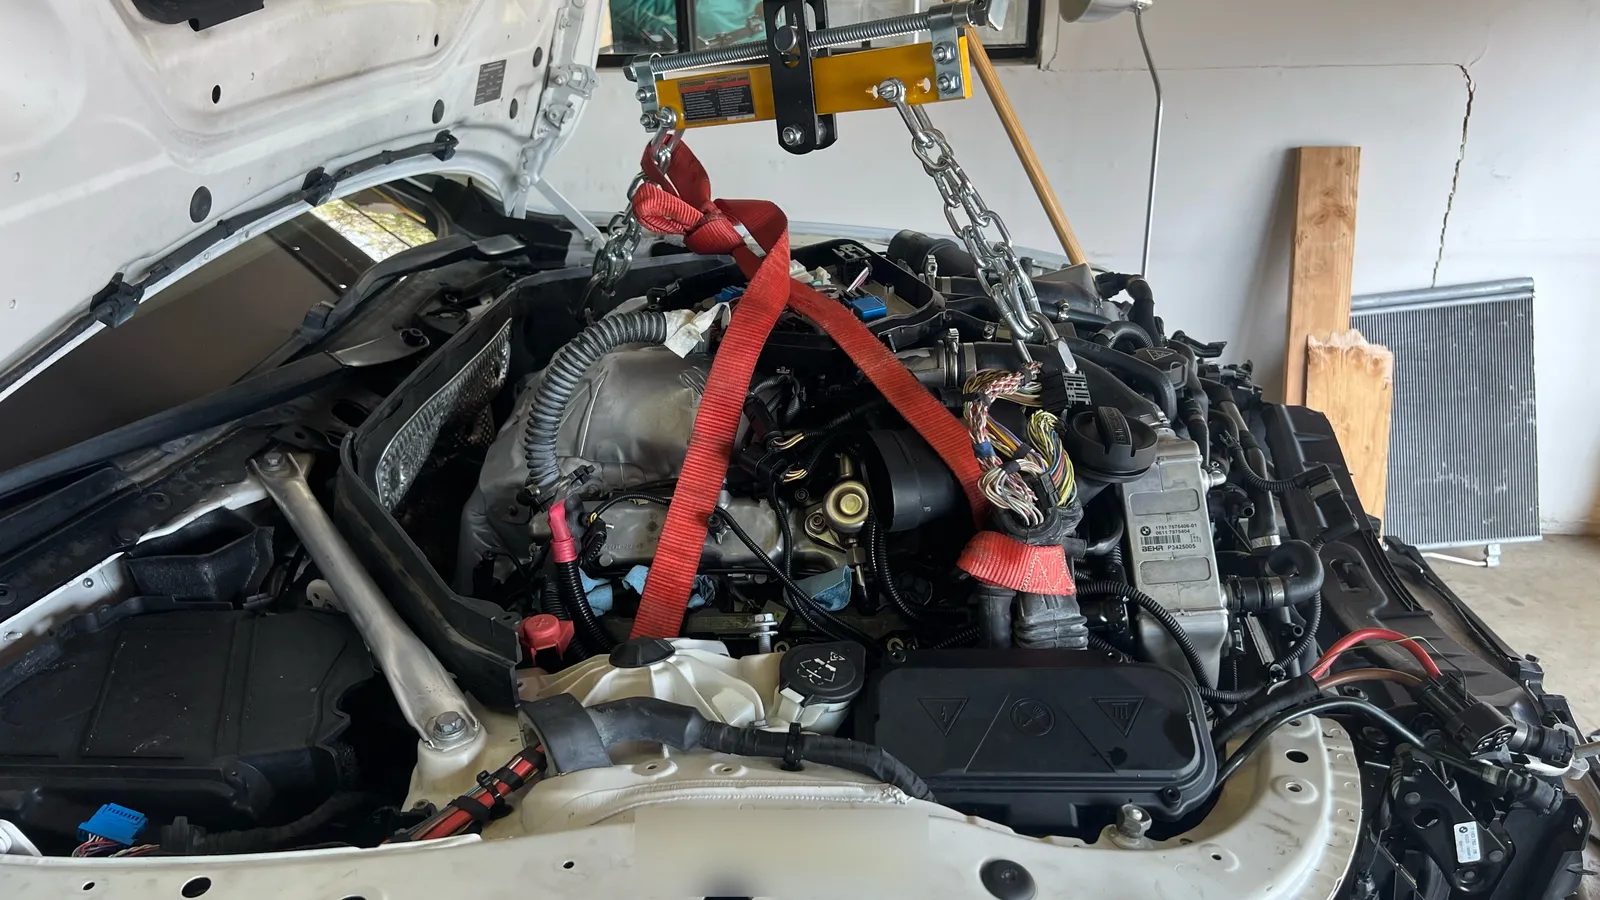
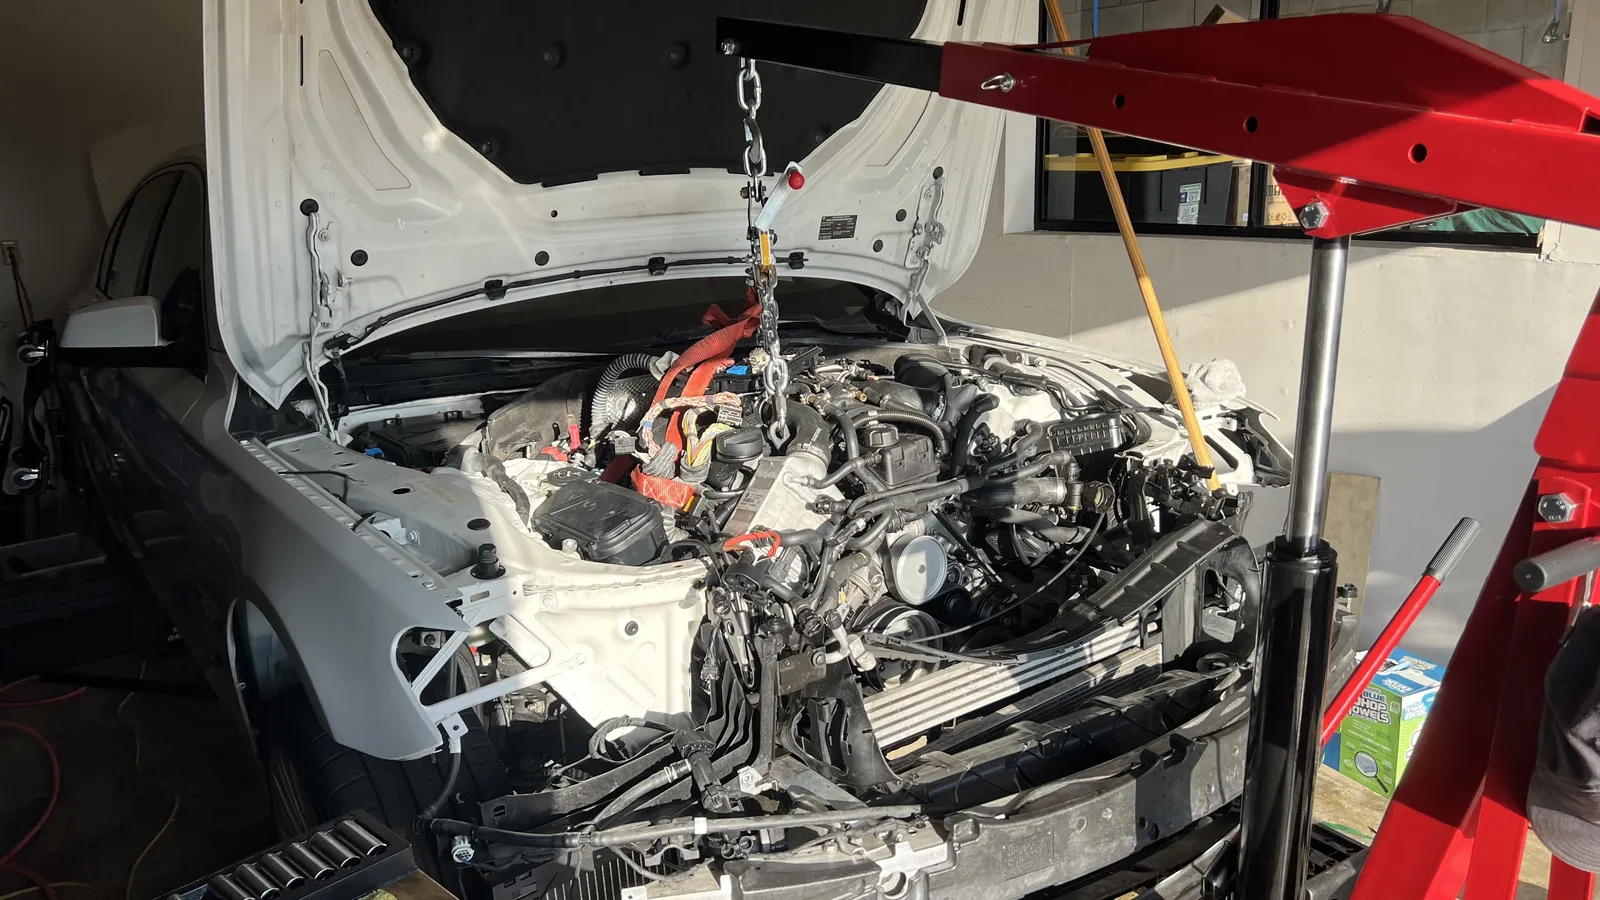
Jun 16 – Jun 22, 2026The only way to find out why it wouldn’t turn was to take the engine out. Accessories, the fuel system and the exhaust came off first; then the front end was stripped back to the radiator and intercooler so the hoist and load levelerload leveler A hoist attachment that tilts the engine while it hangs, so it can be angled out of (or into) the bay. could get in.
The tools came from Harbor Freight: a 2-ton folding shop crane, a ¾-ton load leveler and a folding engine stand. 7Ledger notes: the stand “works great but had to buy bolts from Home Depot to mount” the engine; the leveler was “overkill but worked well” and needed C-clamps.
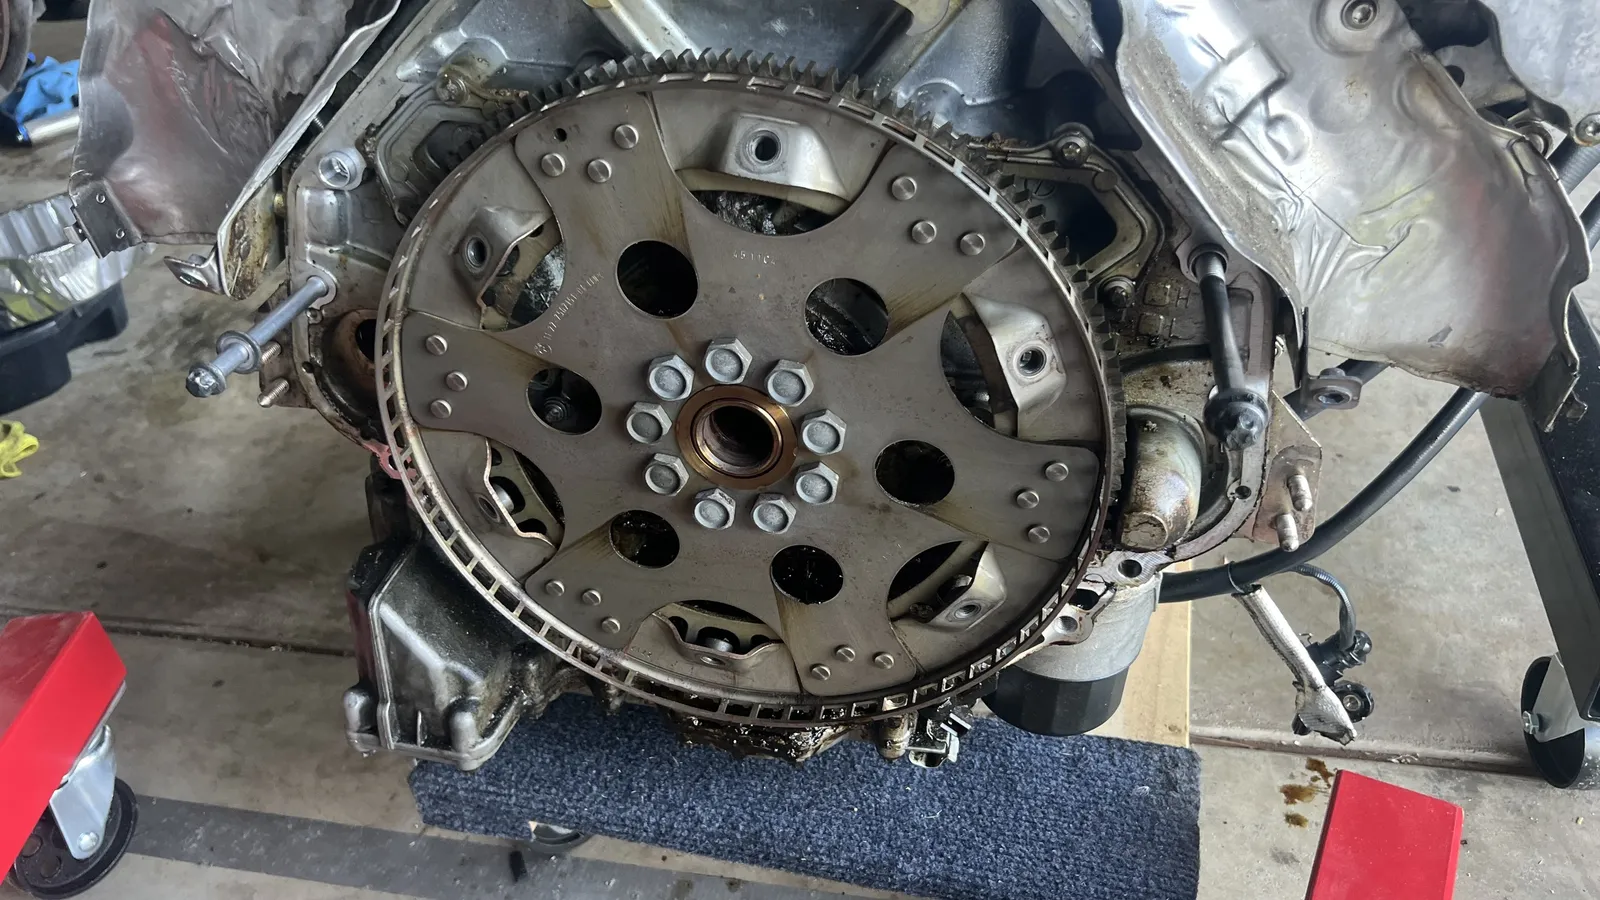
On June 21 the engine came out with the flexplate still on the crank, and by the next evening it was on the stand and ready for teardown.
- Ledger notes: the stand “works great but had to buy bolts from Home Depot to mount” the engine; the leveler was “overkill but worked well” and needed C-clamps.
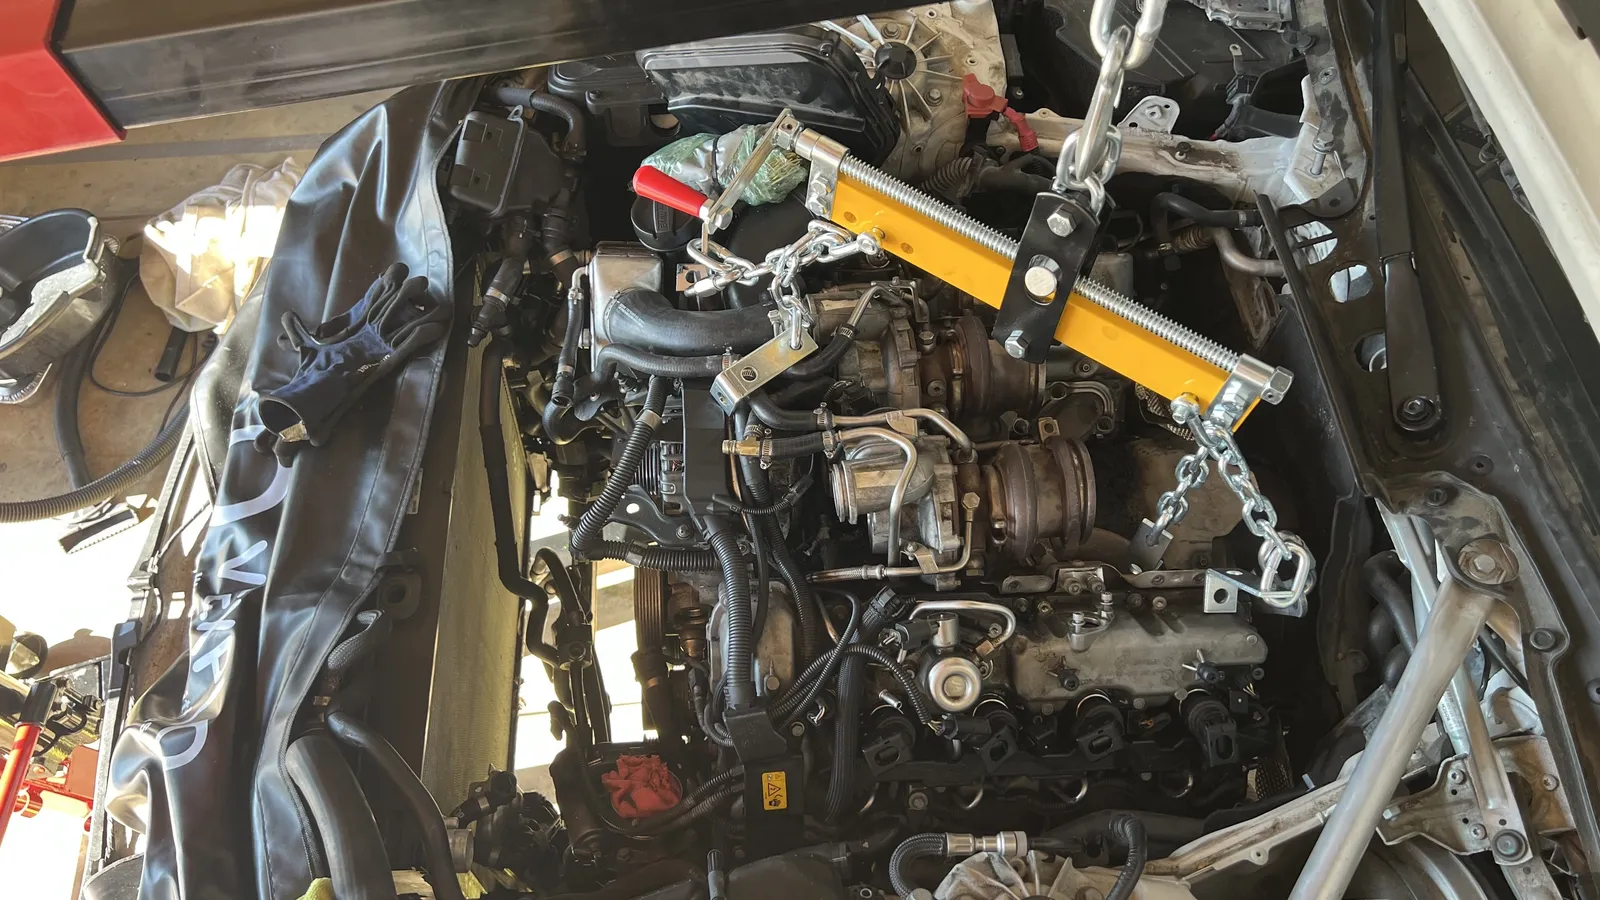
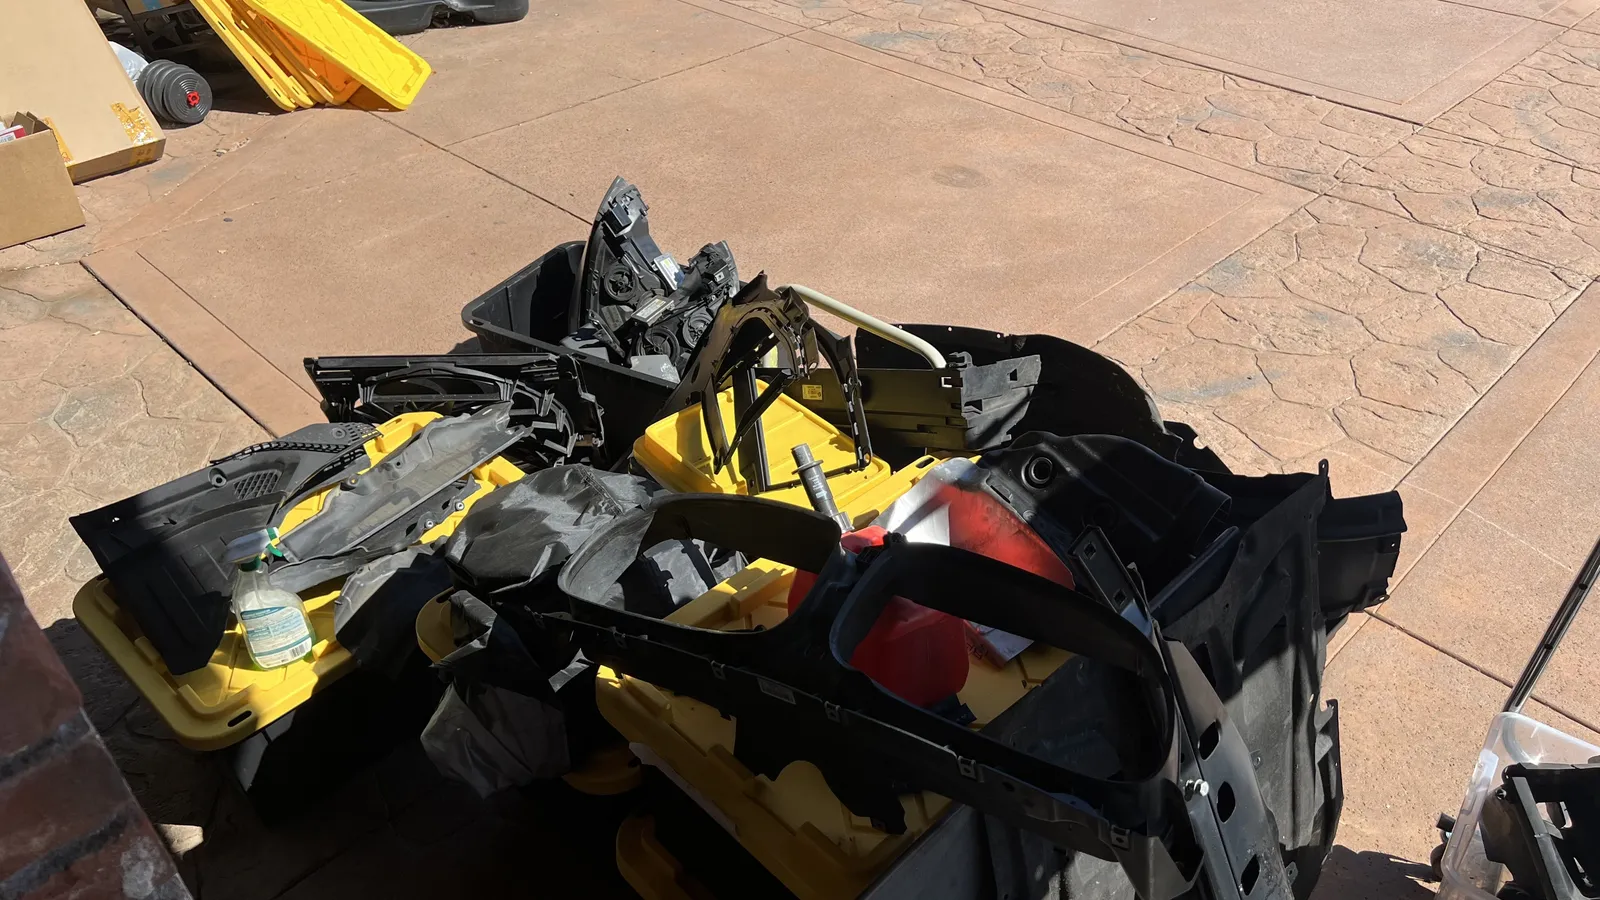
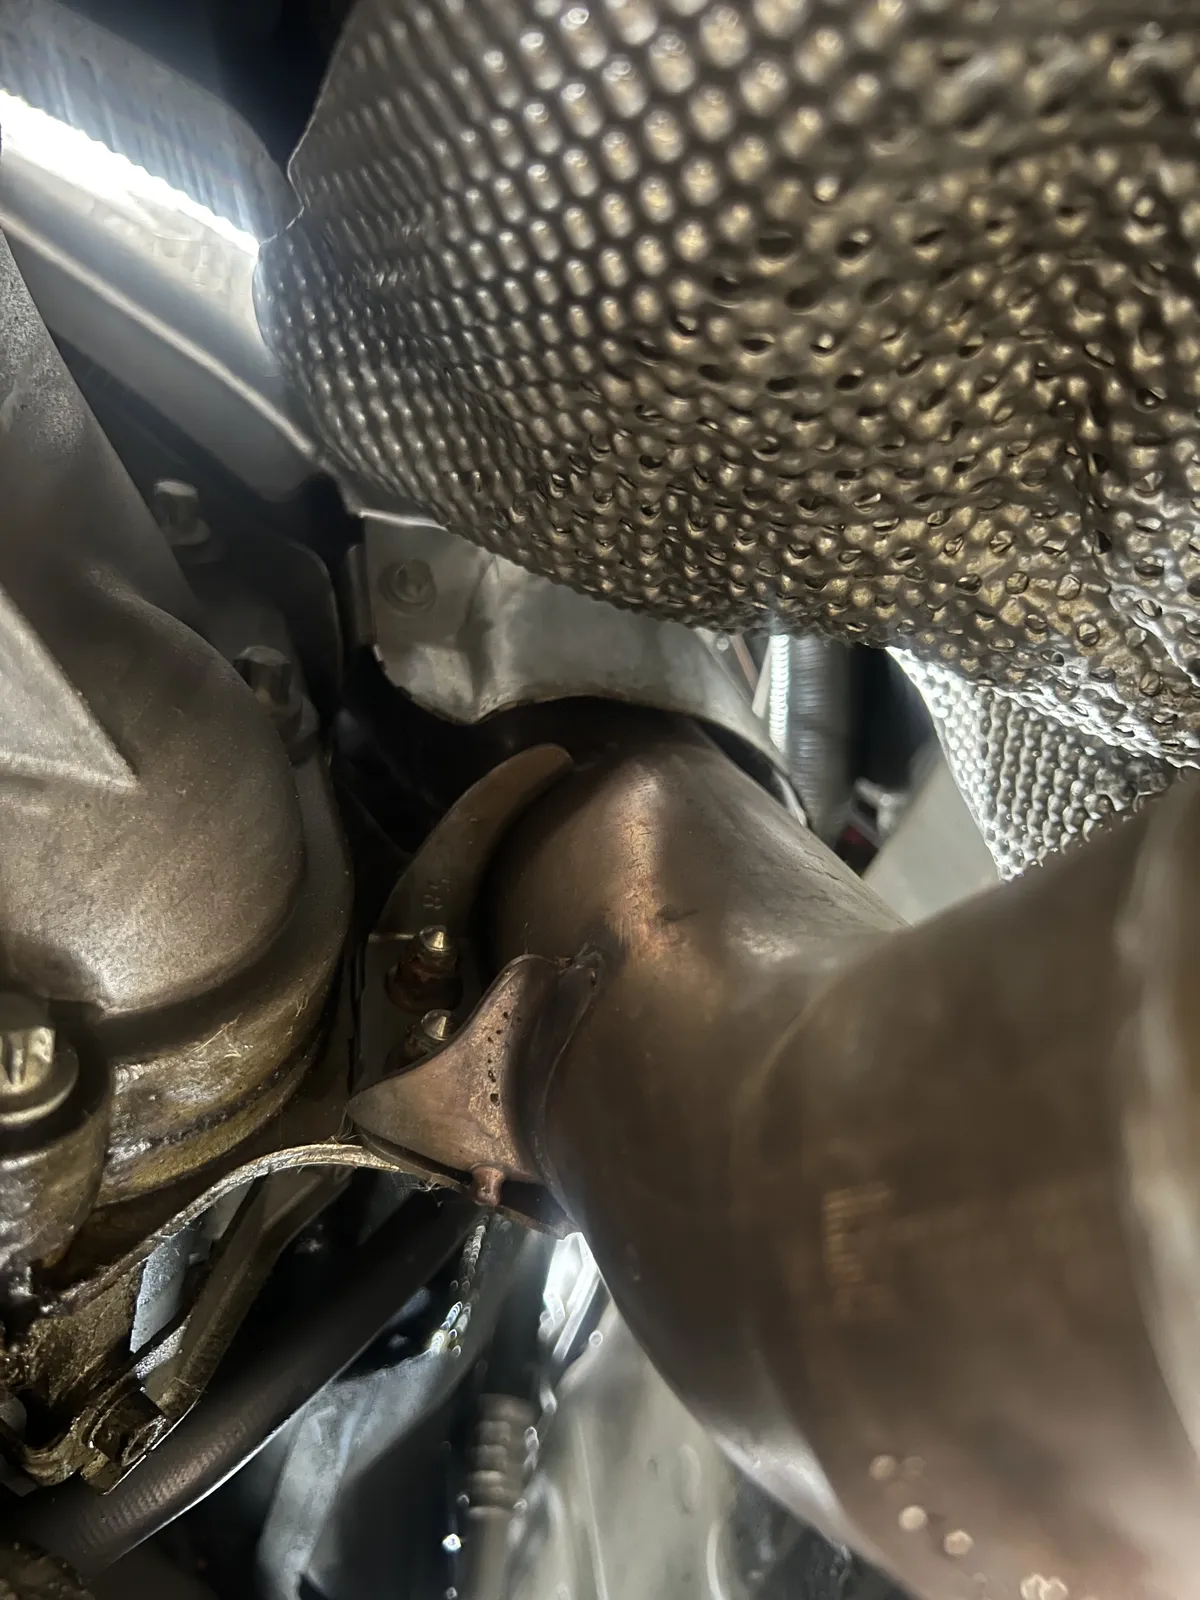 Systems and accessories coming off; documenting as-found condition.
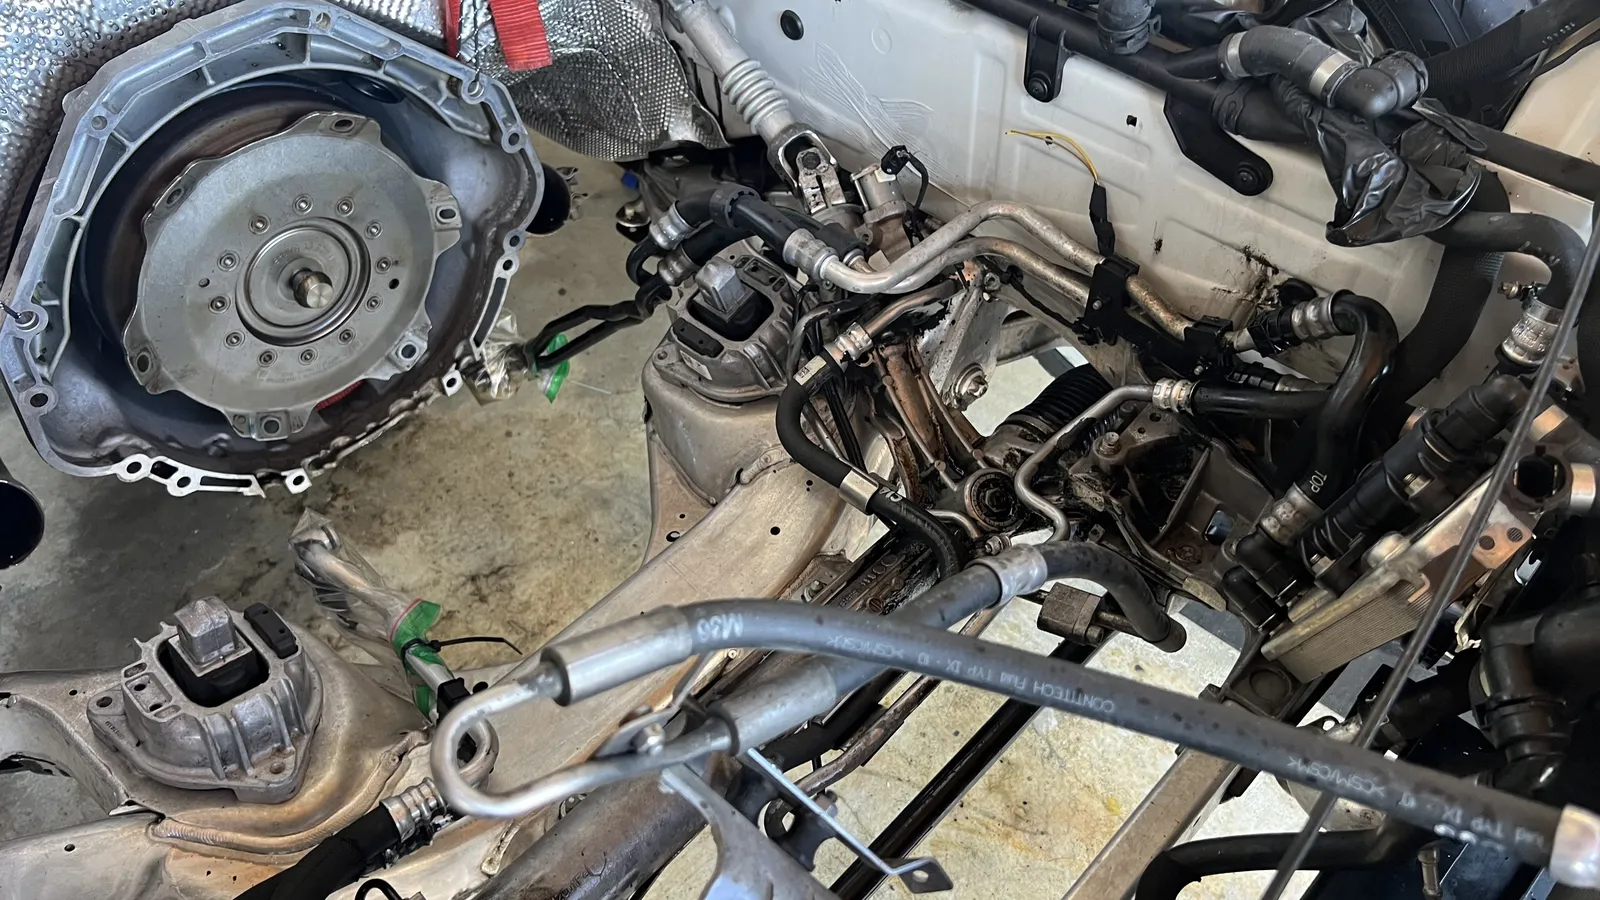
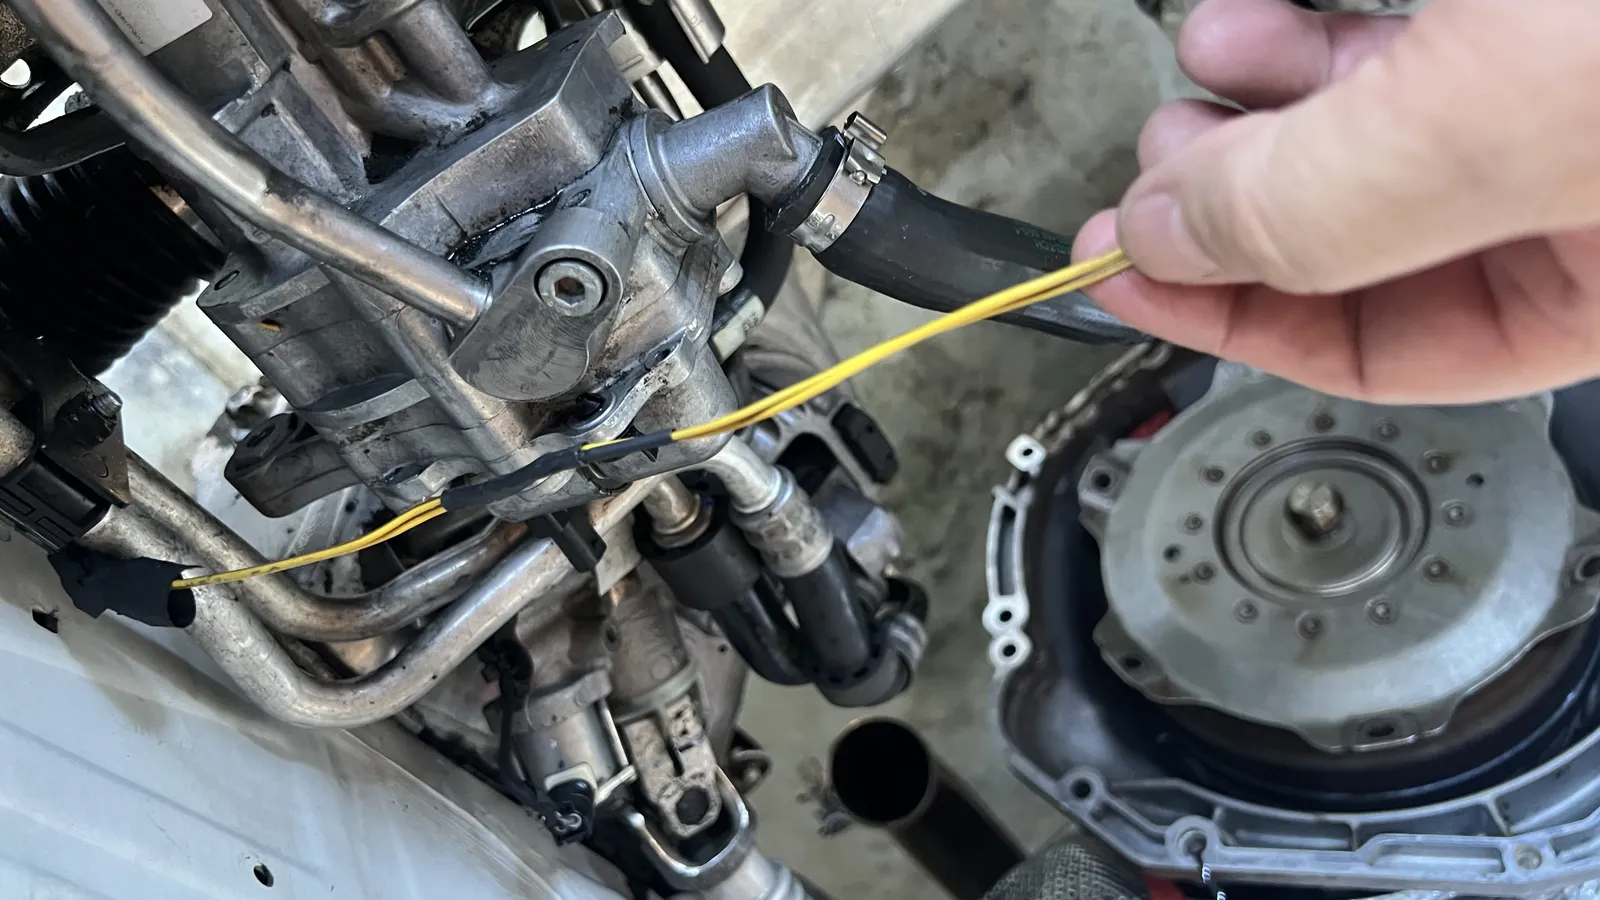
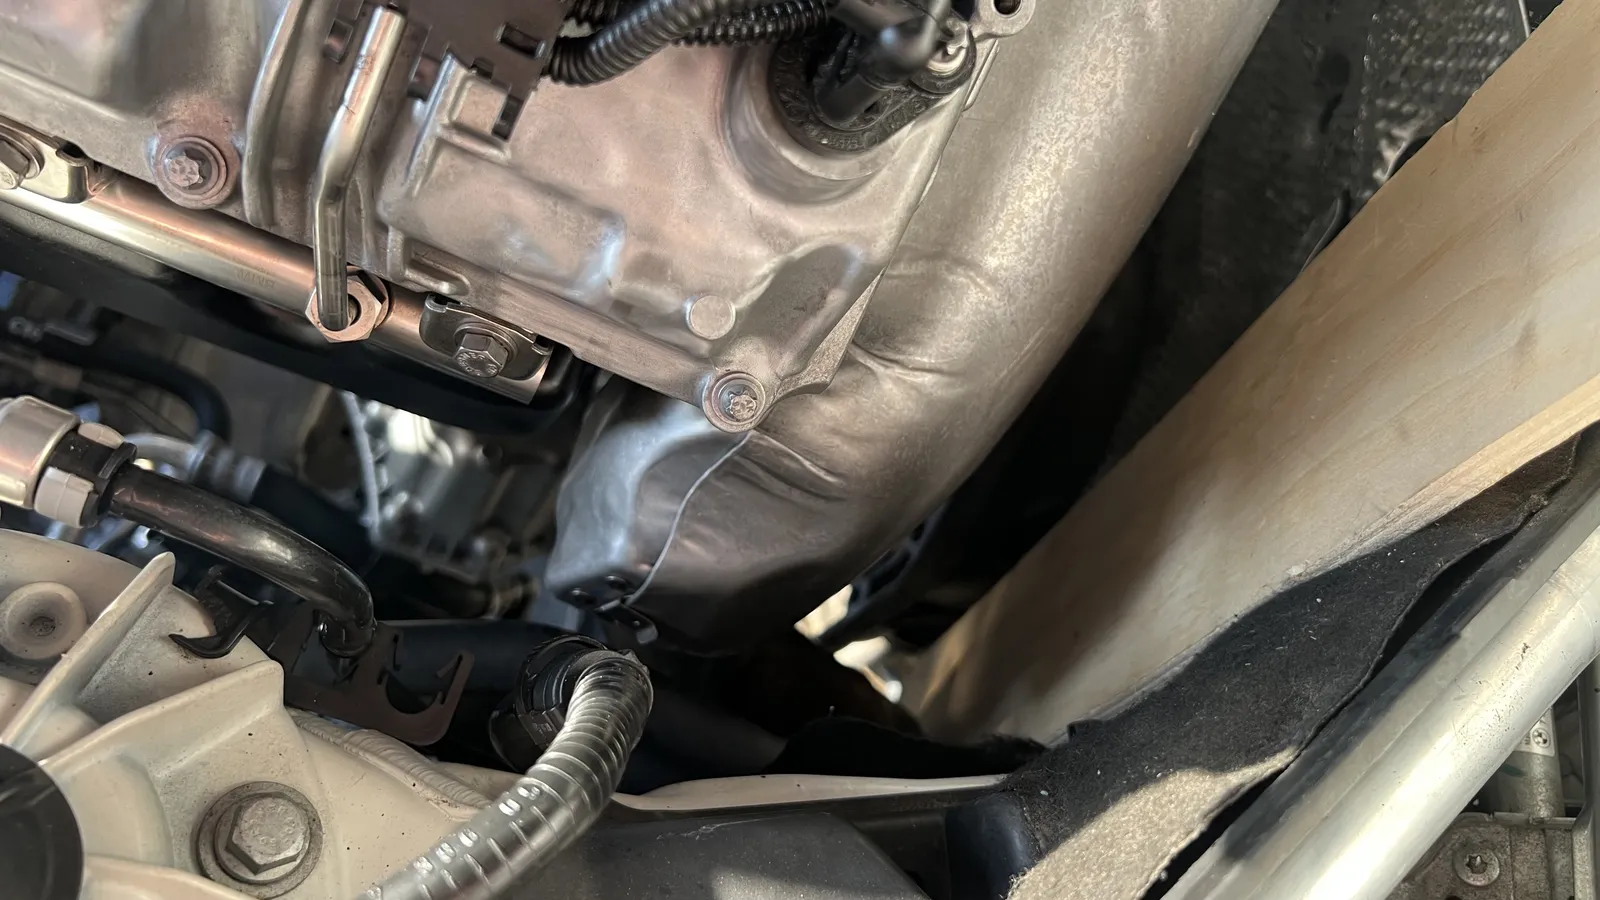
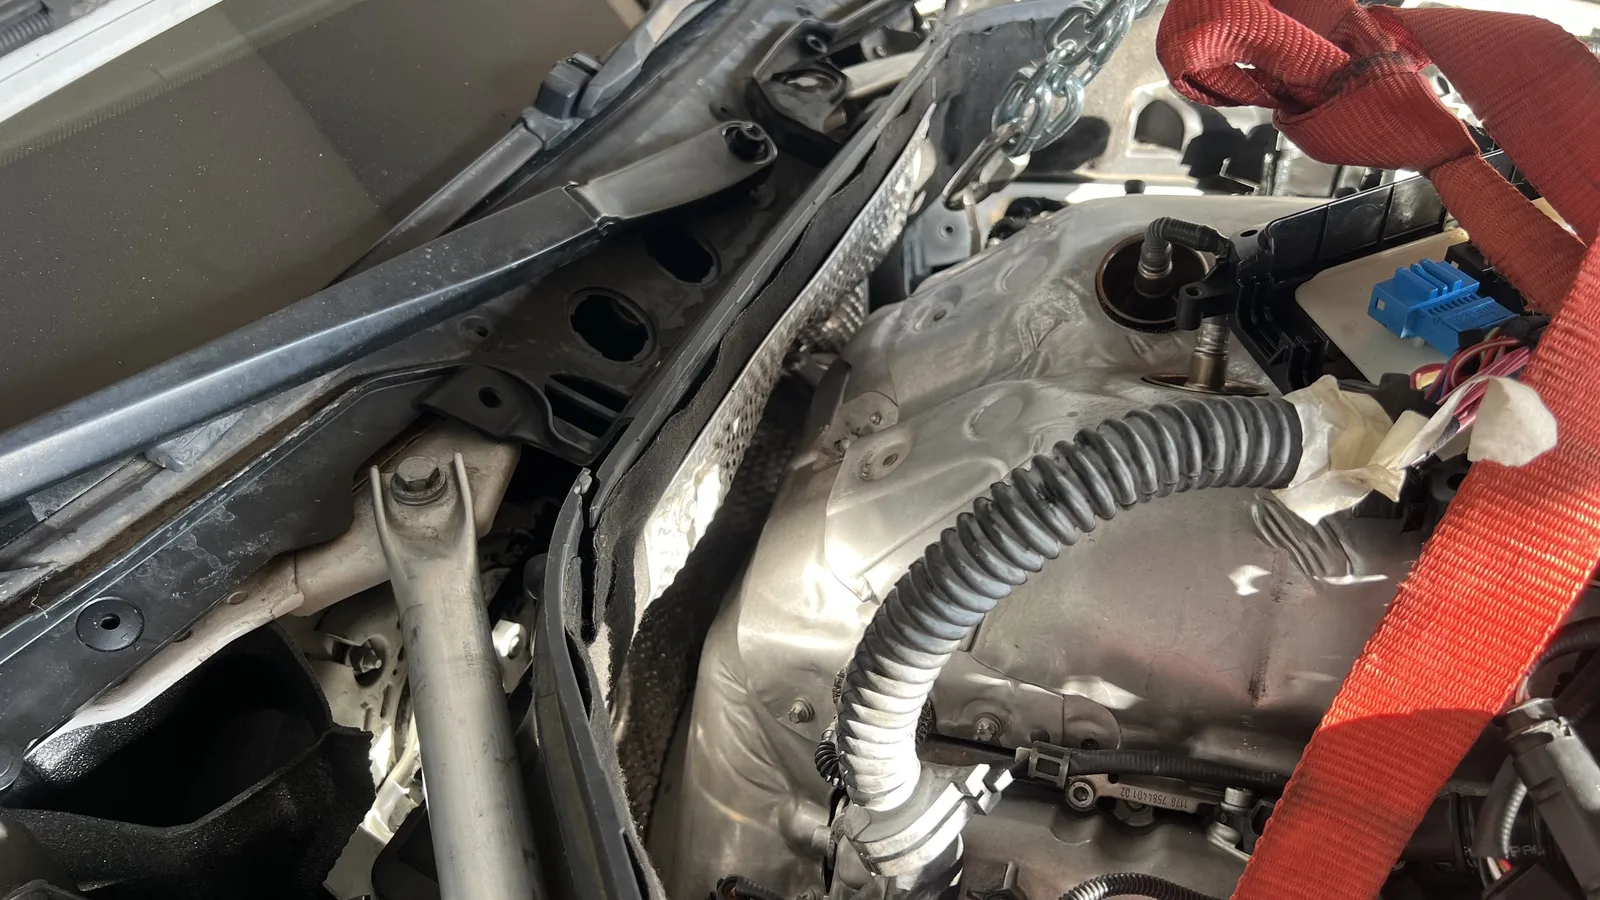
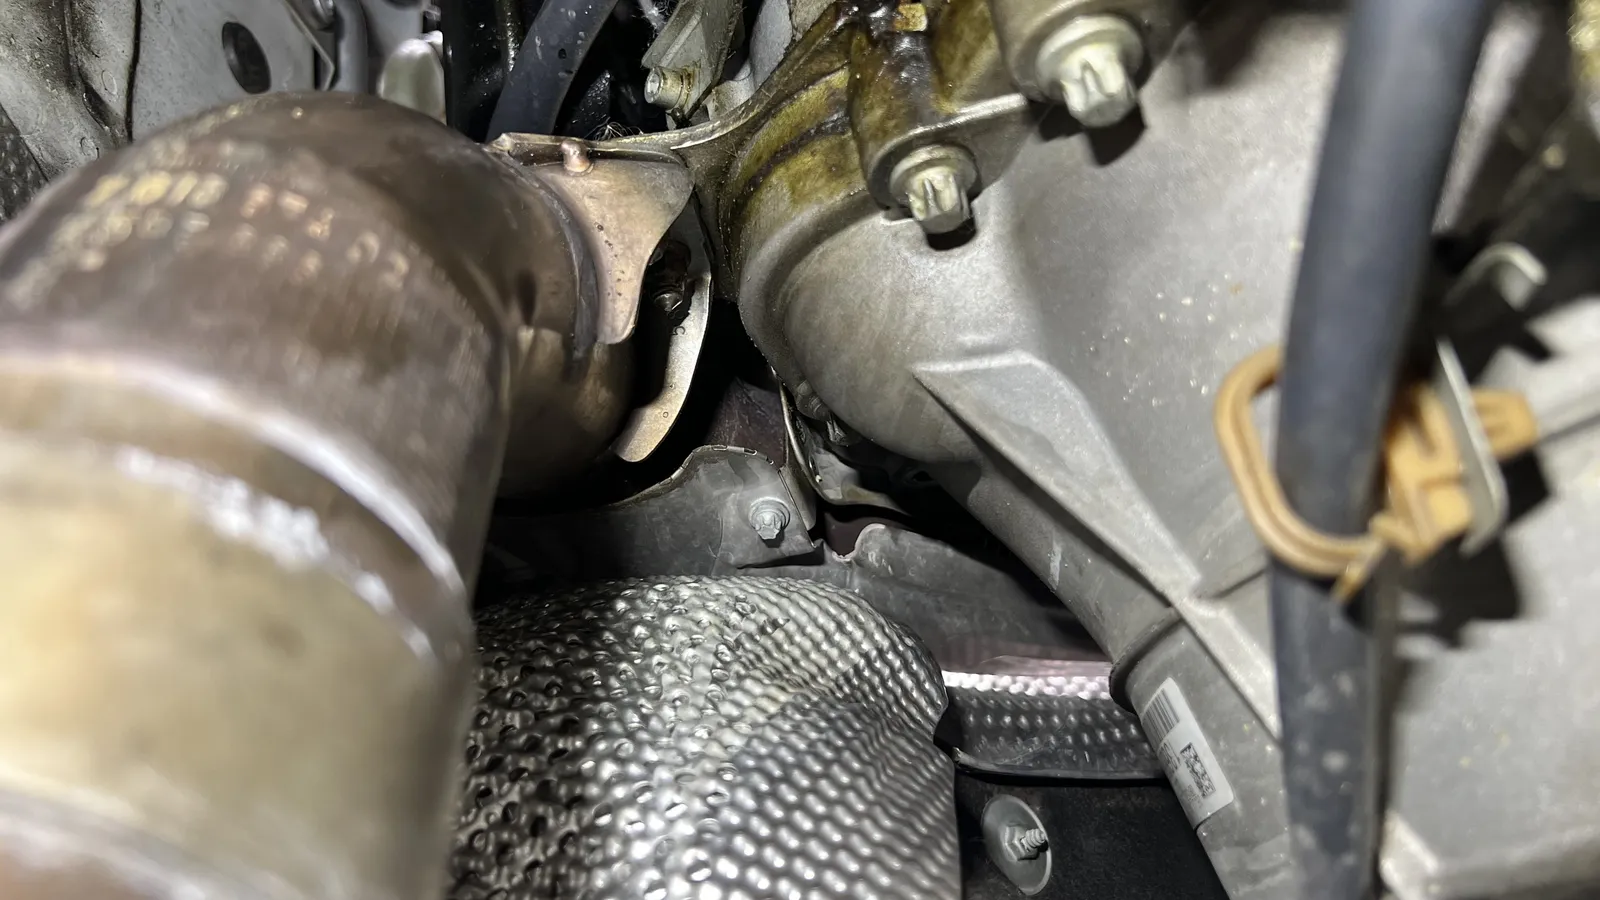 Under the heat shield: exhaust pipe and transmission bell housing — oil pooled at the low point of the bell housing.
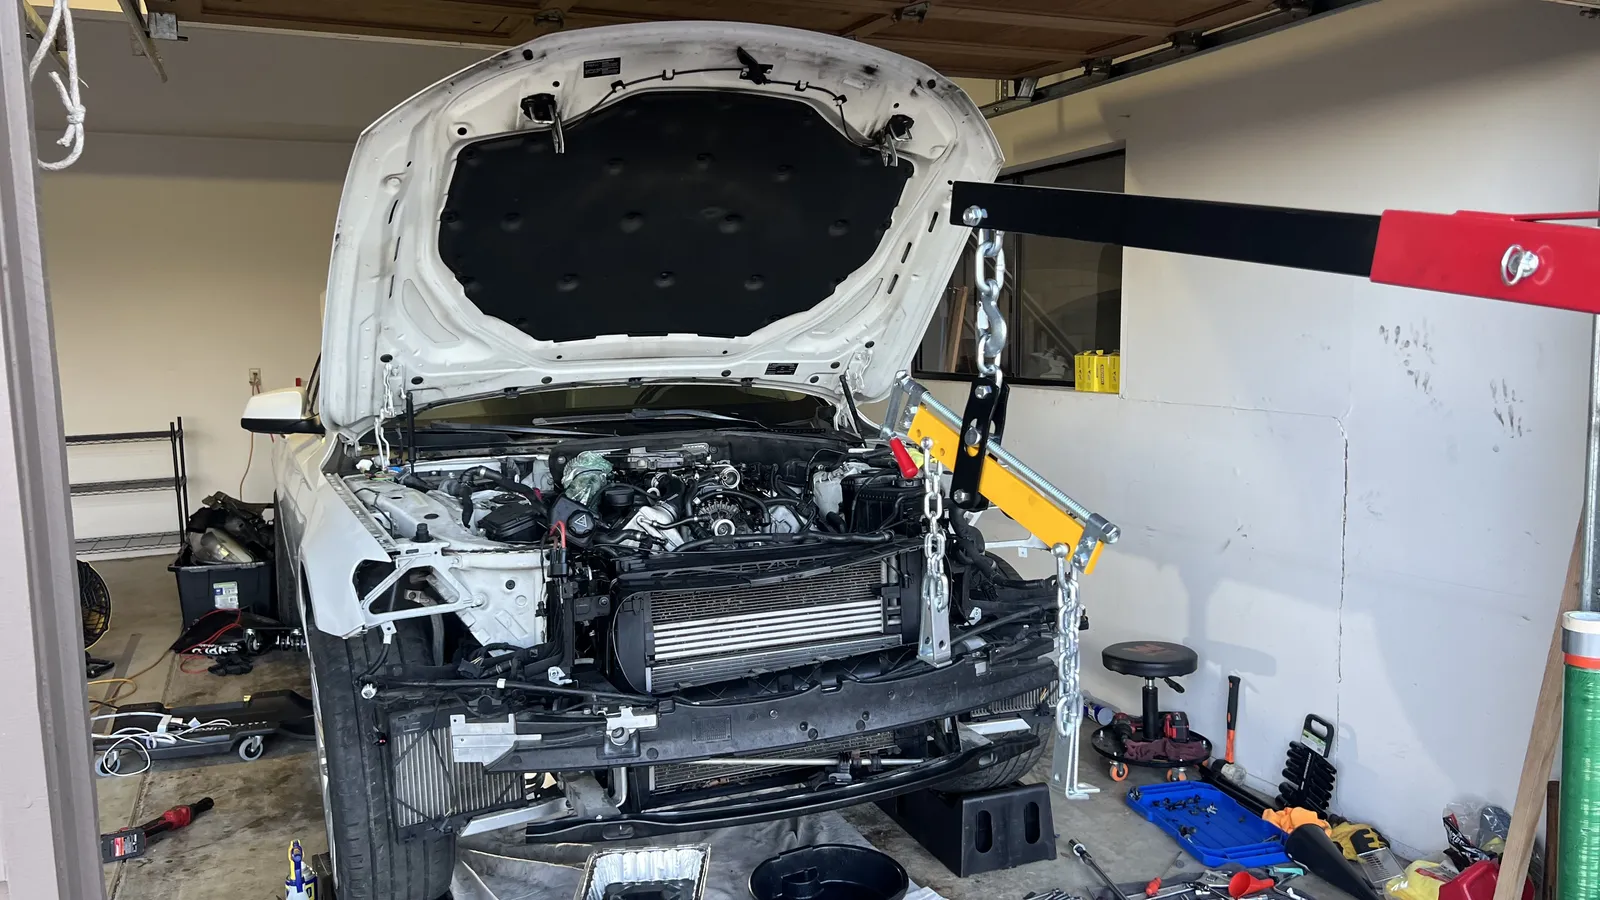 Front end stripped and hoist on: radiator/intercooler exposed, load leveler chained for the engine pull.
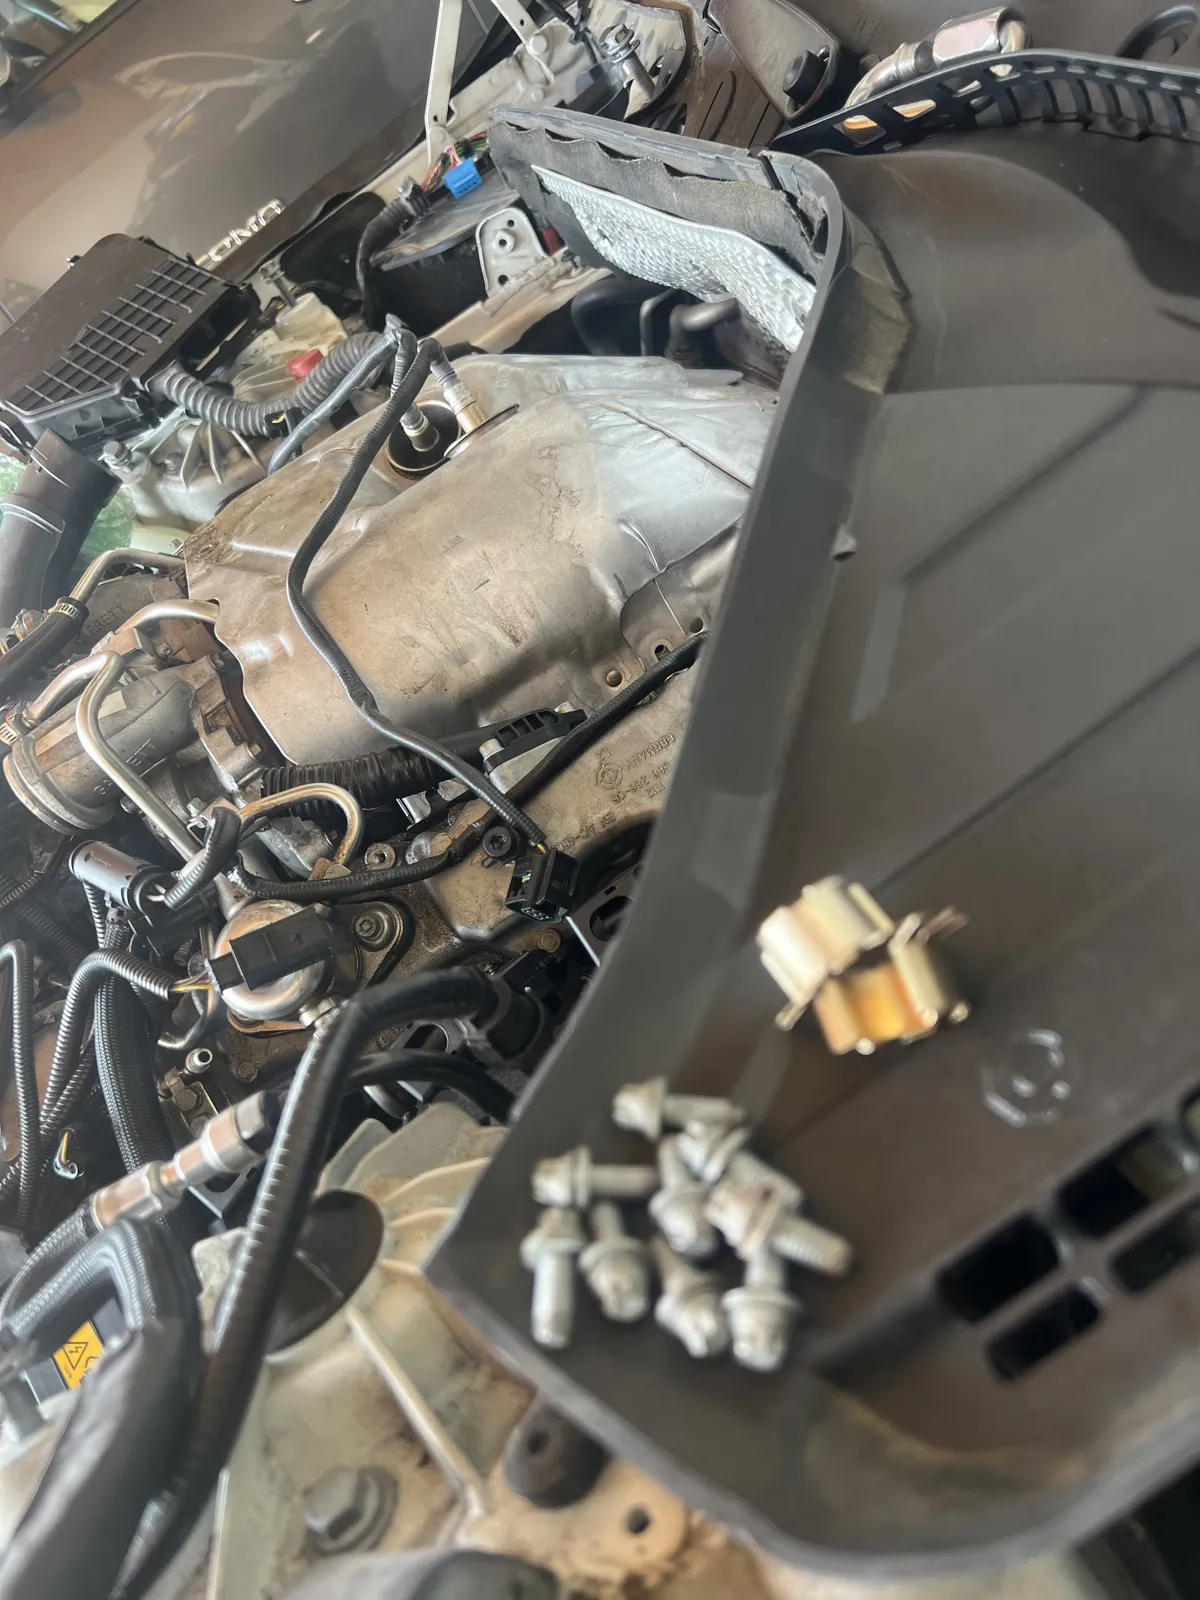 Hardware staged on the cowl while the heat shield stays put — top-end still mostly dressed.
Why it wouldn’t turn: spun bearings
Jun 27 – Jul 10, 2026With the engine out, I first turned it upside down on the stand and removed the oil pans and the oil pump to see the bottom end. The big ends of the connecting rods on cylinders 1 and 5, and 3 and 7, were blackened. The crank wouldn’t turn, so I couldn’t rotate it to reach the rod-cap bolts; instead I removed the main (crank) caps first — and then I saw them: **four spun rod bearingsspun bearing When a rod or main bearing shell loses its oil film, welds to the crank and rotates in its bore, scoring the journal and often locking up the engine.**, on the shared journals for cylinders 1/5 and 3/7. The big ends were warped on all four rods.
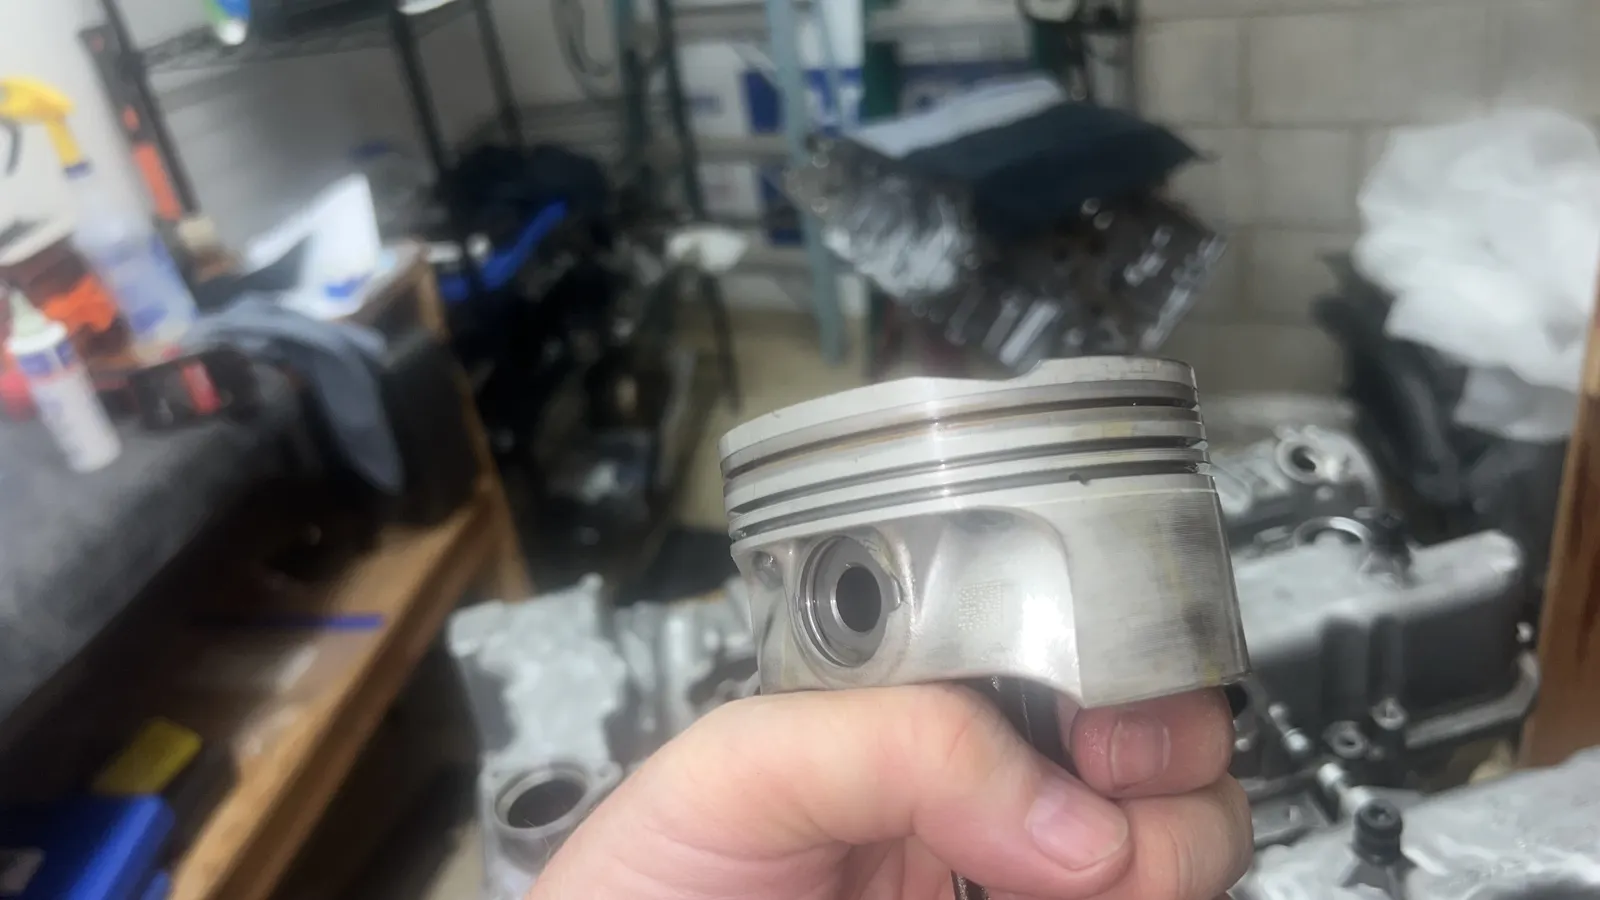
The teardown also showed heavy deposits: oily carbon in the hot-Vhot-V The N63 layout with the exhaust and turbos inside the V between the banks. Compact, but very hot, so oil cokes and gaskets bake., sludge, and caked VANOSVANOS BMW’s variable cam timing. Solenoids and covers at the front of each head. covers. The pistons turned out to be fine.
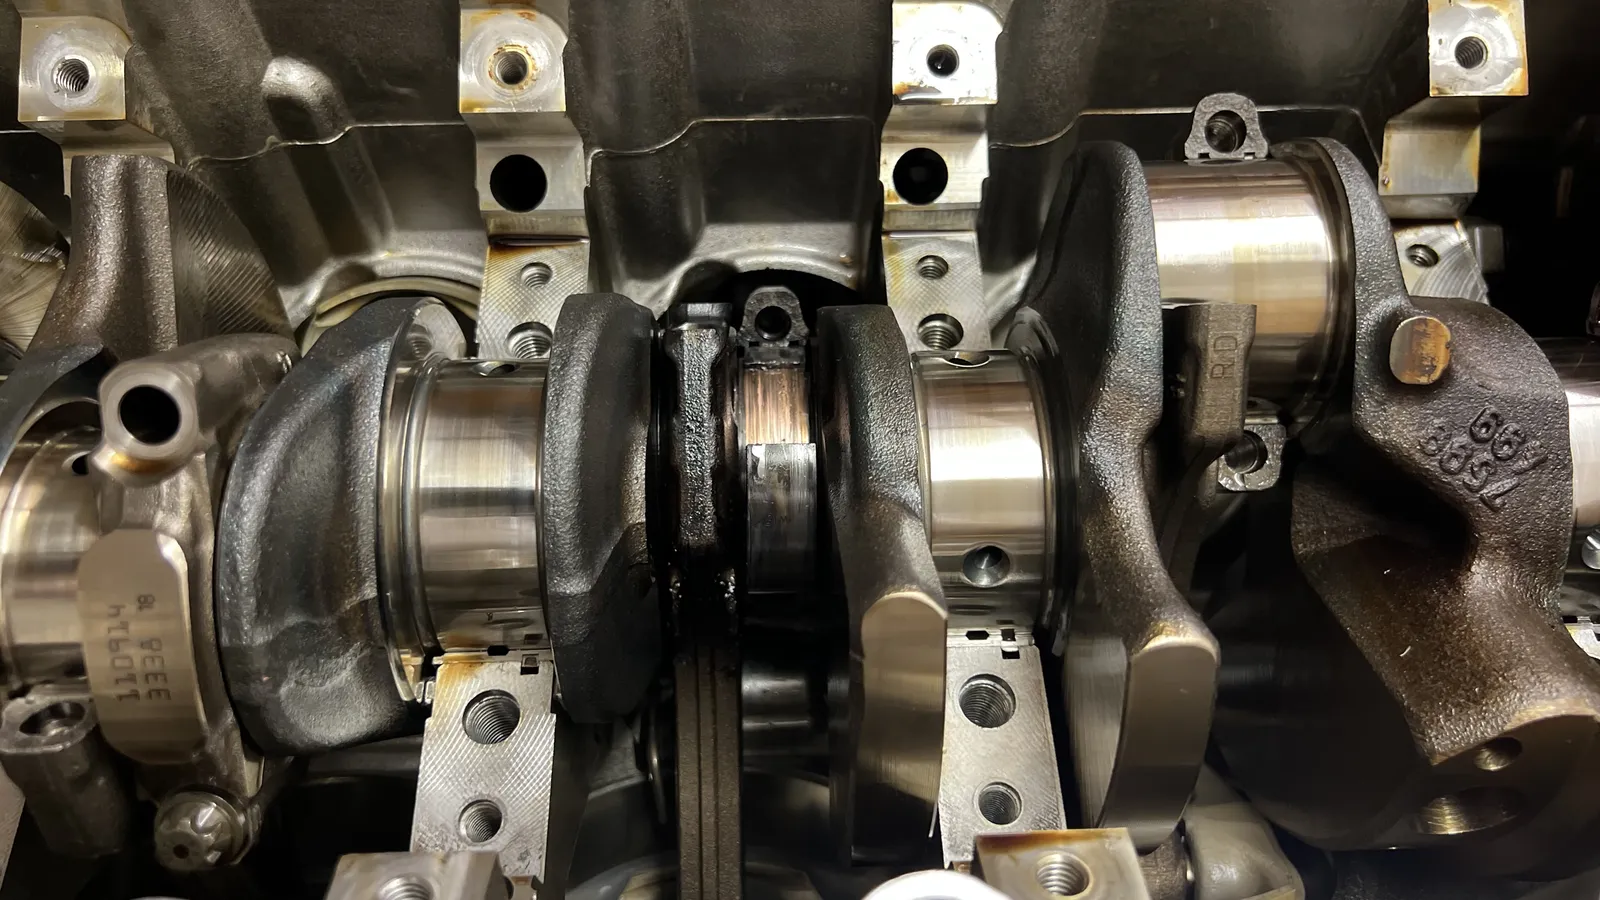 Crank with the block inverted: one journal dulled and coppered where the bearing spun; neighbors still polished. The failure that forced the rebuild.
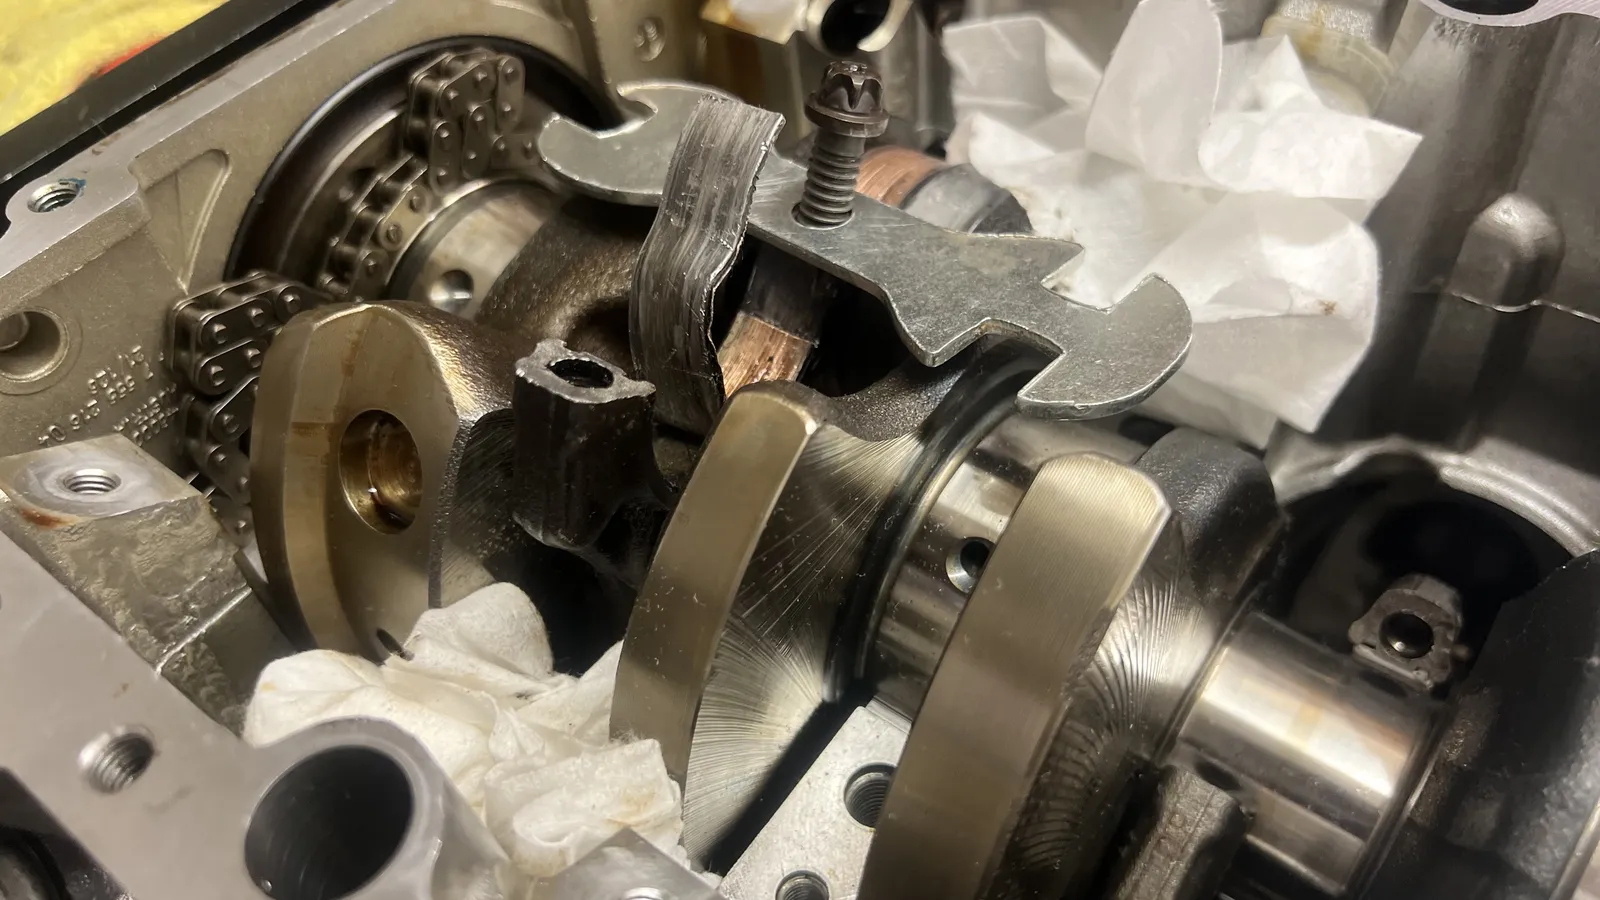 Bottom end open: failed bearing shell still in the case, timing chain on the left, towels catching debris.
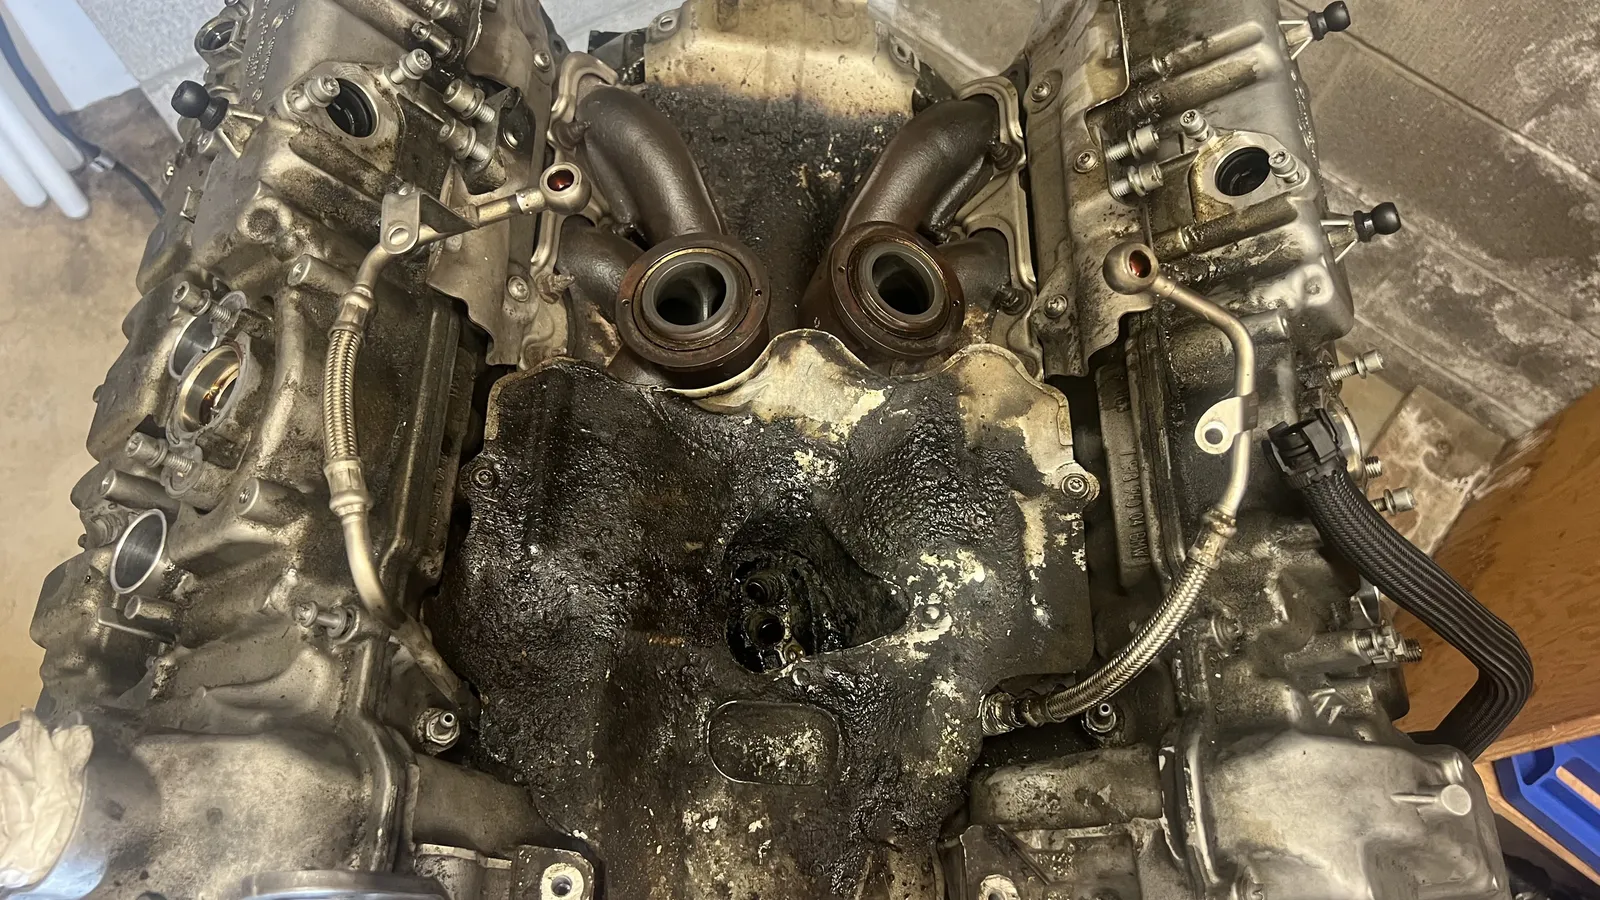 Turbos off: oily carbon crust in the hot-V valley between the banks.
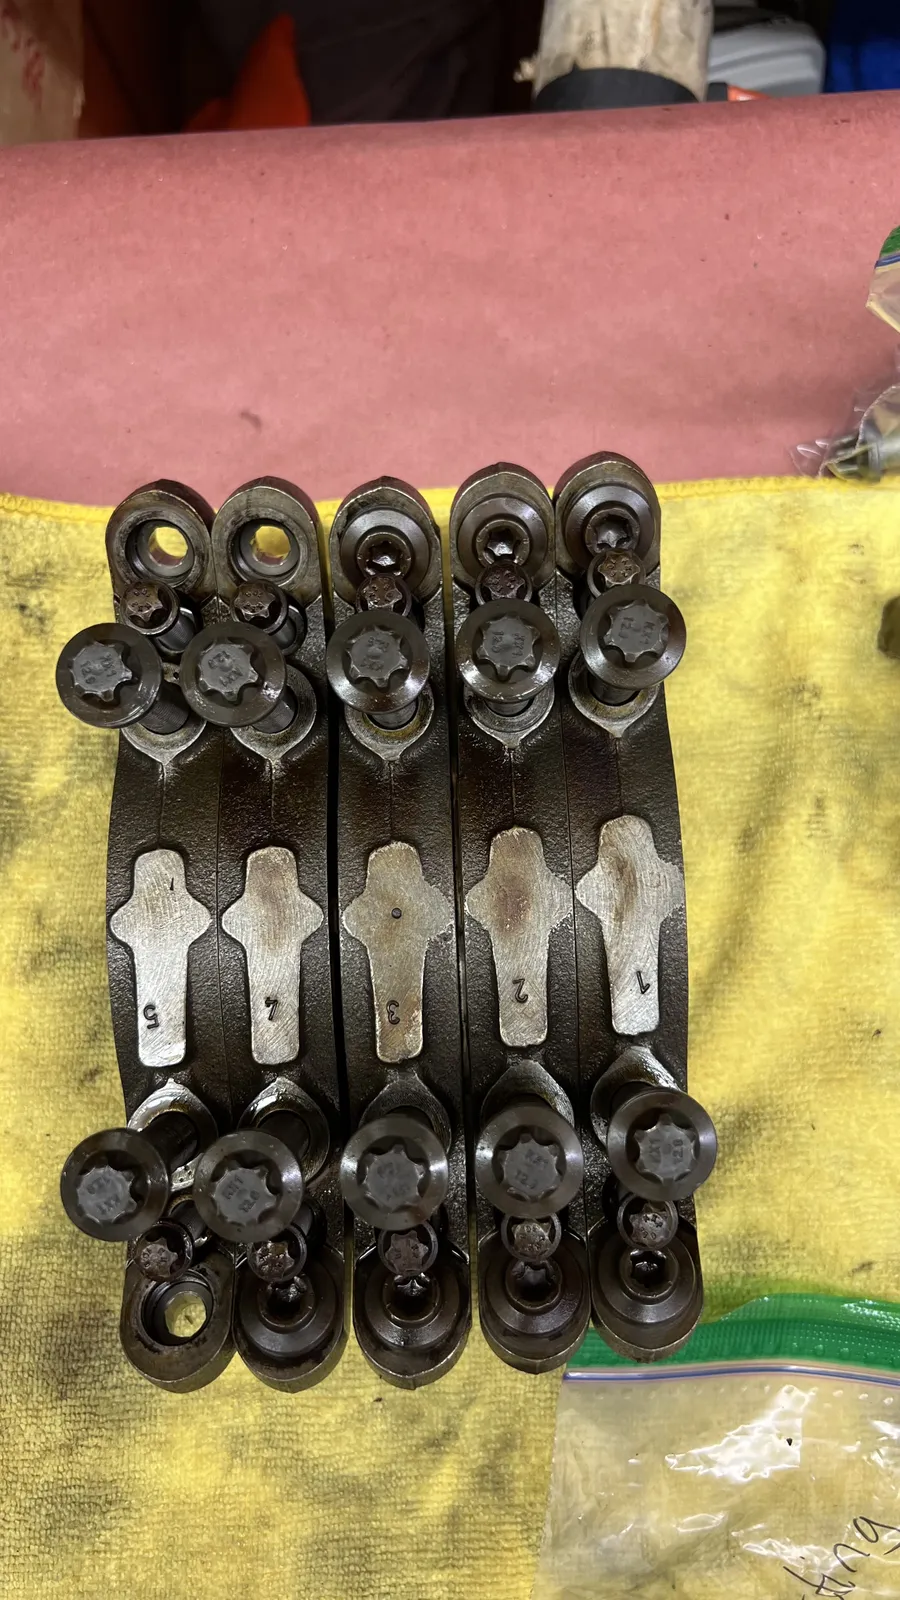 Main caps 1–5 with bolts, kept in order after coming off the block.
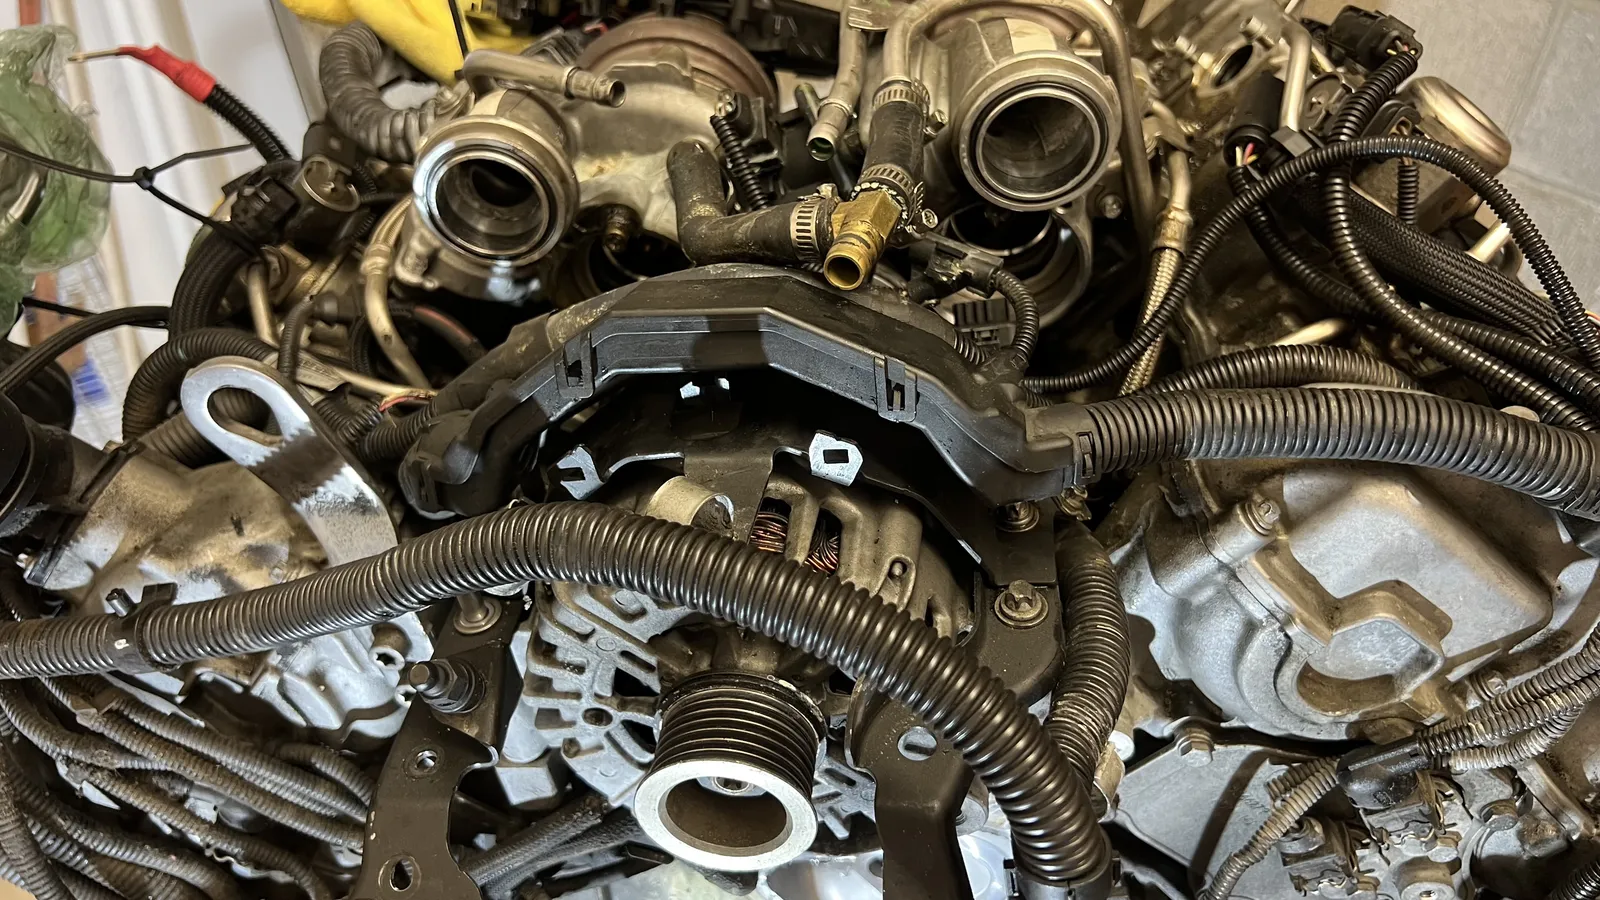 Still dressed on top: hot-V turbos in the valley, alternator up front, loom and hoses everywhere.
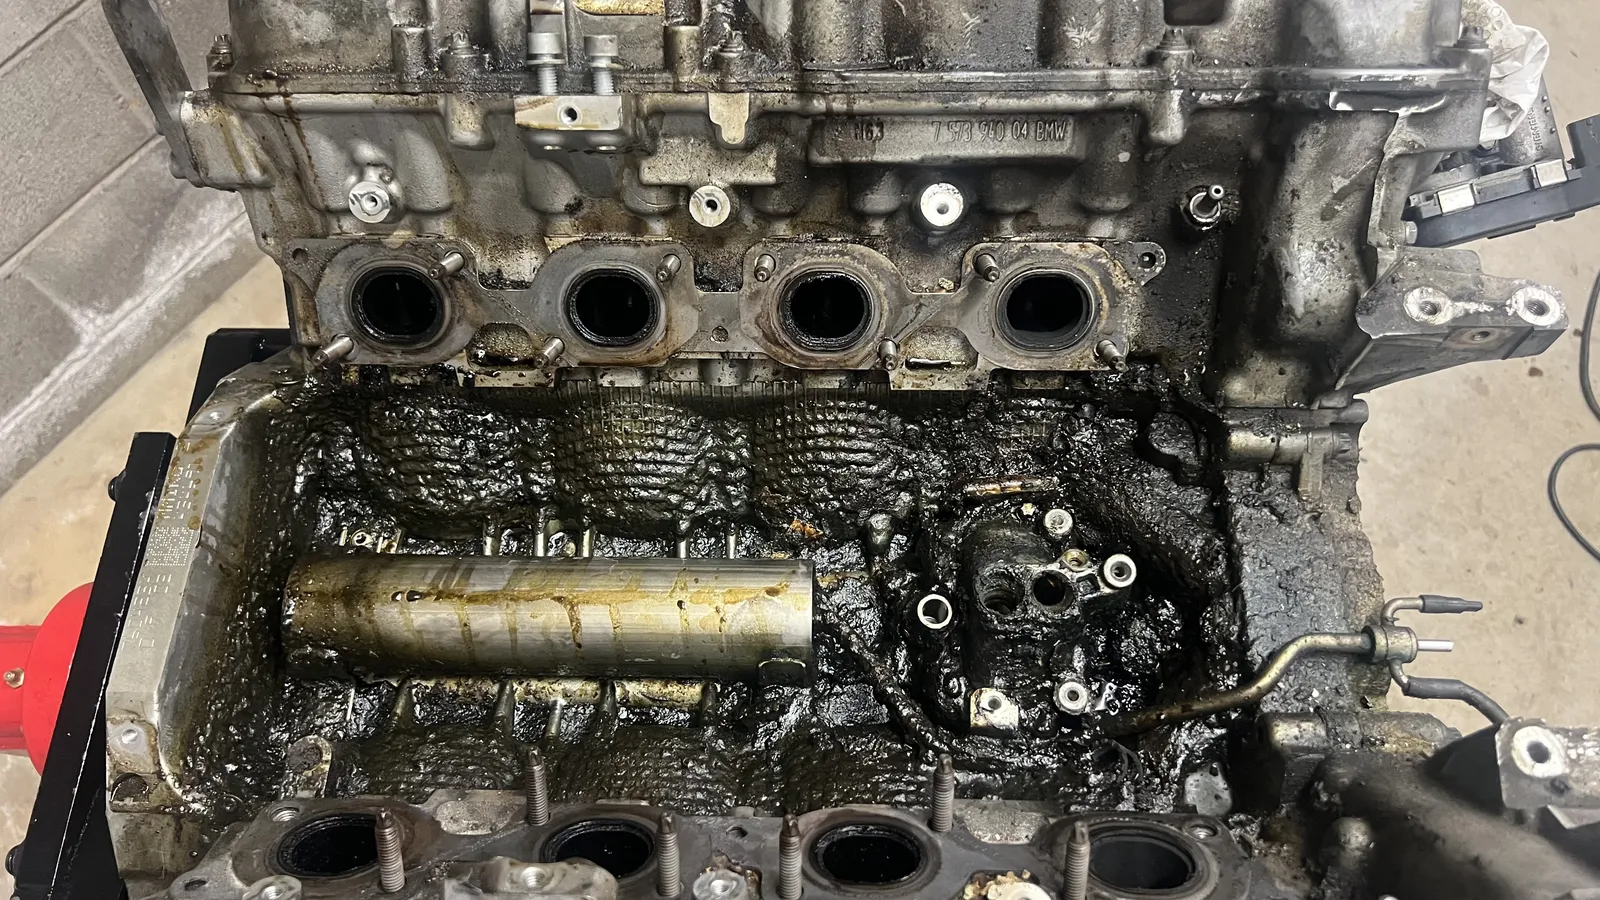 Sludge and greasy buildup the teardown exposed.
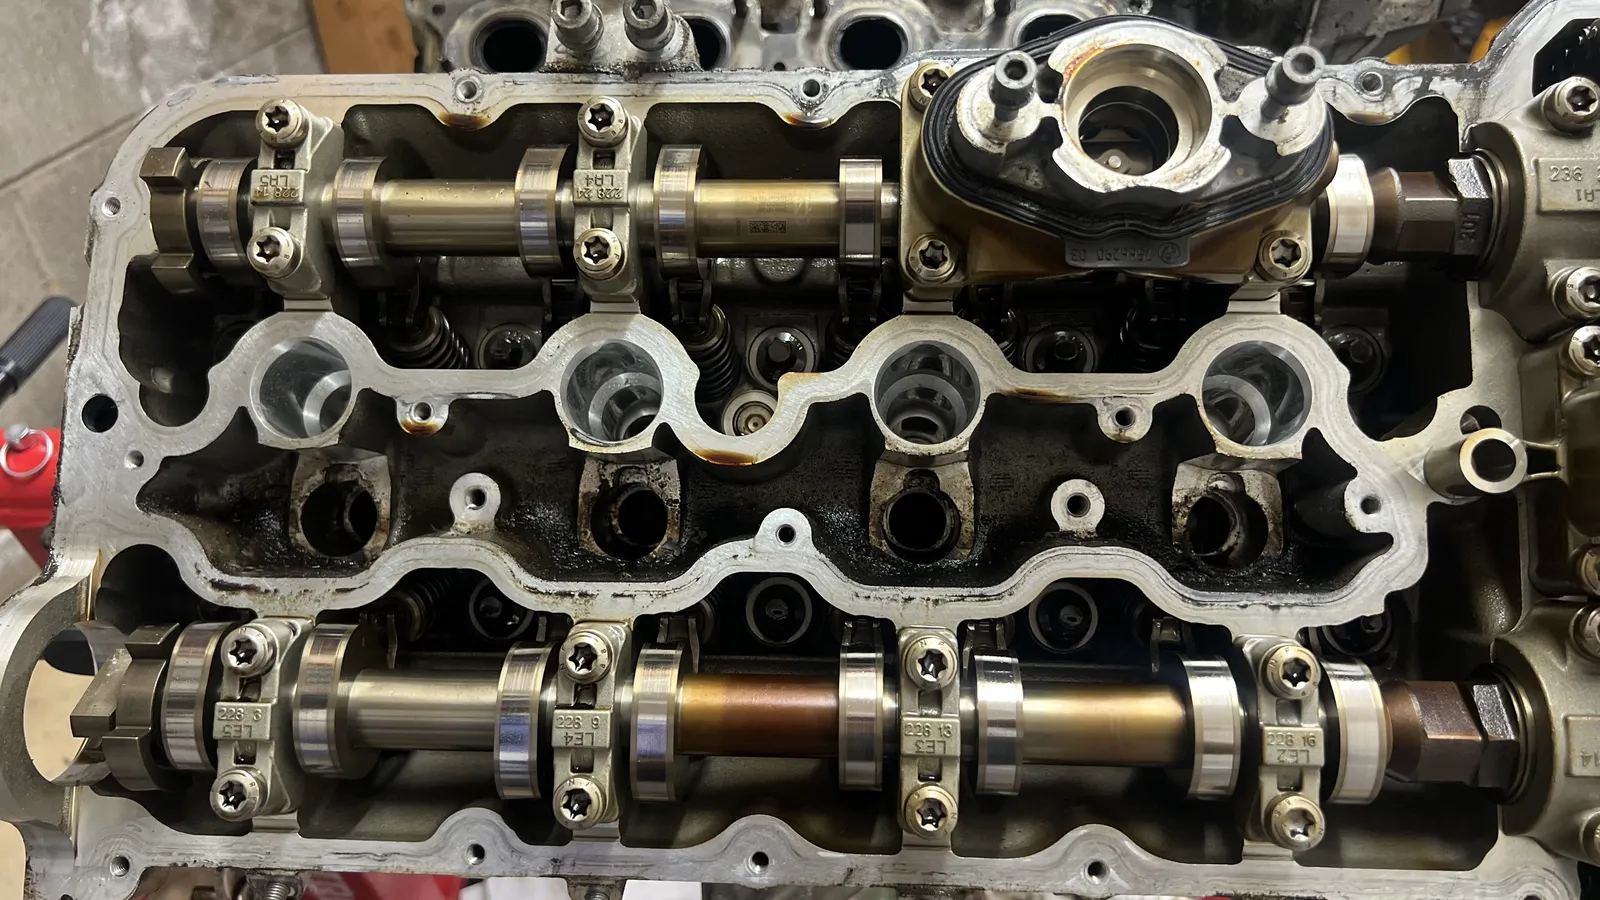 Left head — cams ready to come out for cleaning.
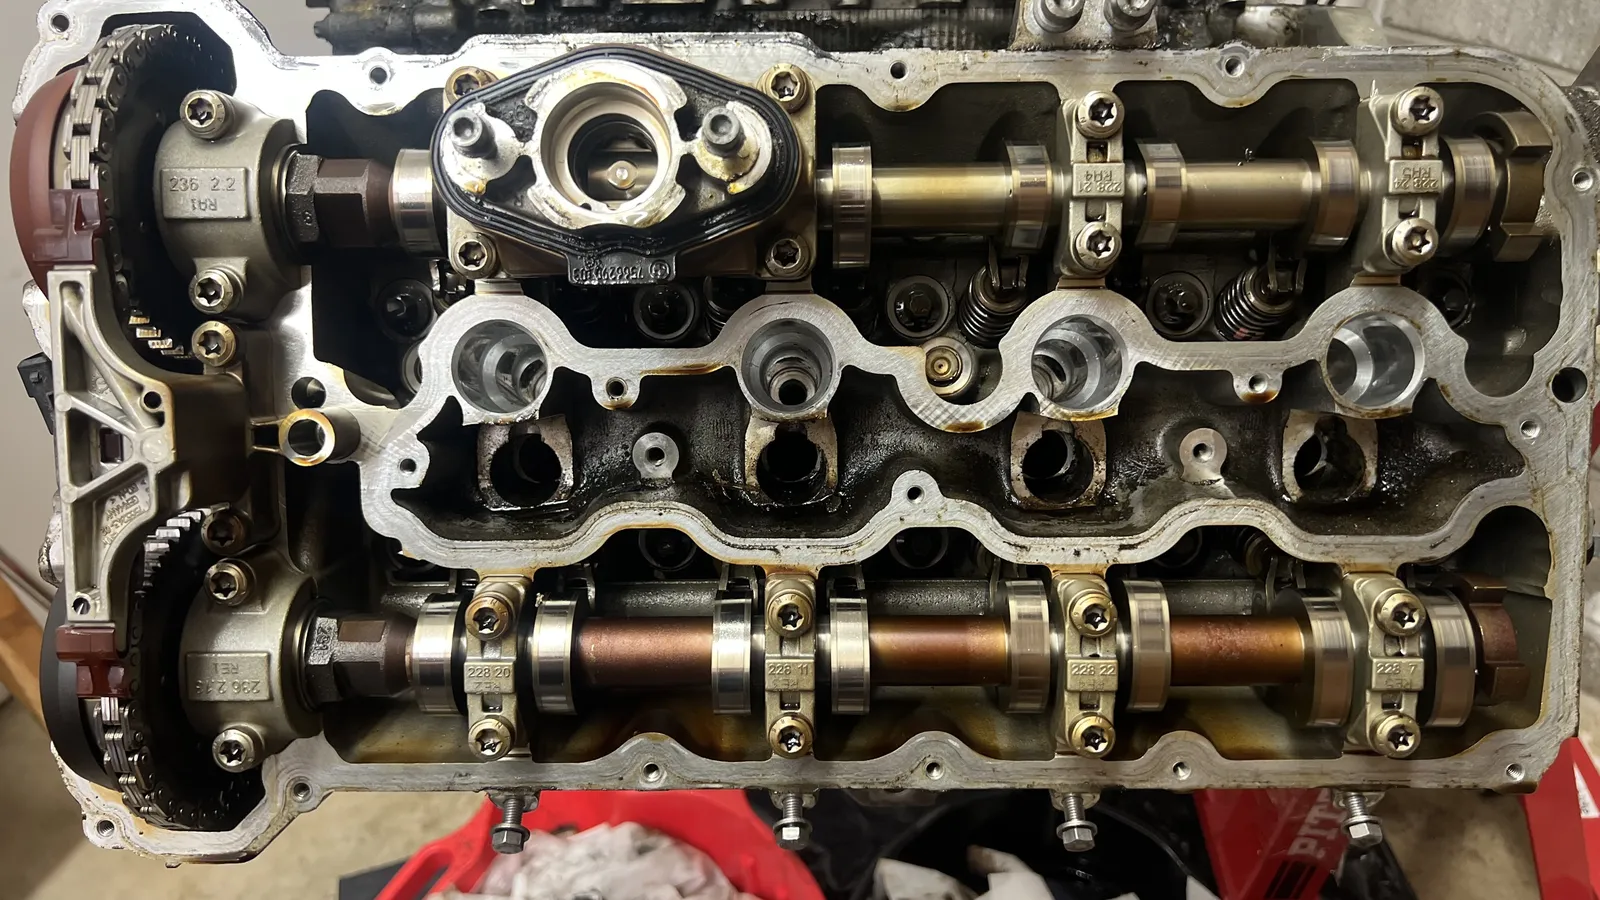 Right head — cams ready to come out for cleaning.
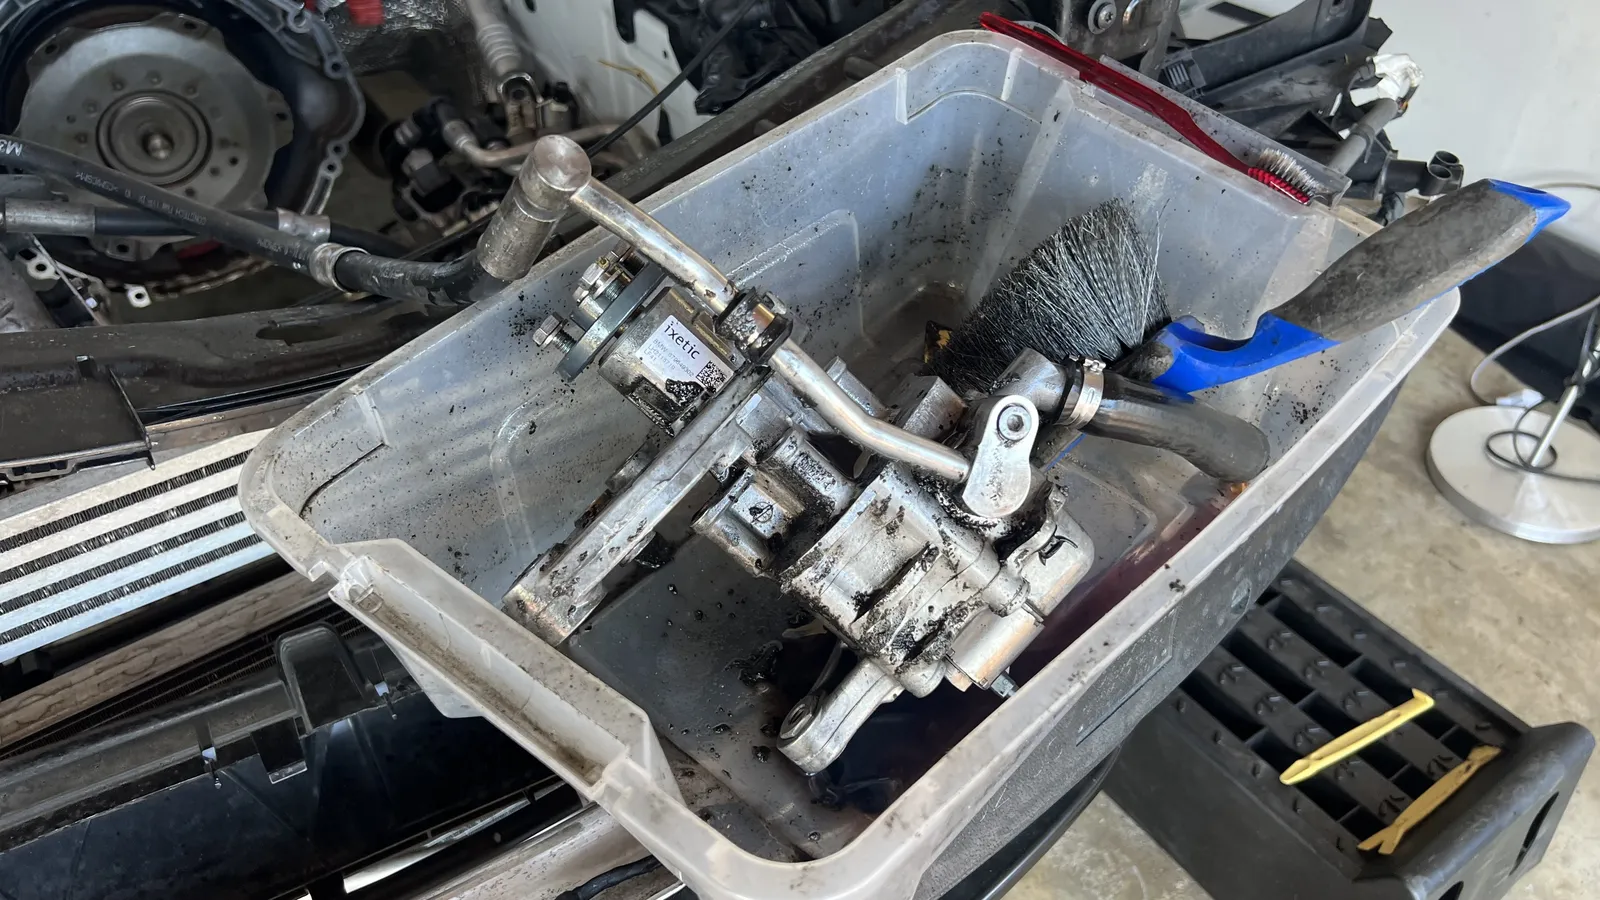
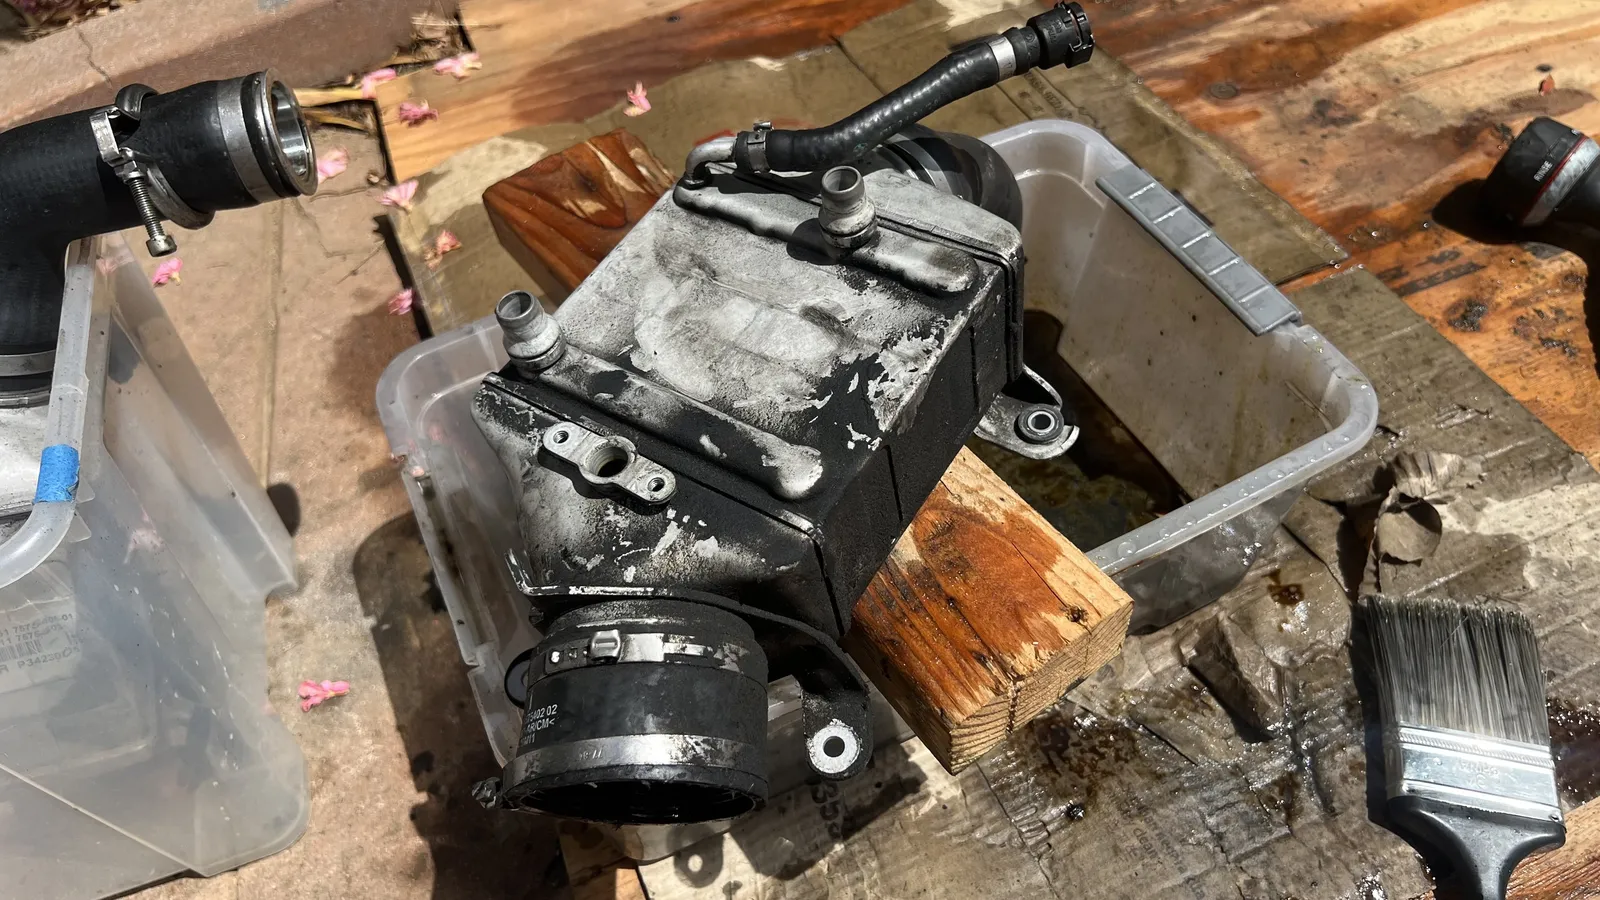 Oil cooler off the car for a solvent scrub — still coated in oil film.
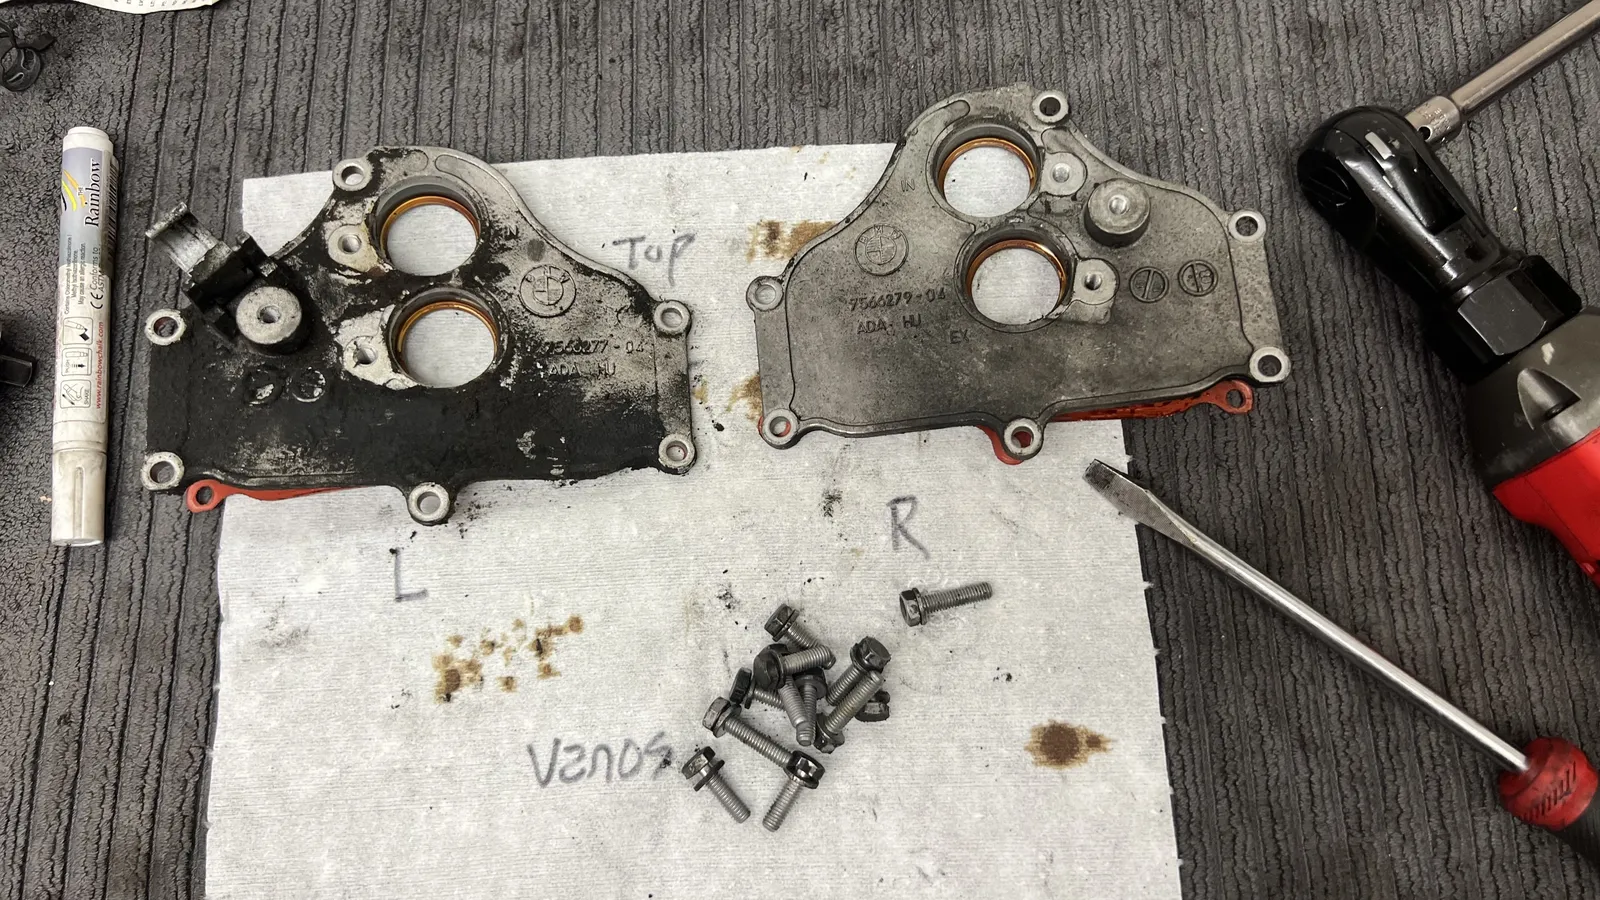 VANOS covers L vs R: left still caked in sludge, right scrubbed; bolts kept labeled.
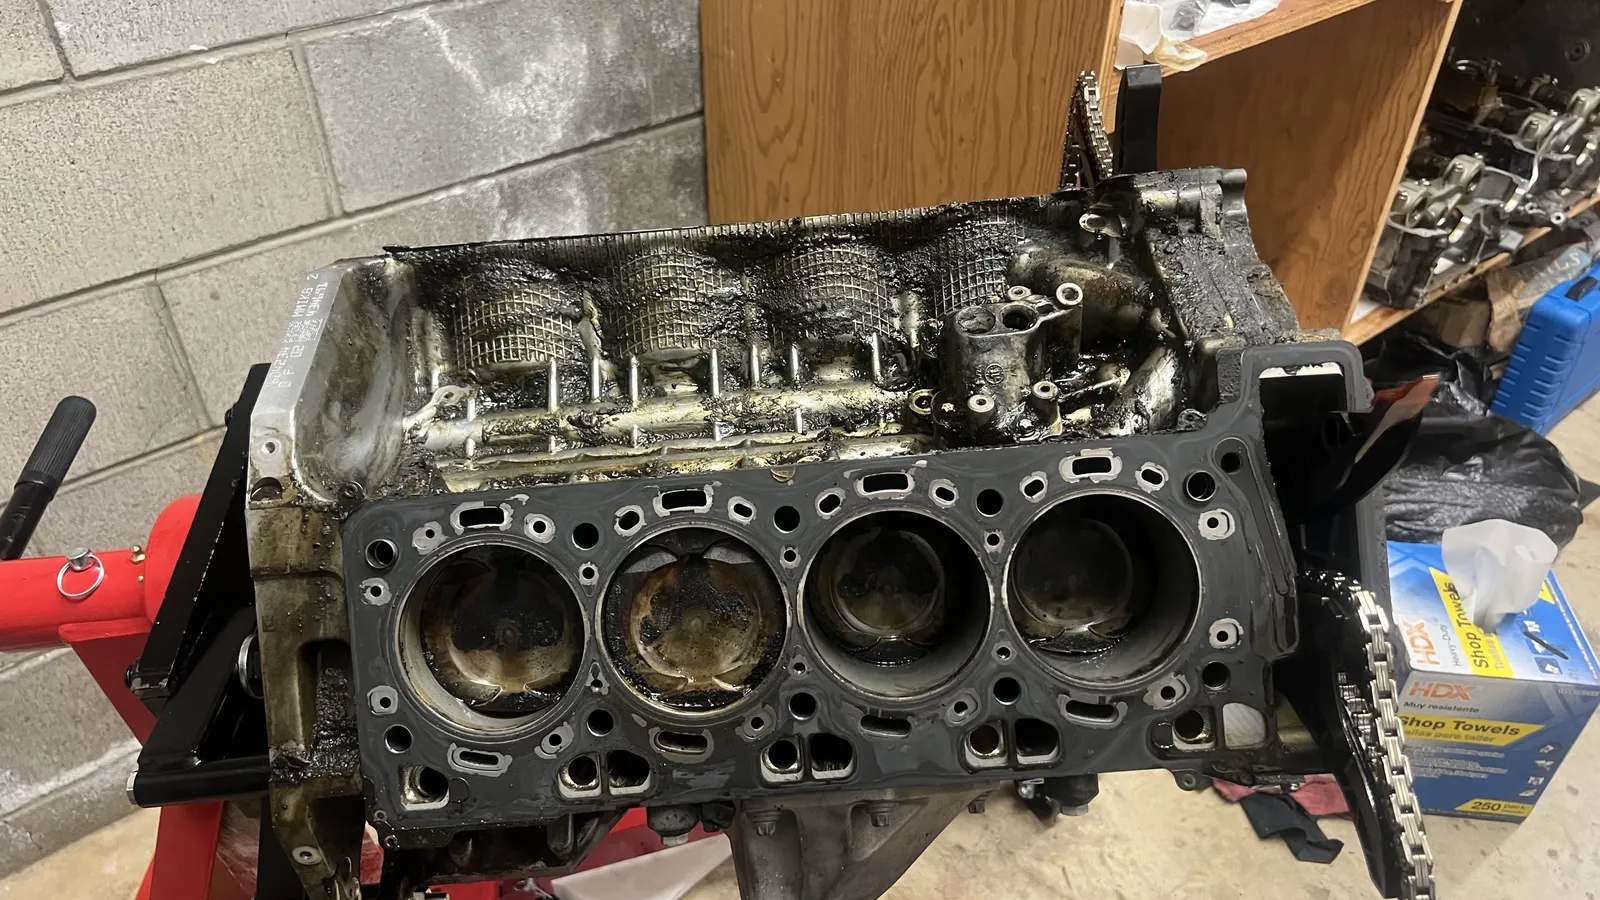 First look at the pistons on the right bank (cylinders 5–8).
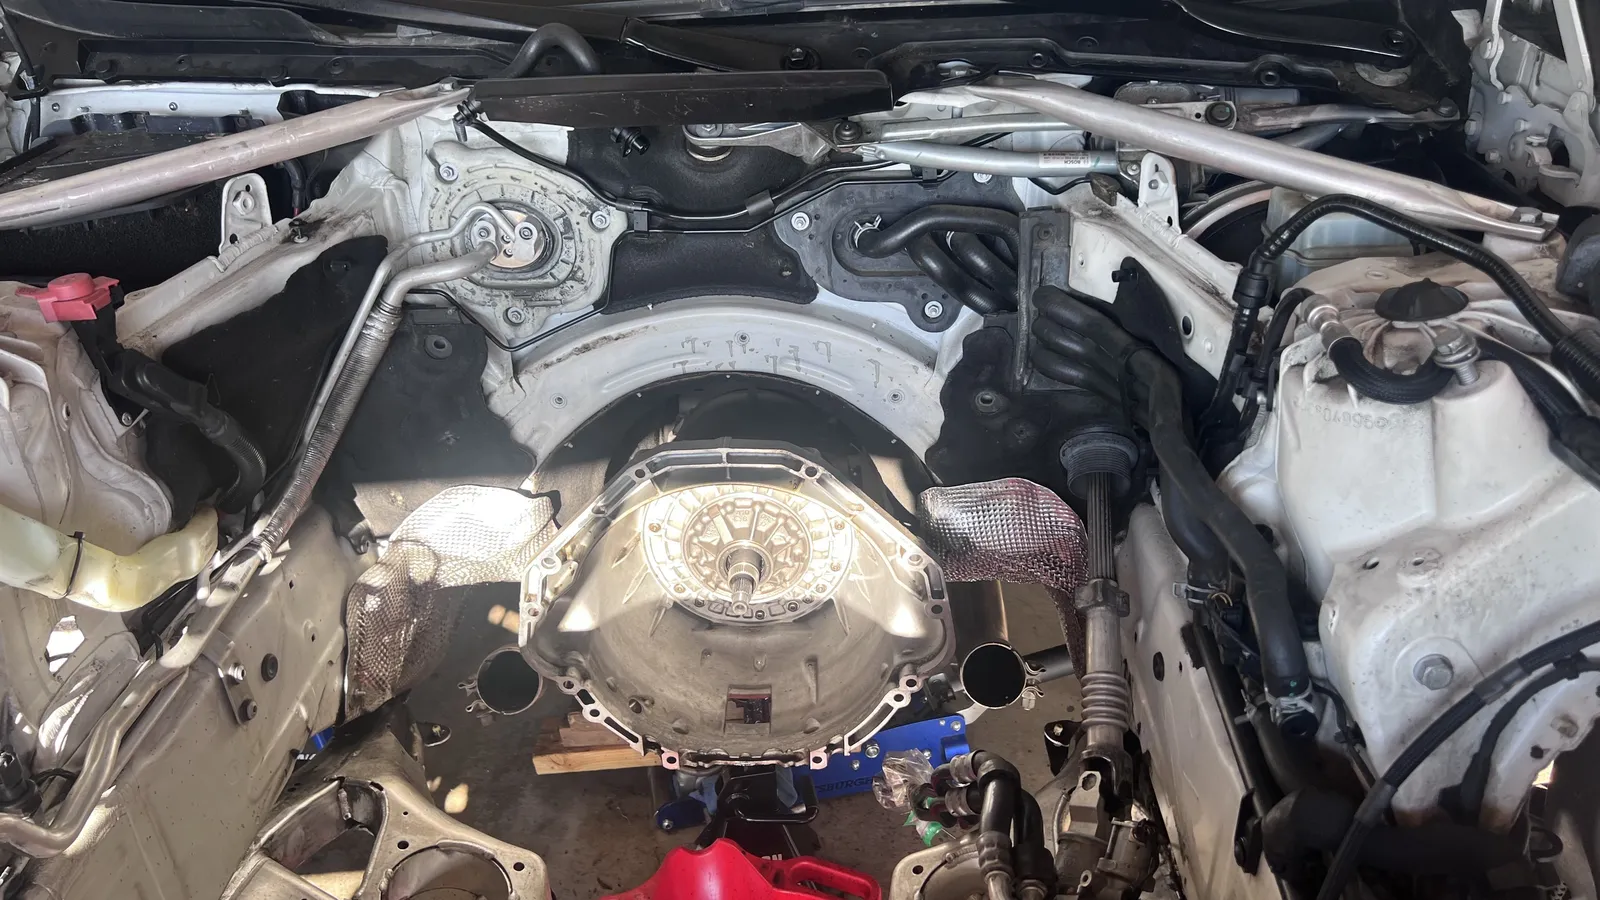
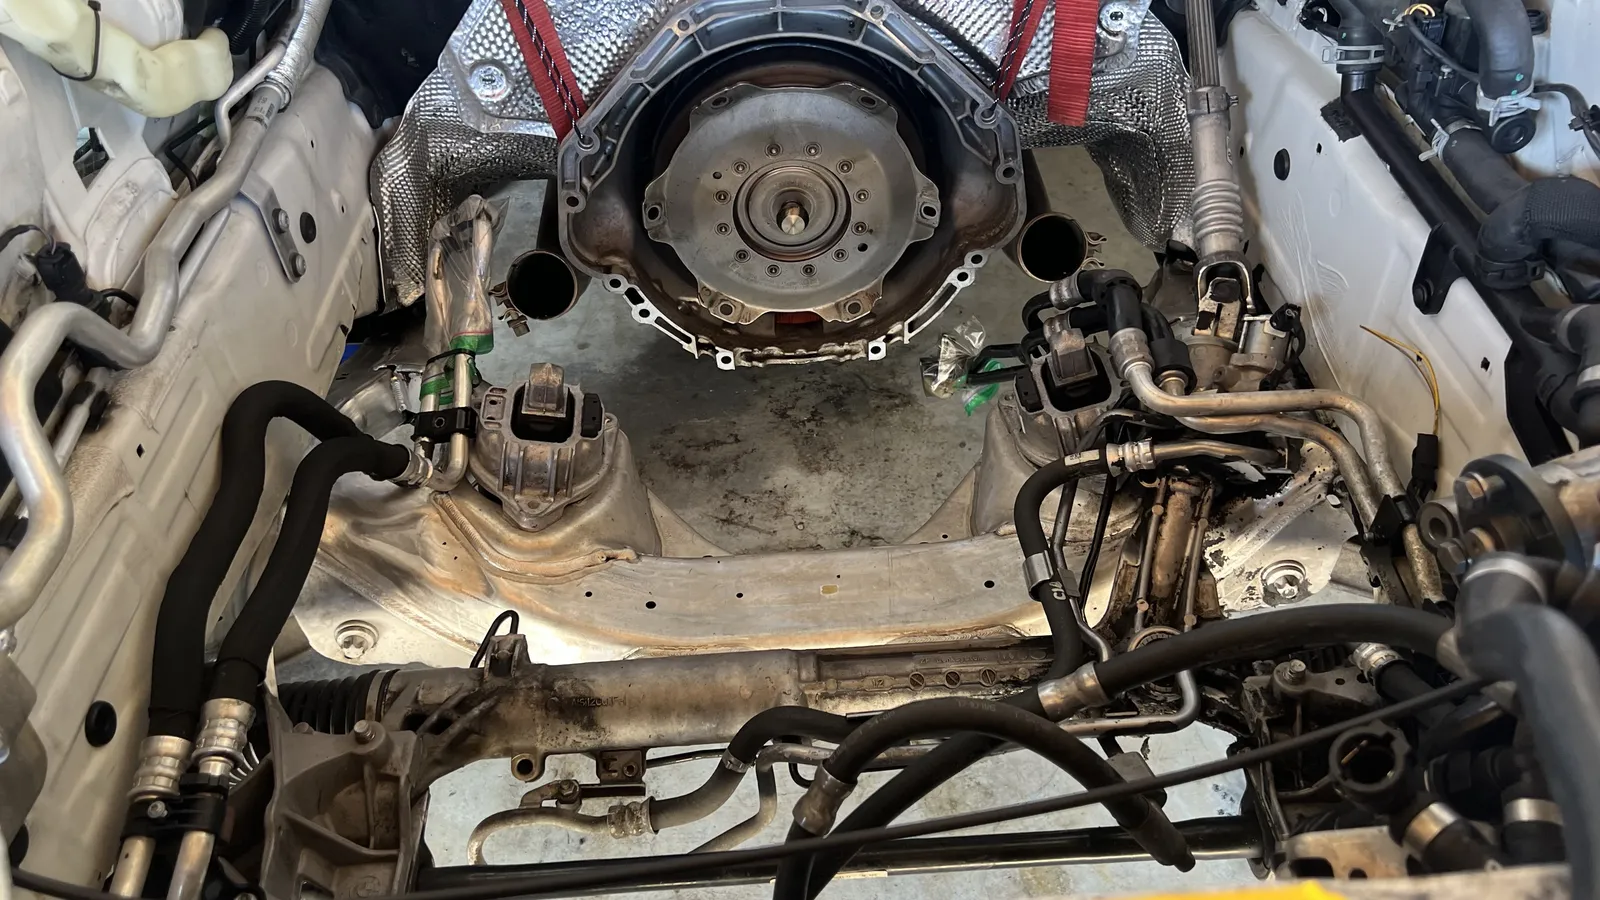
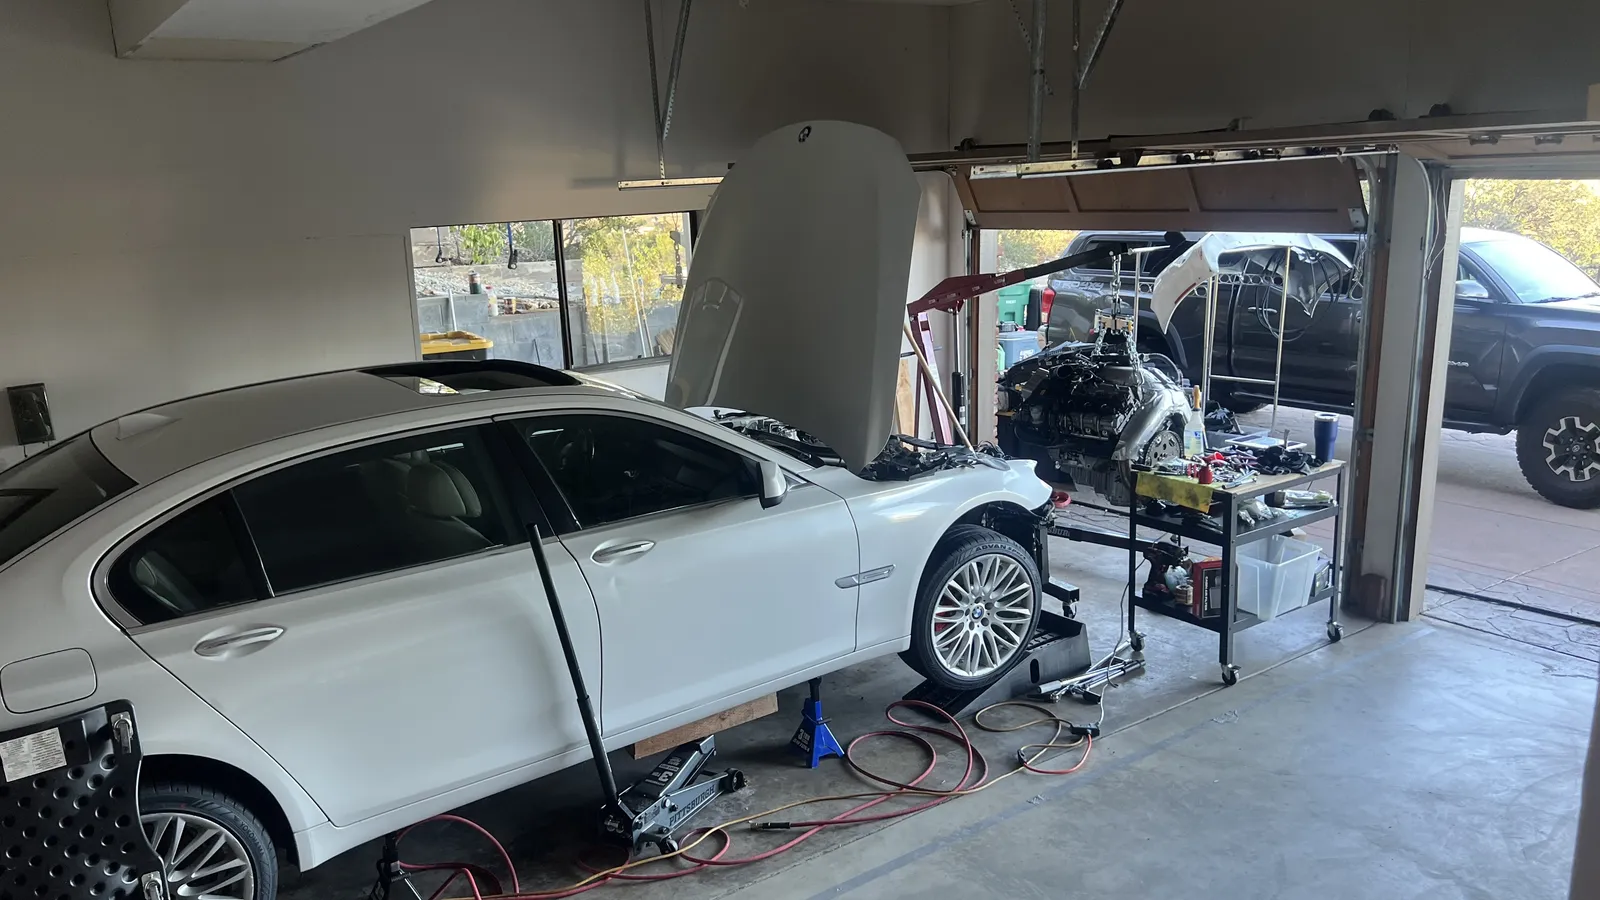
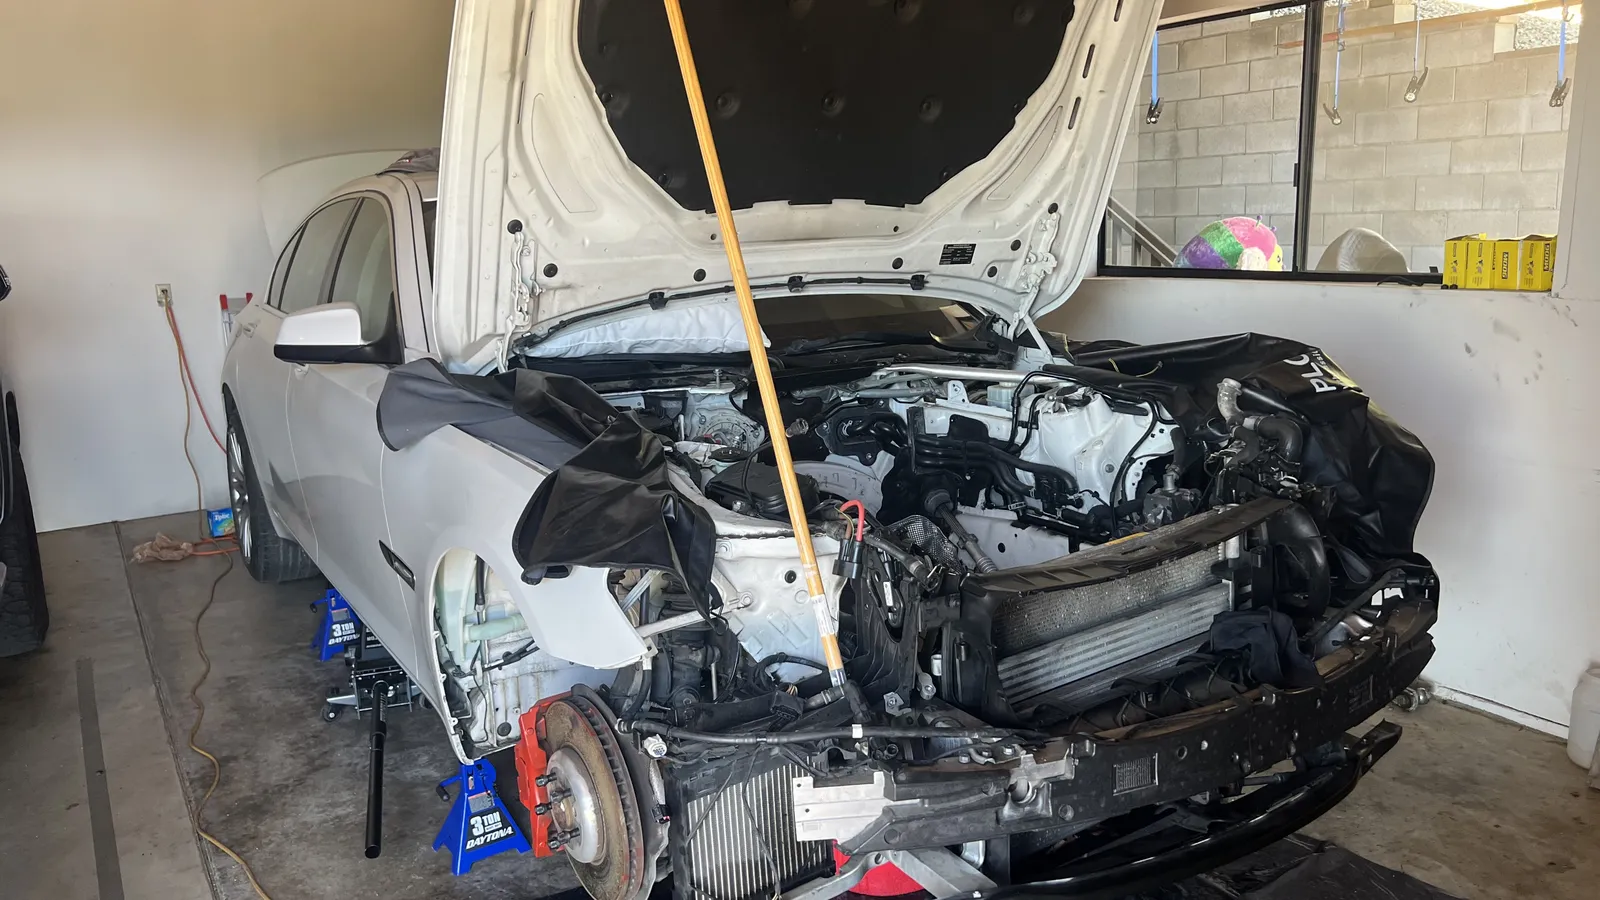 Engine out: empty bay, front end stripped, car on stands with the hood propped open.
Heads, valves and stem seals
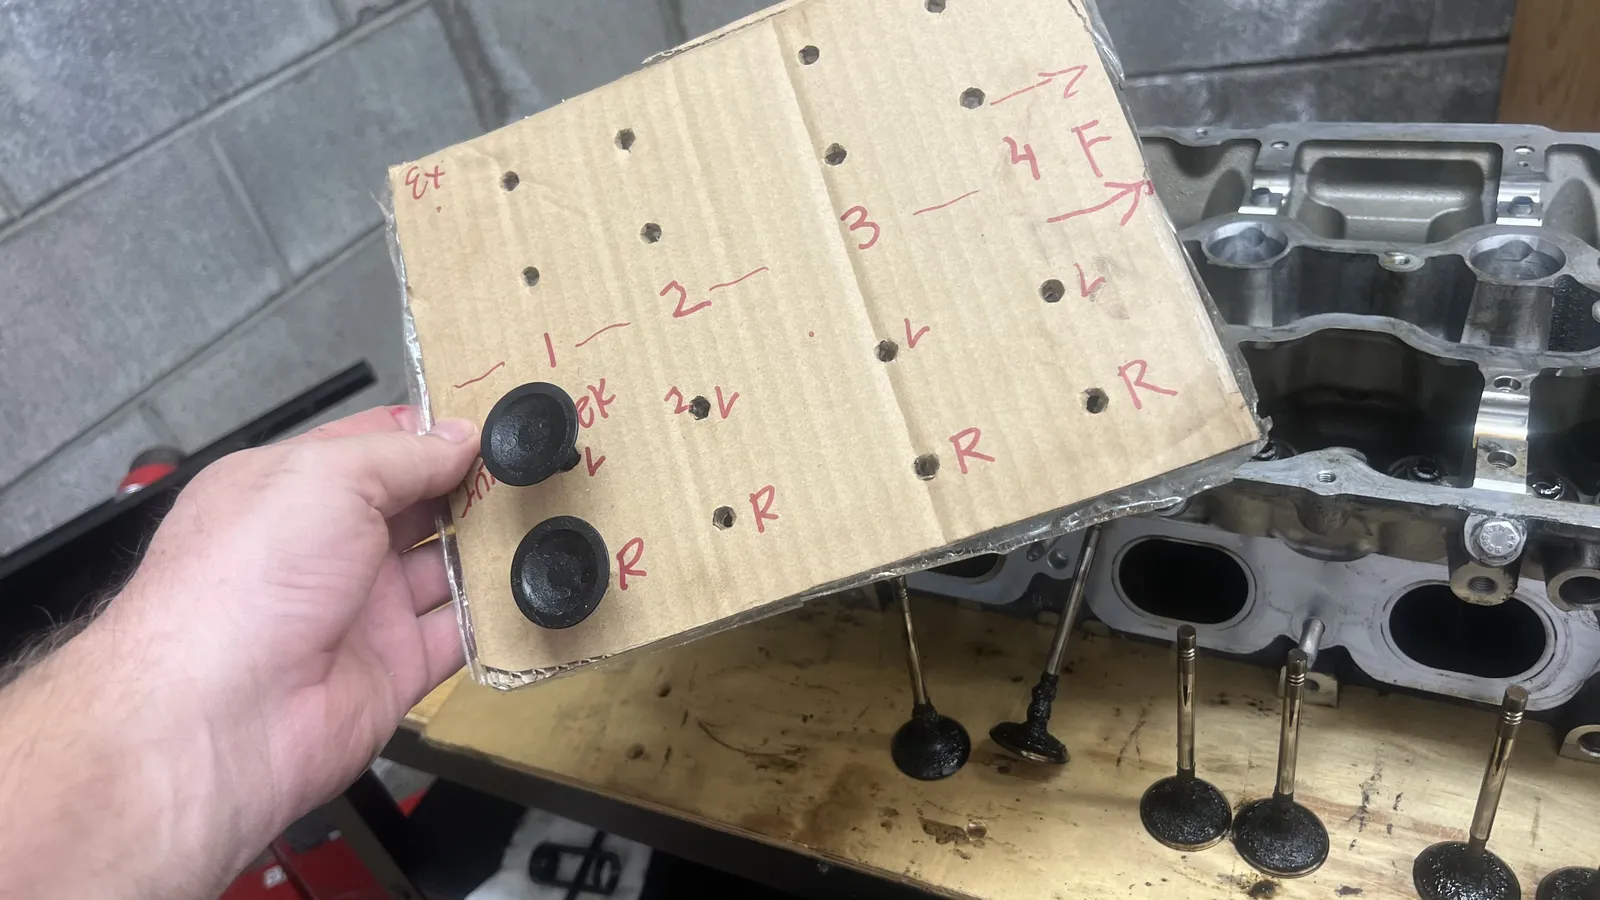
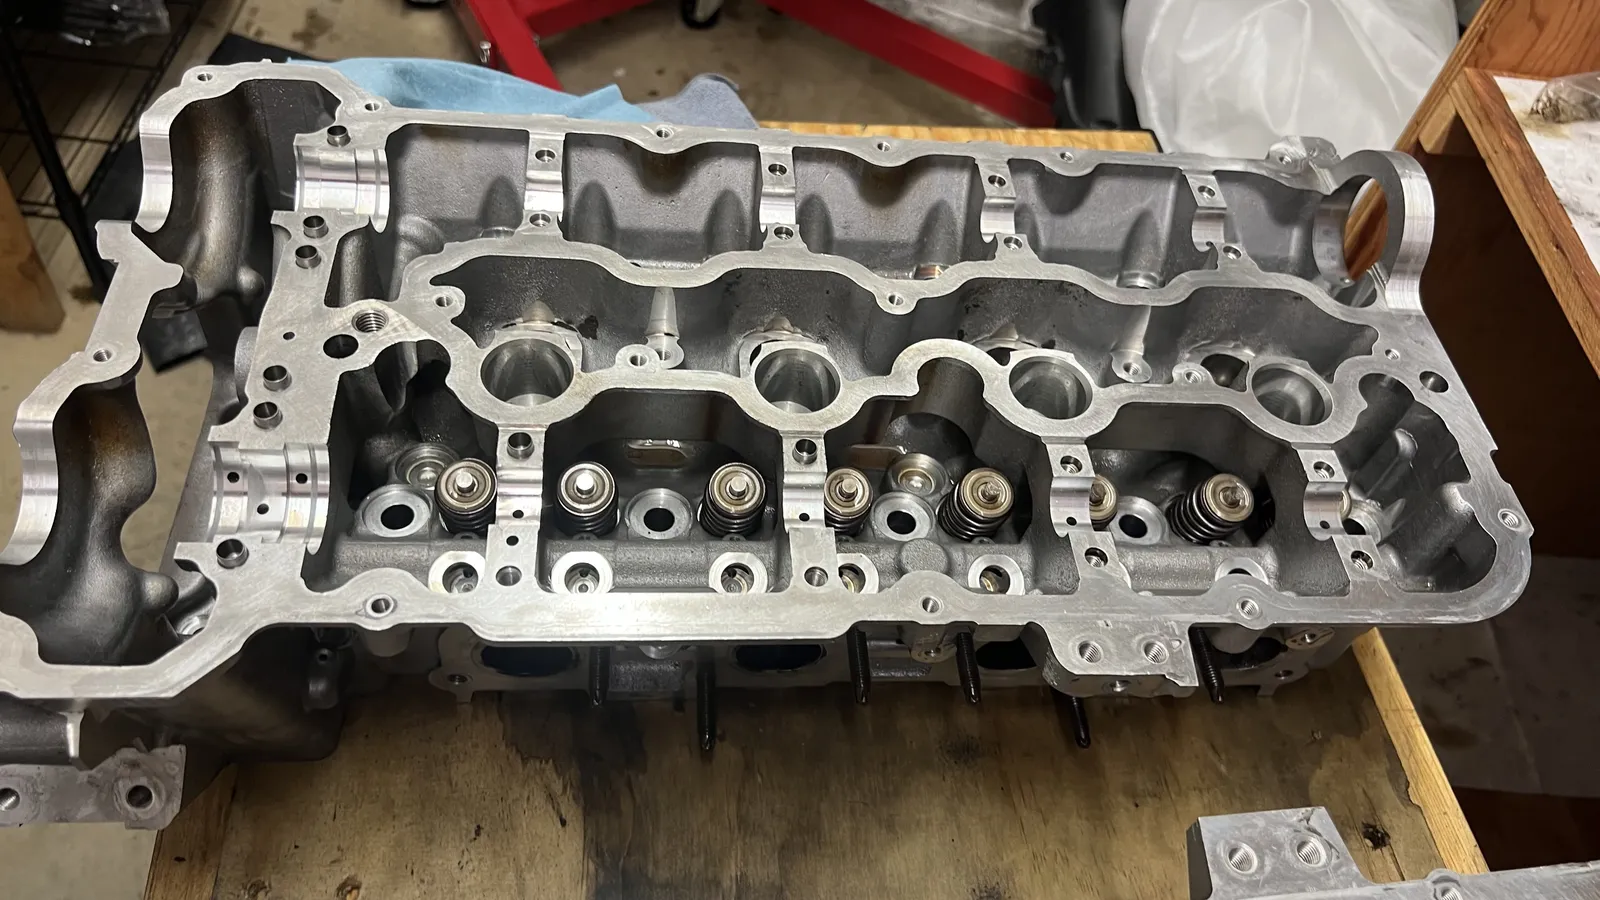
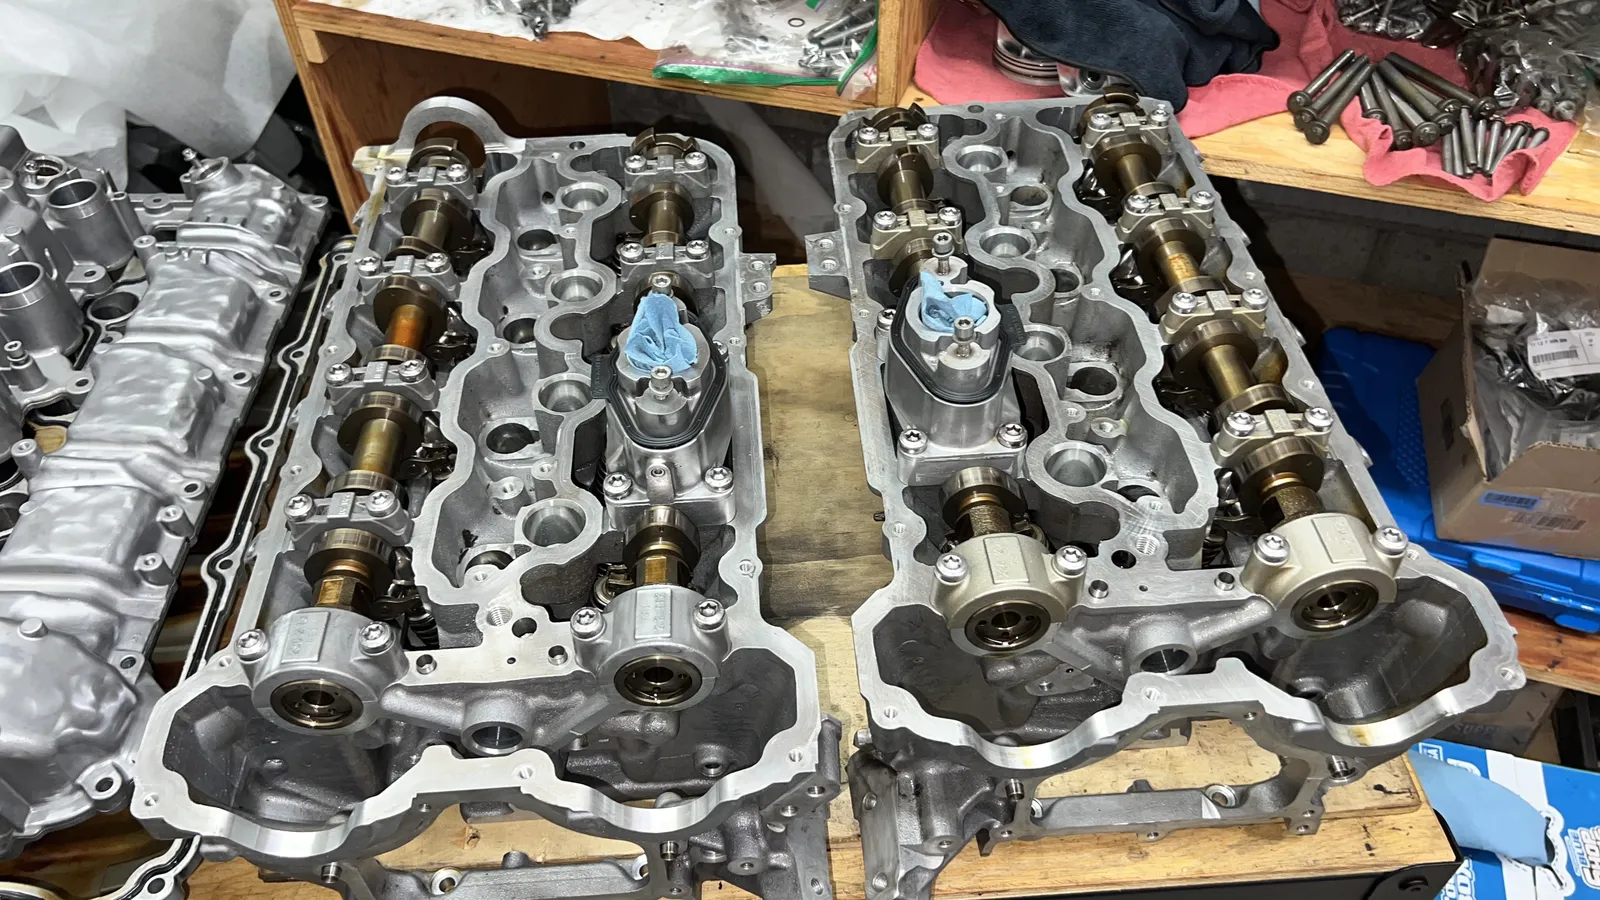
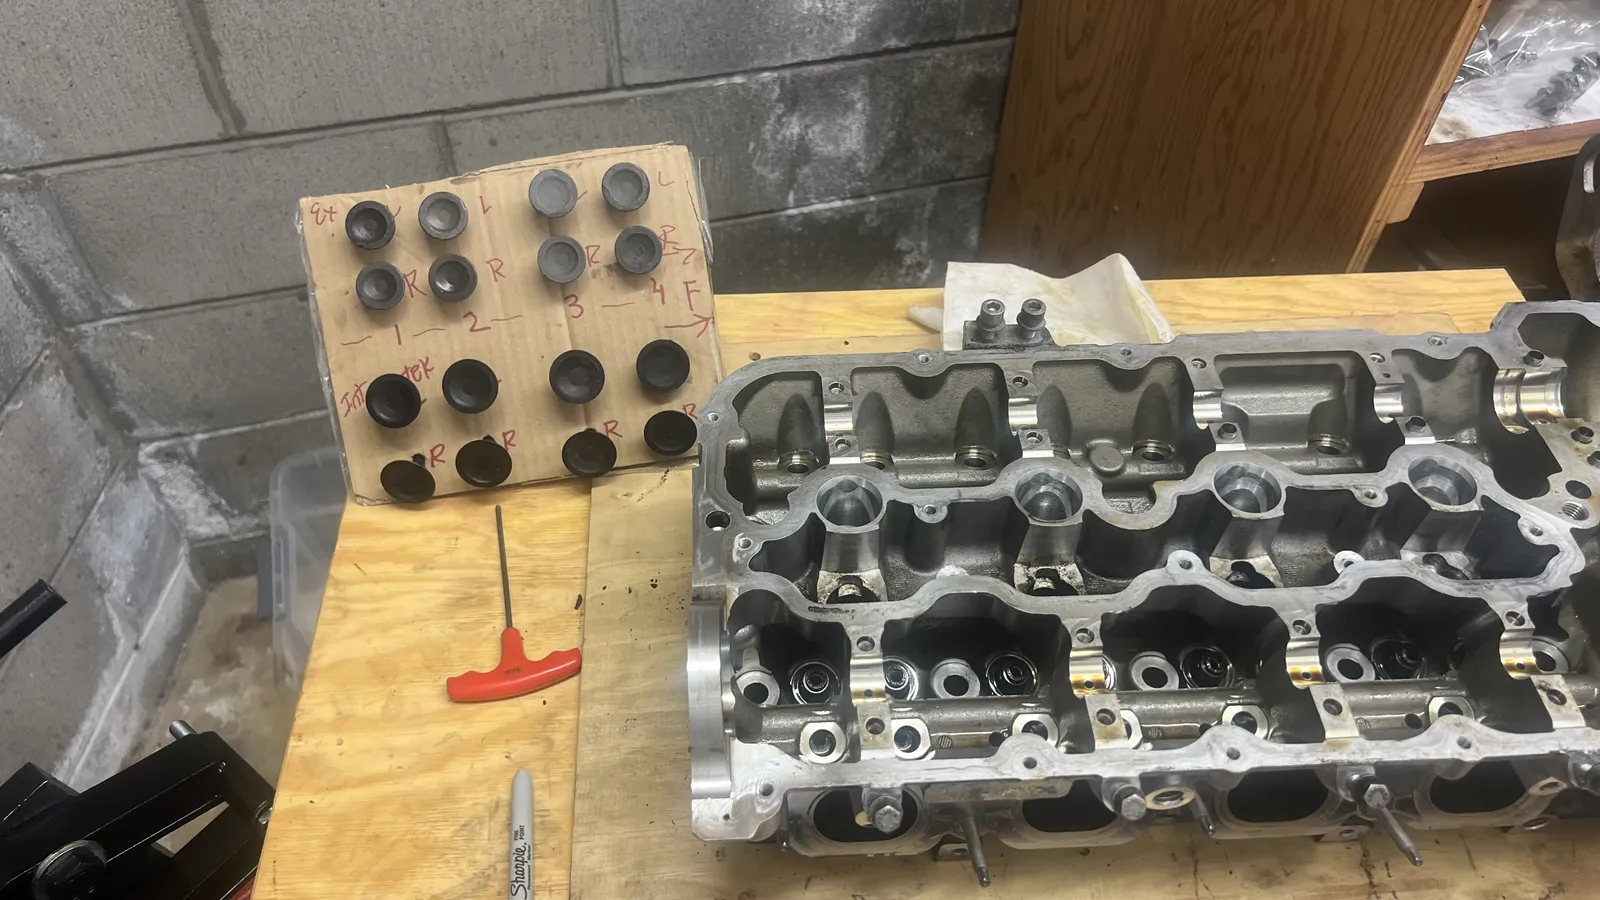
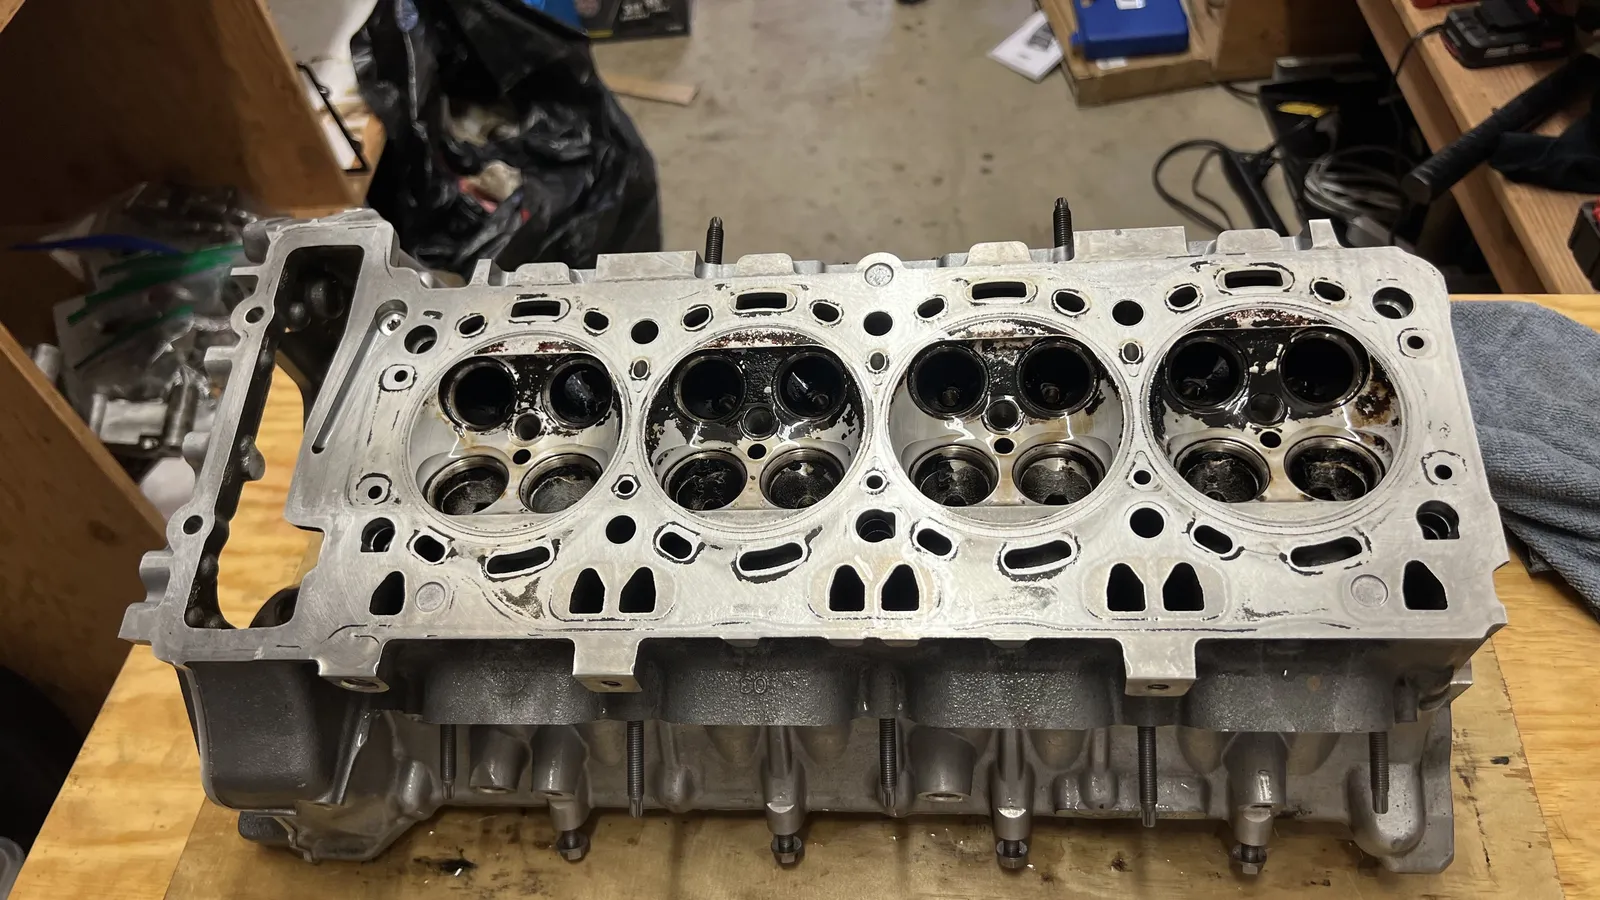
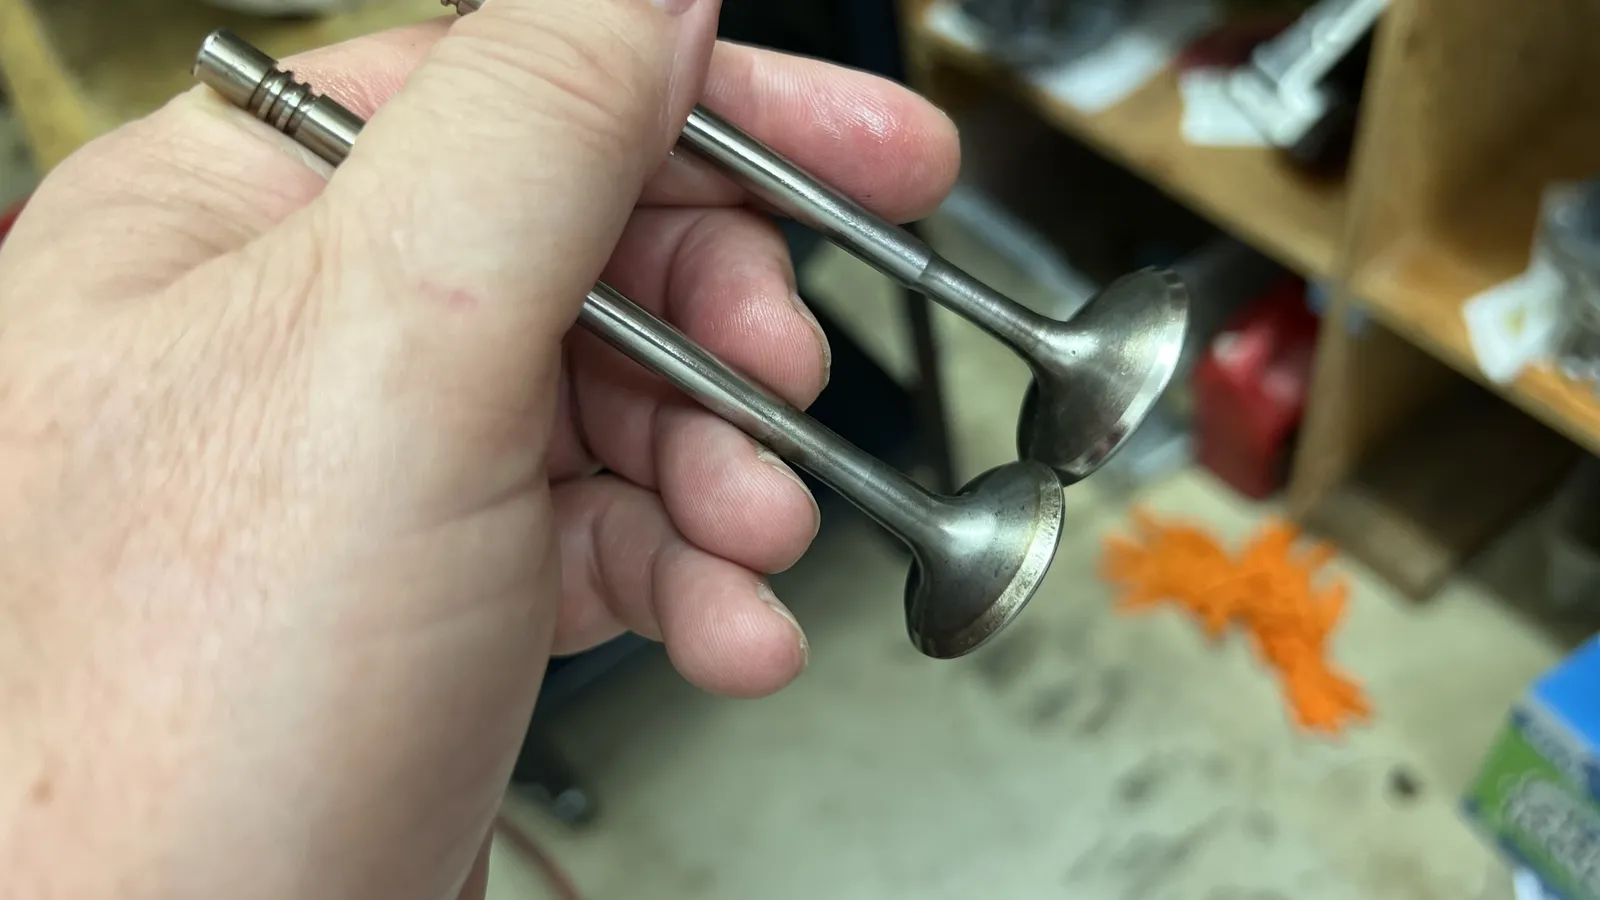
Jul 4 – Aug 13, 2026The heads stayed together until the cams came out. After that every valve was kept in order on a cardboard map (cylinders 1–4 on one bank, intake and exhaust, front marked) so it could go back exactly where it came from.
The valves were cleaned of carbon, the heads were scrubbed (Dremel and a lot of degreaser), and new valve stem sealsvalve stem seals Small rubber seals on each valve guide that keep oil out of the combustion chamber. Hardened seals are the classic cause of N63 oil burning and blue smoke. went in — the classic N63 oil-burning fix while the heads are on the bench. 11340029751Part 11340029751 Valve stem seal set (one head’s worth). Two sets were bought from BMW Parts Warehouse. Then came the springs and cams. By August 13 both heads were assembled and ready for the block.
Crank, bearings and the bottom end
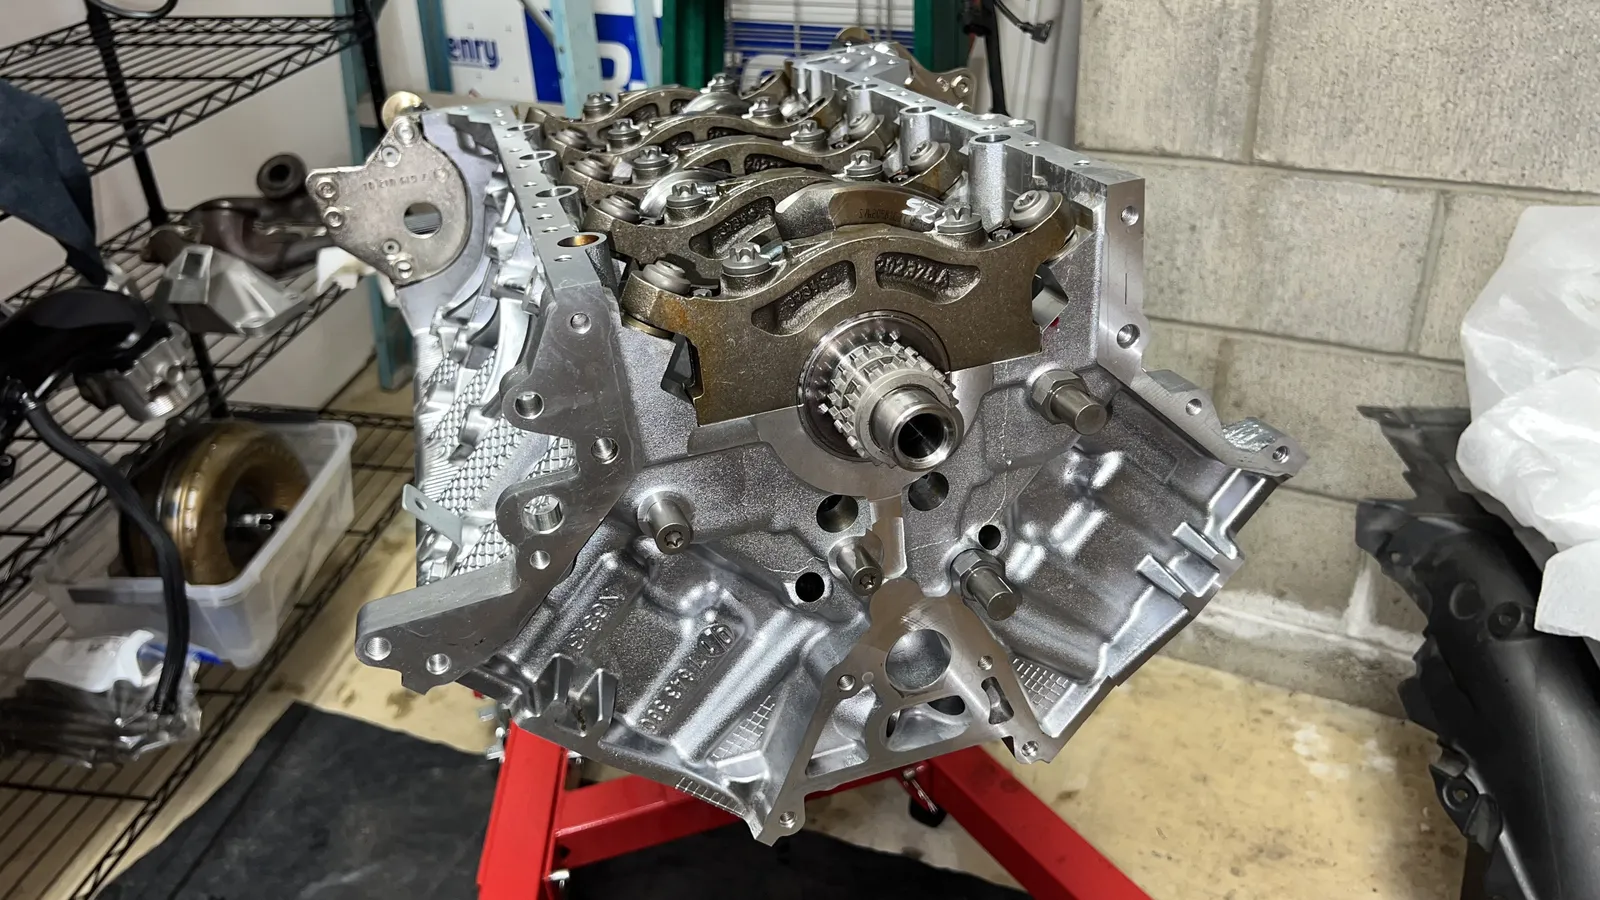
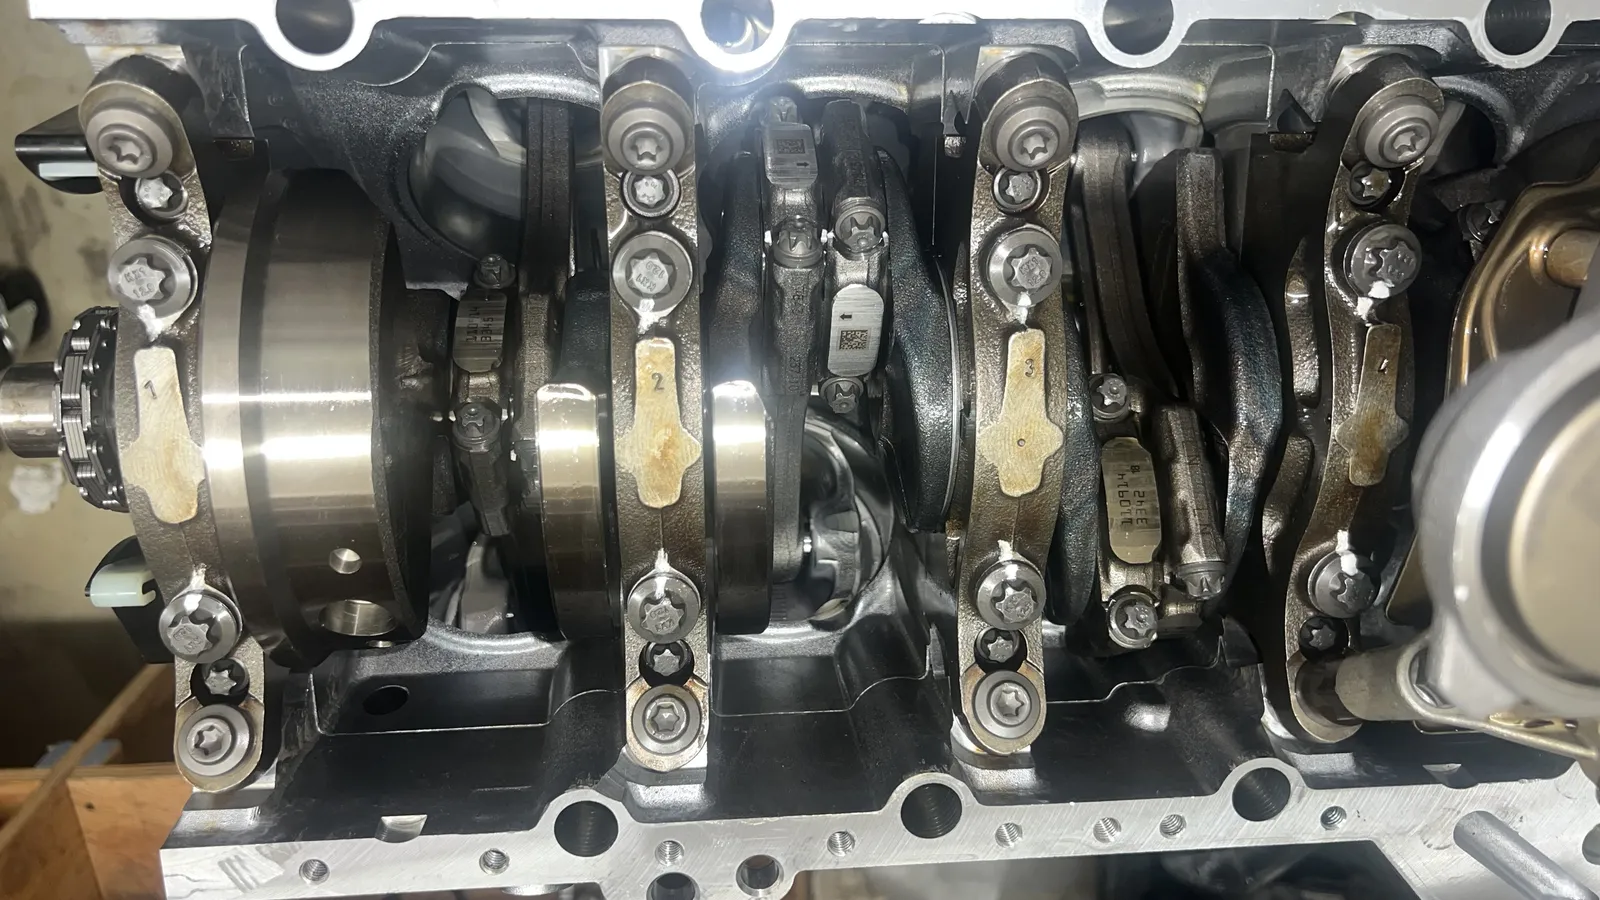
Jul – Sep 2026The crank went to L&L Grinding — very nice people. They didn’t have the specs for this crank, so I looked them up with Grok. They straightened the slightly bent crank, then ground 0.25 off the main journals and 0.50 off the rod journals: the spun bearings had welded brass bearing material onto the journals. It went back in on King bearings, +0.25 mains MB5801SM0.25Part MB5801SM0.25 King main-bearing set, 0.25 mm oversize, via Turner Motorsport. and +0.50 rods CR8050SV0.5Part CR8050SV0.5 King rod-bearing set, 0.50 mm oversize, via Turner Motorsport..
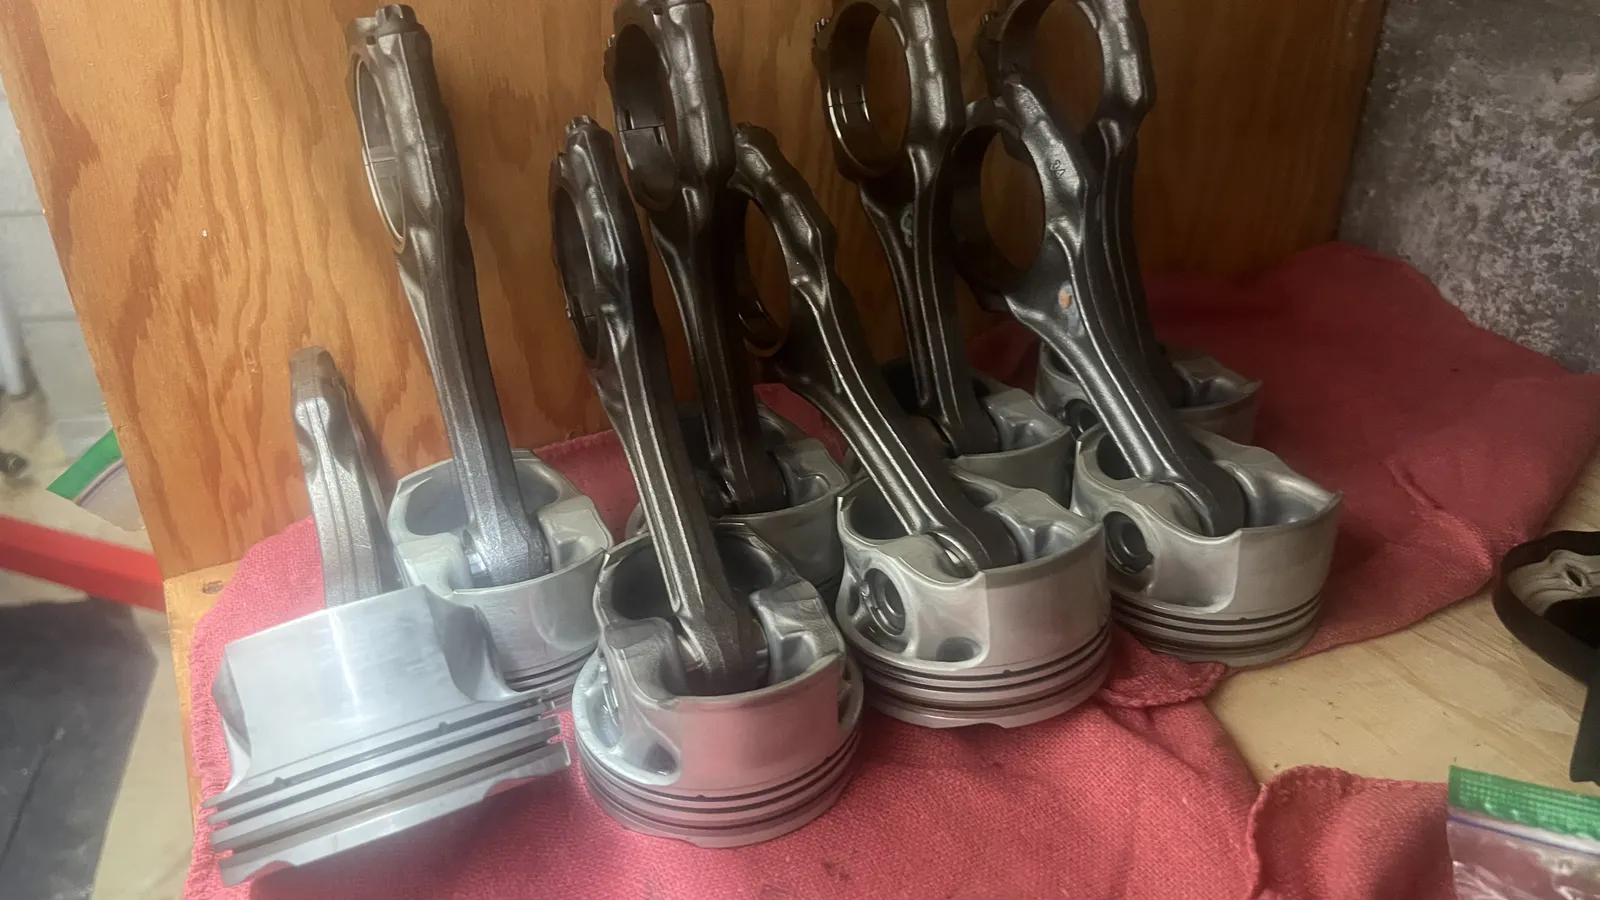
Everything got cleaned of oil and sludge before it went back on. At first I replaced only two of the damaged connecting rodsconnecting rod The link between piston and crankshaft. A spun rod bearing usually damages the rod’s big end too.. On assembly, the two reused rods wouldn’t go onto the journals, so all four were replaced with new BMW rods — and the new ones fit perfectly. 11247843237Part 11247843237 BMW connecting rod (N63/S63). Four were bought: two from BMW Parts Warehouse in one order, one more from BMW Parts Warehouse and one from Turner. Piston rings were a saga of their own: the drop-in sets were EU-only and had to come through a distributor in Saudi Arabia, which nearly doubled the cost of eight sets. The ring gaps on the first set were in spec, so the work carried on.
This motor is full of stretch boltsstretch bolts Torque-to-yield (TTY) bolts, tightened to a torque and then turned a set angle so they stretch. One-time use.. Once they’re torqued they can’t be reused, so the parts bill grew fast during assembly: rod bolts, main-cap bolts, cam-sprocket bolts — and the oil-pan bolts. Those are stretch bolts too: replace them, or risk snapping one like I did. Getting the broken one out was lucky: centre-punching it to prepare for drilling loosened it, and I turned it slowly with the punch until I could pull it out with pliers. After that I bought all new pan bolts. 8Email from BMW Parts Warehouse, Sep 1, 2026: “BMW does note all screws for the oil pan are required for replacement. These screws come precoated in adhesive.”
Assembly was slow on purpose. Double, triple, quadruple check: stretch bolts don’t give you a second go.
- Email from BMW Parts Warehouse, Sep 1, 2026: “BMW does note all screws for the oil pan are required for replacement. These screws come precoated in adhesive.”
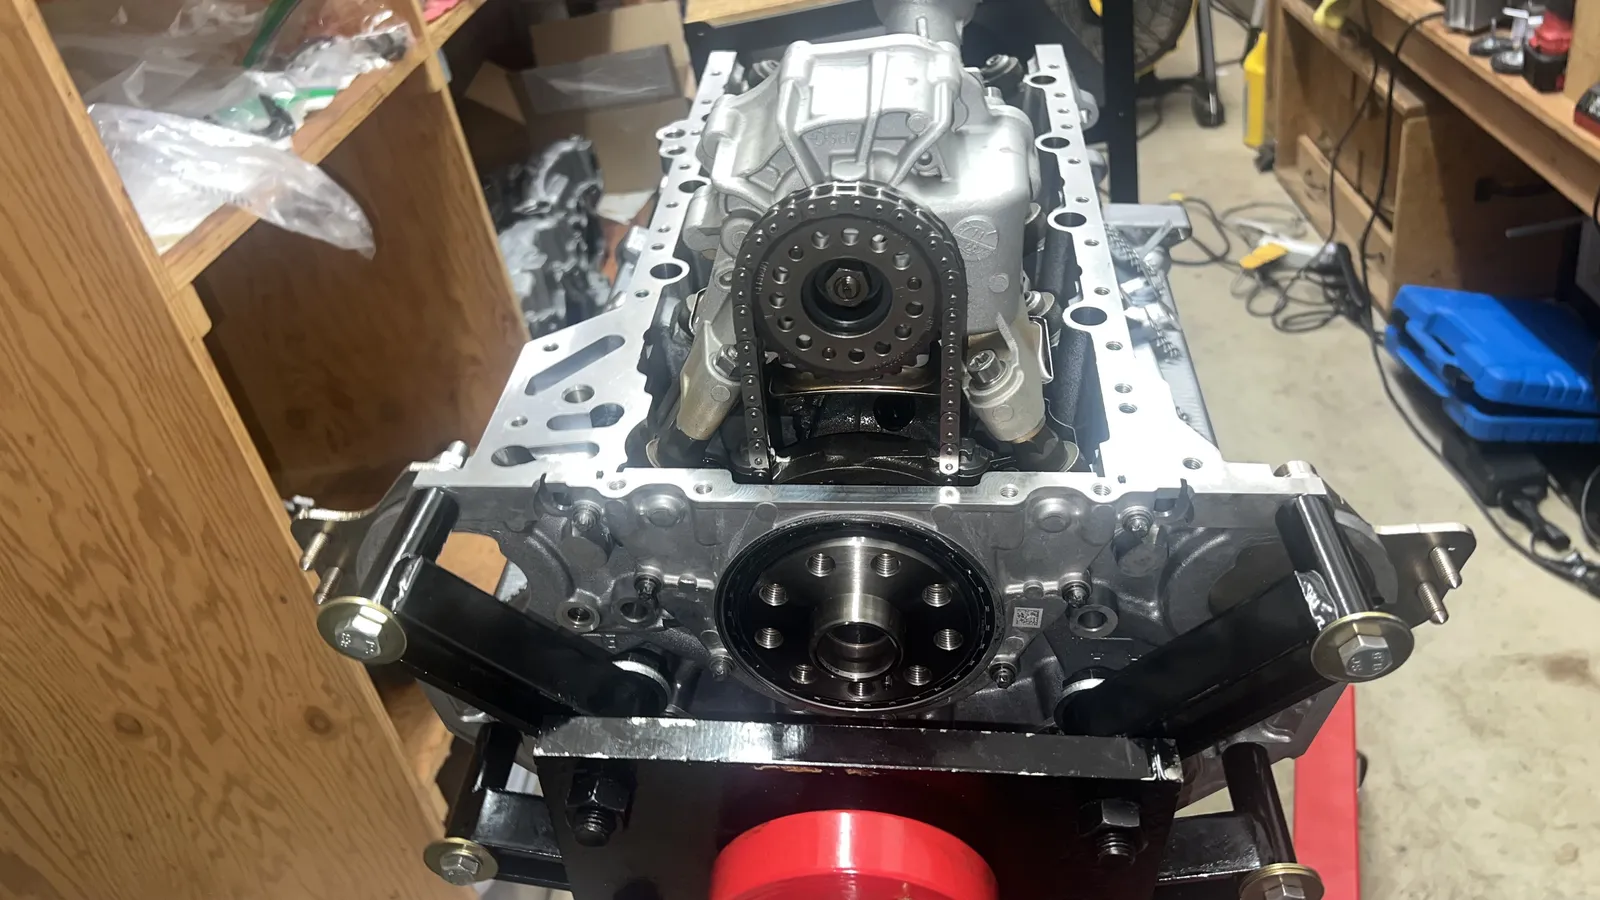
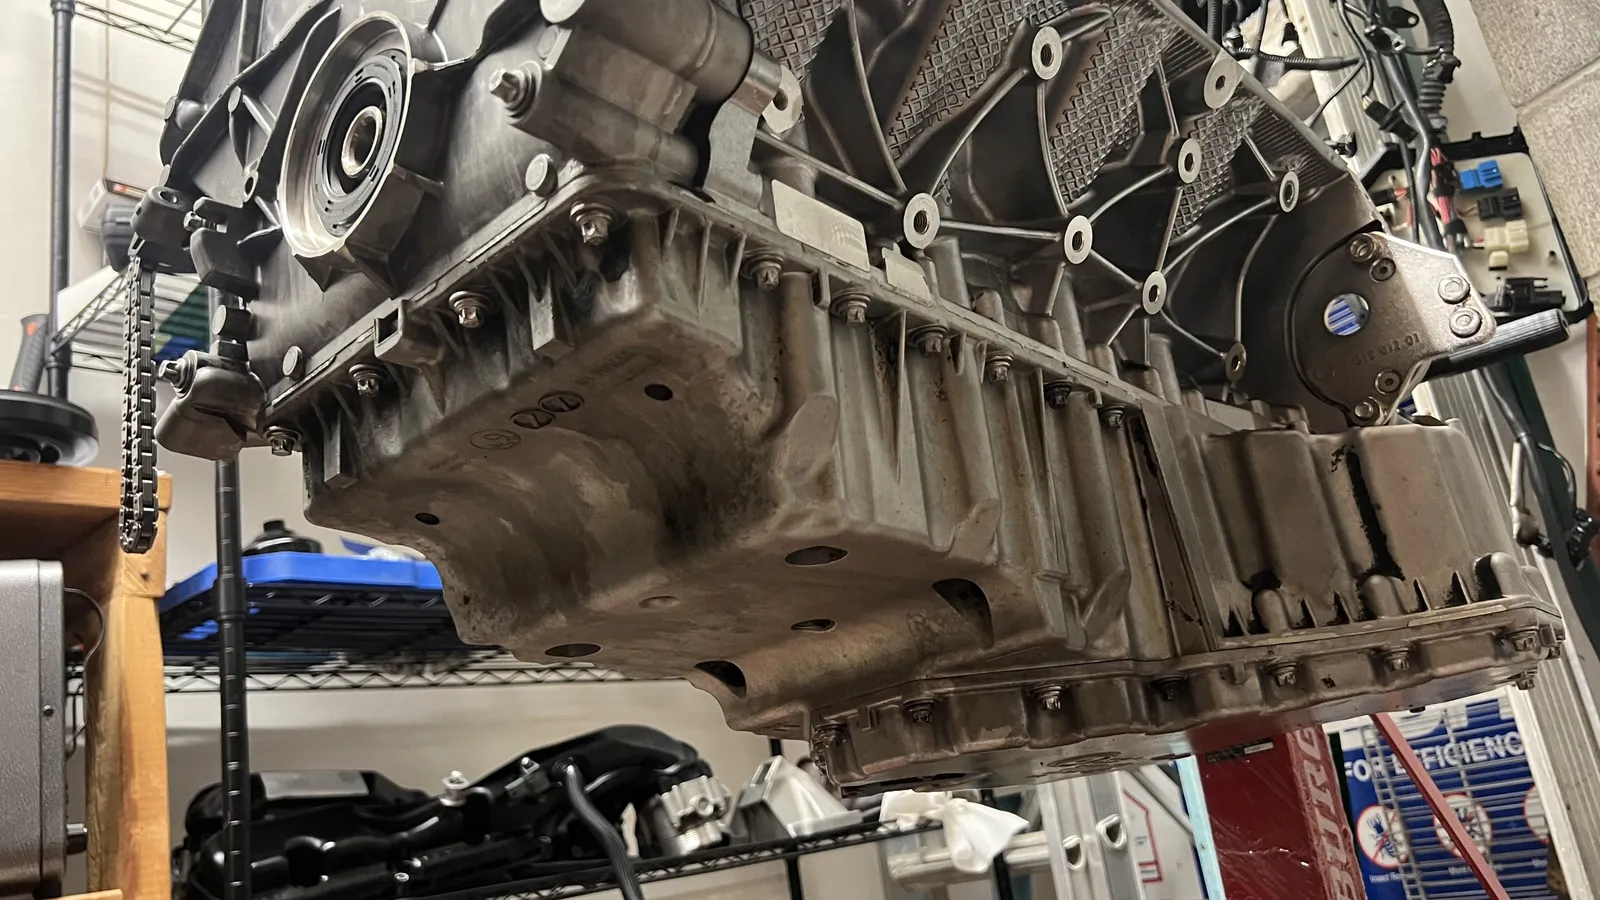
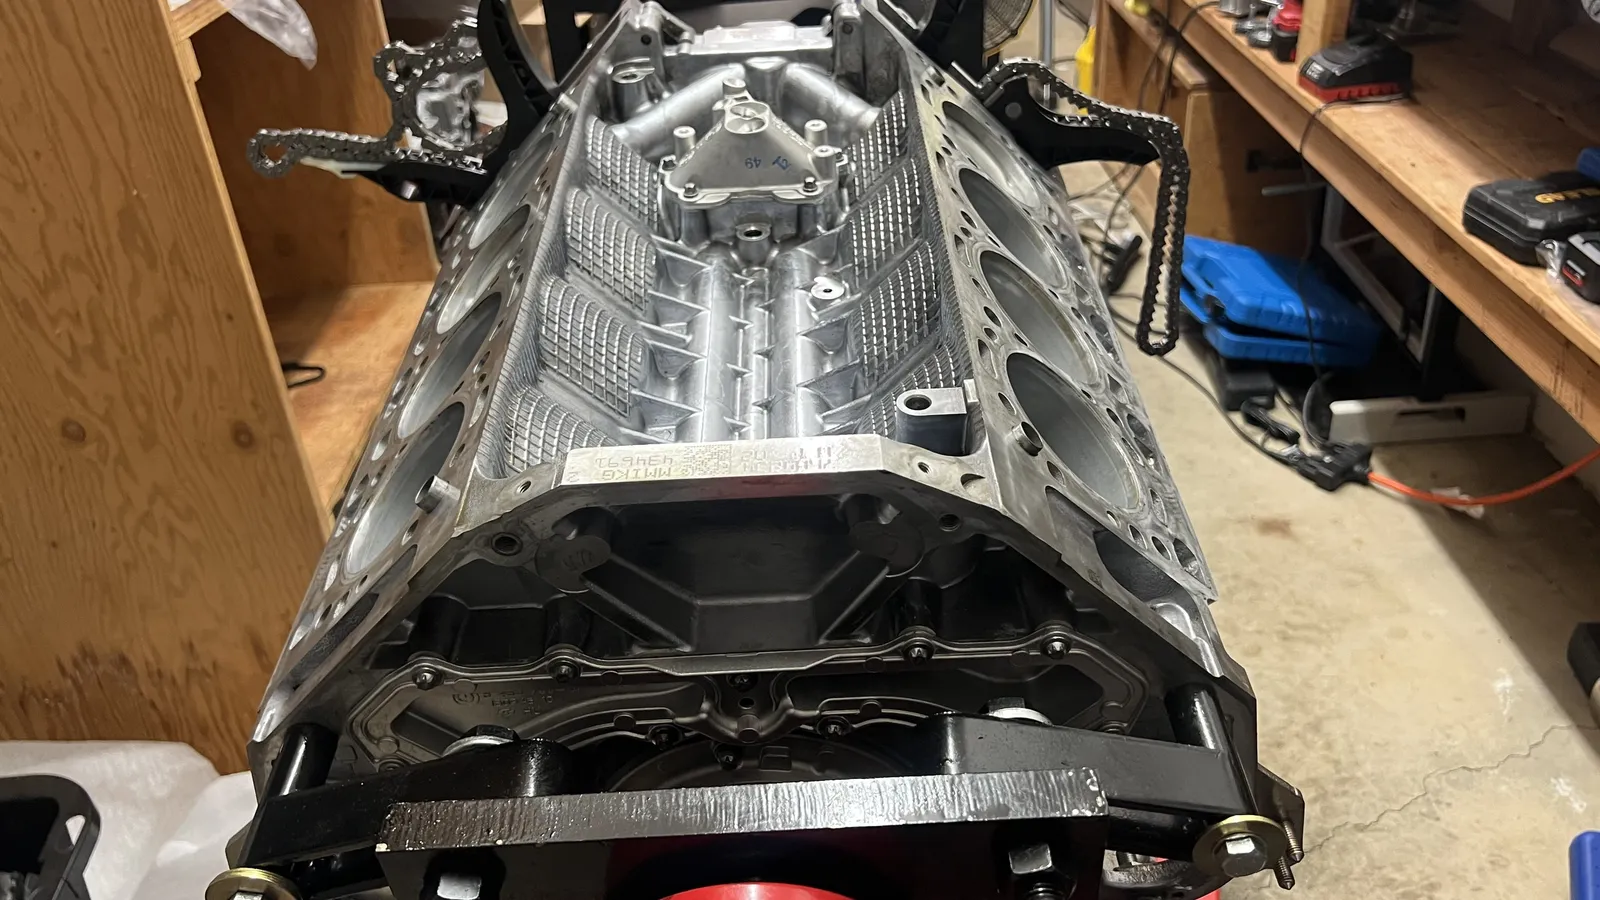
Dressing the long block
Sep 5 – Sep 19, 2026Heads on, cam gears on, valve covers on. Then came the slow part: injectors with new Teflon injector sealsTeflon injector seals PTFE ring on the tip of each piezo injector. It must be fitted with a sizing tool and is easy to tear. (easy to ruin on install, and one took several tries), crankcase ventcrankcase vent The PCV / oil-separator lines in the valley that return blow-by gases to the intake. lines, the HPFPHPFP High-pressure fuel pump, which feeds the direct-injection fuel rails at very high pressure. and fuel rails, harnesses, heat shields, and a hunt for the handful of fasteners that went missing during teardown.
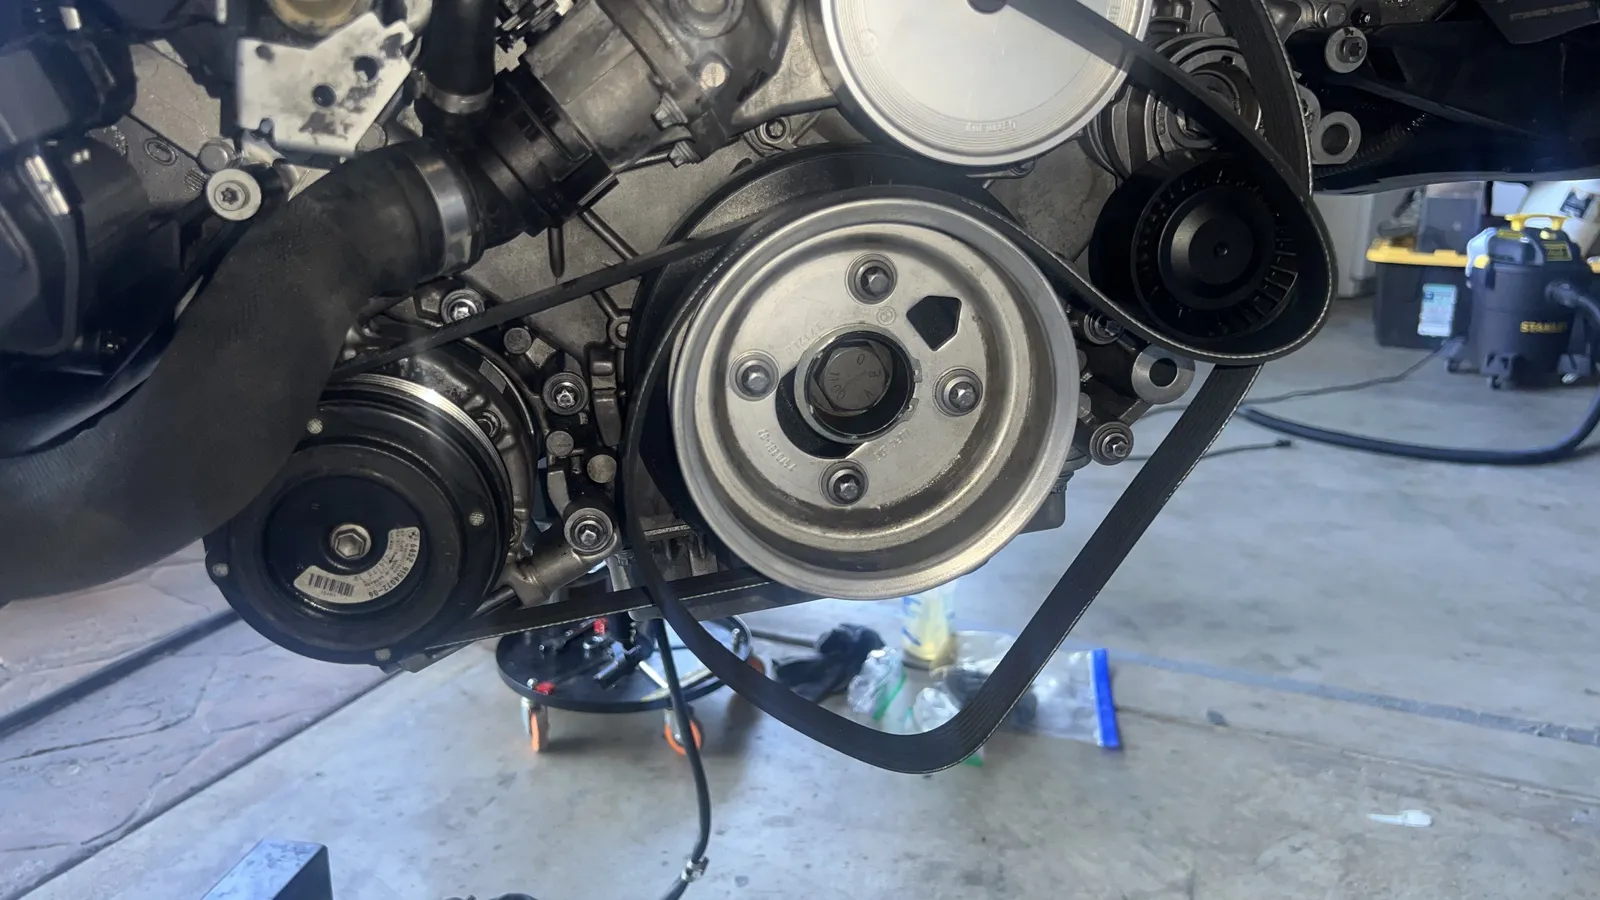
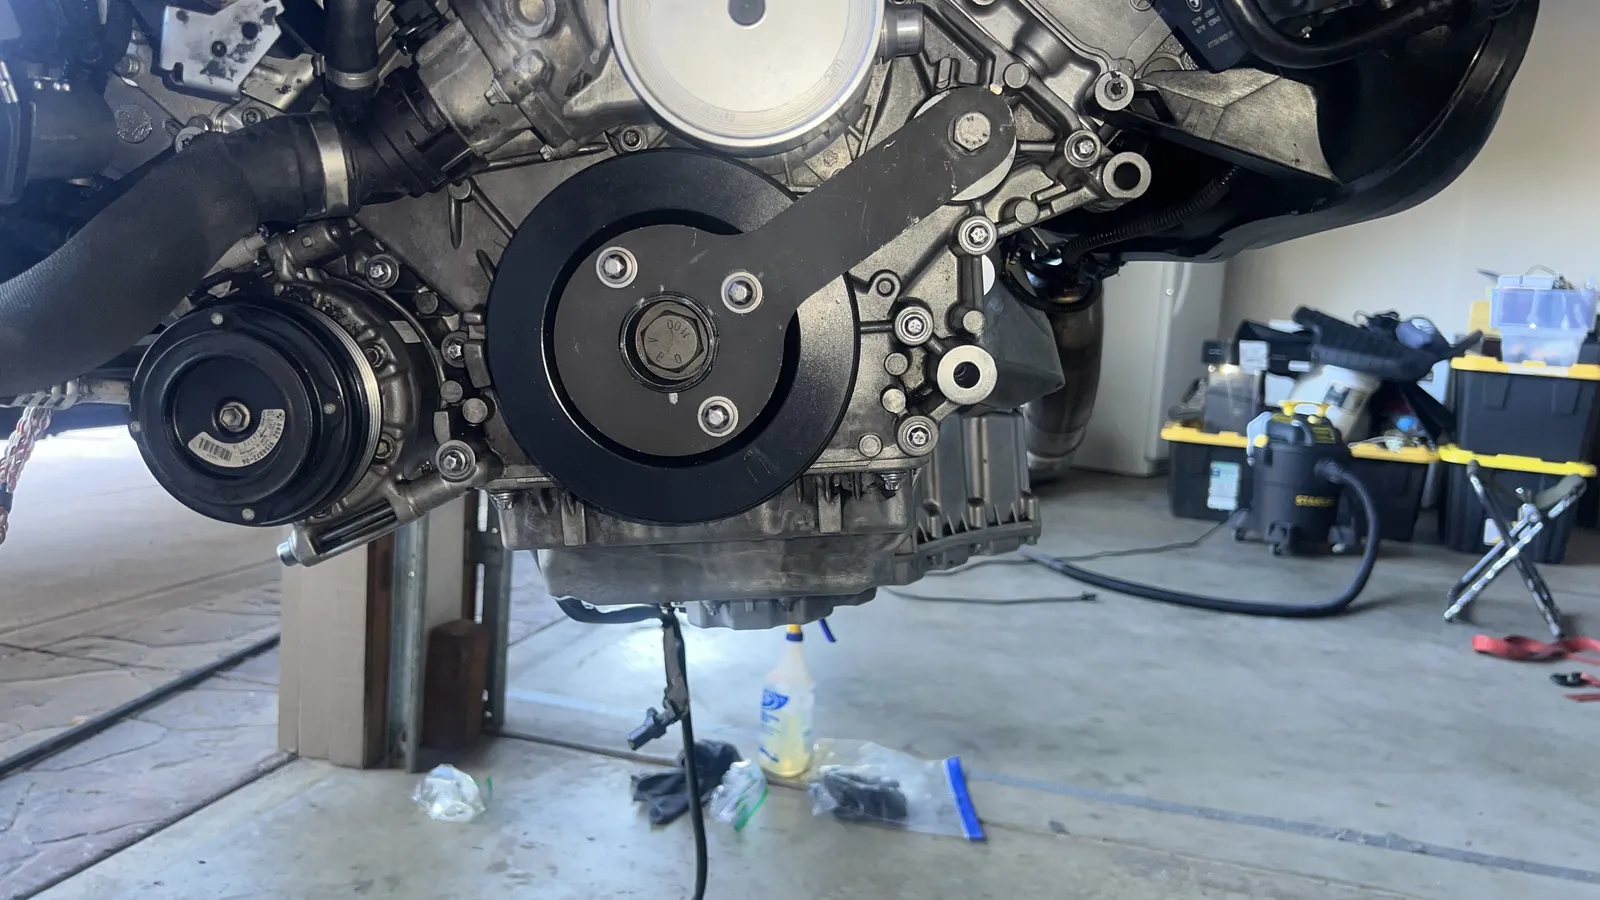
The last big job on the stand was the harmonic balancerharmonic balancer The vibration damper and pulley on the front of the crank, held by a large stretch bolt.. The 27 mm bolt goes to 100 Nm and then three more 60° turns — 180° of stretch — with the crank locked in a holding tool. 11238648148Part 11238648148 Crankshaft pulley / harmonic-balancer bolt (18 × 1.5 × 122 mm), a stretch bolt that must be replaced.
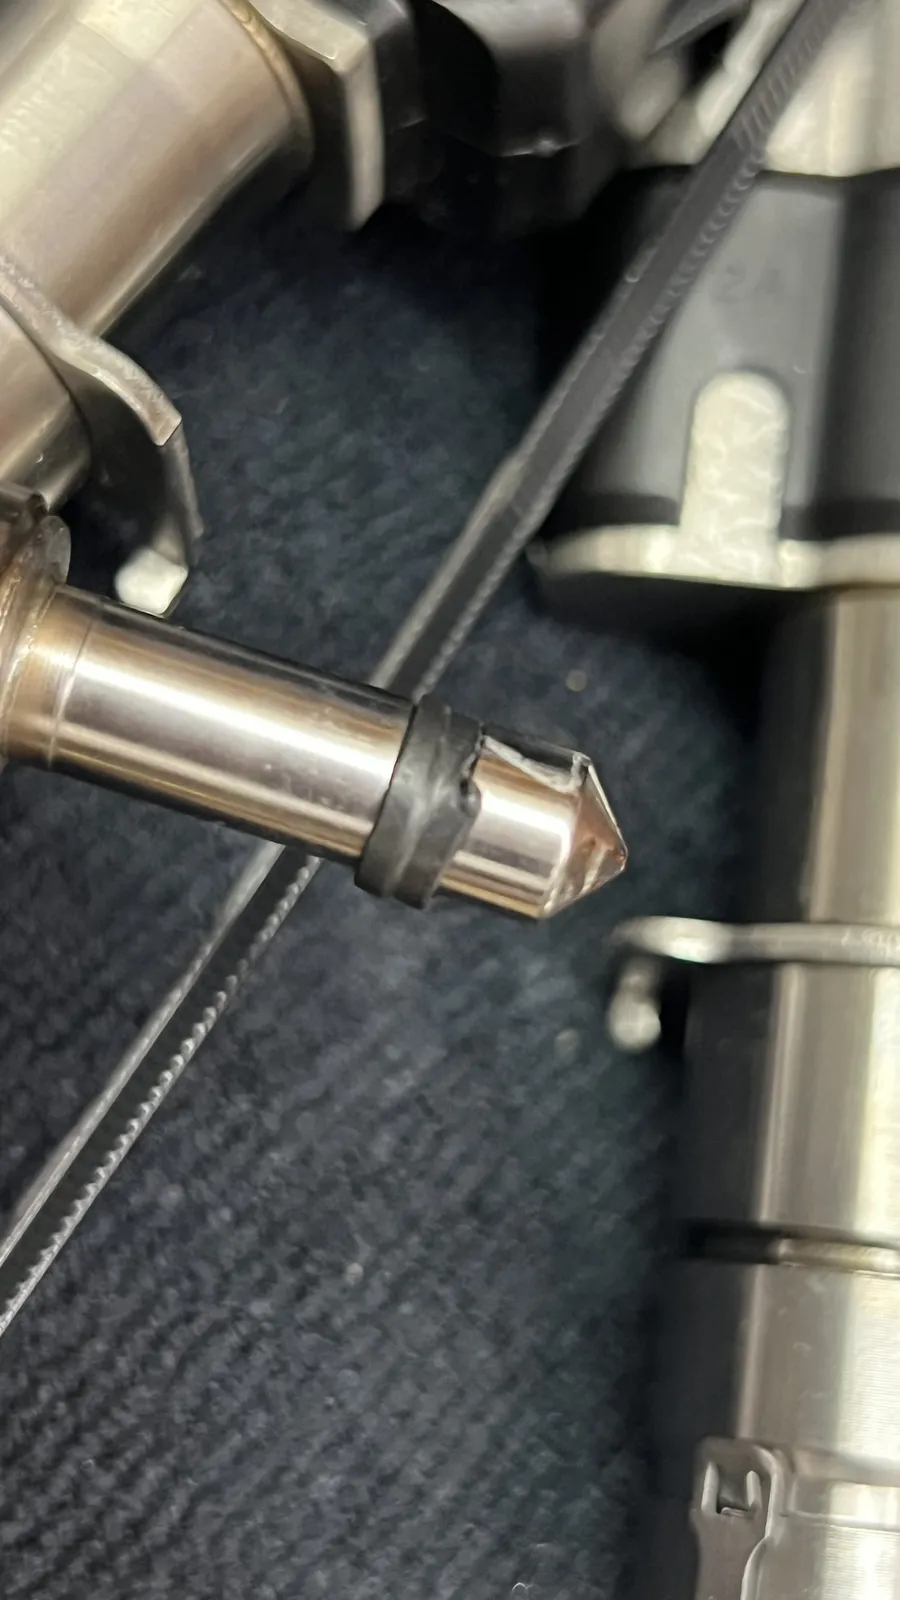 Damaged fuel-injector Teflon seal I replaced — easy to ruin on install; took several tries to seat without tearing.
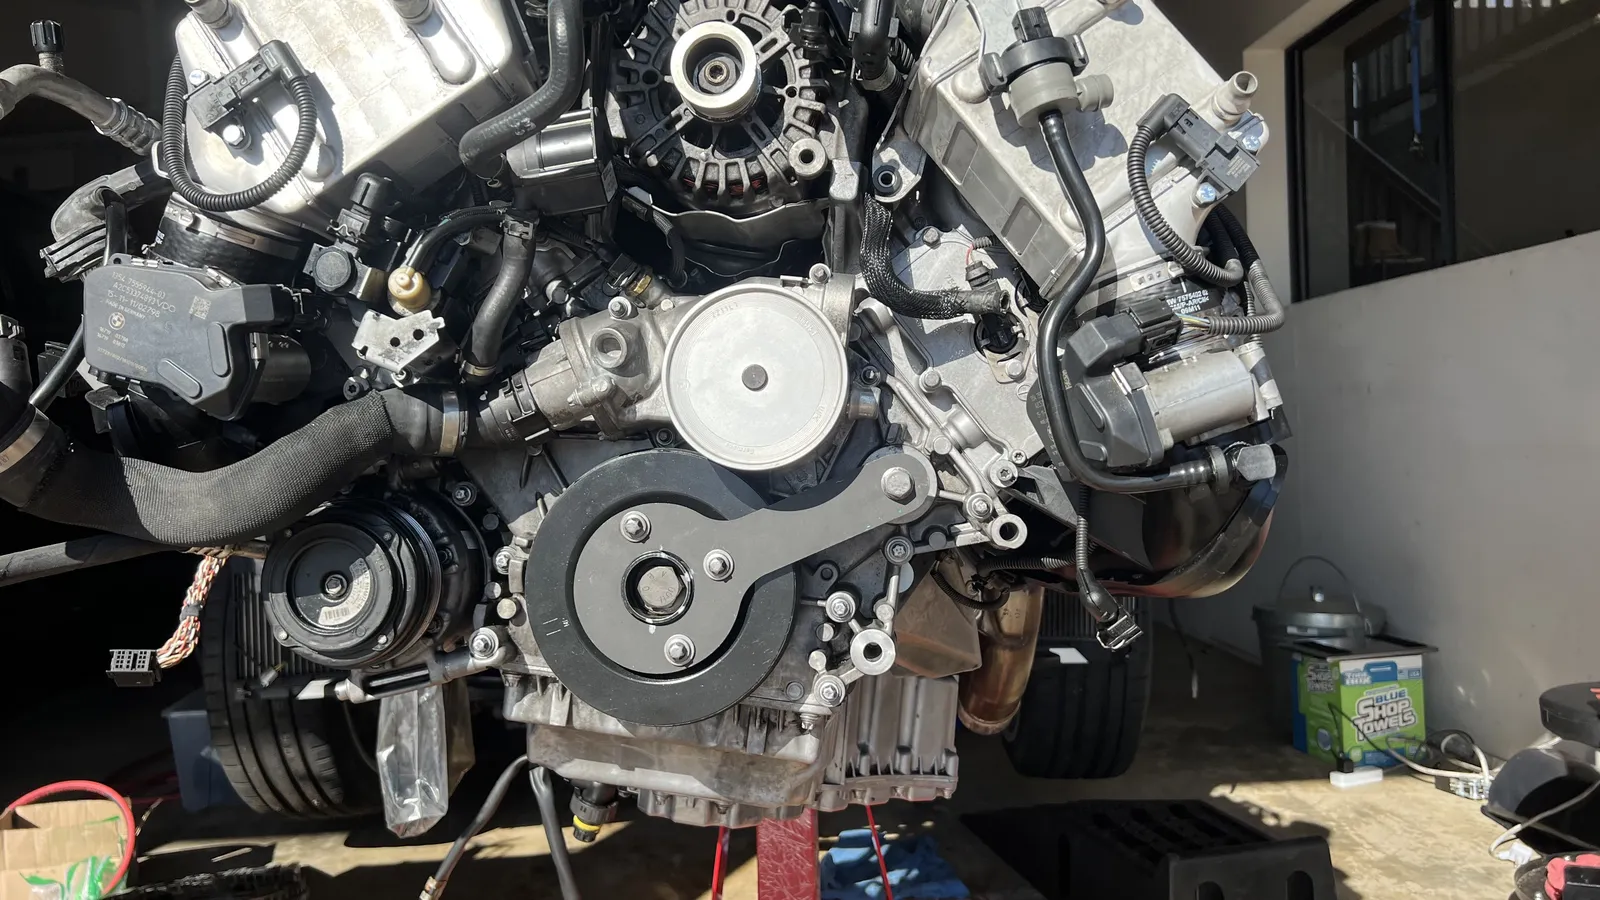 Harmonic balancer locked with the holding tool — 27 mm bolt torqued to 100 Nm, then +60° three times (180° total stretch).
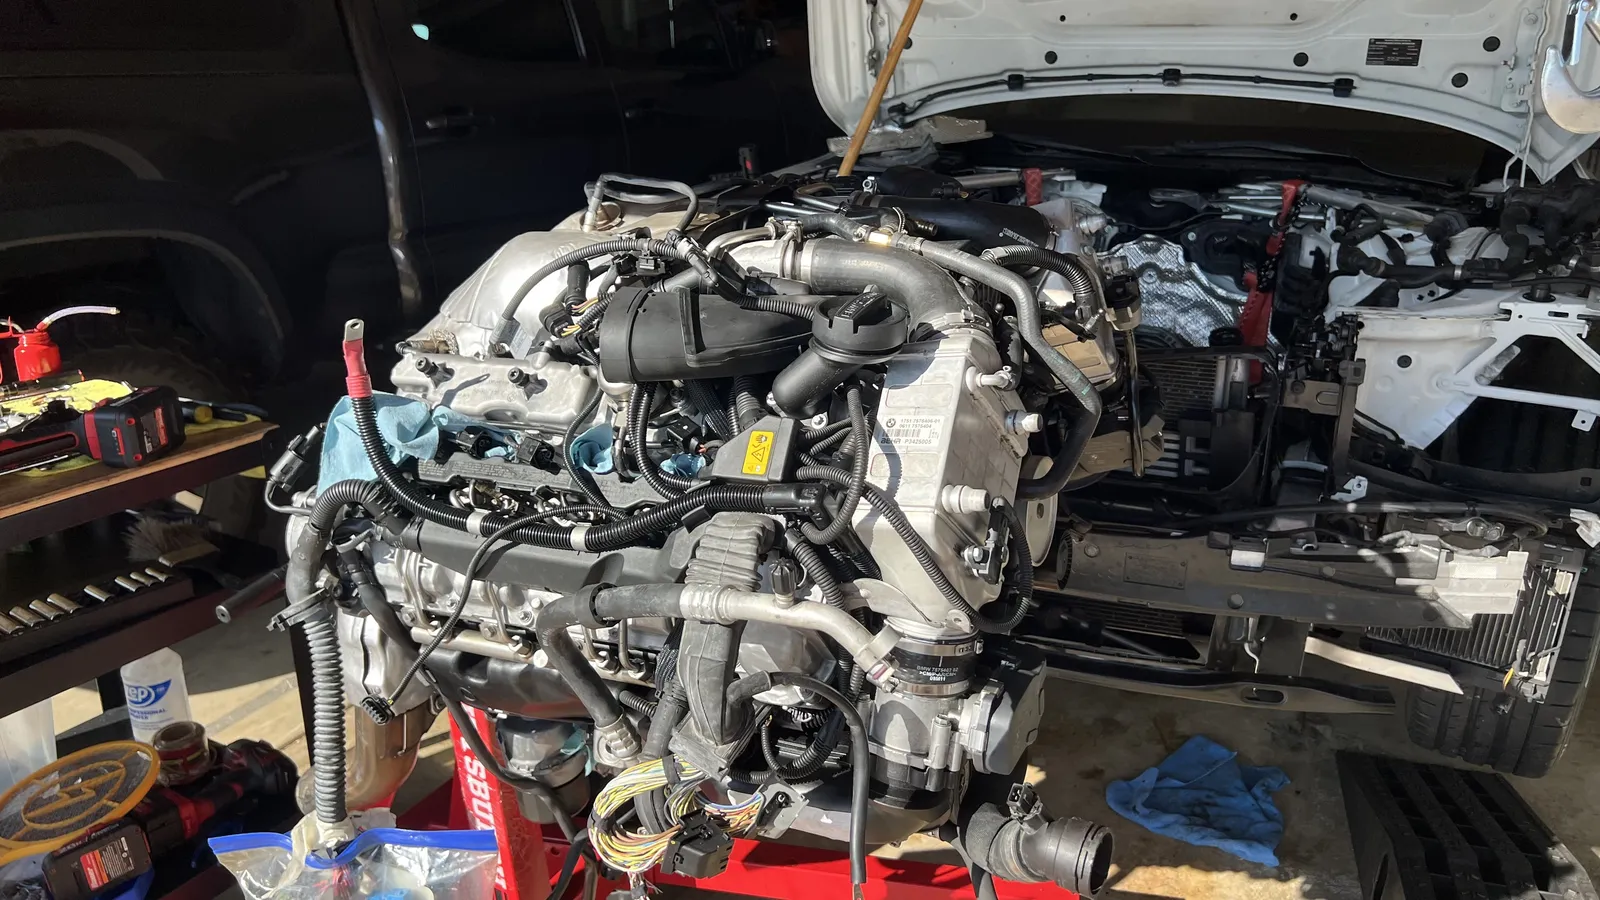 Long block on the stand in front of the empty bay — dressed and waiting to go back in.
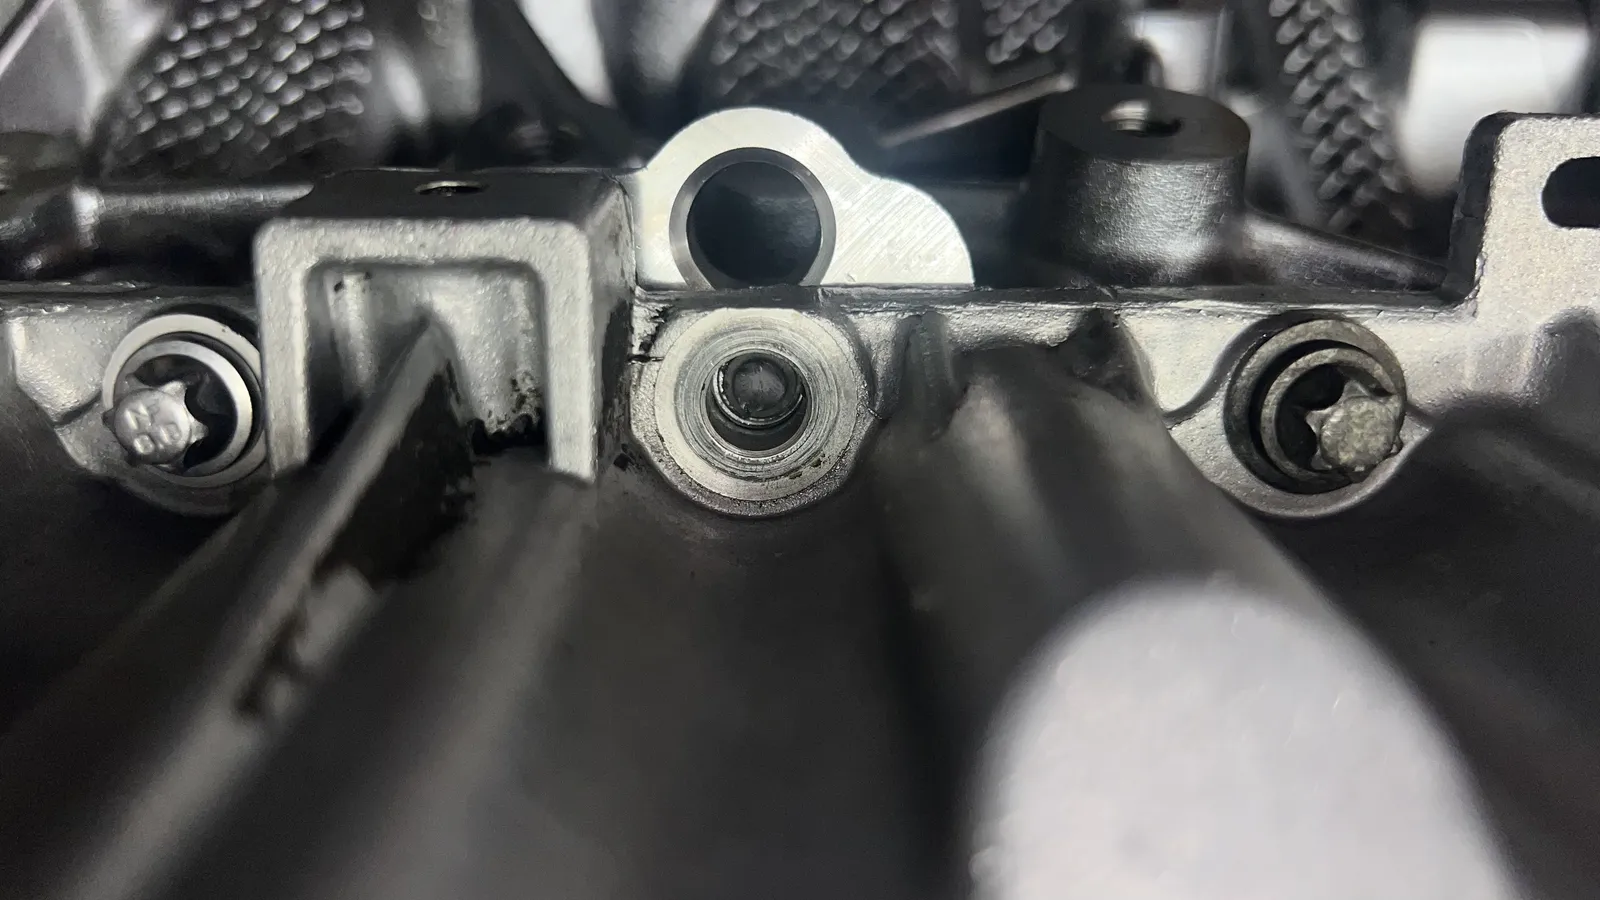 Oil pan bolt snapped before reaching 27 Nm.
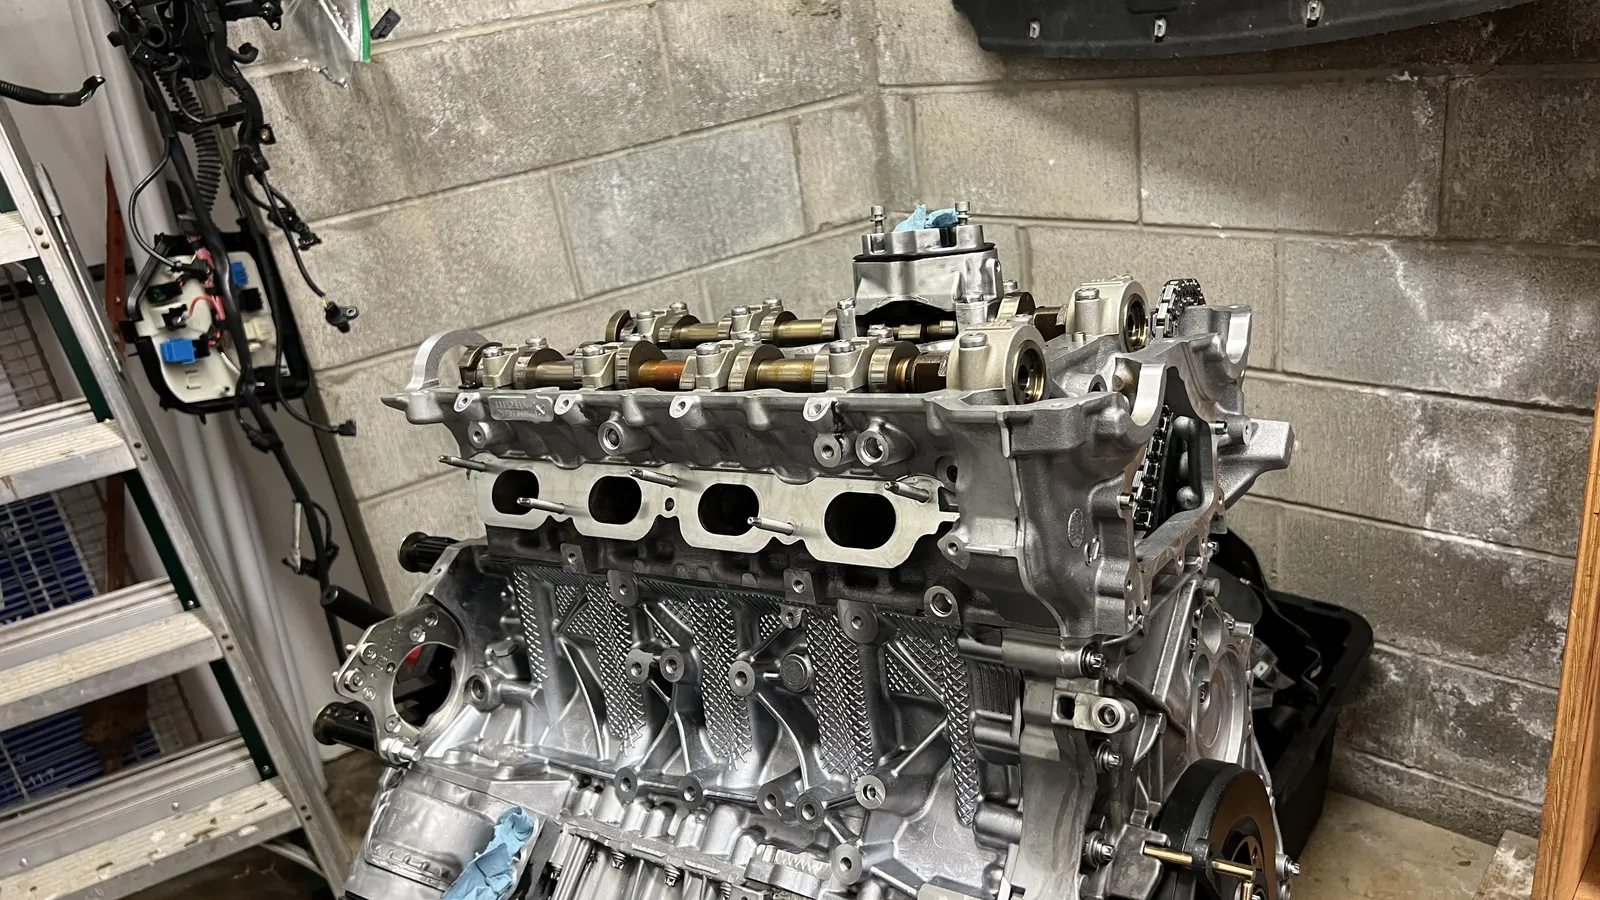 Left head going on.
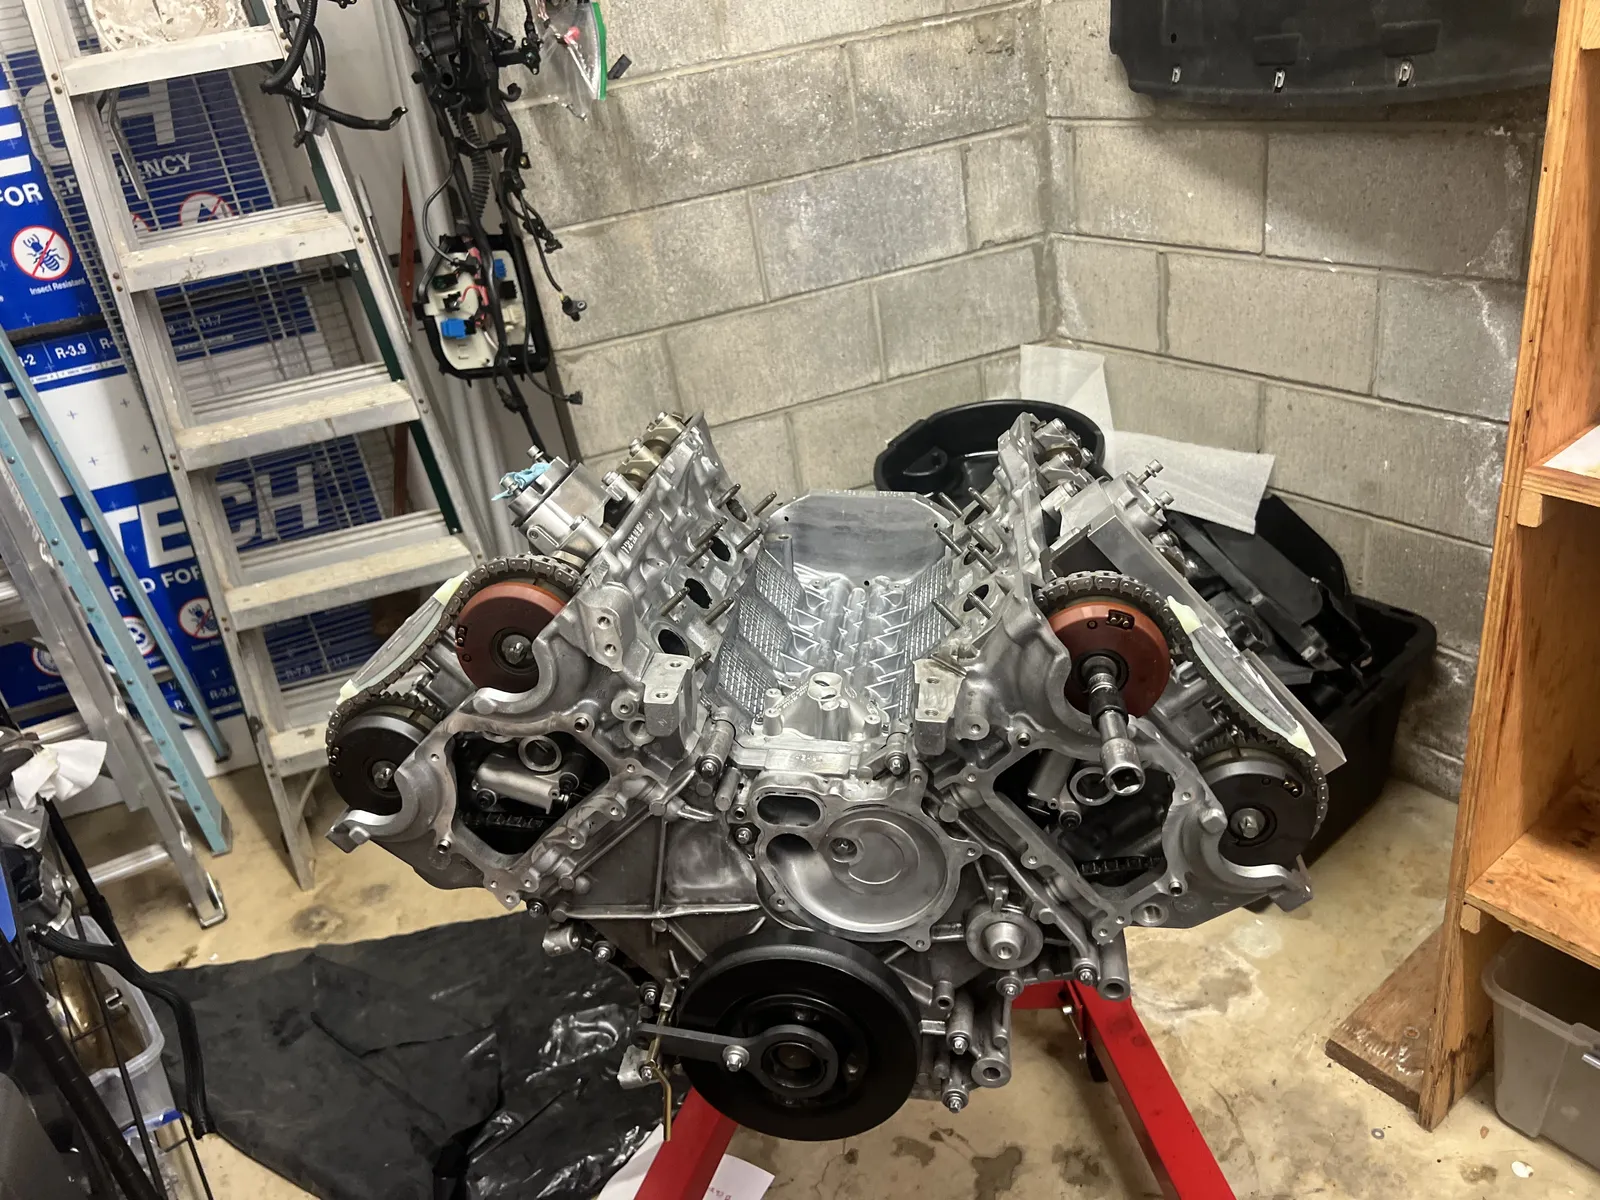 Right-side cam gears going on.
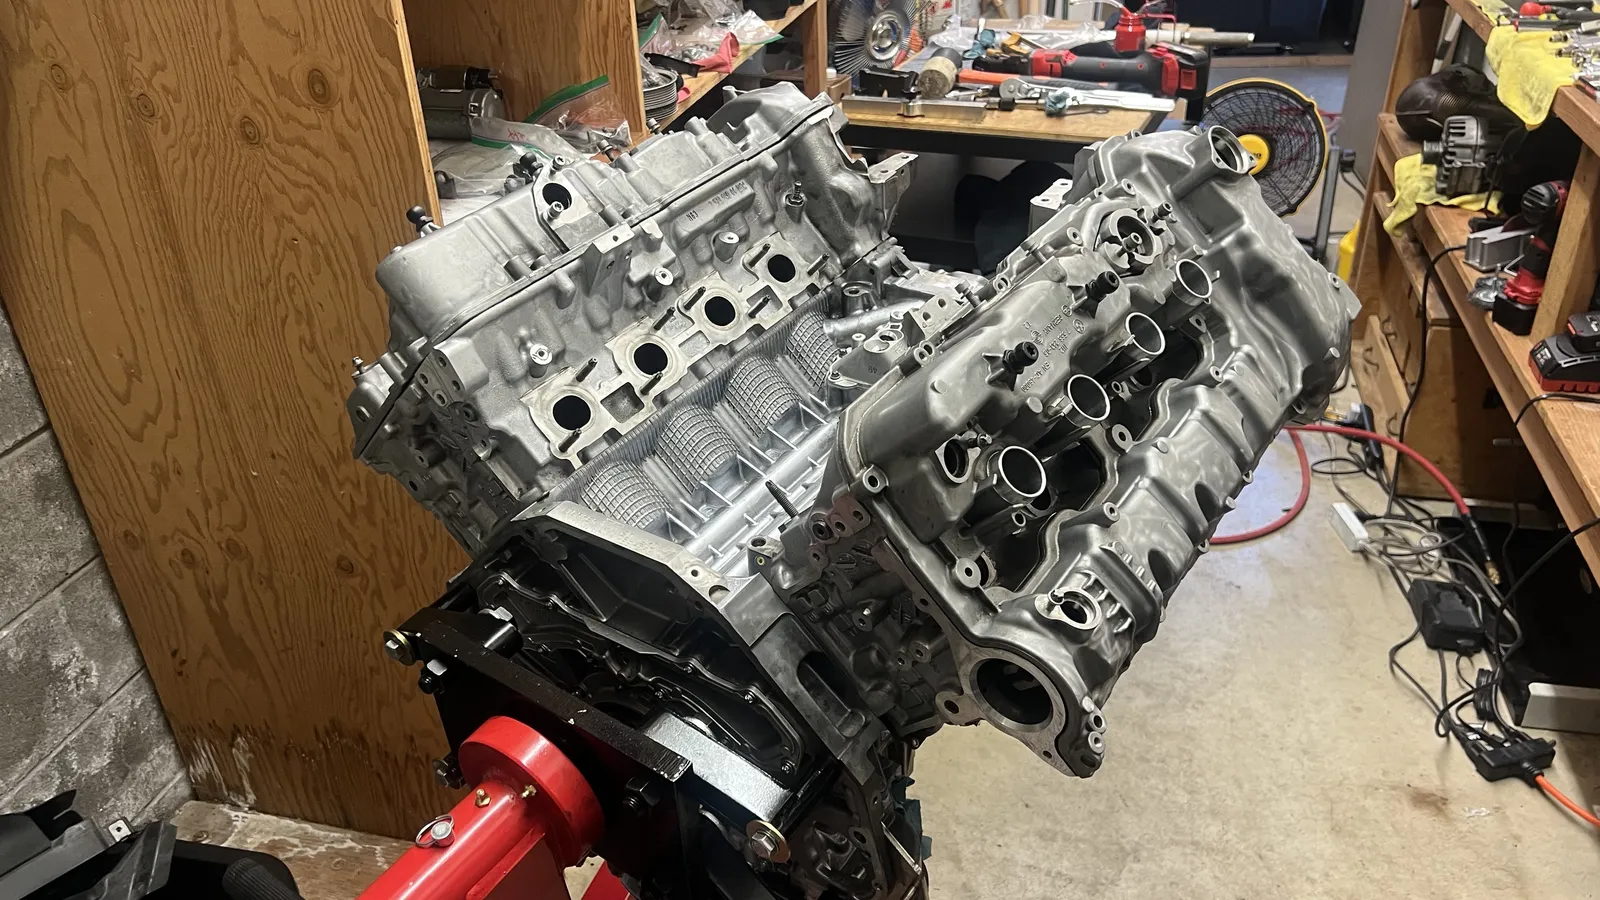 Valve covers on but not tightened down yet.
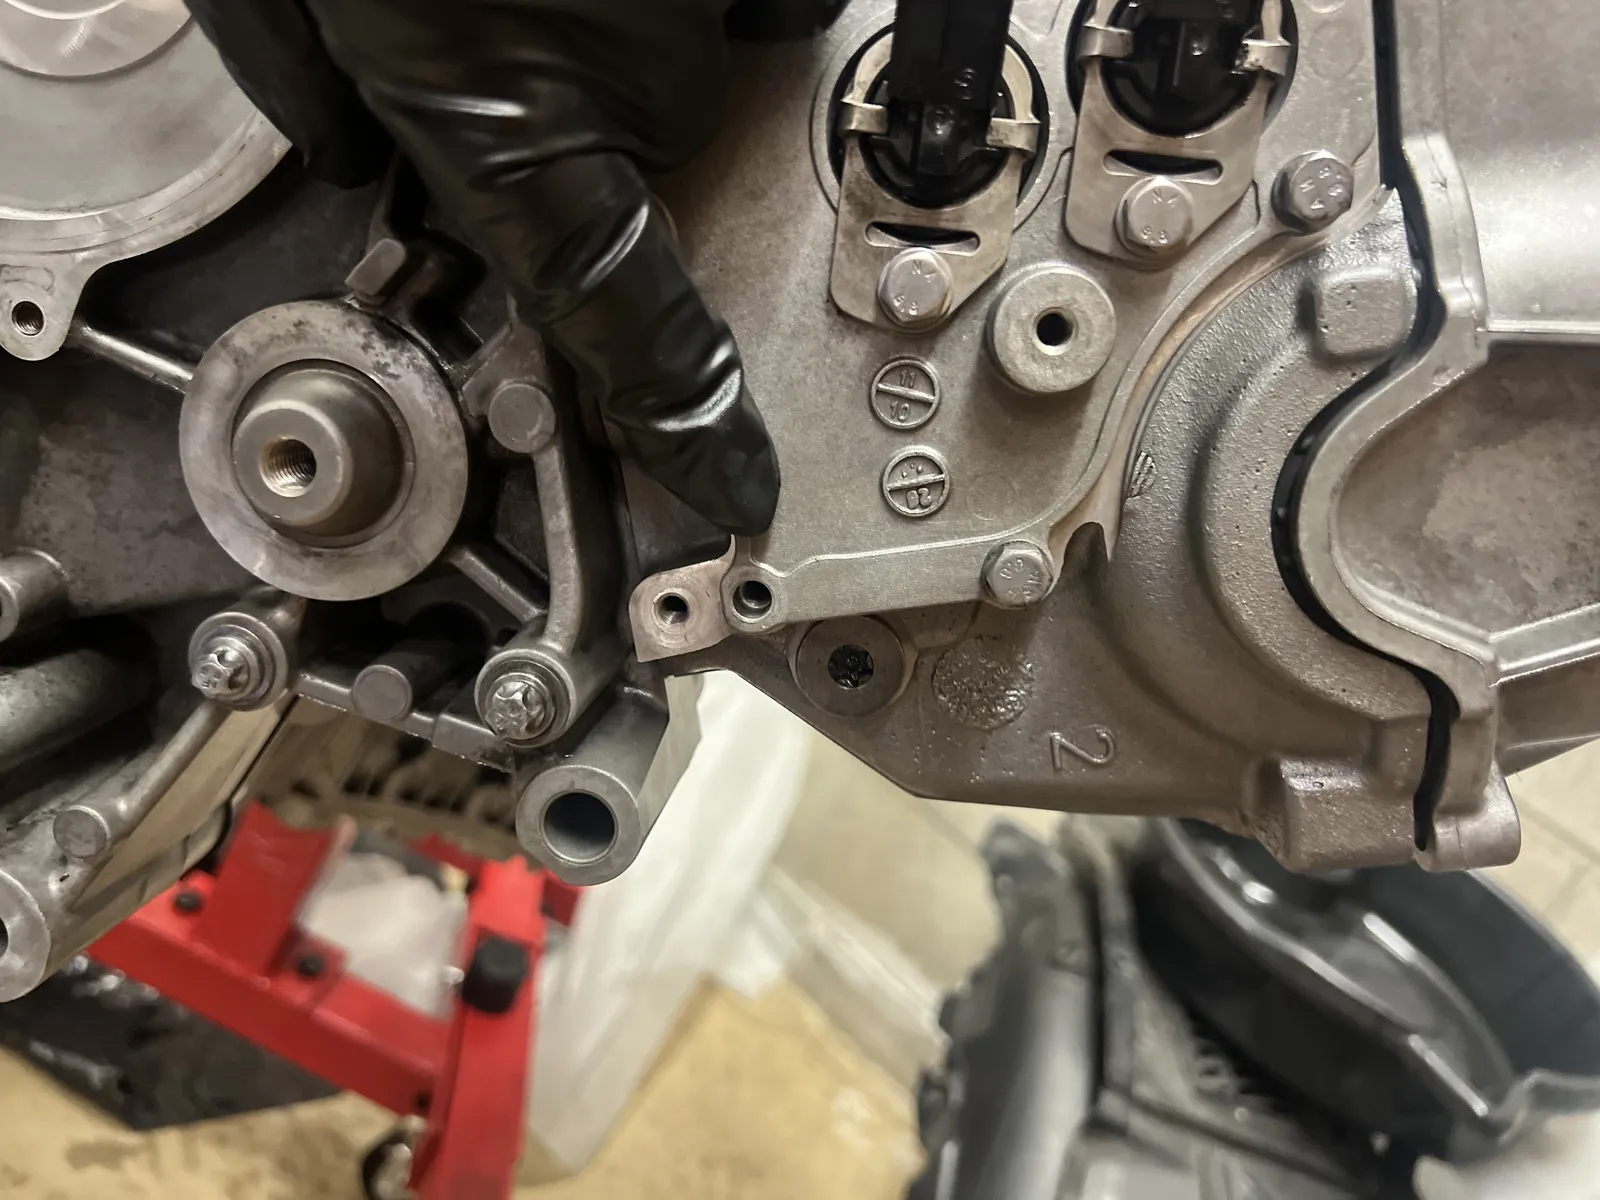 Pointing out the missing cover bolt
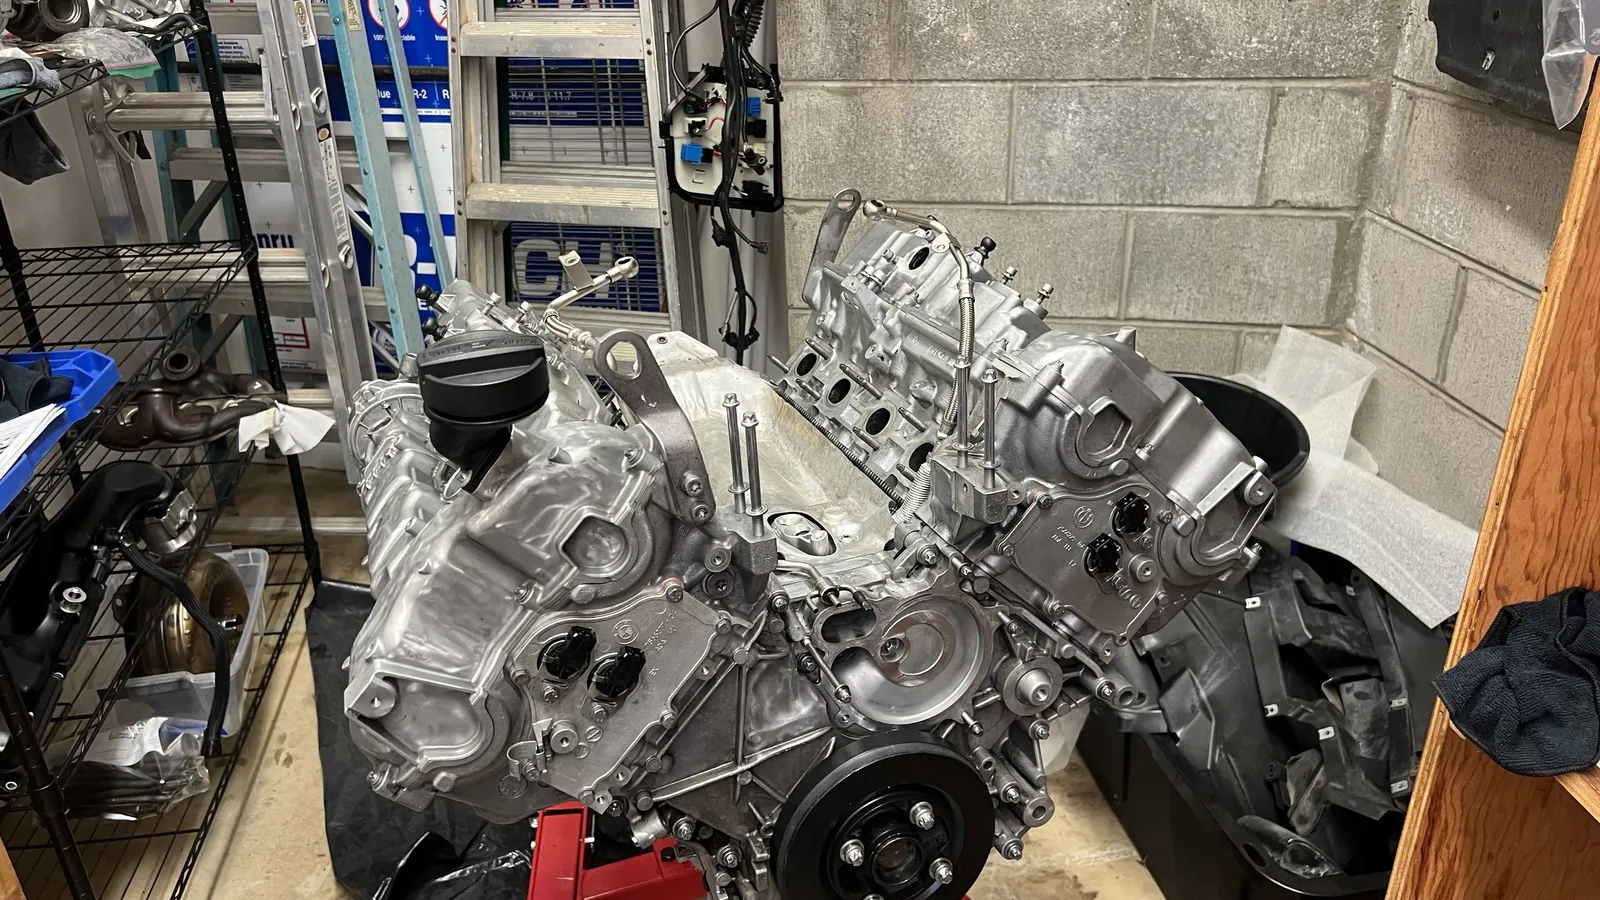 Long block nearly dressed on the stand — one bolt still missing from the cam-sensor cover.
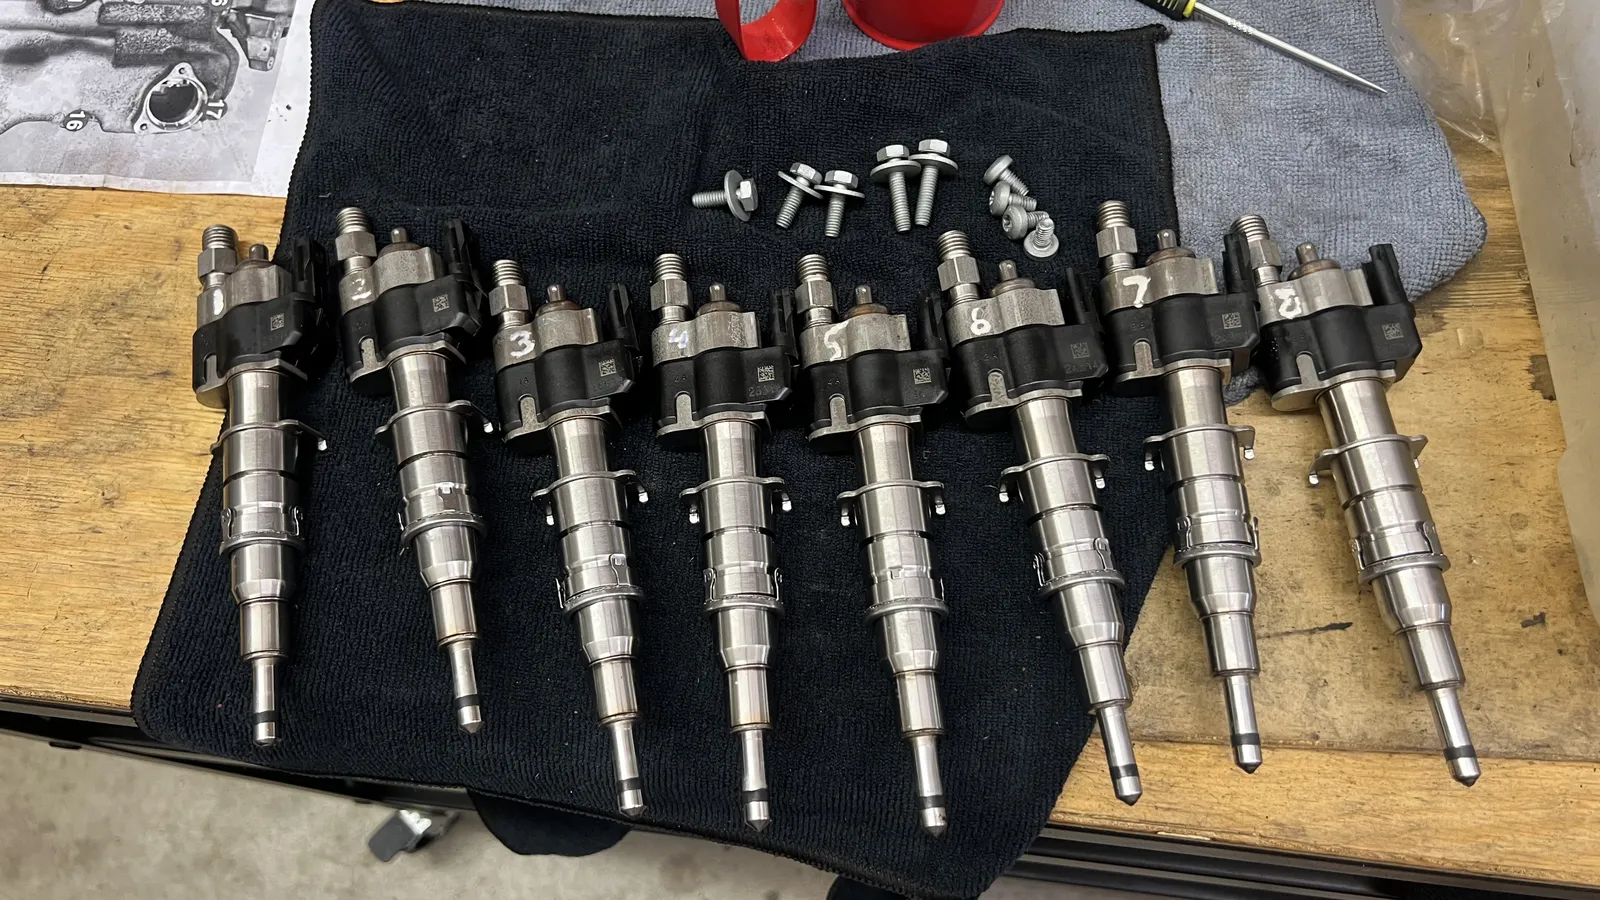 Eight injectors staged with bolts — cleaned and ready to go back in.
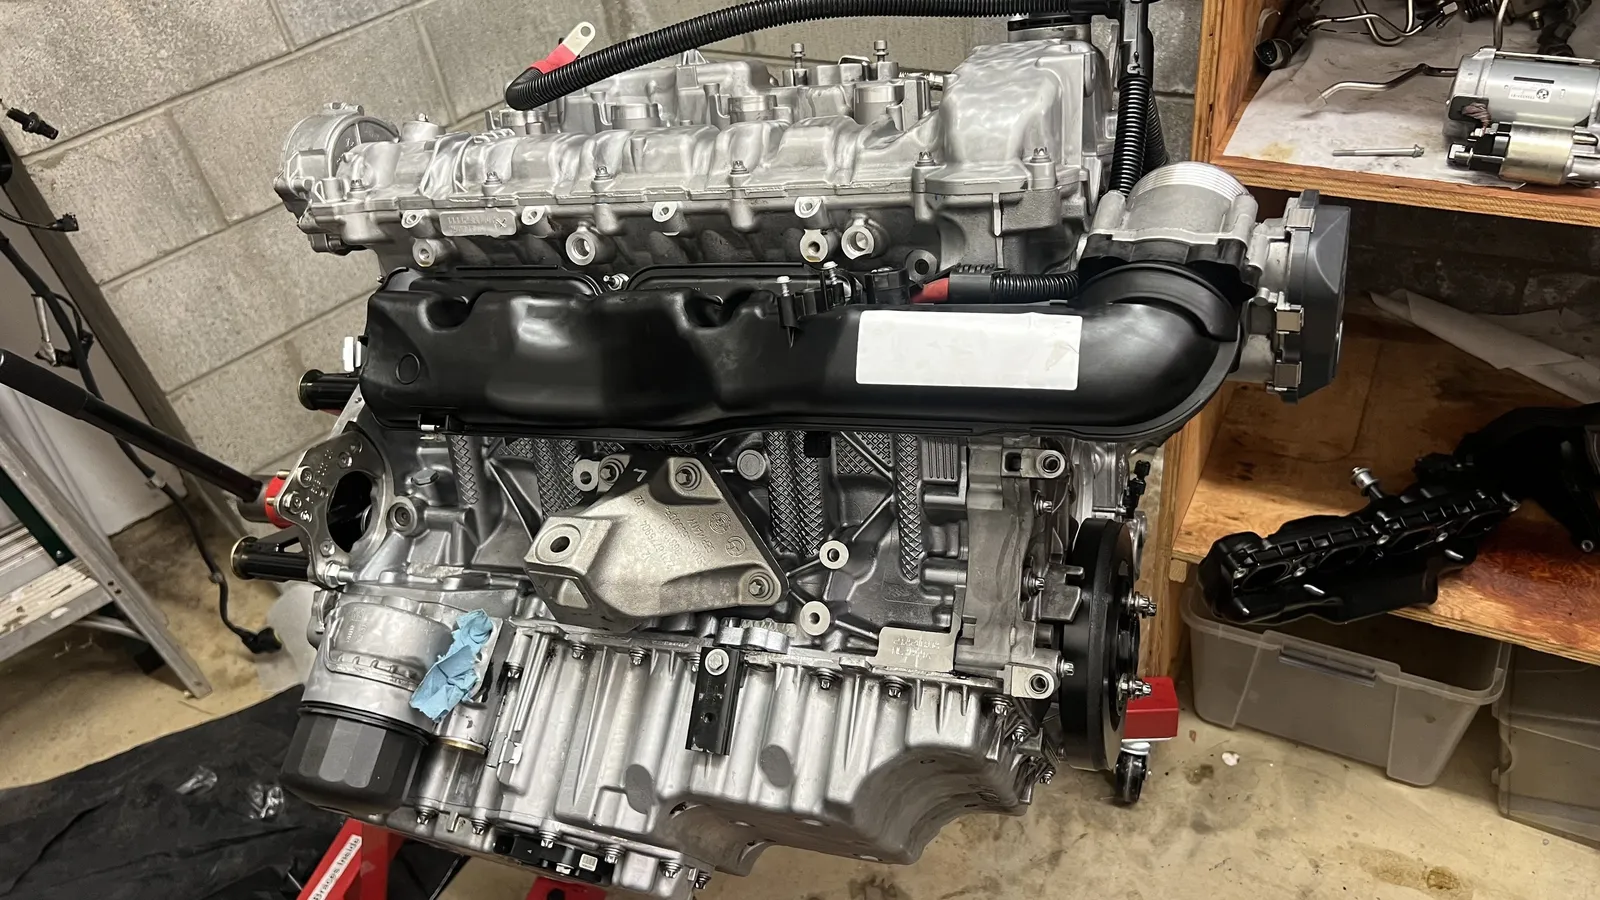 Side of the long block on the stand — dress-up continuing.
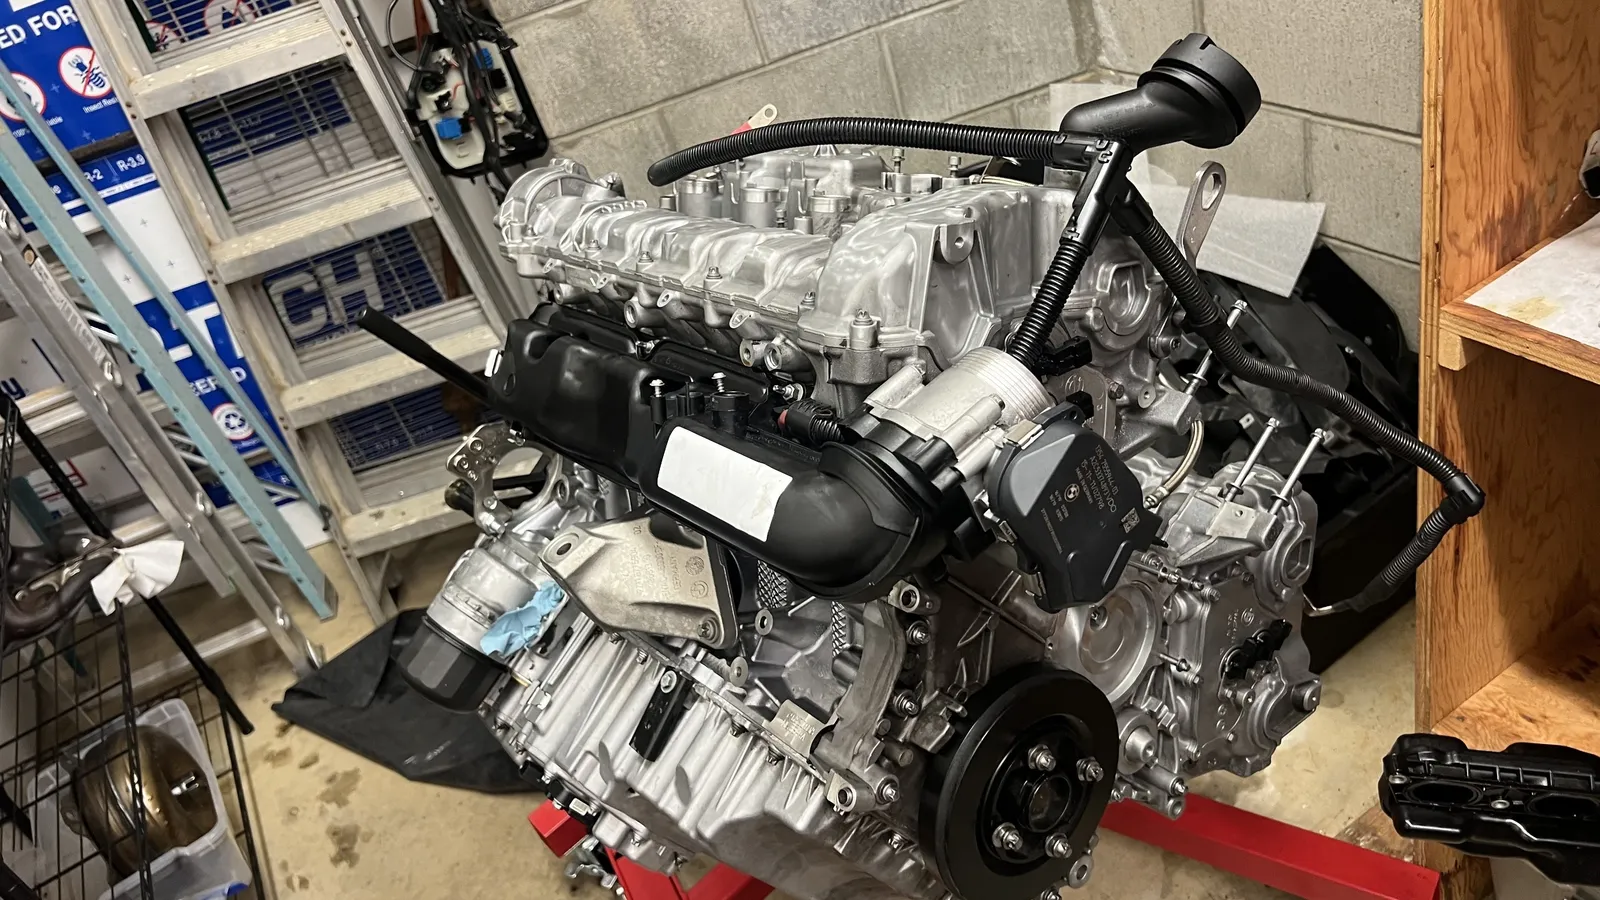 Front of the long block on the stand — harmonic balancer area still open.
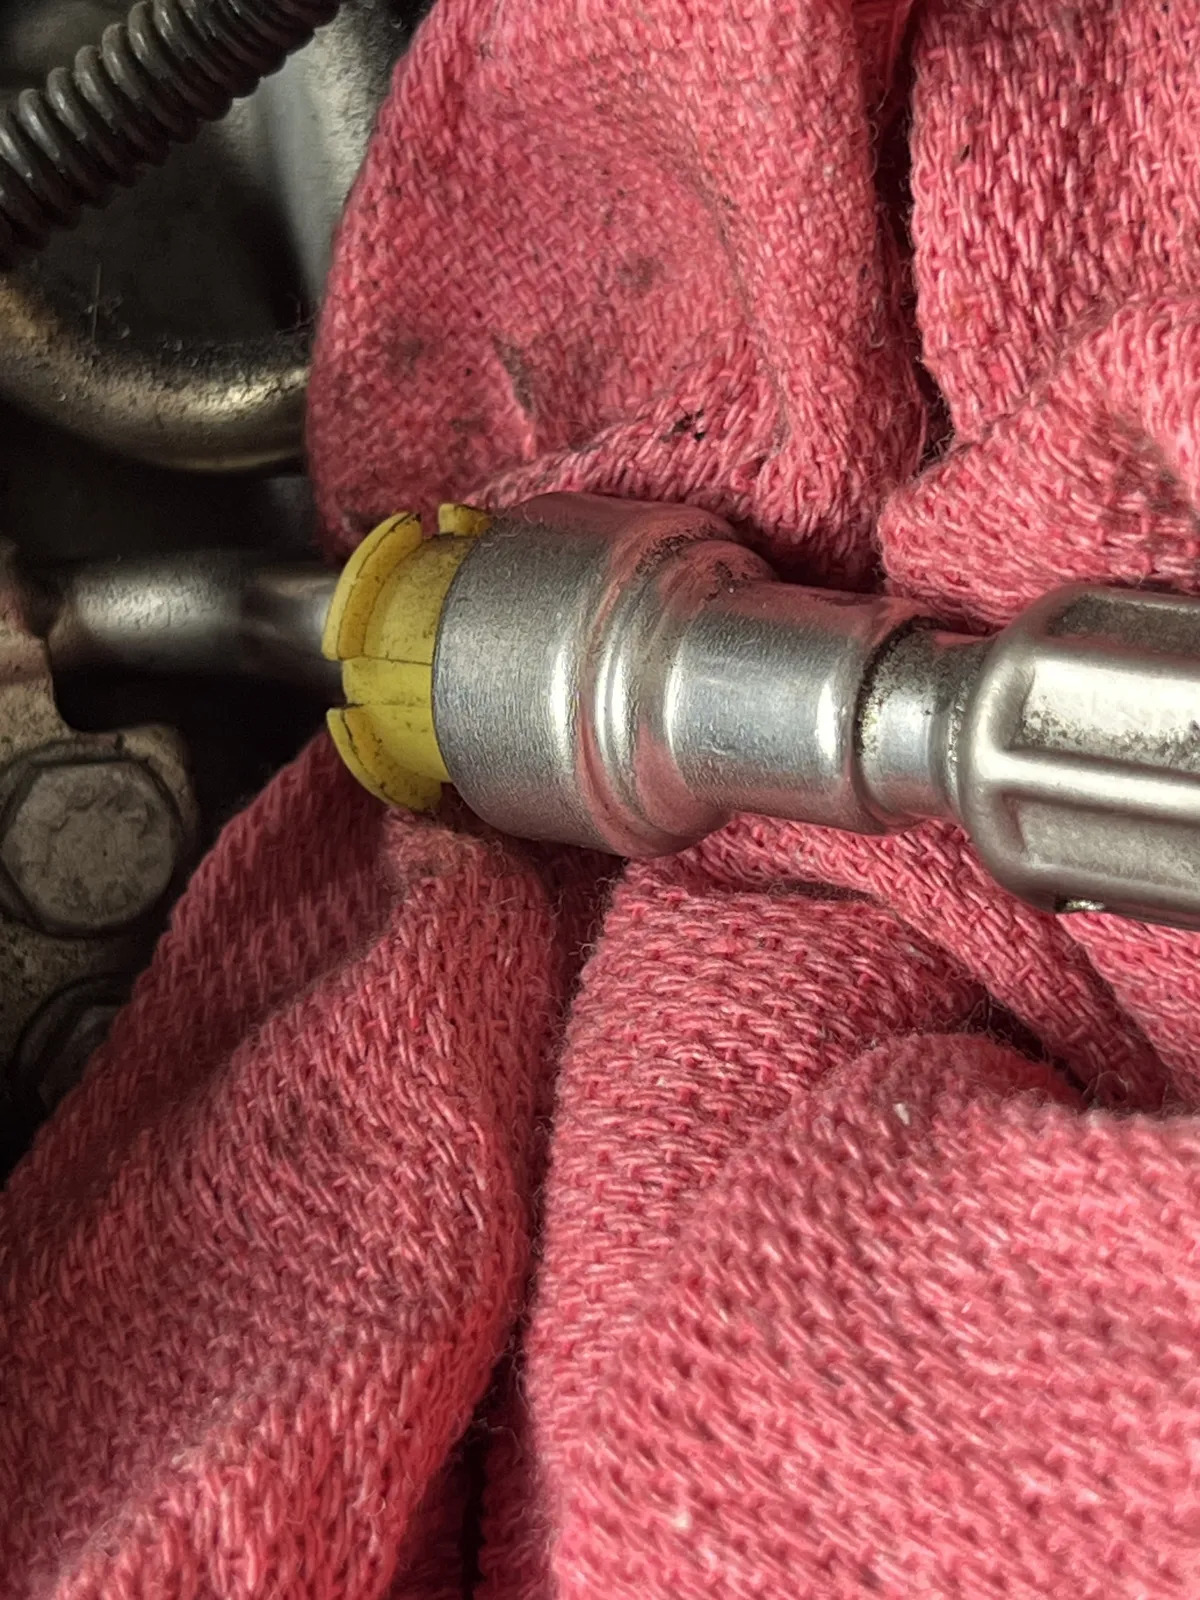
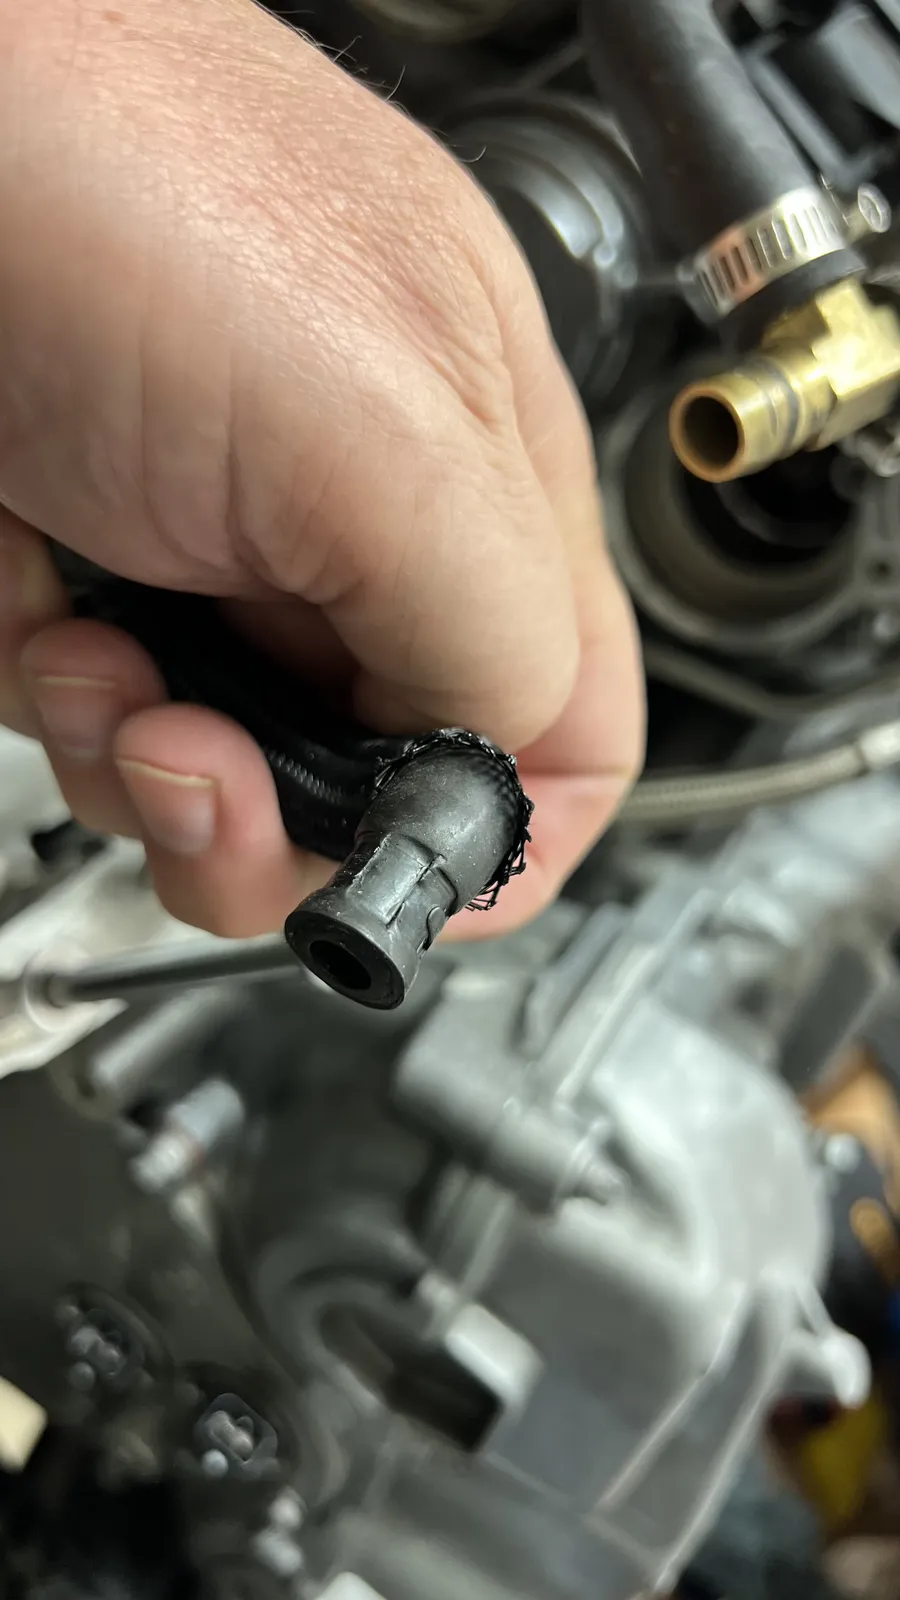 Fitting a plastic elbow onto a braided line during dress-up.
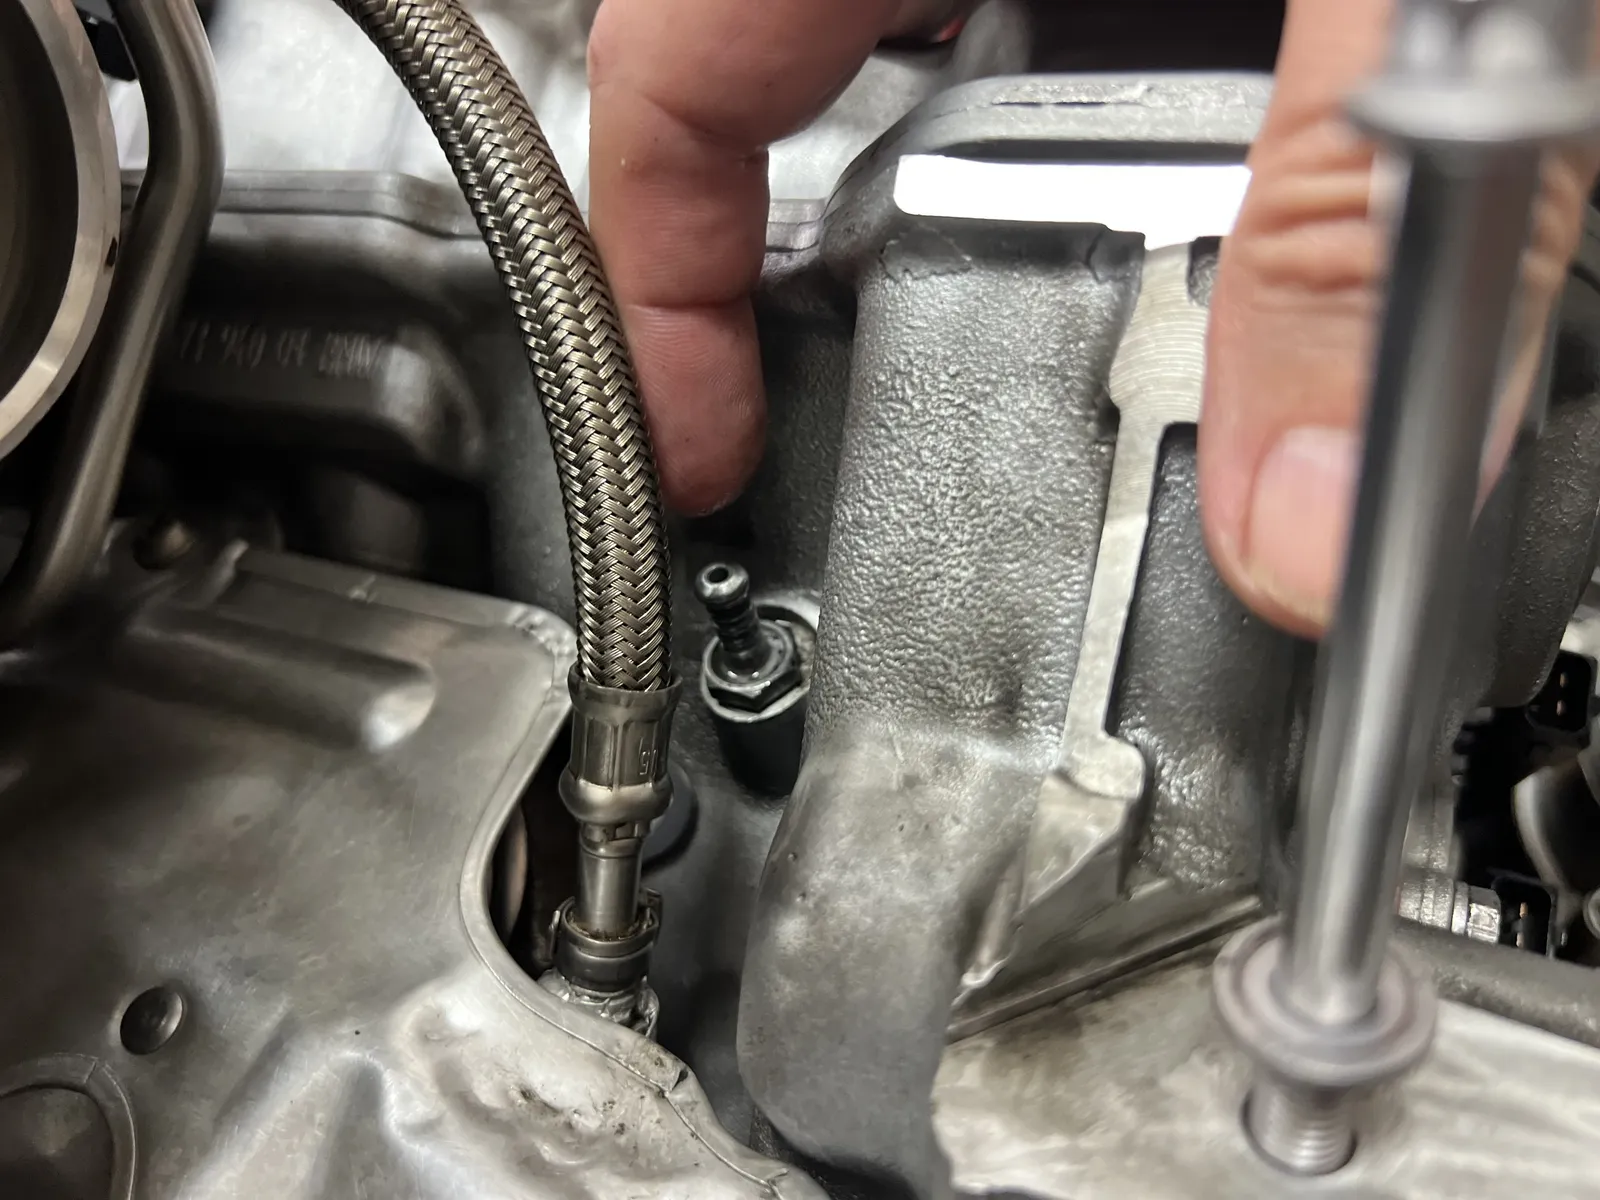 Right-bank head vent — there’s a matching vent on the left bank.
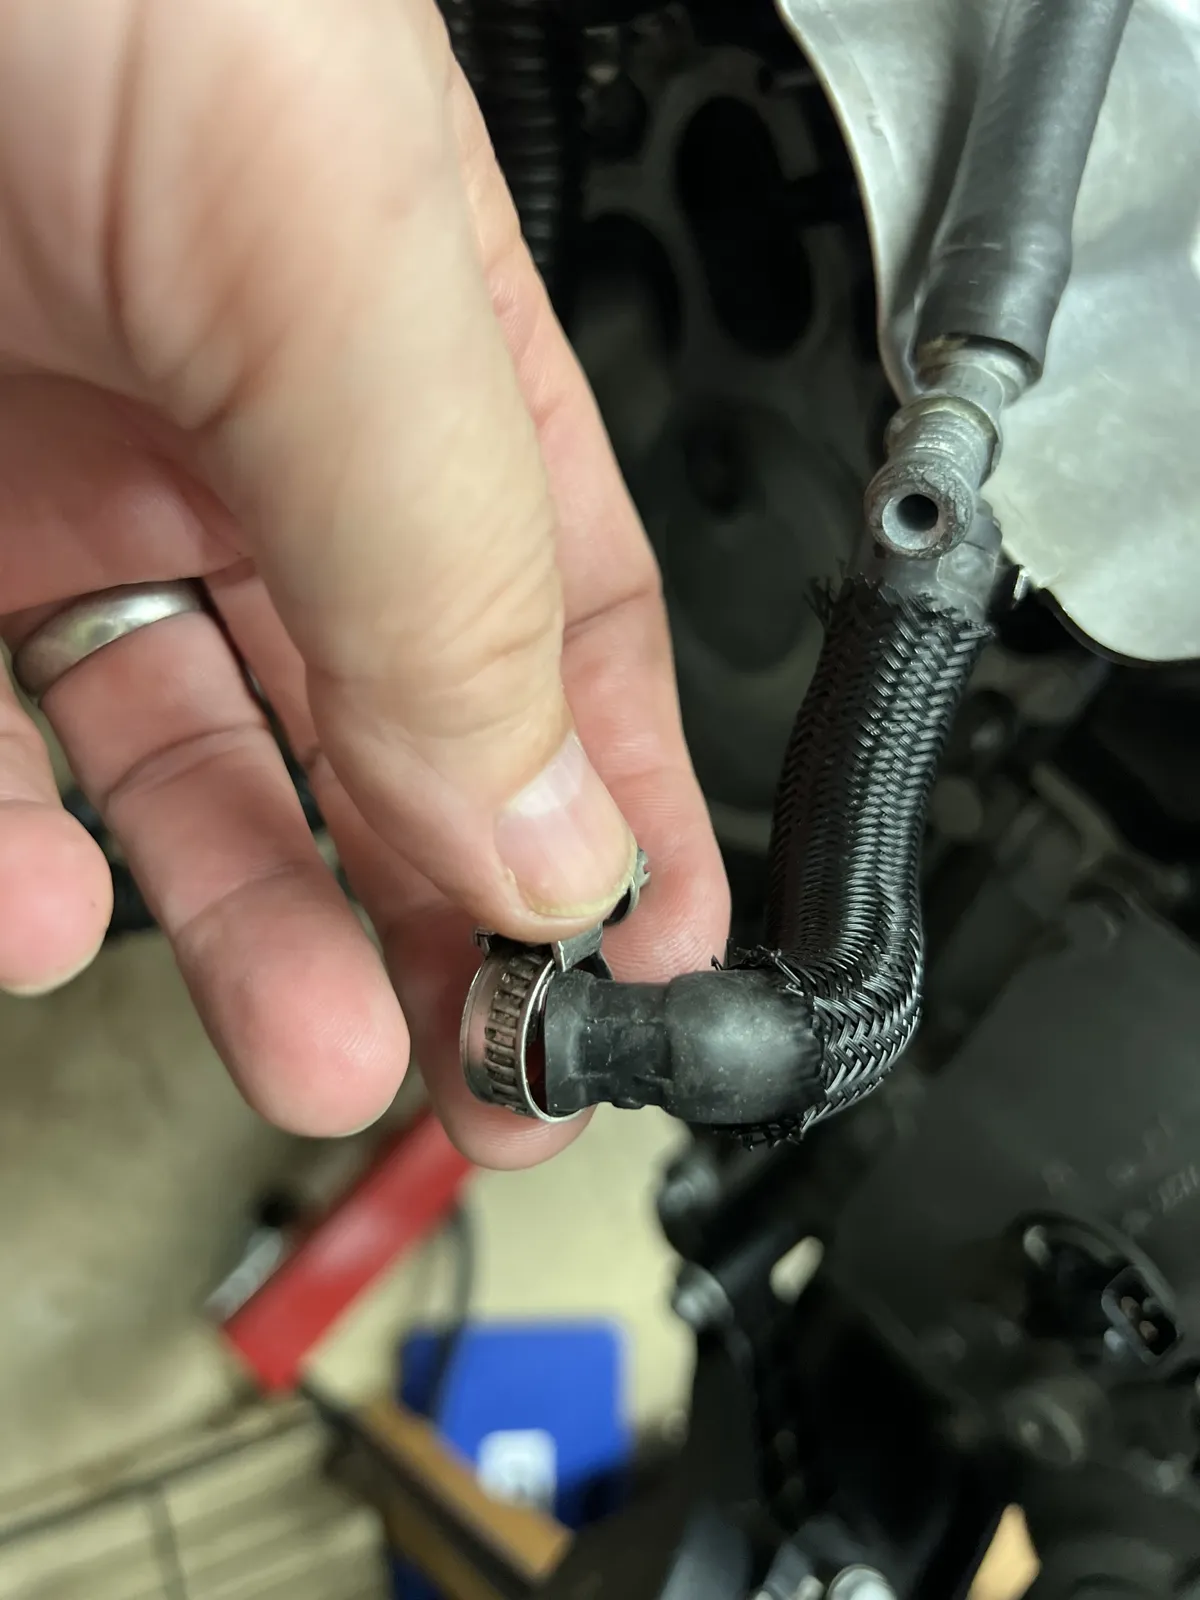 Hose that joins the left and right head vents.
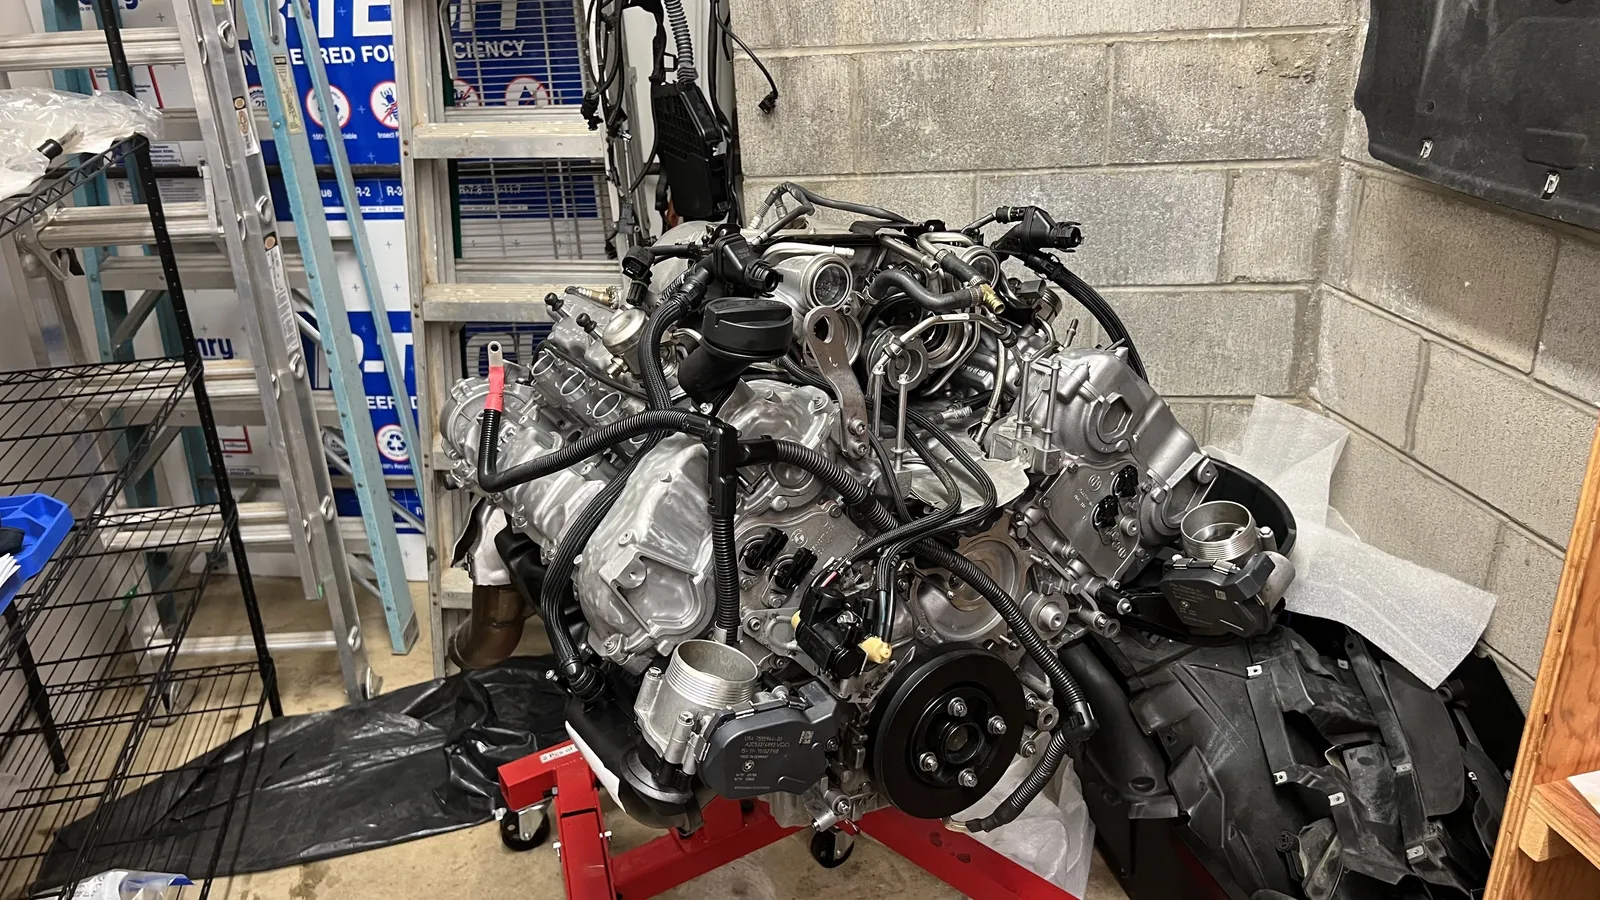 Wiring and fuel lines going on — long block filling out on the stand.
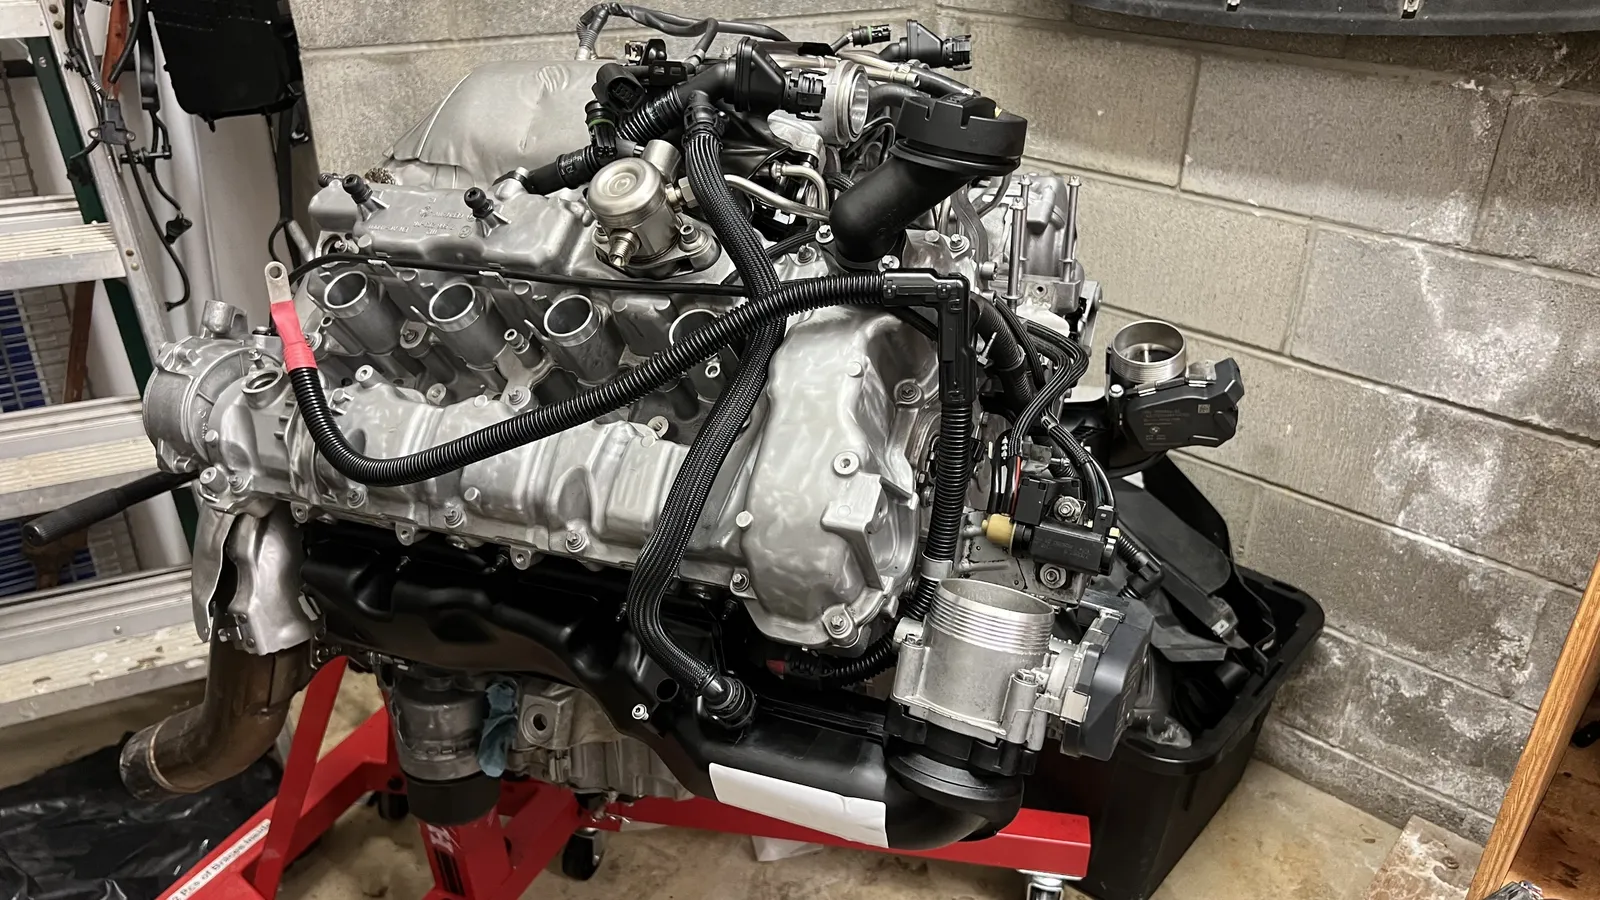 Side view of the dressed long block on the red stand.
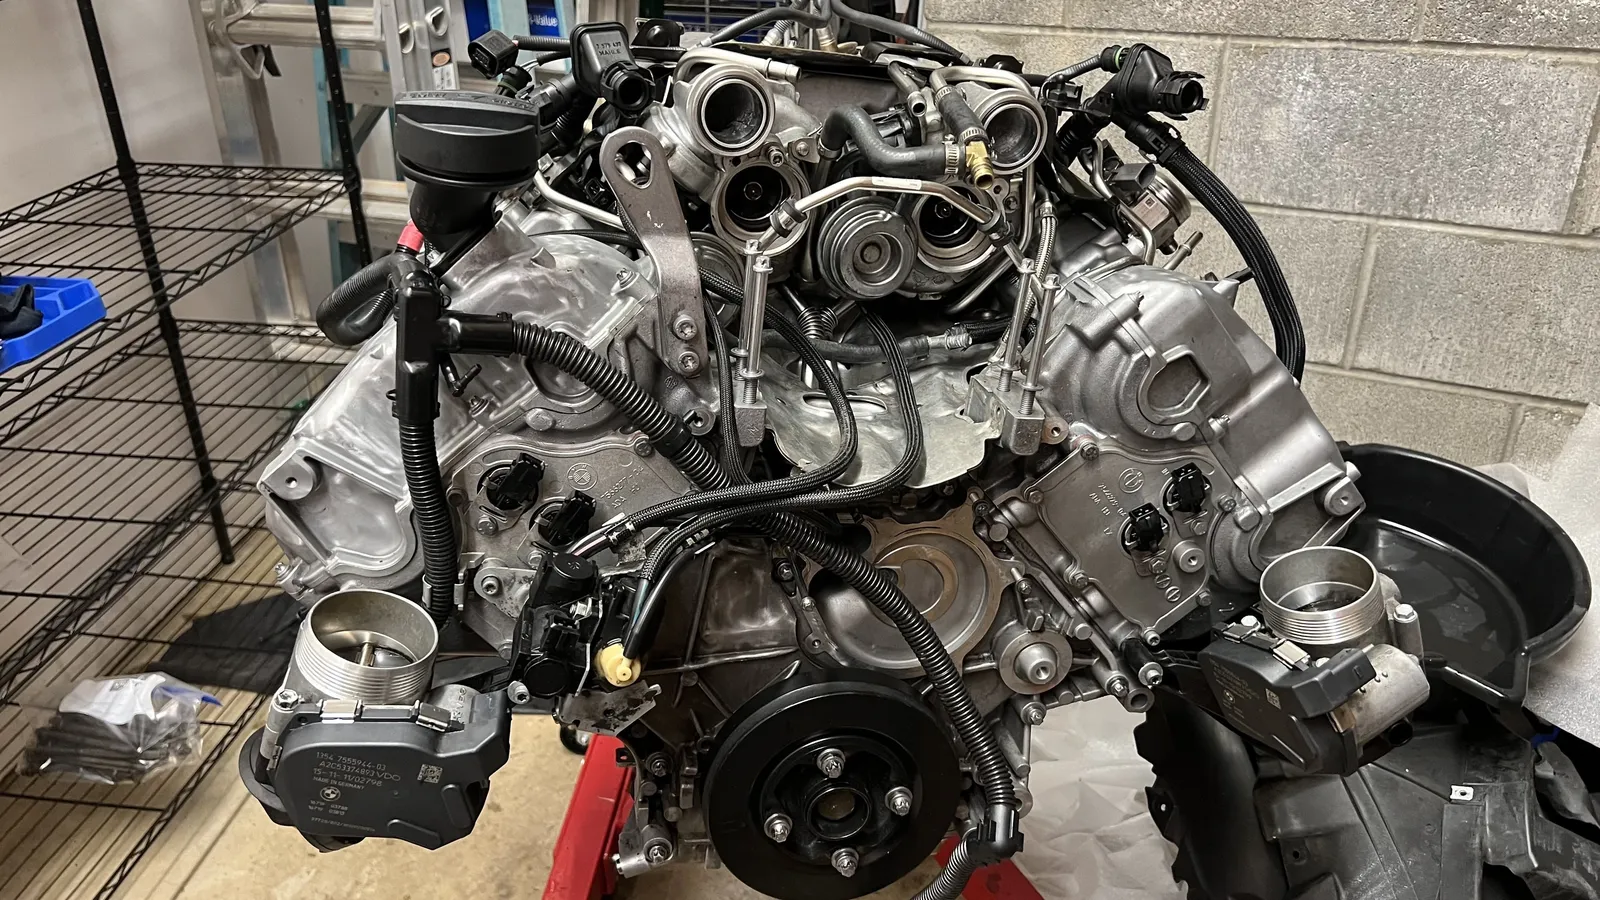 Front of the long block — assembly progress.
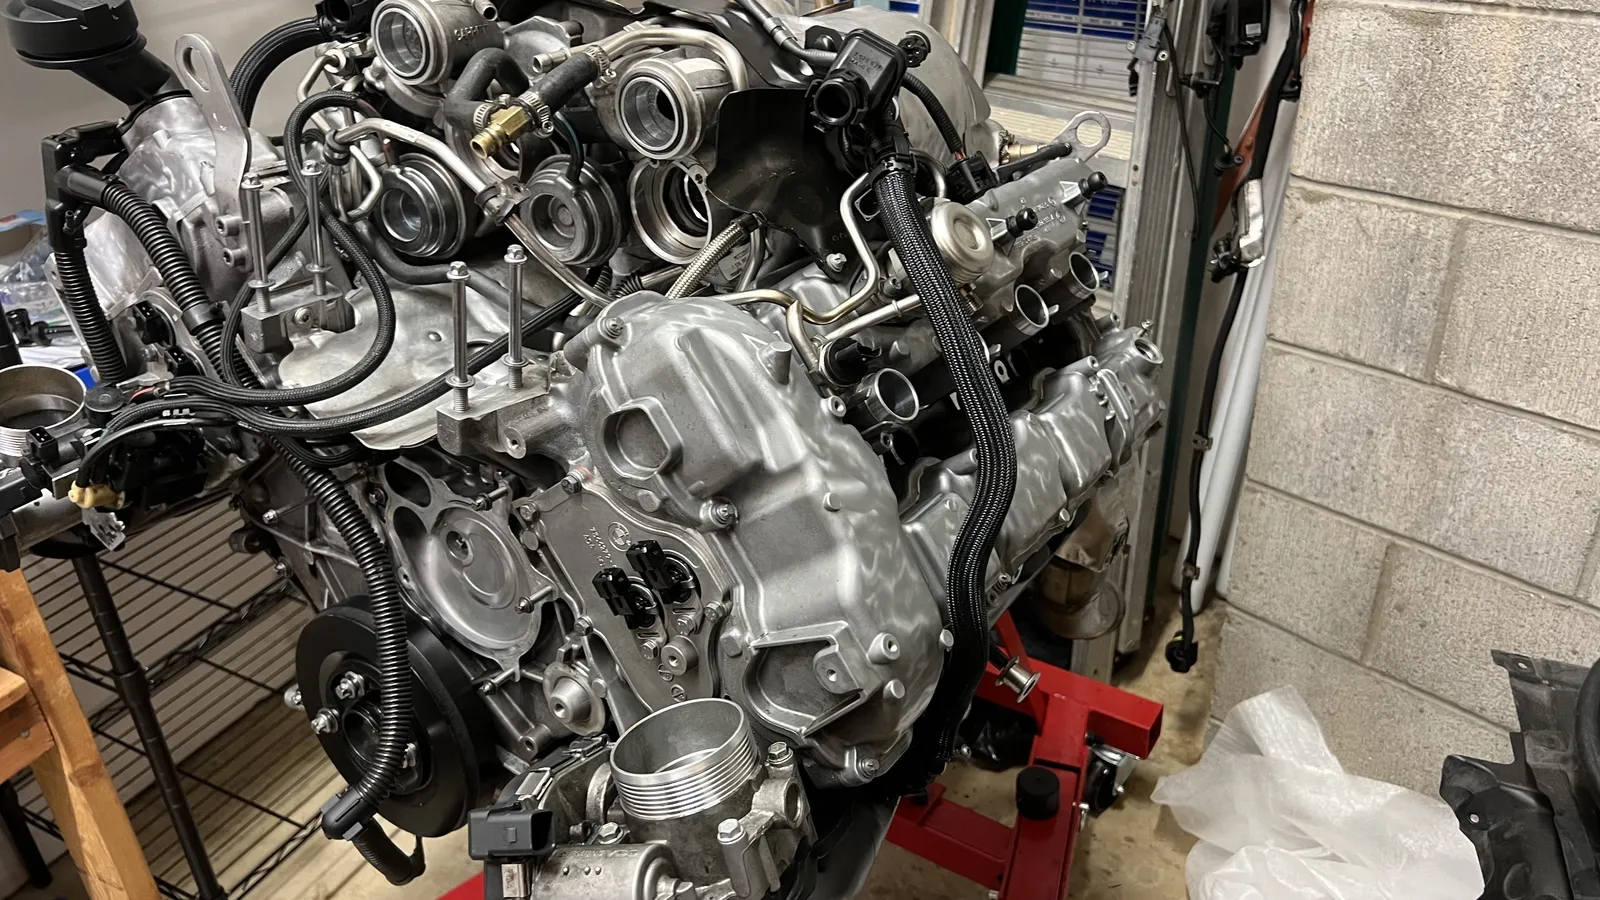 Front-right side of the long block — assembly progress on the stand.
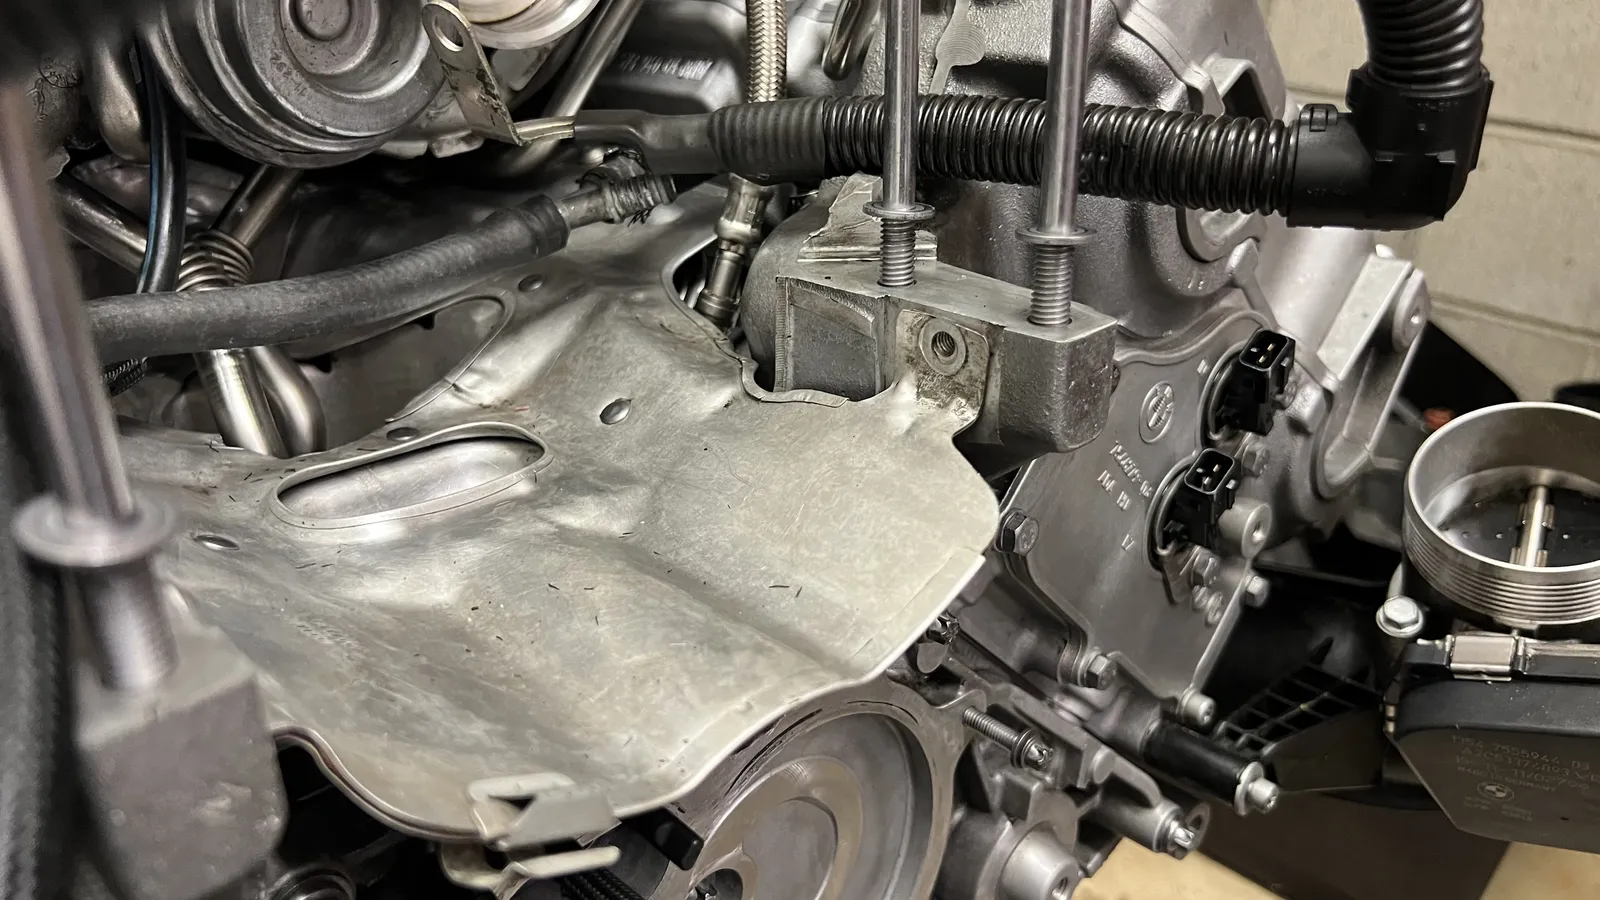 Heat shield and nearby hoses on the dressed long block.
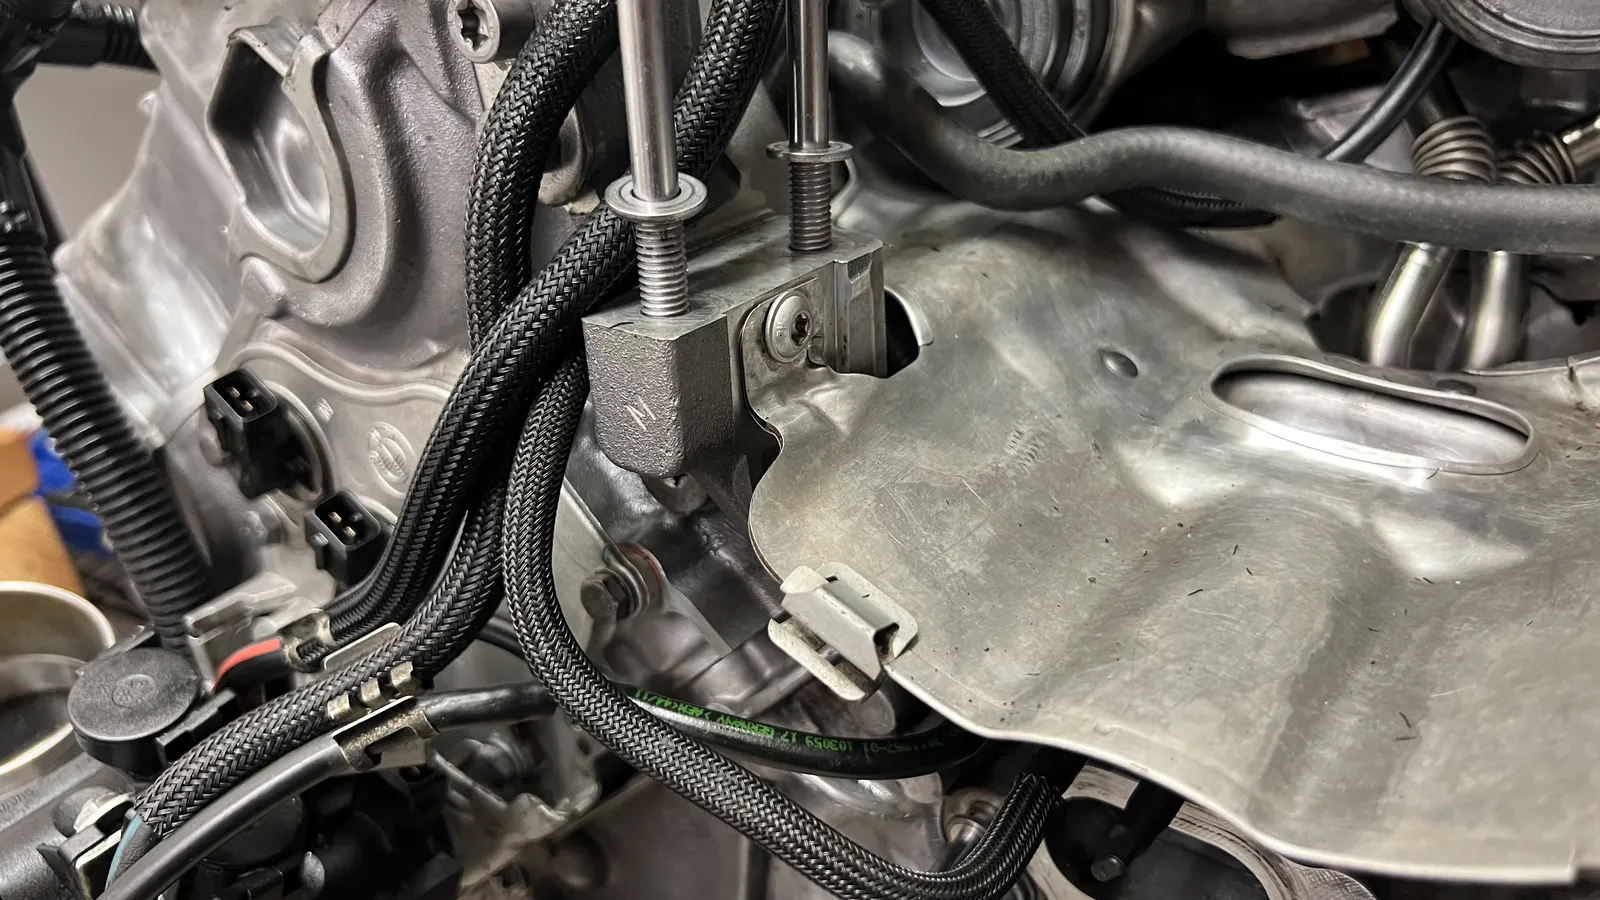 Long bolts for the alternator in place; first screw in for the forward heat shield.
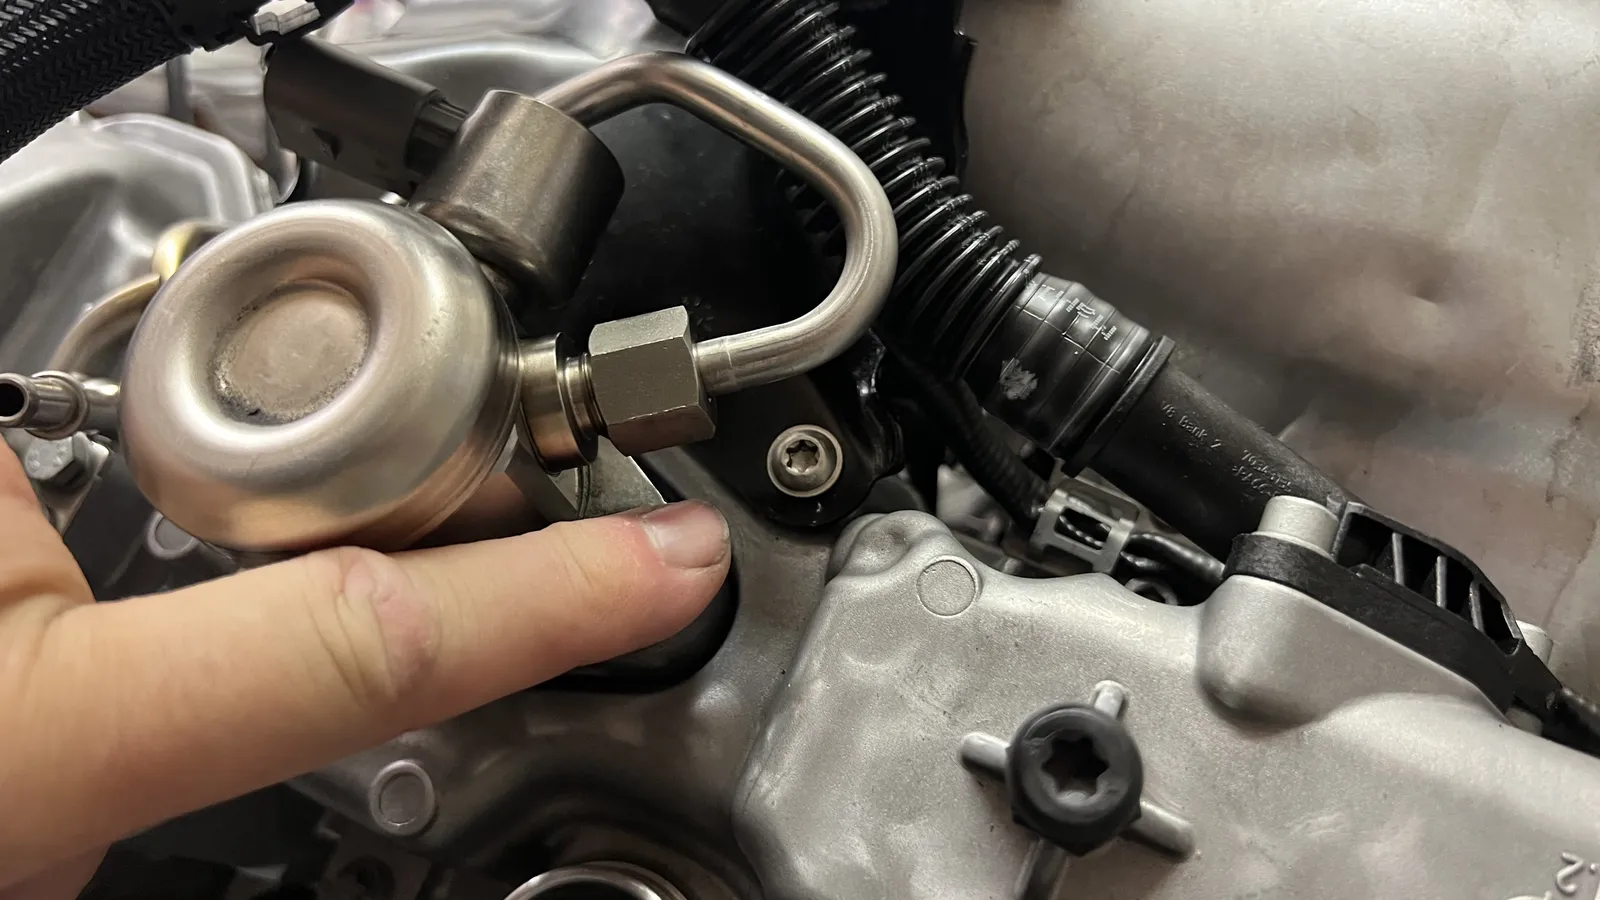 Pointing out the bolt type just above the HPFP — existing fastener, not a missing hole.
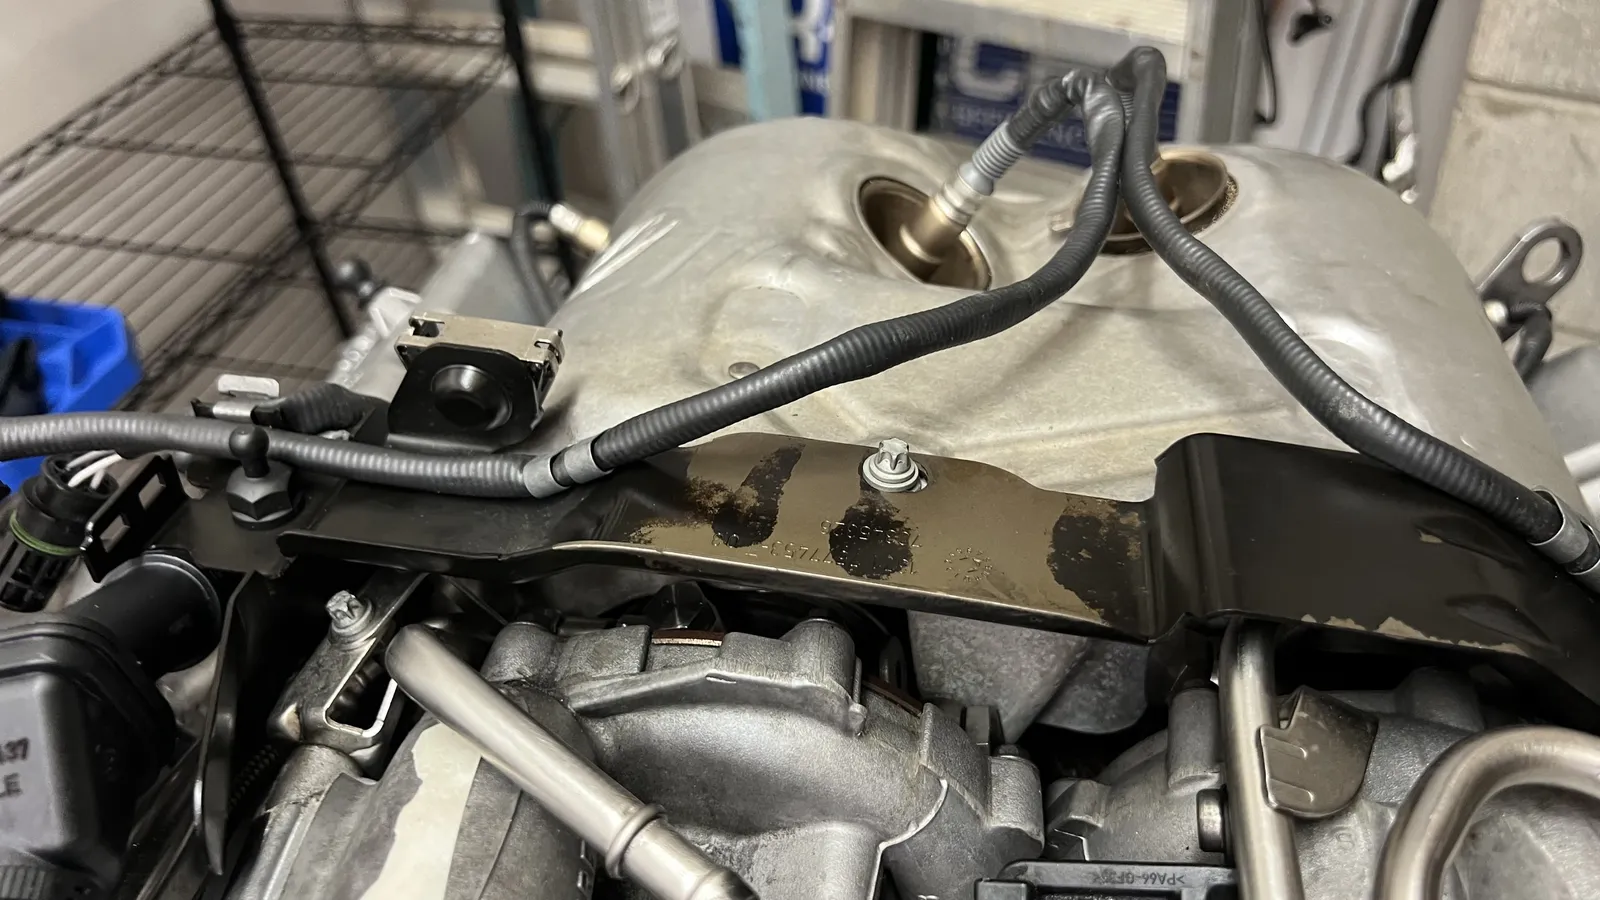 Arch bracket over the turbos — not the valve covers.
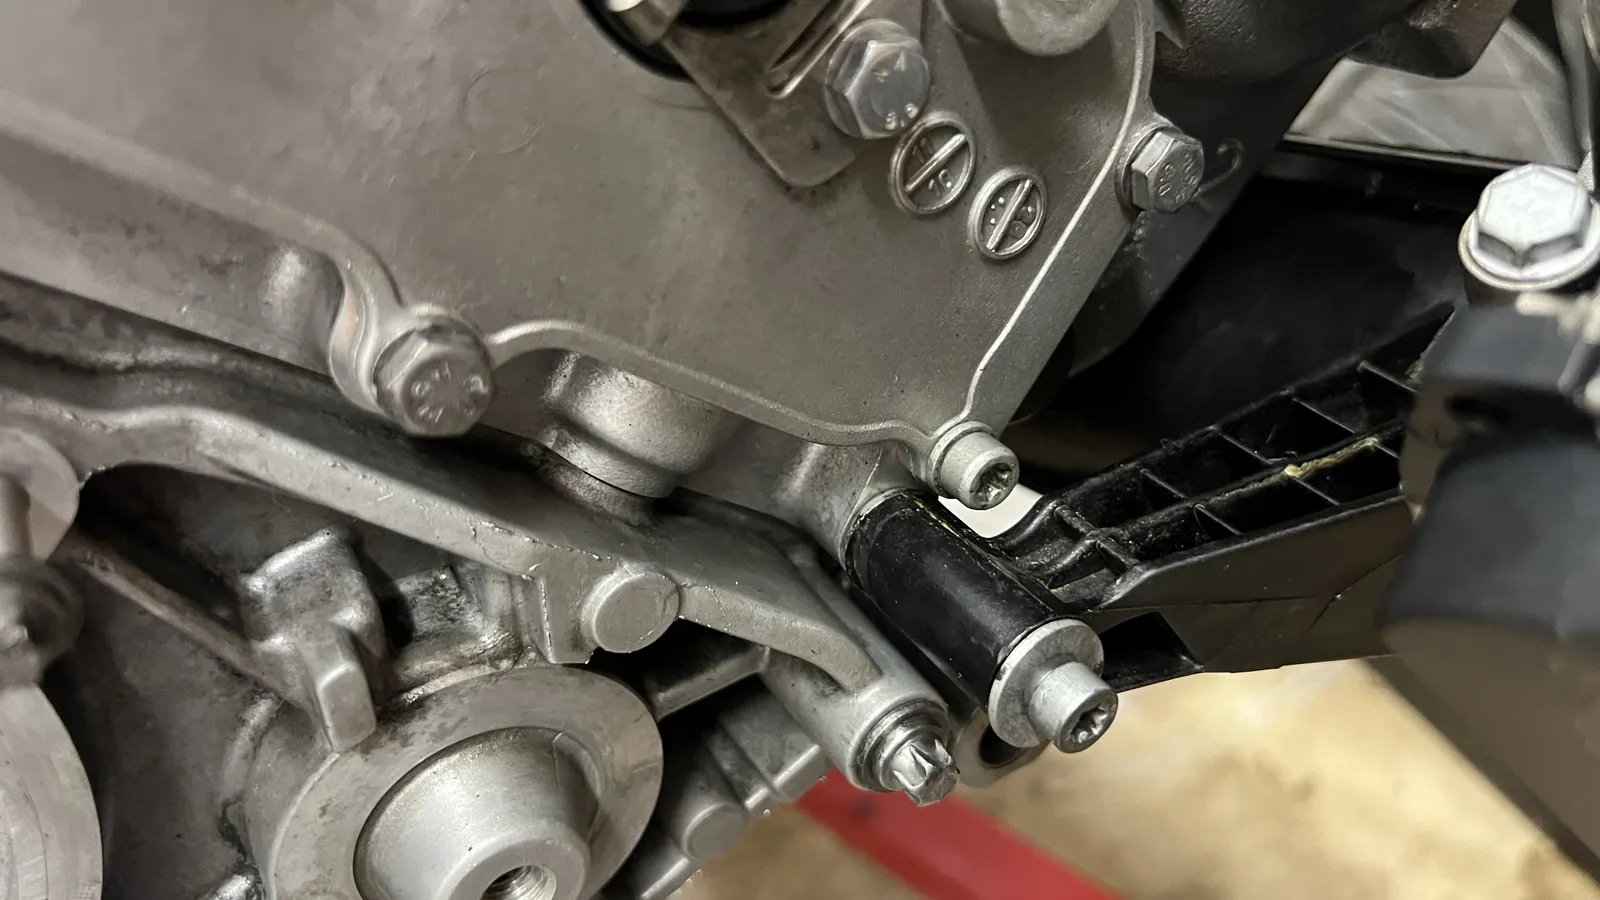 Side mount and bracket hardware on the long block.
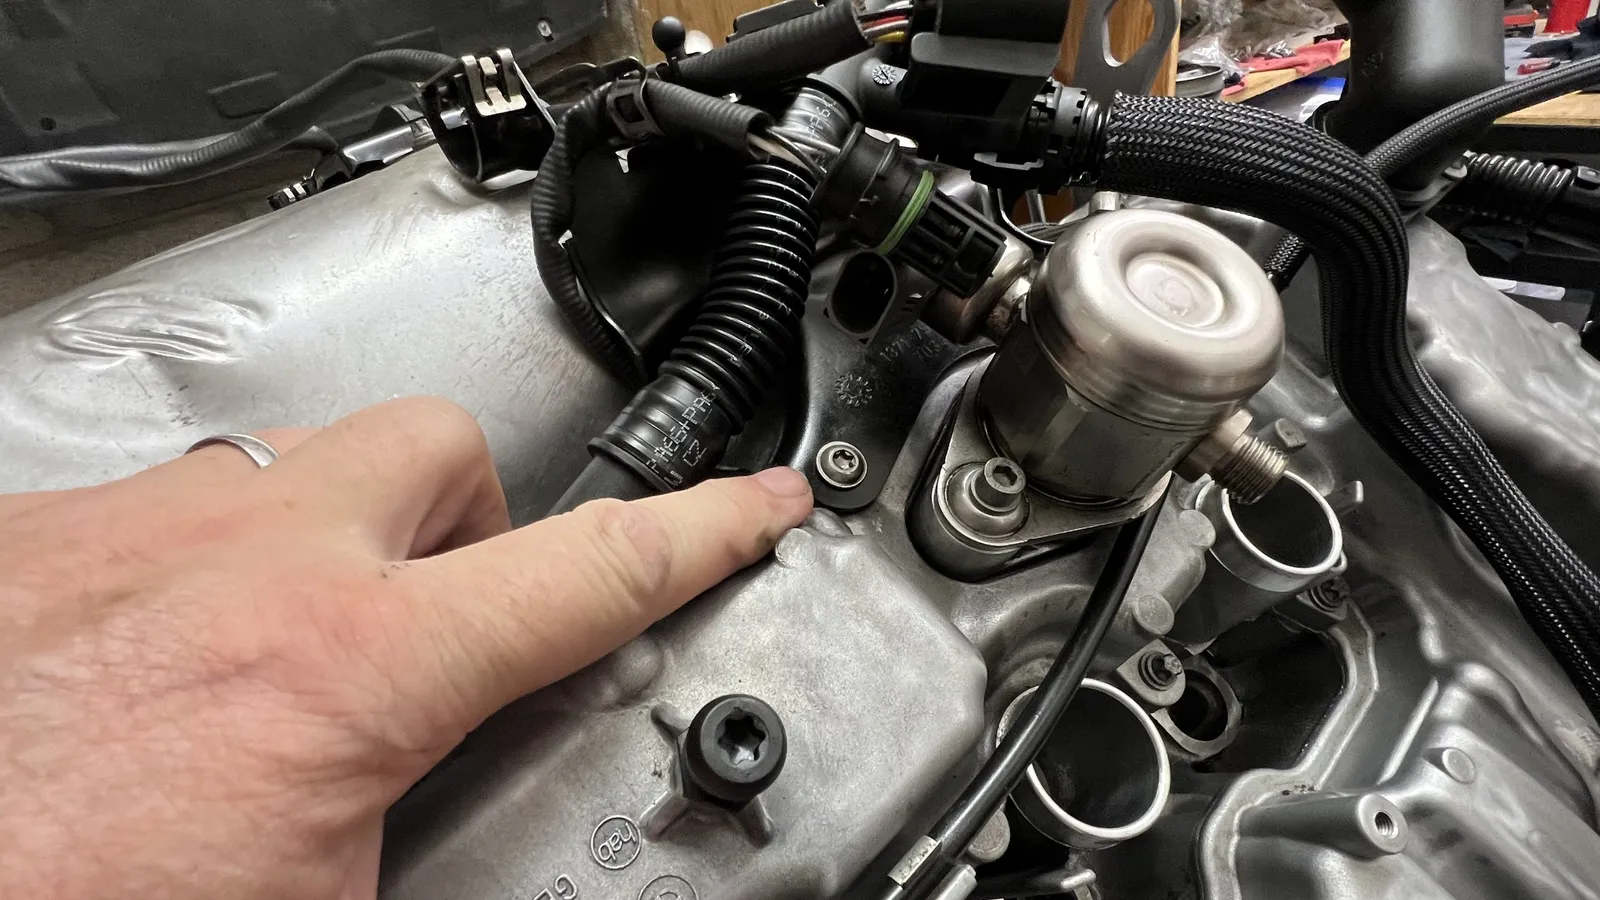 Finger on a cover fastener — still chasing the missing bolt.
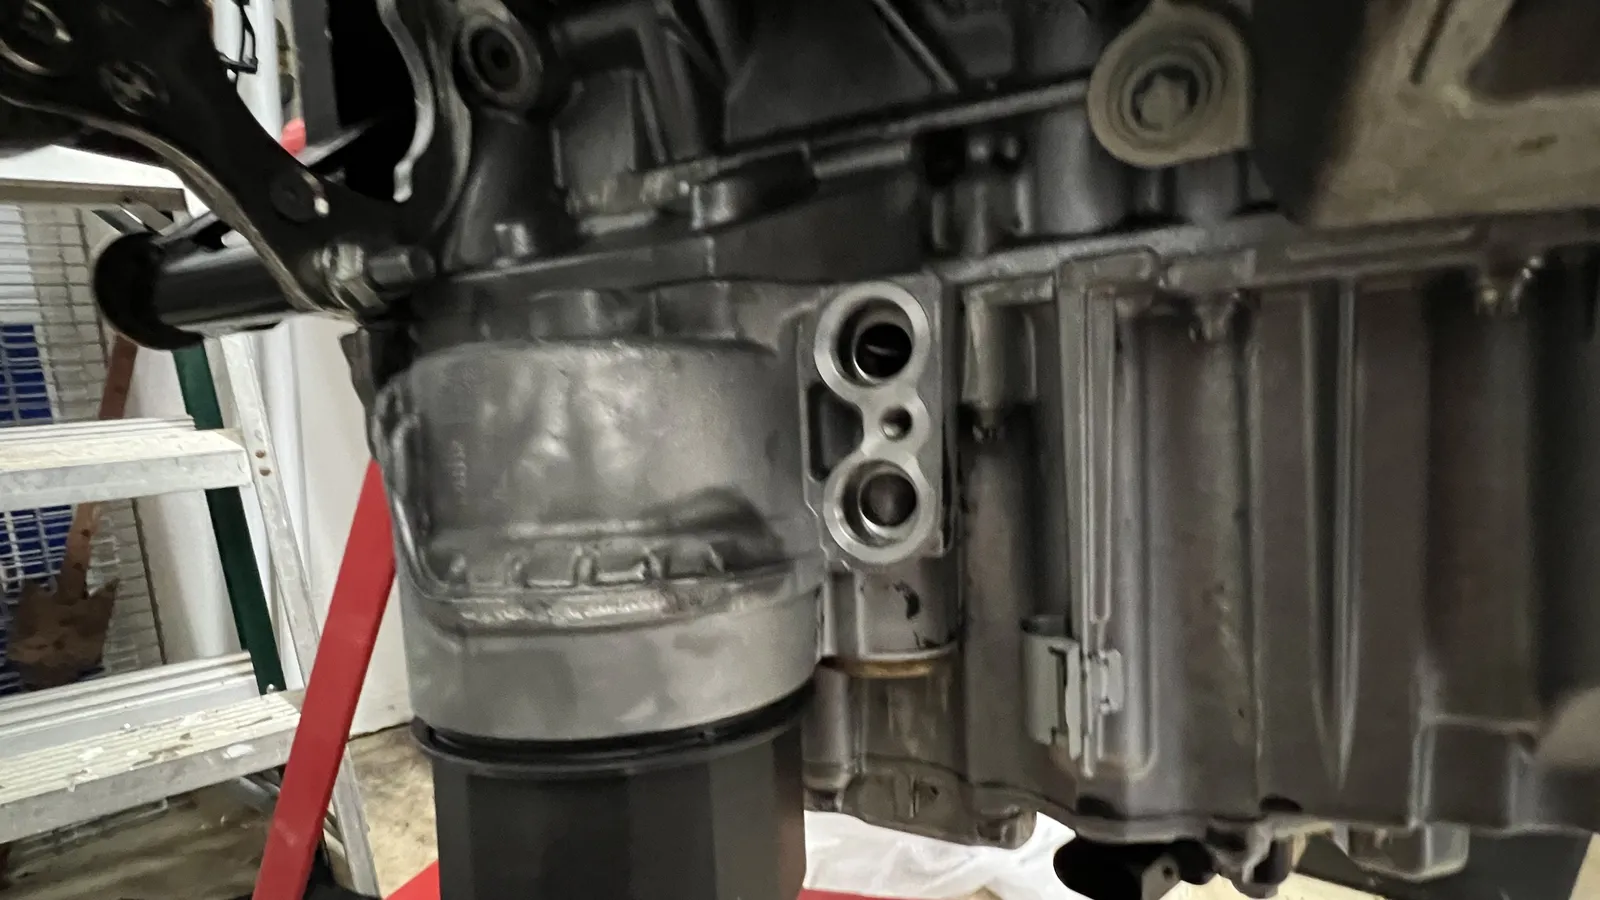 Lower block and oil-filter housing area, cleaned up on the stand.
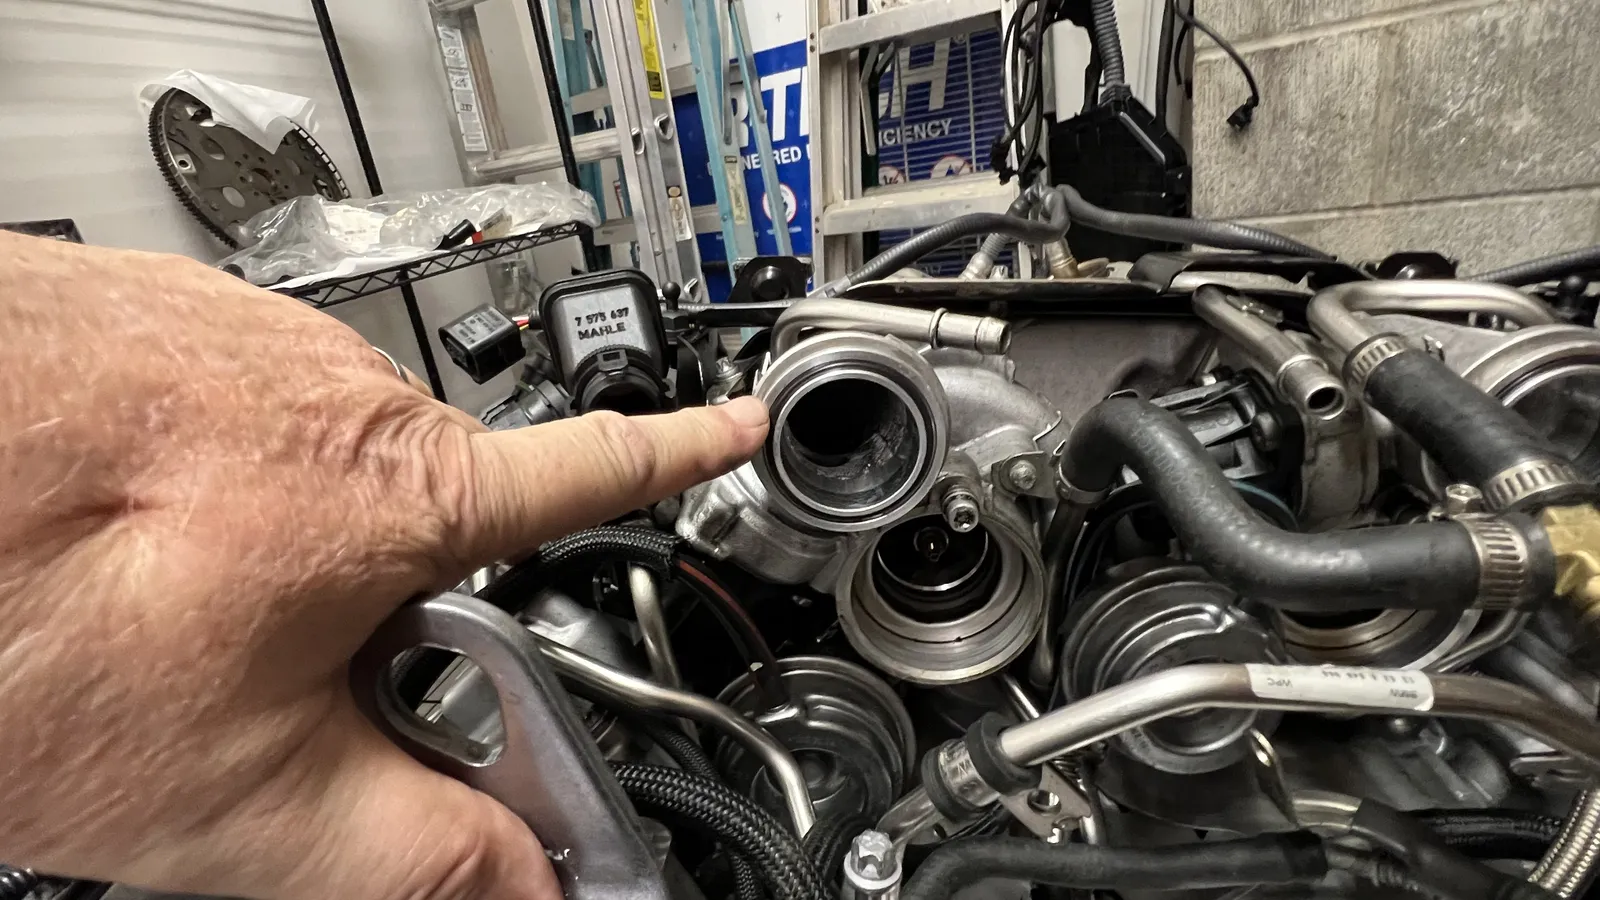 Hand at a large port — checking turbo/intake interface on the stand.
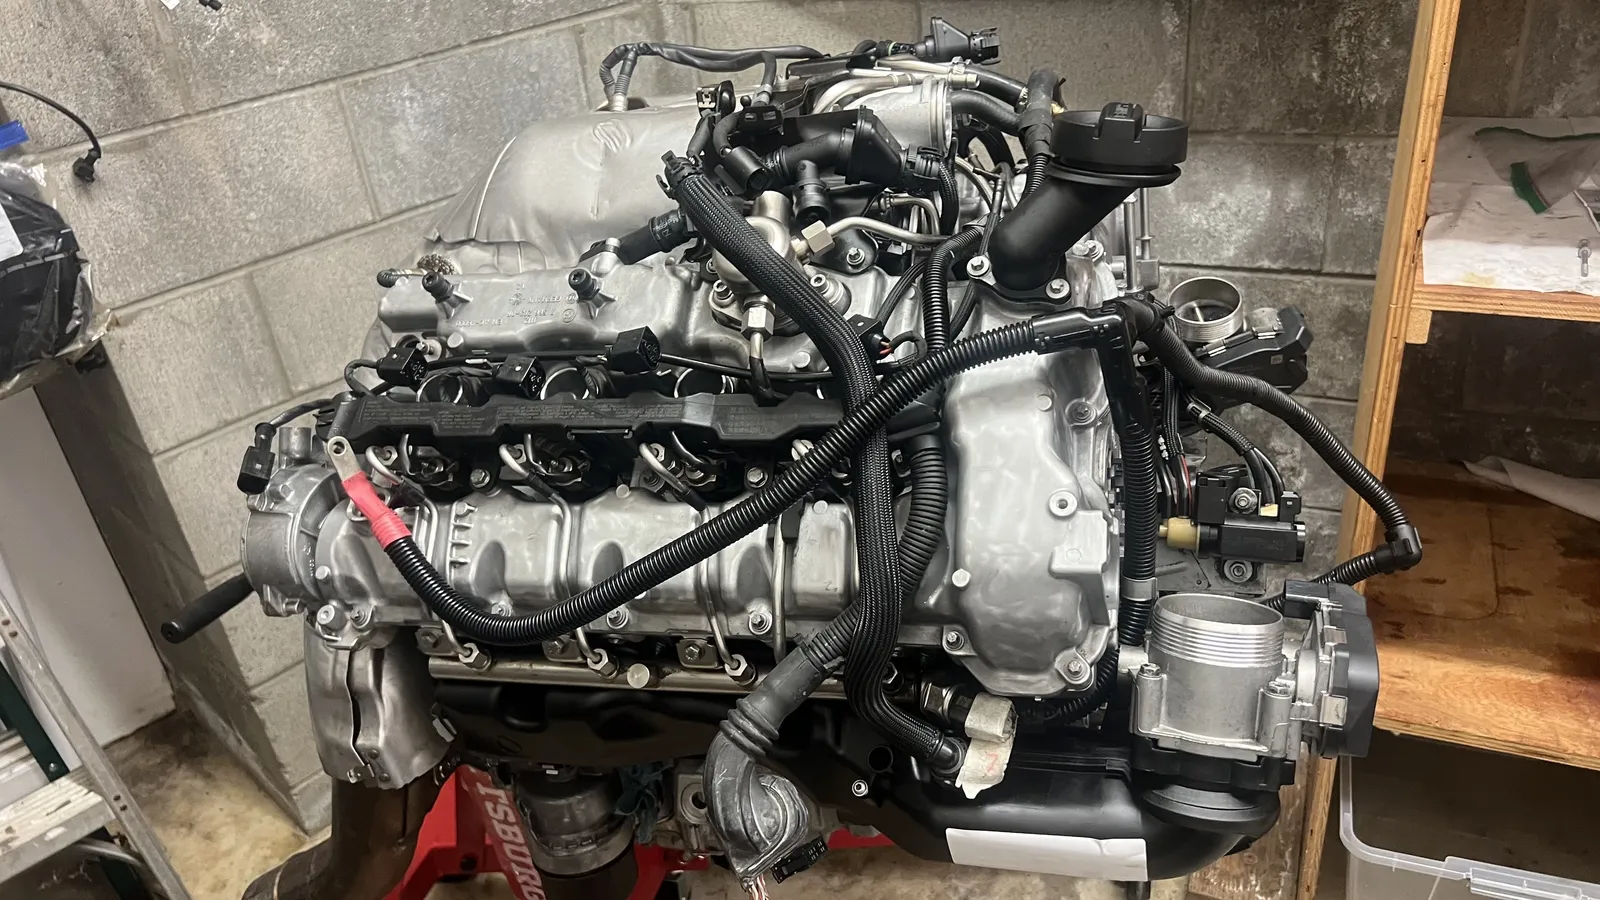 Long block on the stand with harnesses and hoses draped for routing.
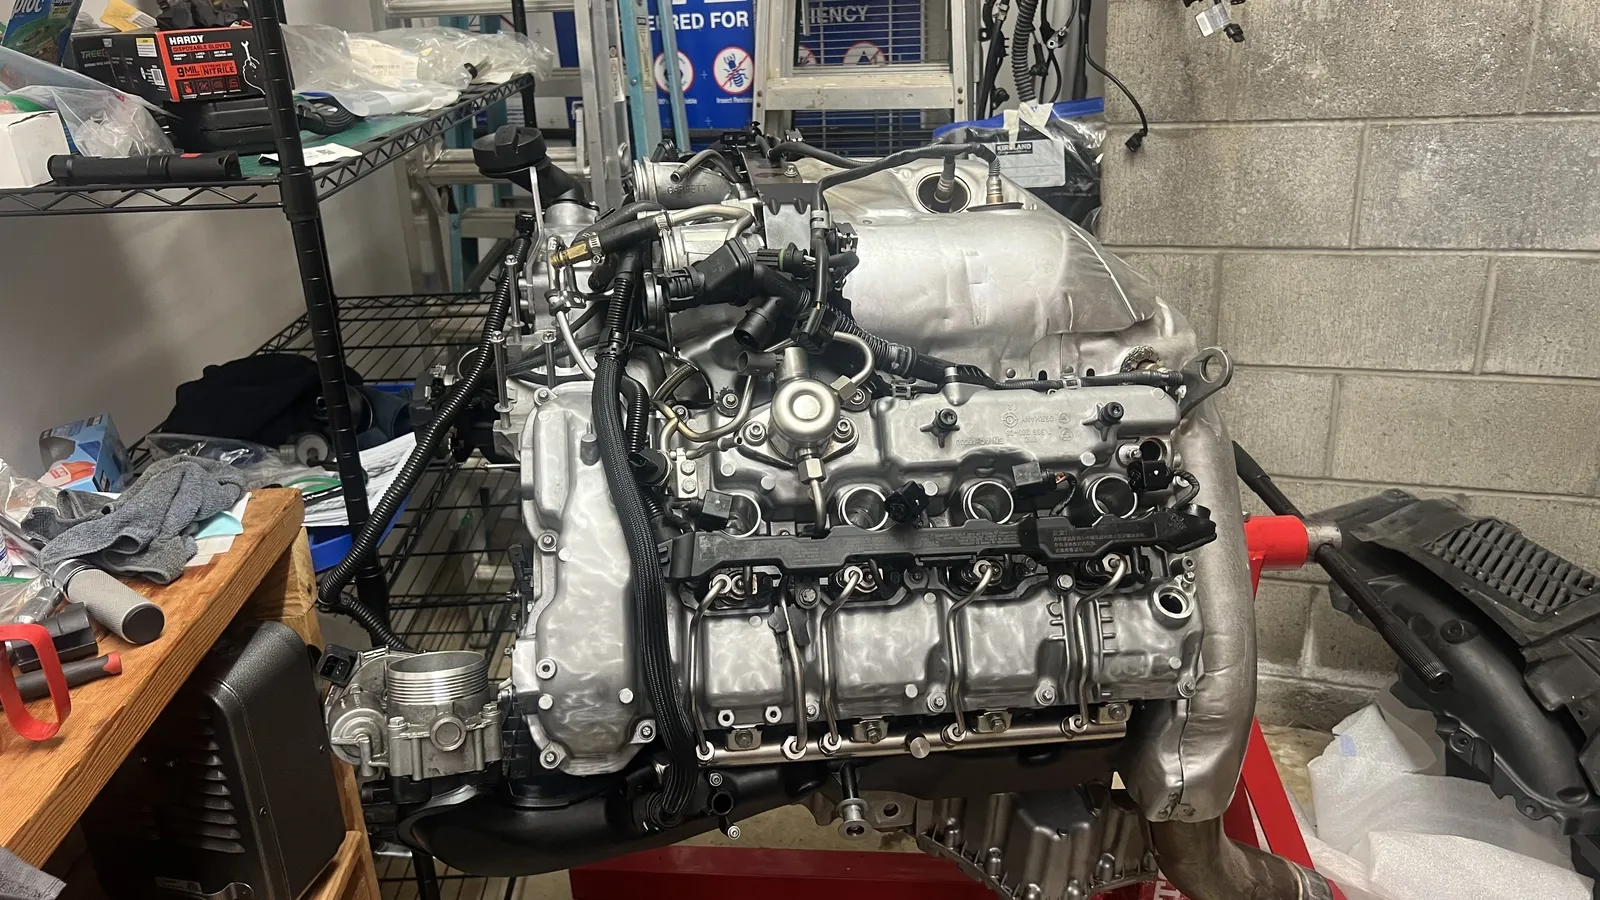 Another angle of the nearly dressed long block on the stand.
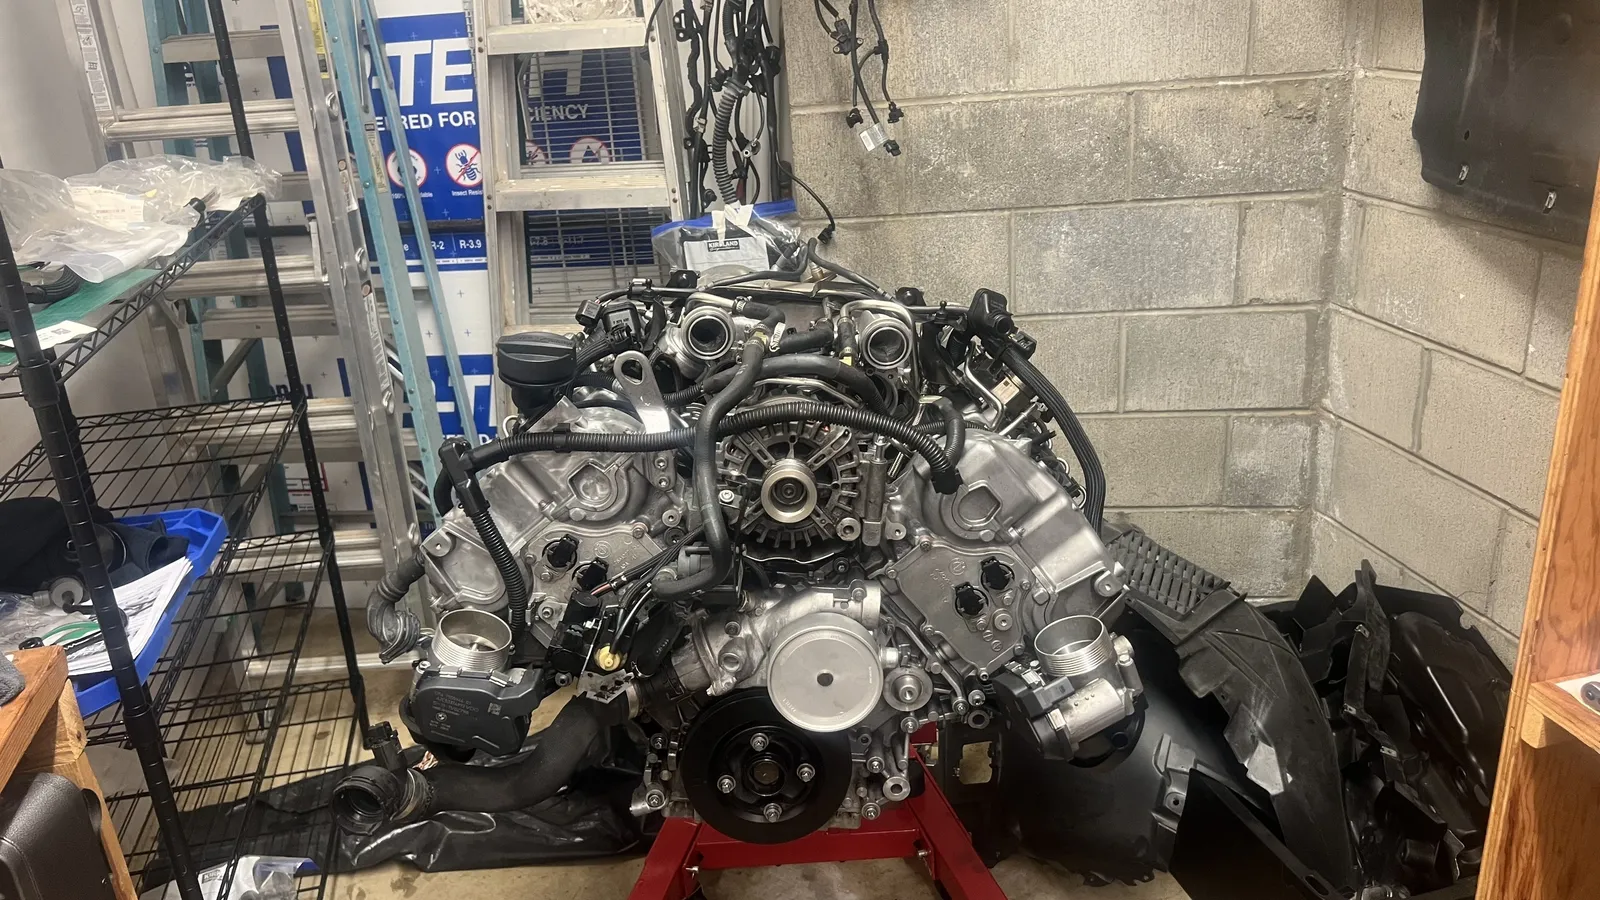 Front of the long block — black crank pulley visible, balancer bolt still pending.
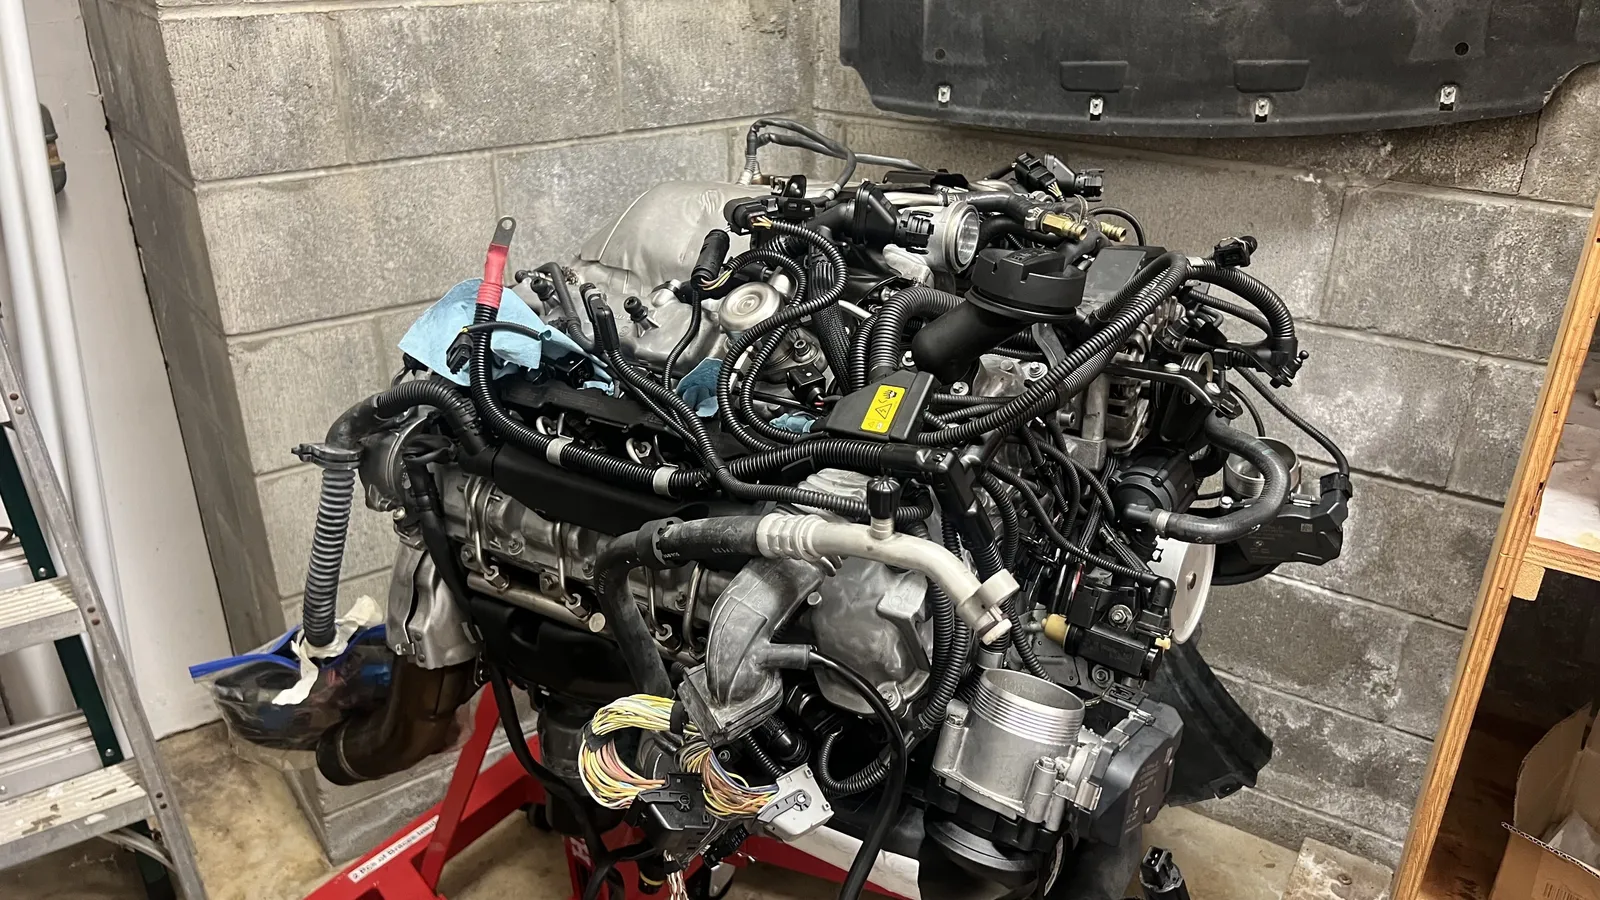 Rear three-quarter of the dressed long block — plumbing and electrics in place.
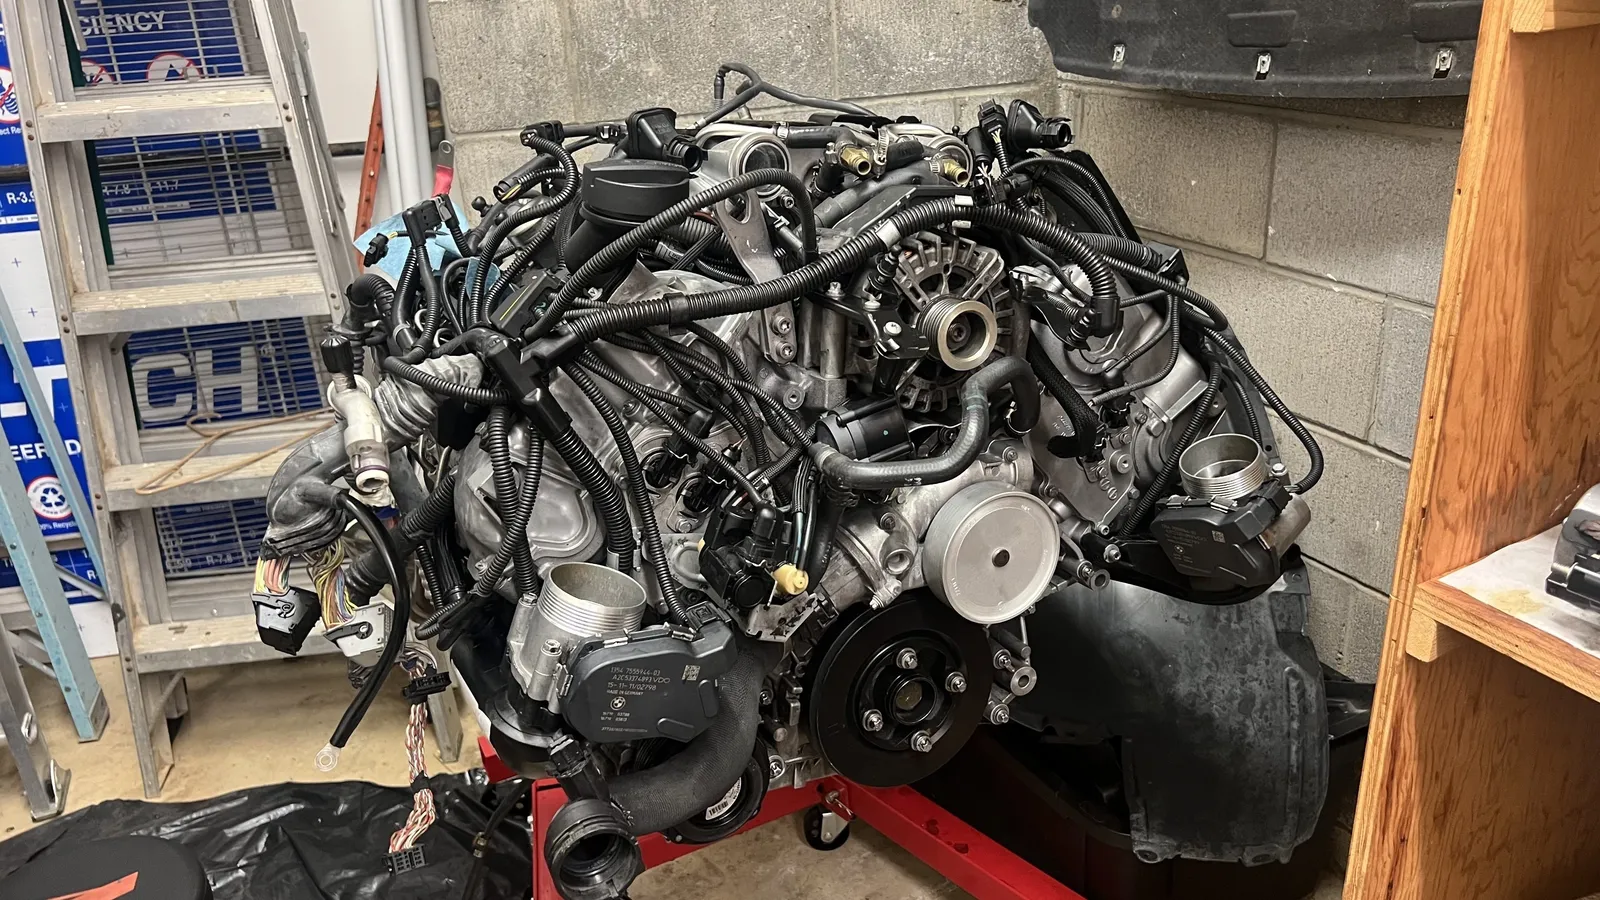 Dressed long block on the stand — assembly nearly complete.
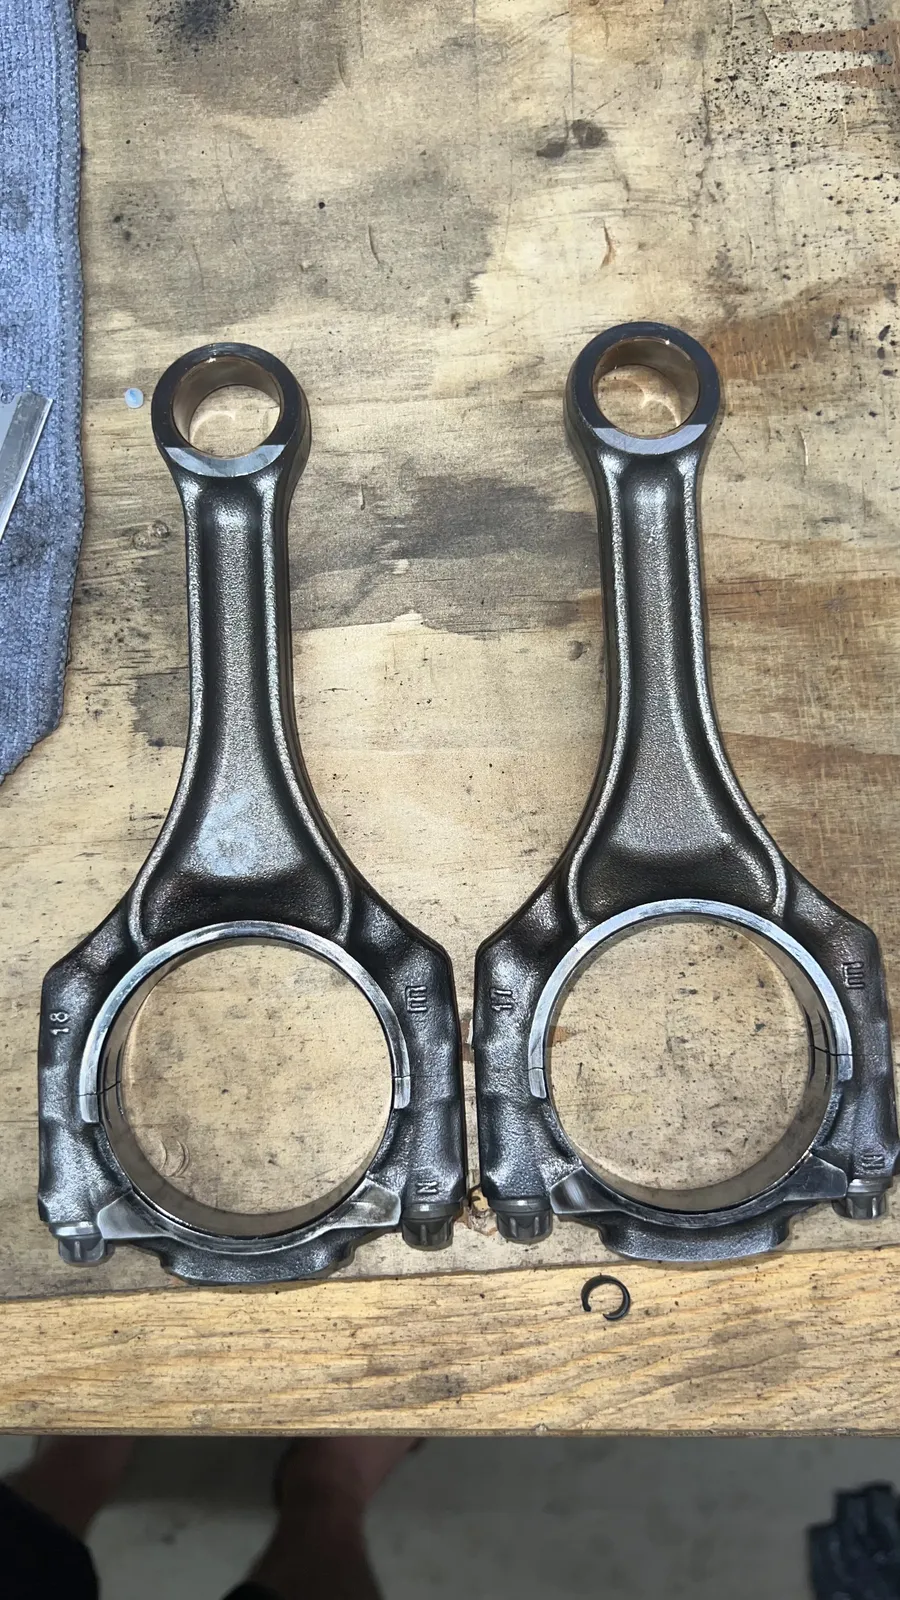 Two of the out-of-spec connecting rods I had to replace.
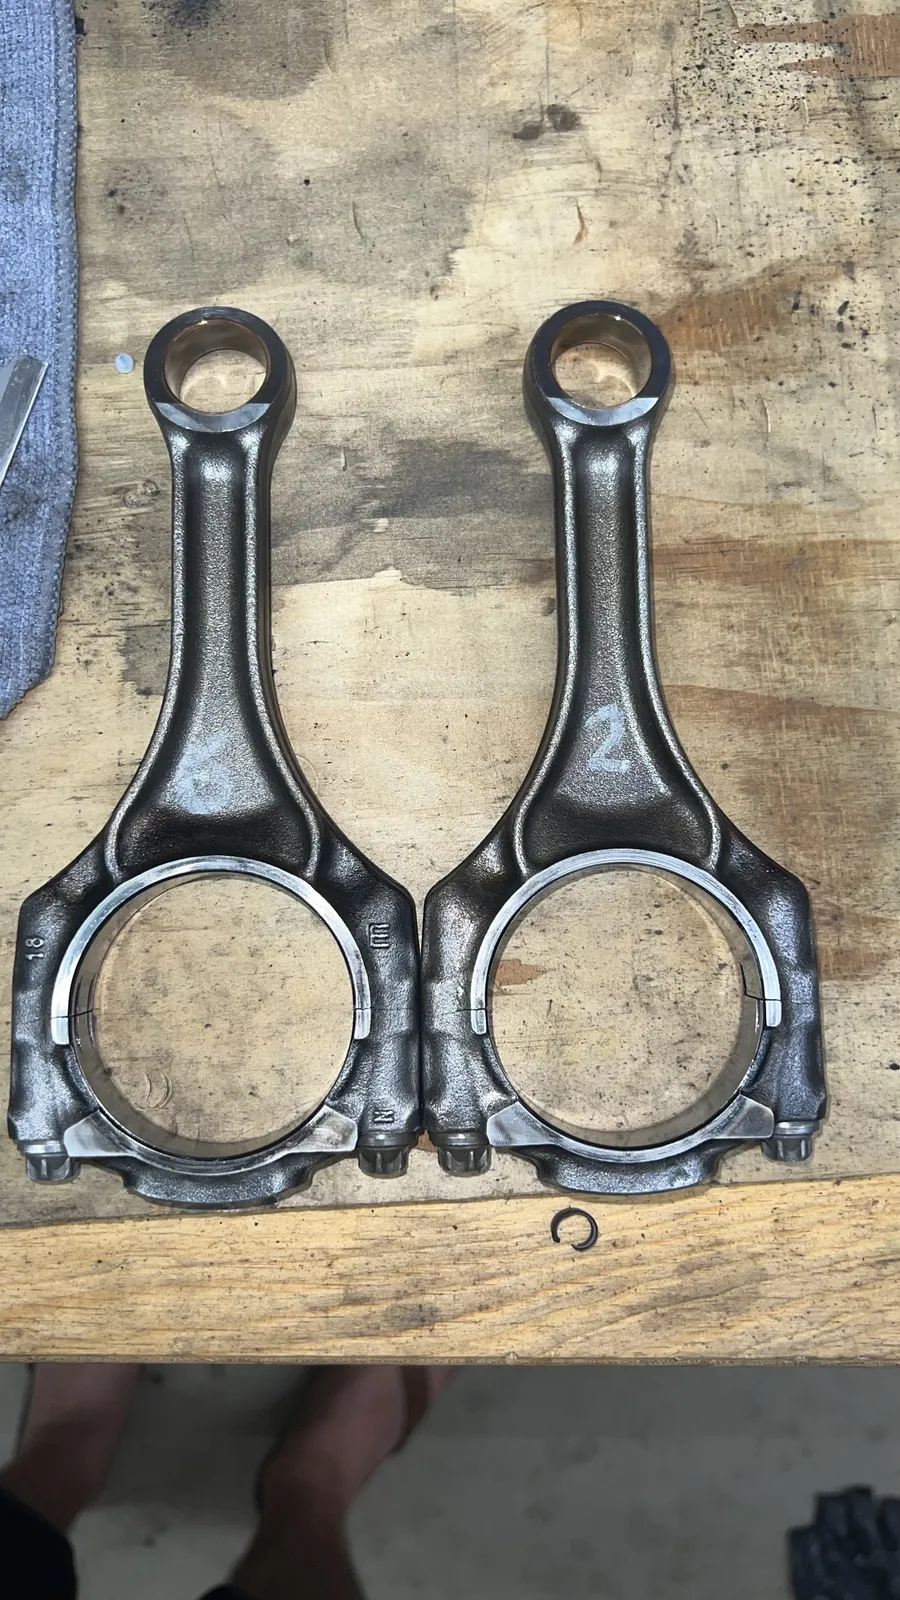 Connecting rods are bi-directional — same both ways; one face marked, the other blank.
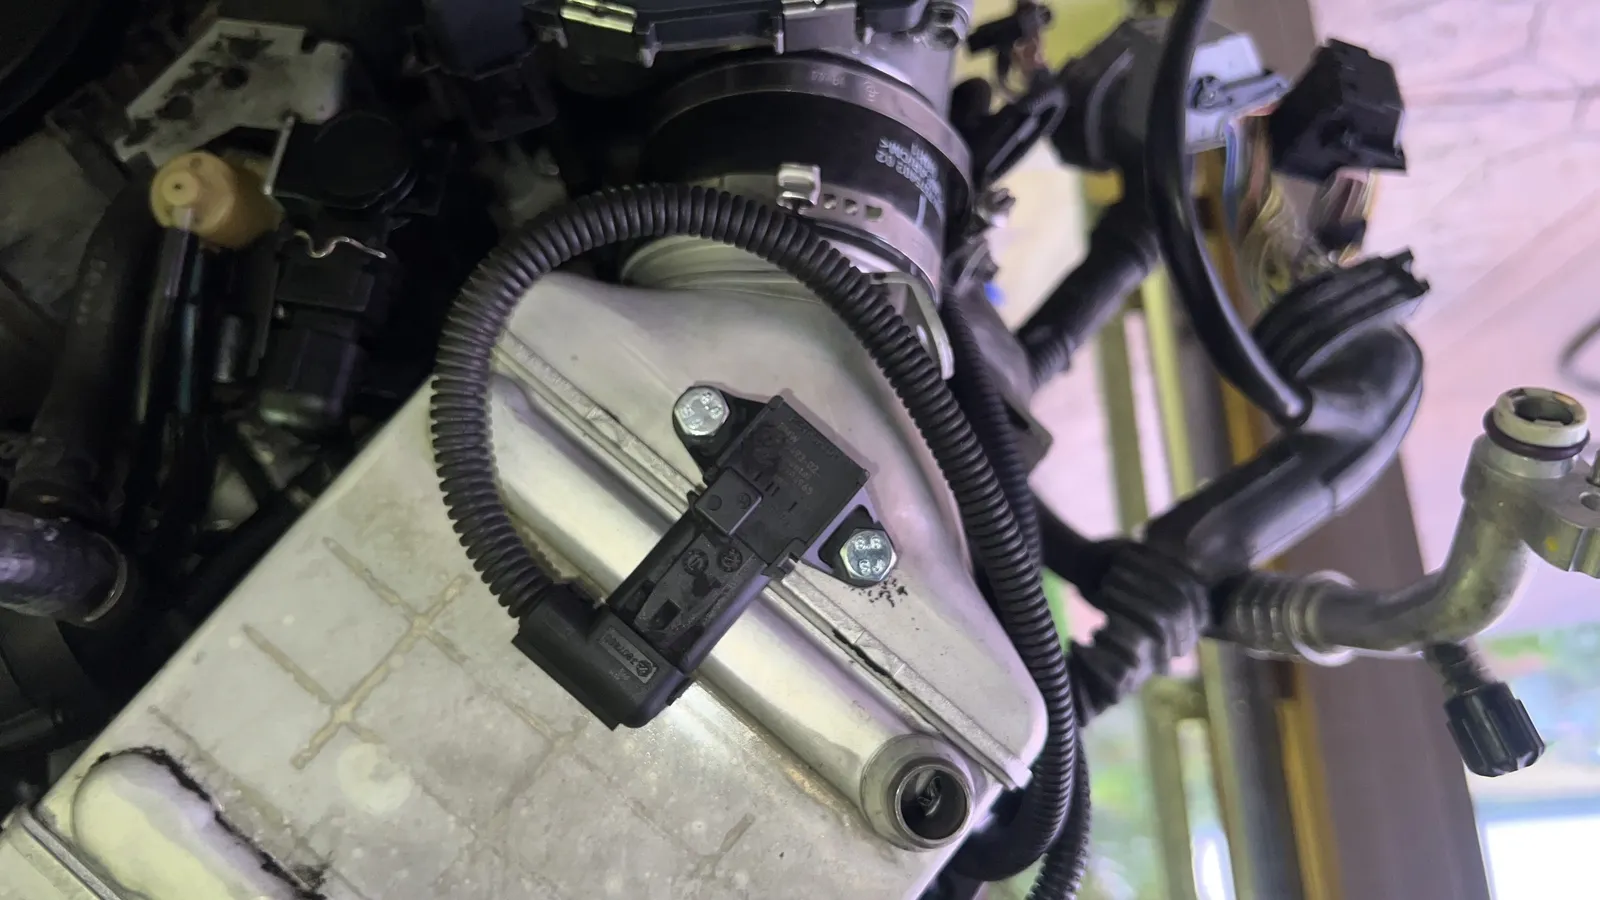 Boost sensor on the right intercooler — two Home Depot replacement bolts; OEM BMW bolts were about $7 each and went missing in teardown.
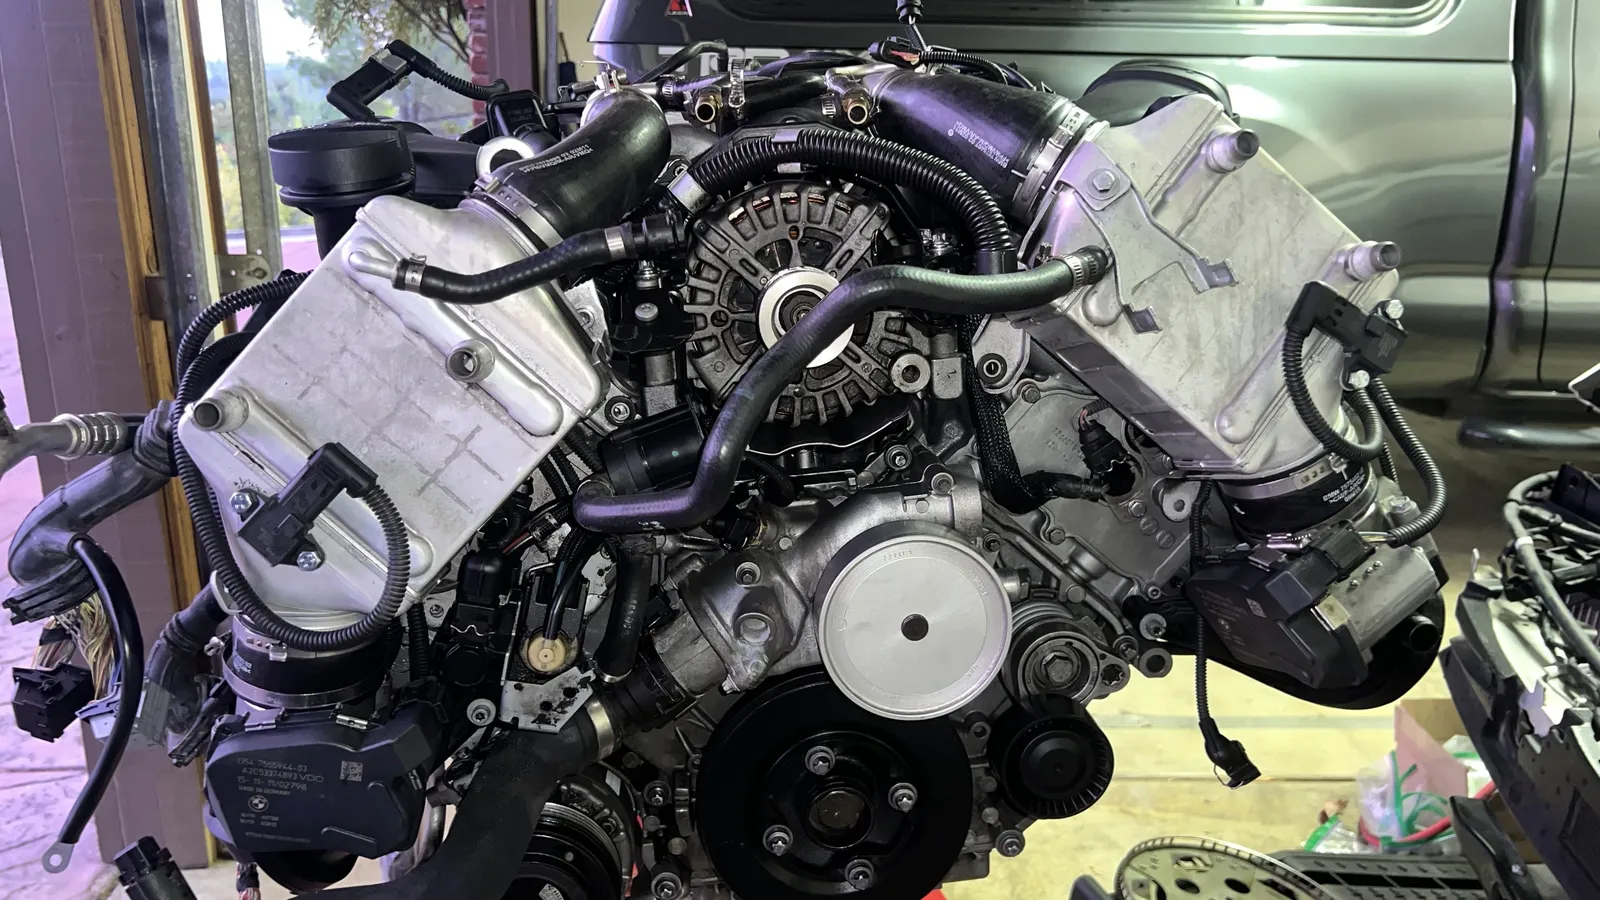 Assembly progress — nearly there on the stand.
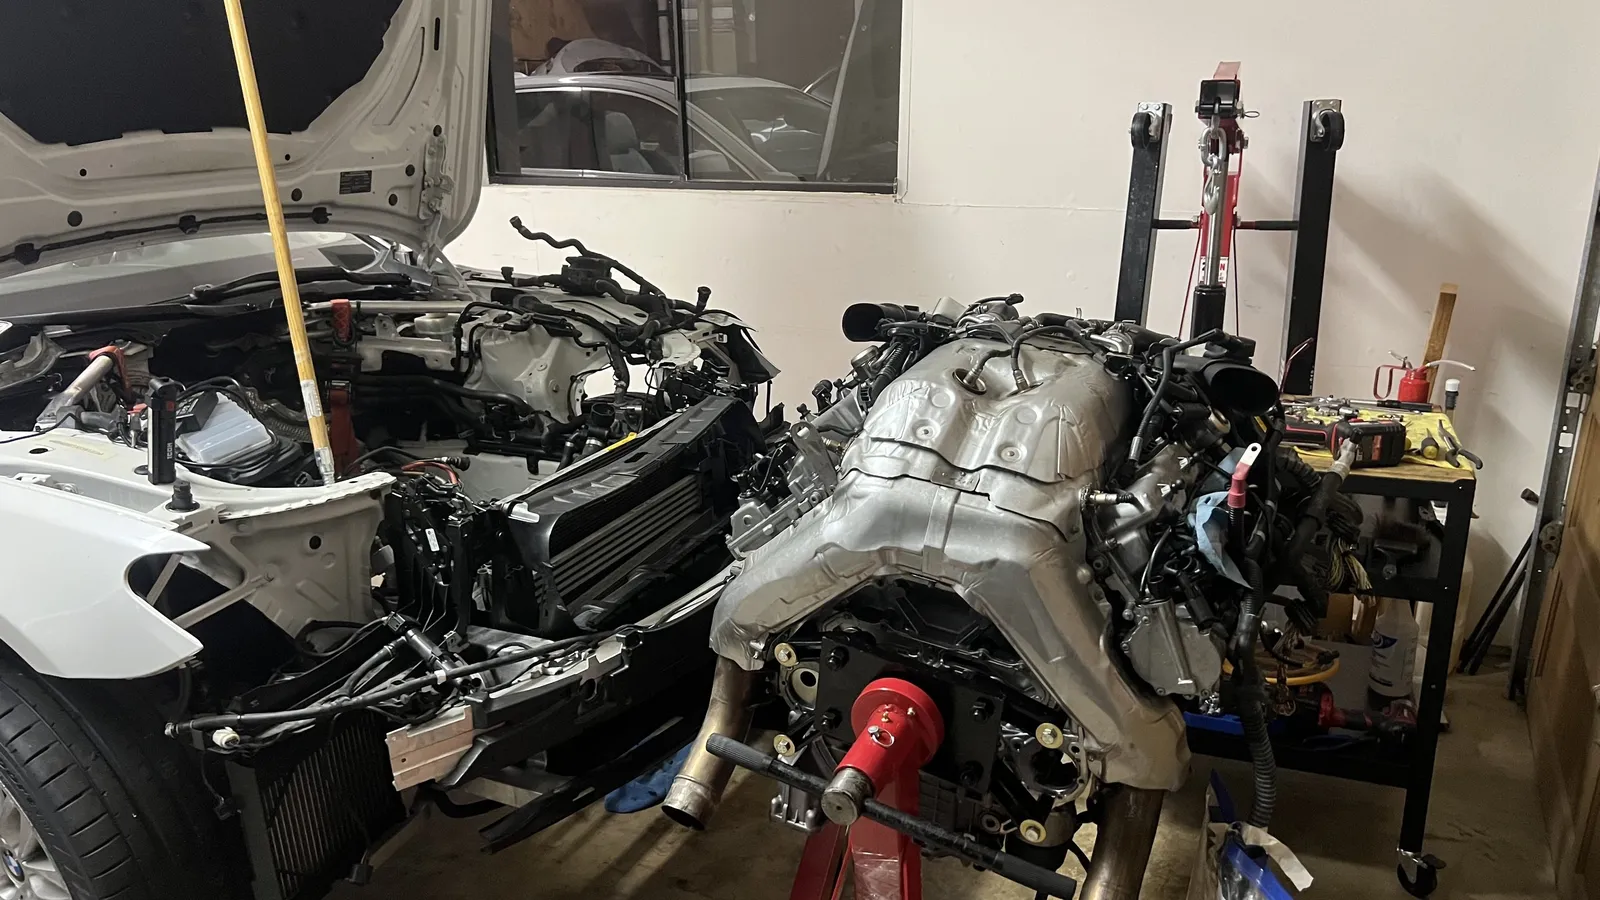 Long block on the stand in front of the empty bay — ready to go back in once the balancer bolt arrives.
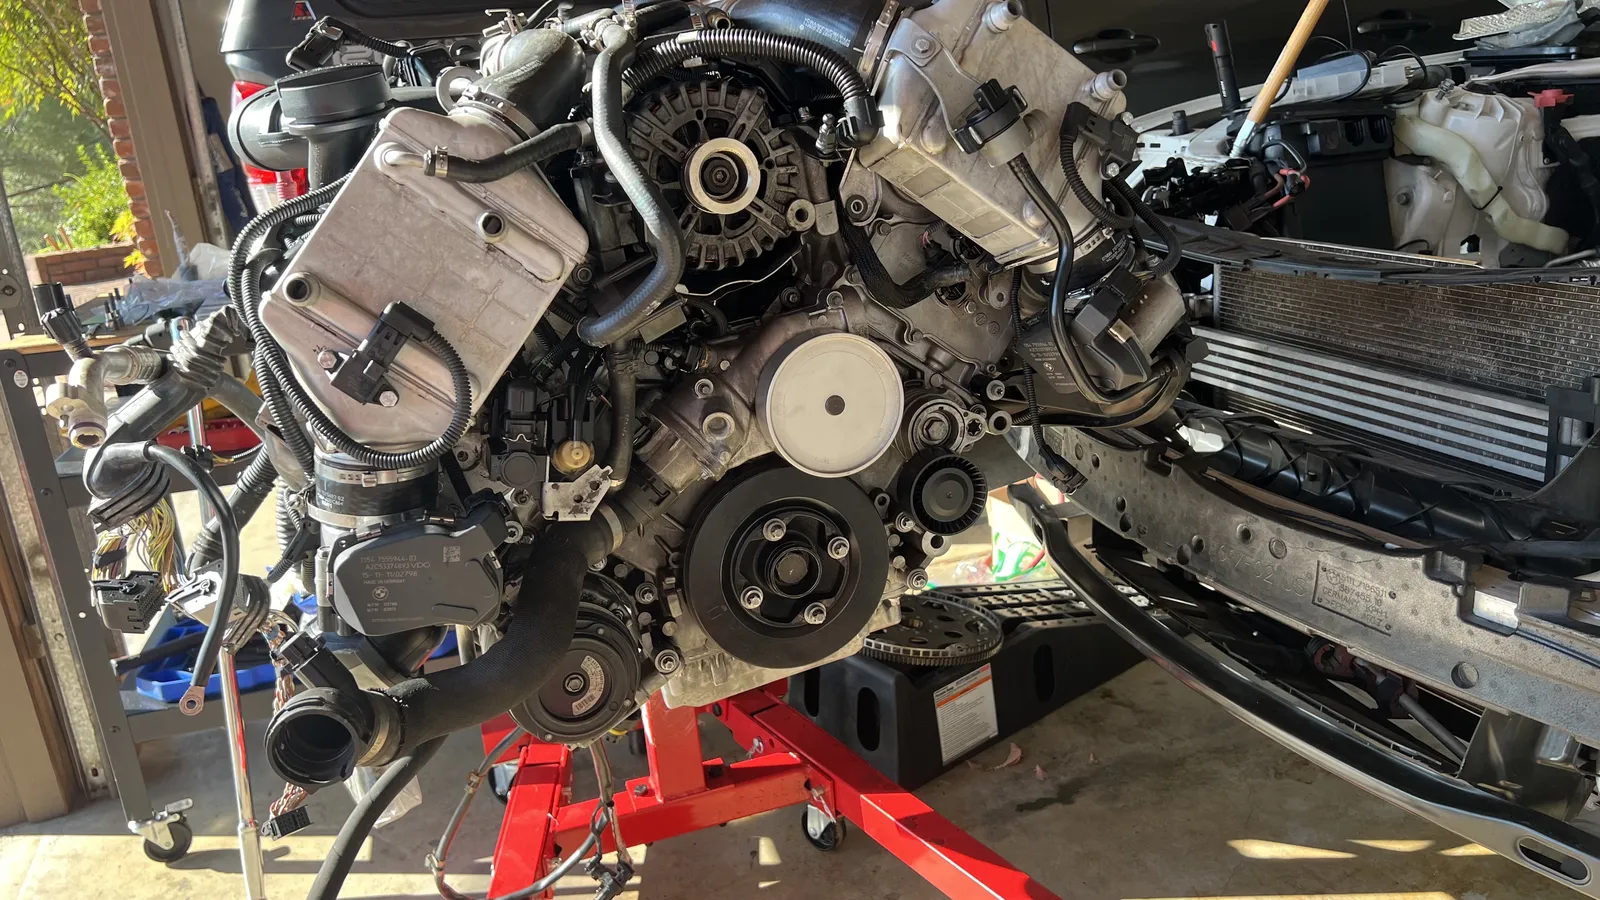 Front of the long block — crank pulley / harmonic balancer ready for the stretch-torque sequence.
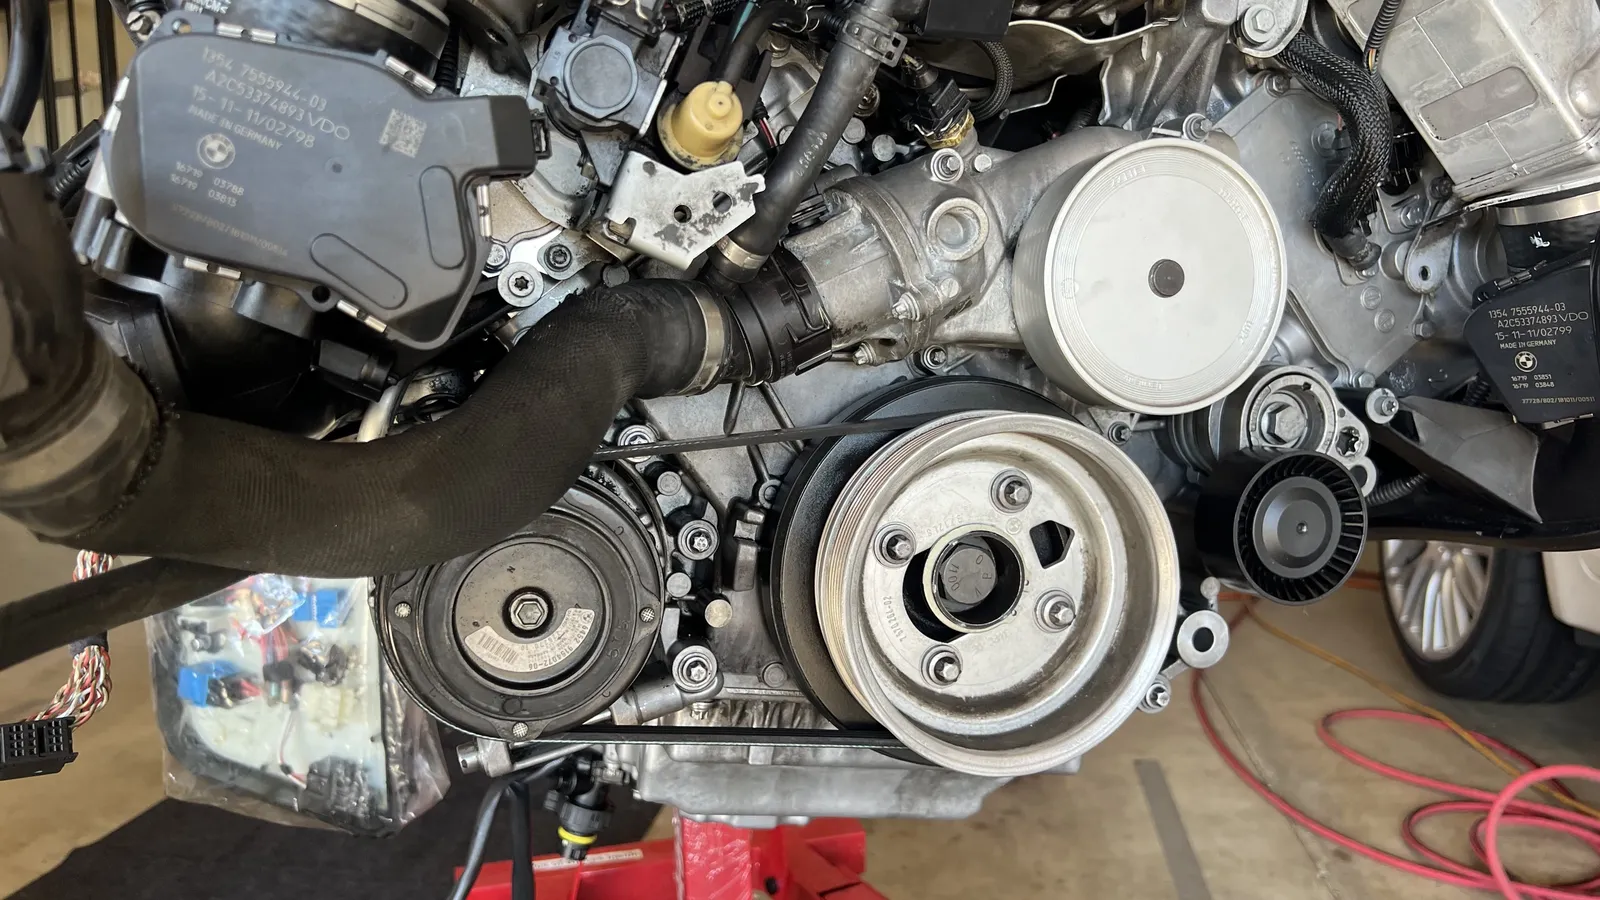 Front of the dressed long block on the stand — serpentine belt, pulleys, and coolant hose routing.
 Front accessory drive on the stand — belt path and idlers for reinstall reference.
 Front of the long block — pulley stack and hose clamps documented before the hoist.
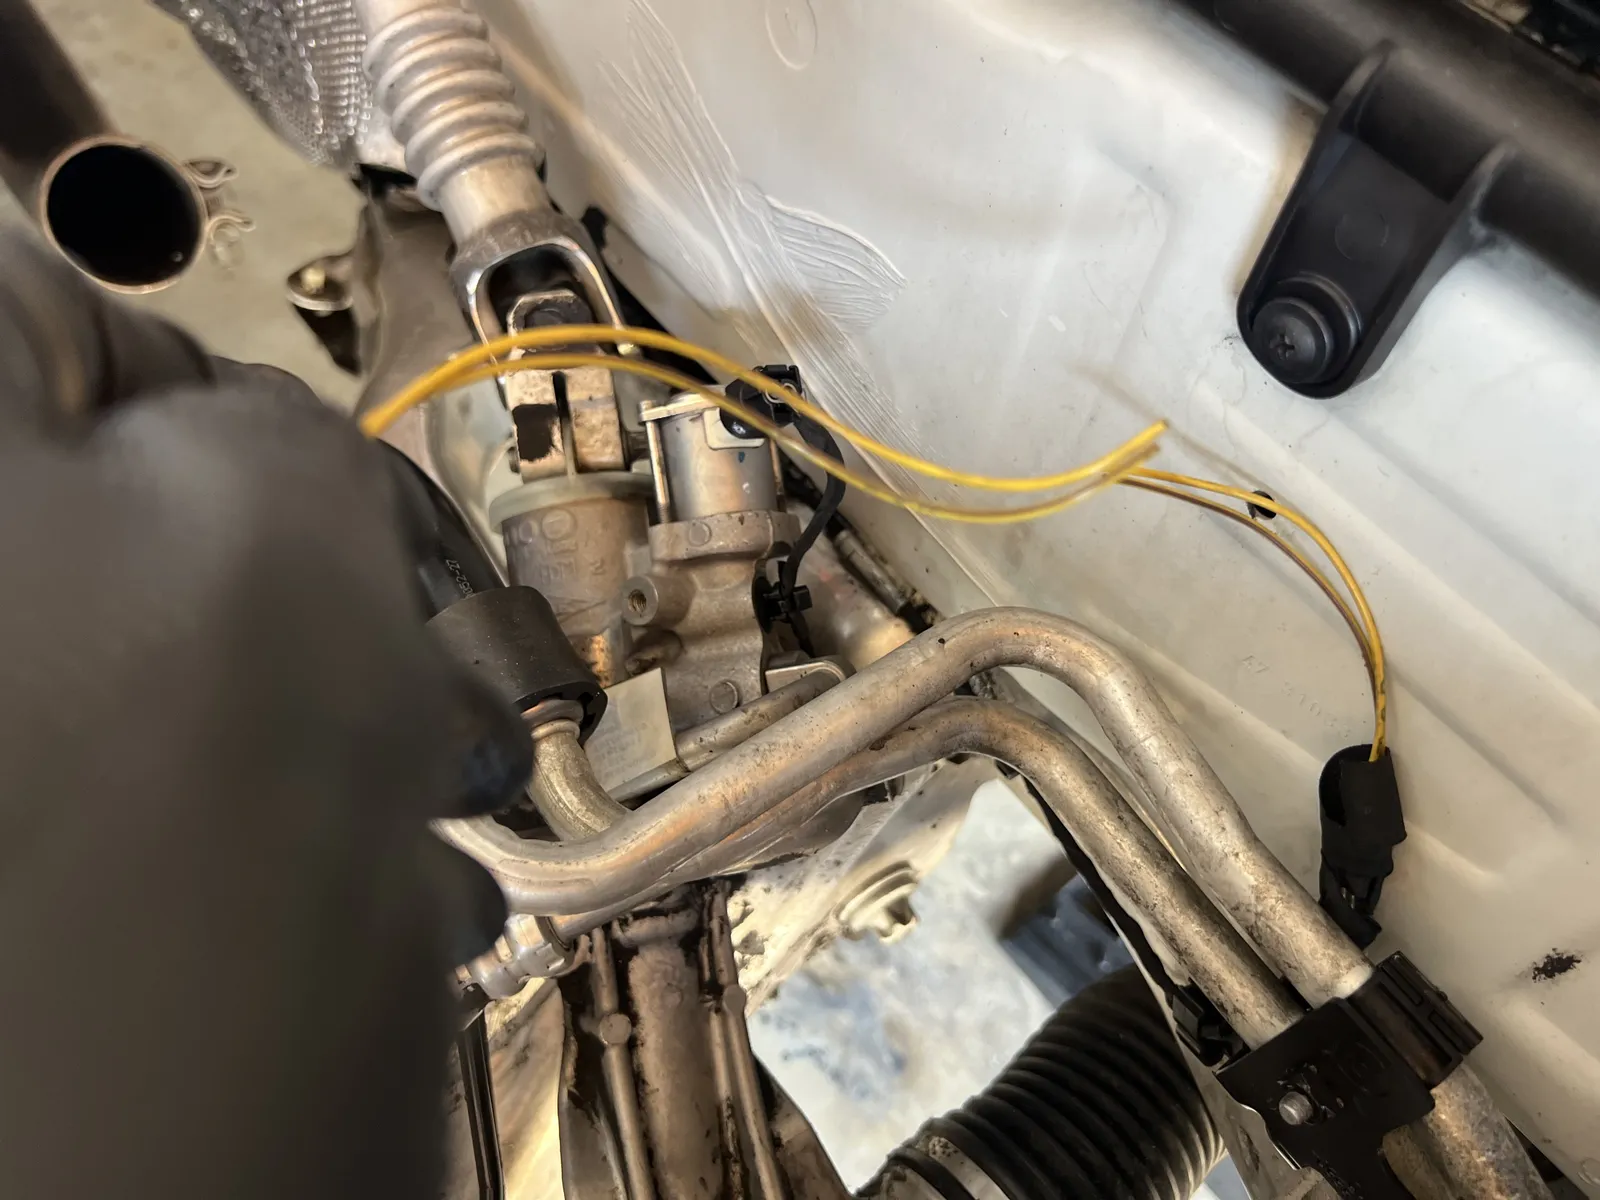 Front dress-up detail on the stand — sensors and harness routing.
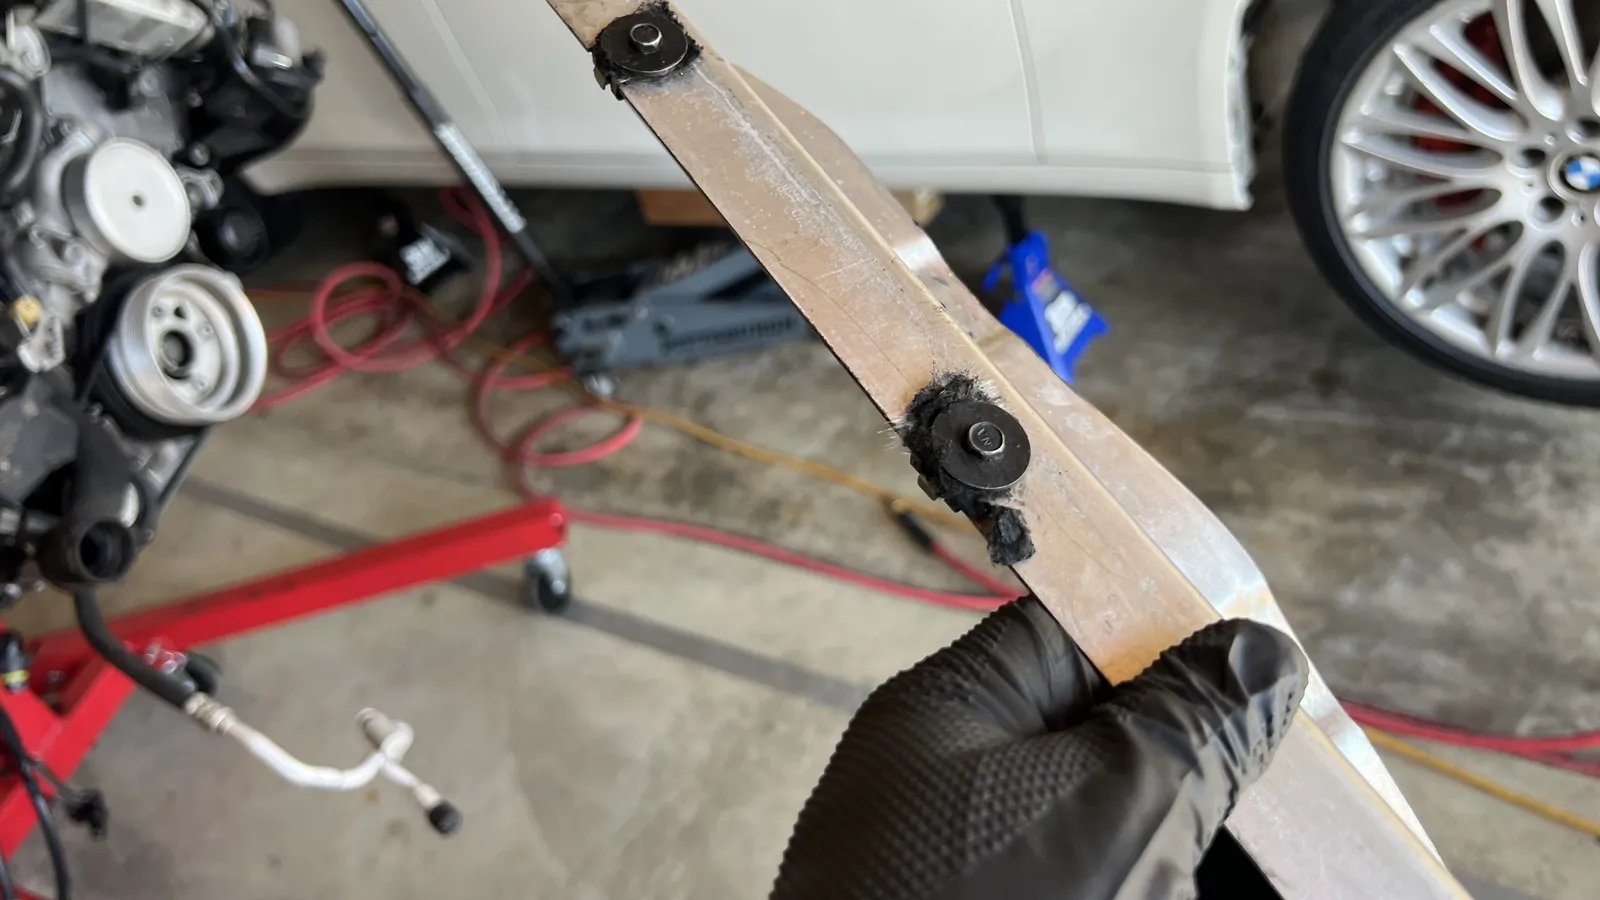 Thin heat-shield strip with felt washers — fastener type for bay reassembly.
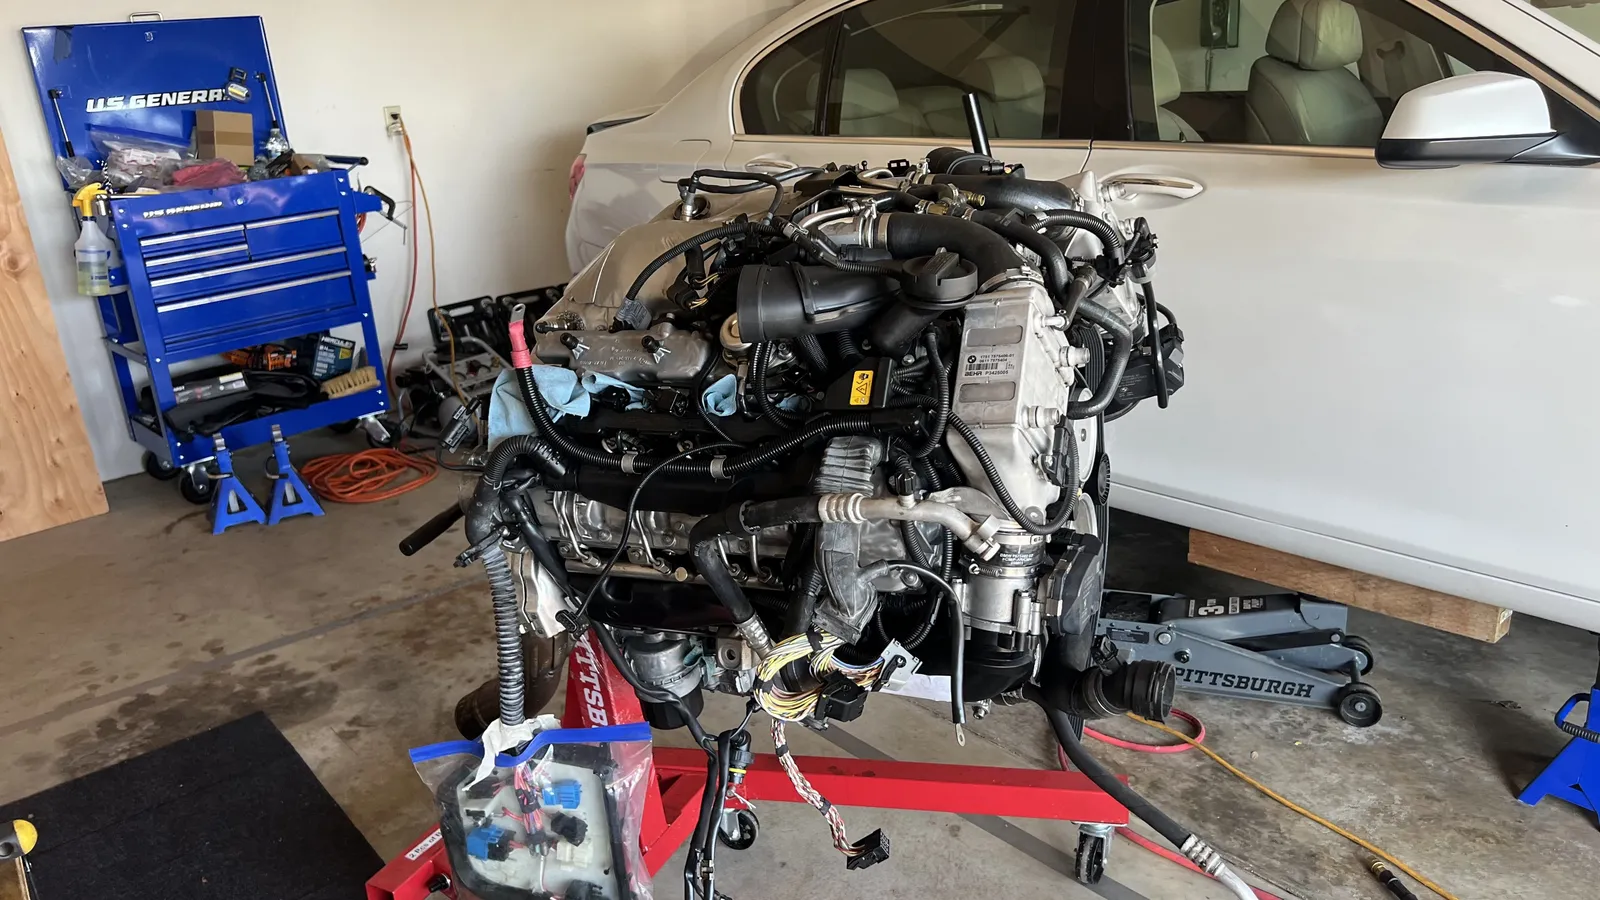 Long block on the stand — side dress-up before lifting back toward the car.
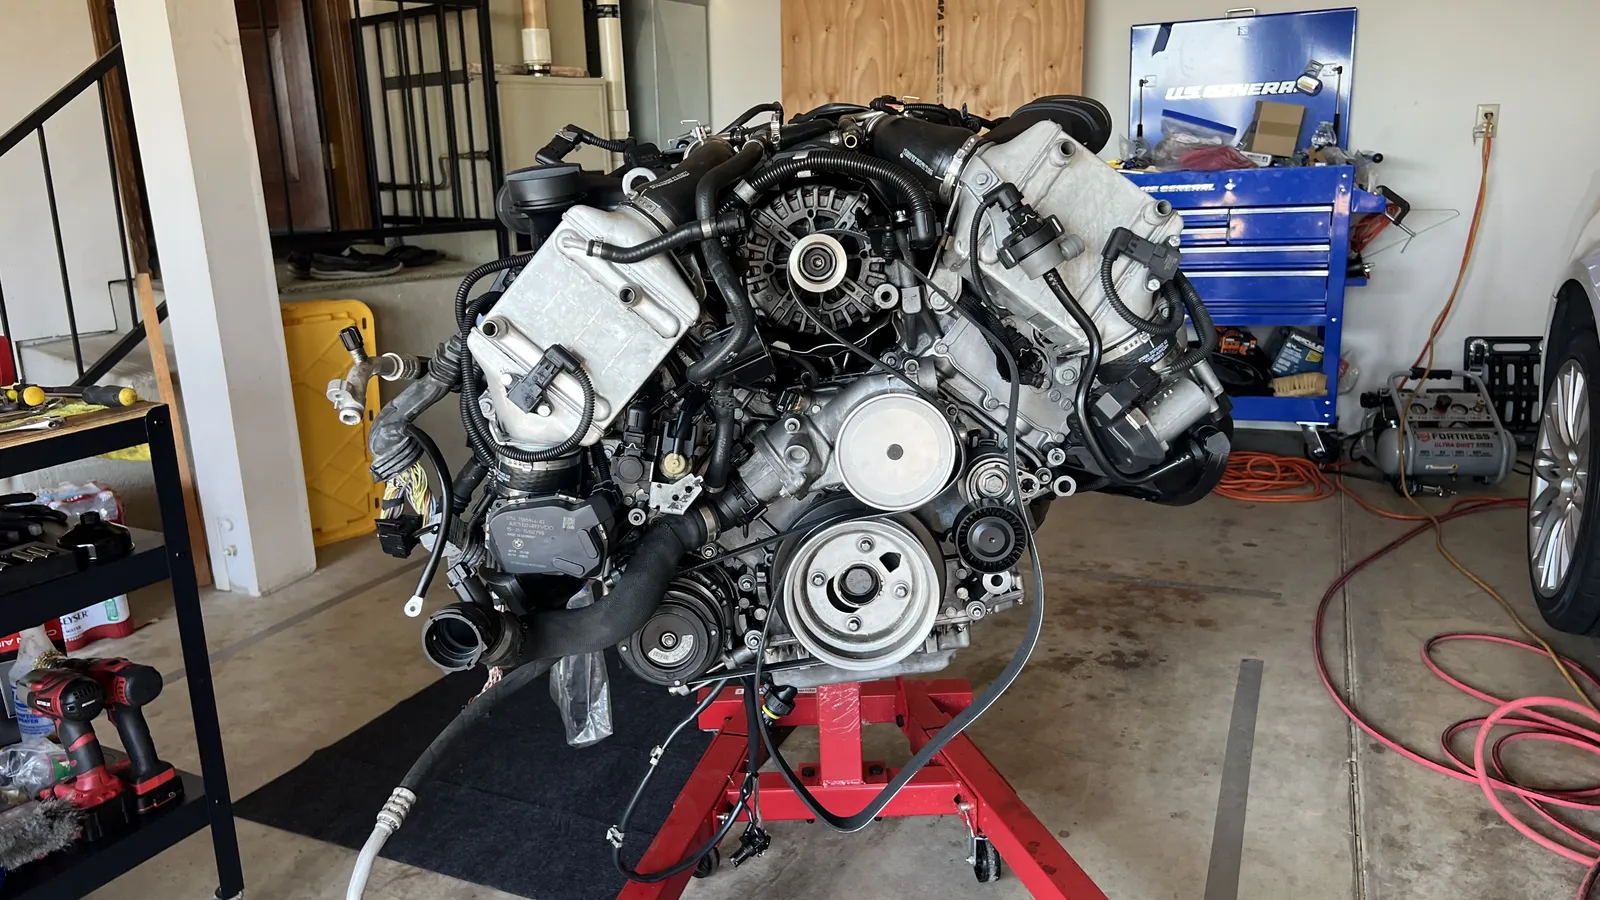 Long block on the stand — another angle of harness and hose dress-up.
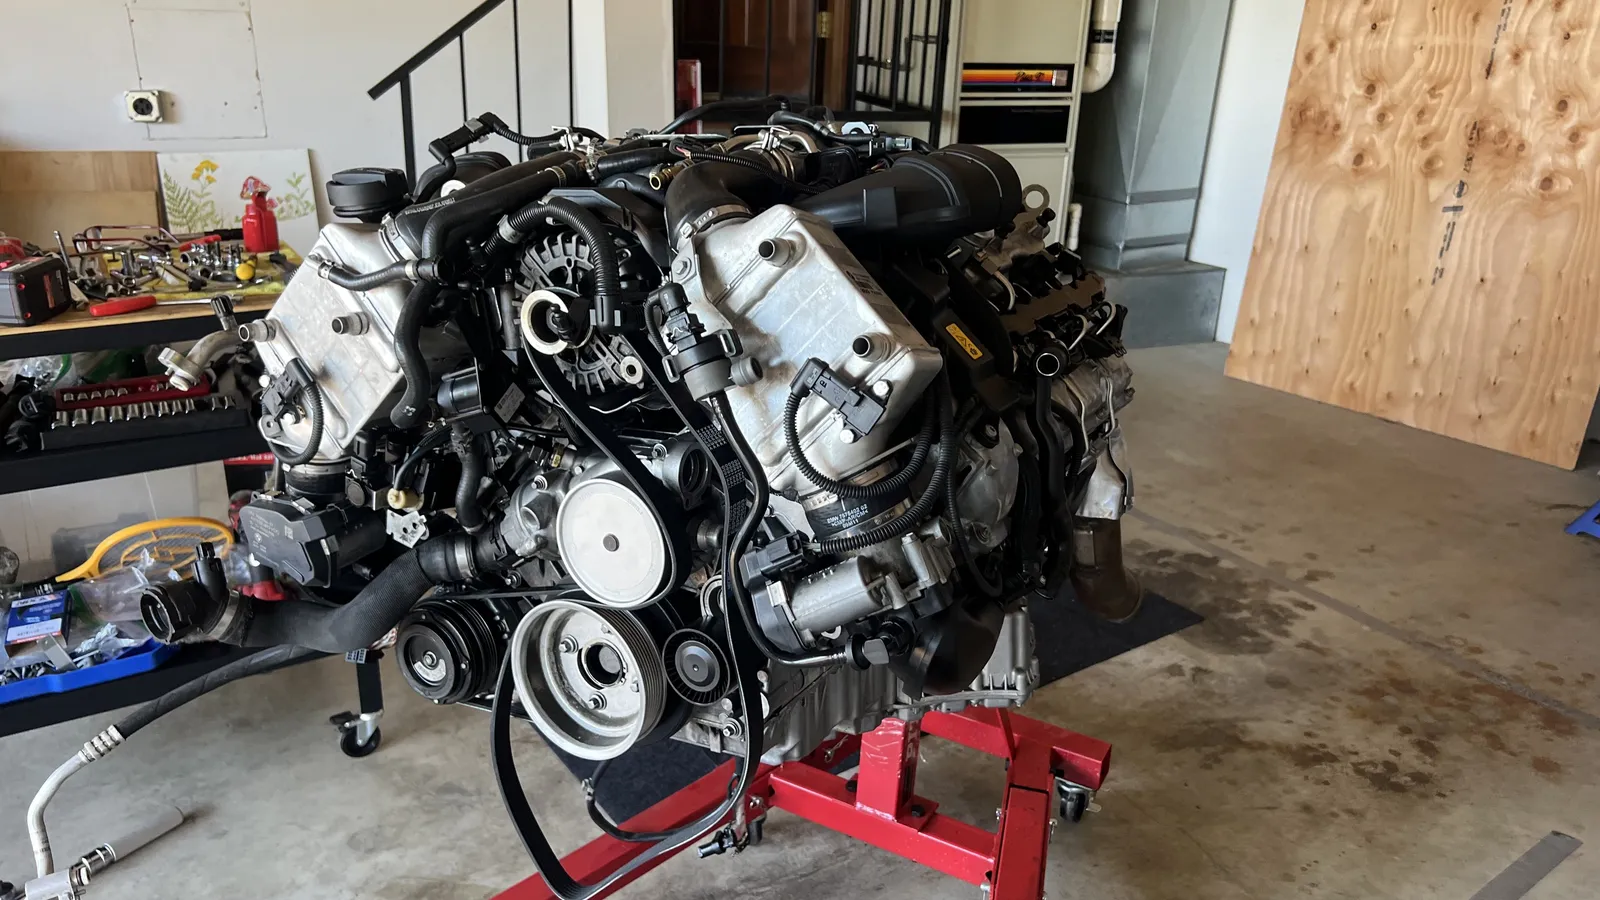 Stand-side view of the dressed engine — ready for the hoist.
 Dressed long block on the red stand — final checks before moving to the bay.
 Front three-quarter of the dressed long block on the stand.
 Side of the dressed long block — plumbing and electrics staged for reinstall.
 Long block on the stand — nearly ready to hoist back into the bay.
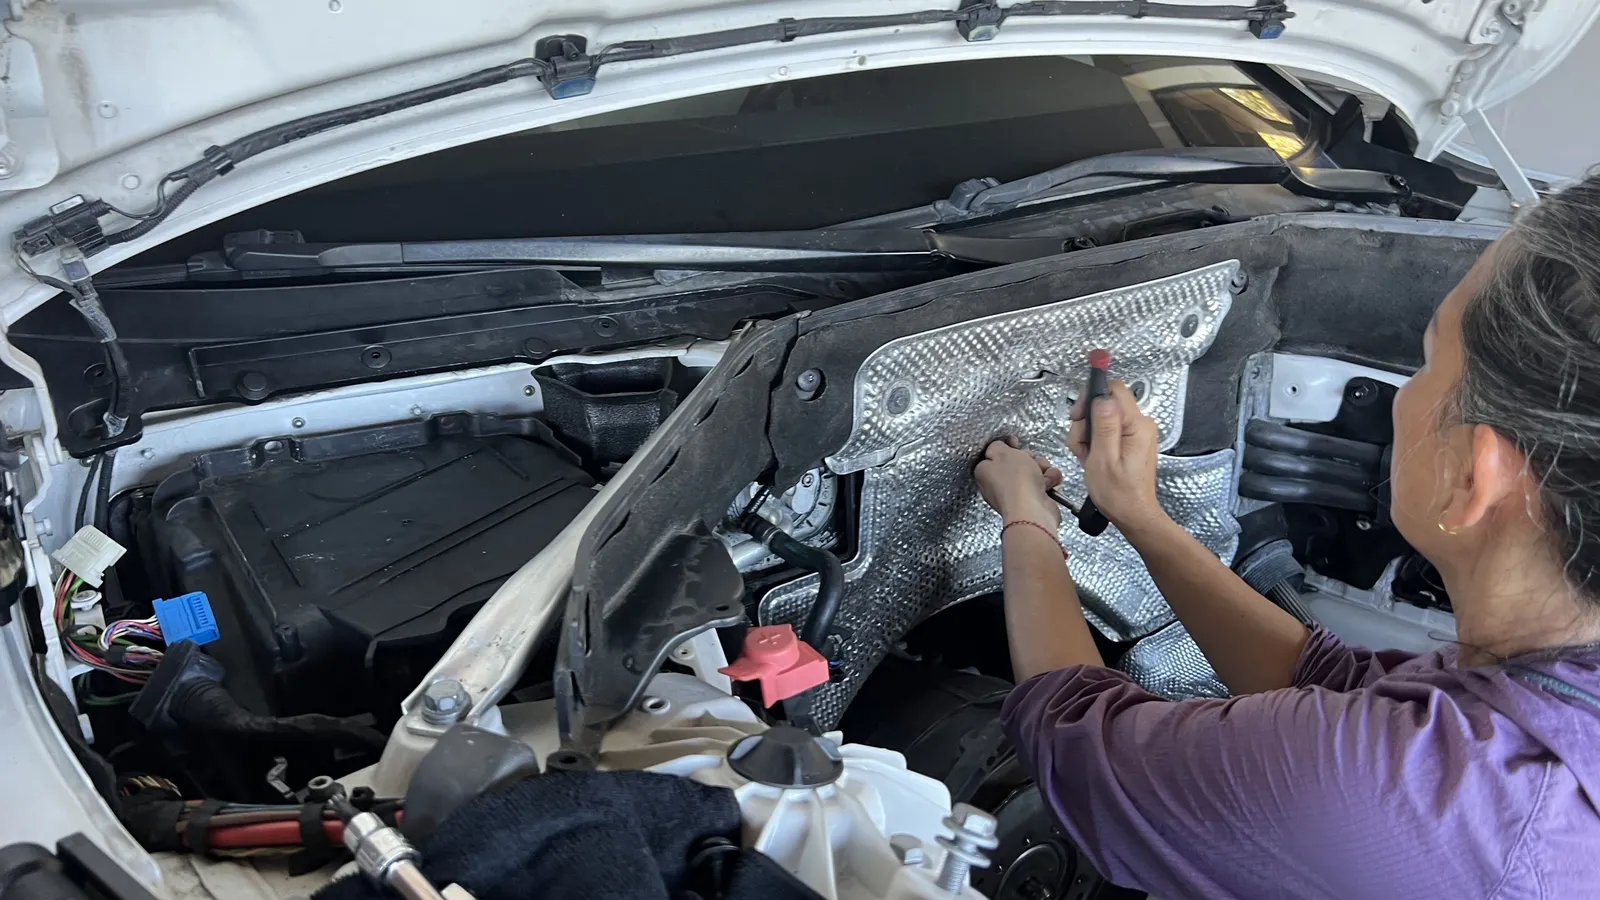
 Empty engine bay prep — firewall / heat-shield area before the engine returns.
 Working the firewall heat shield in the empty bay — movie for reassembly reference.
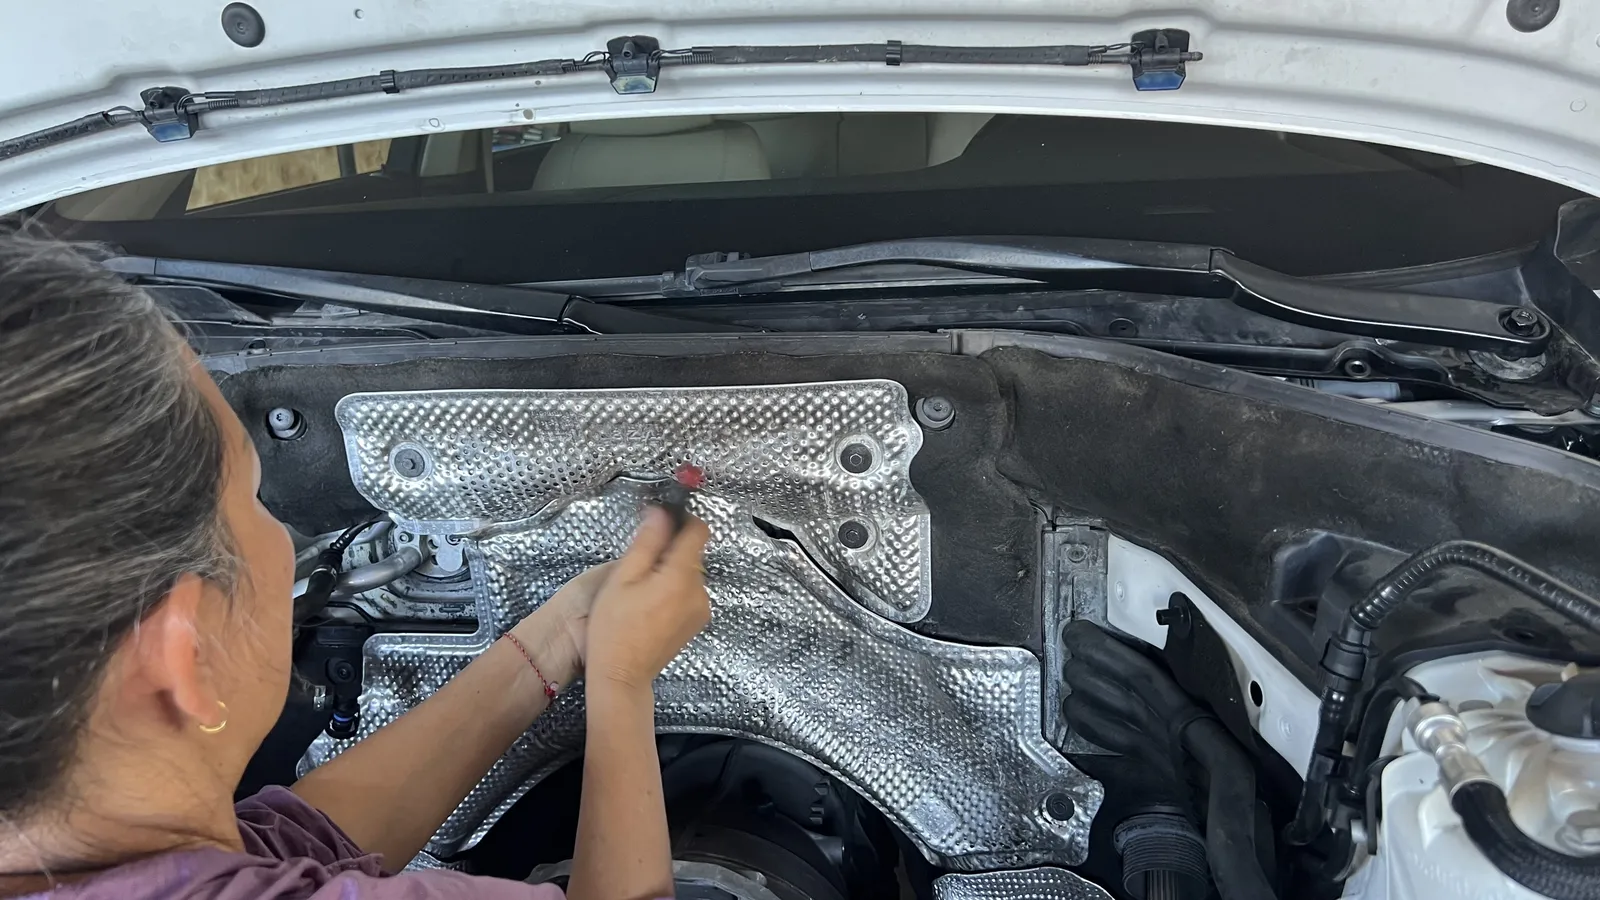 Empty bay heat-shield / firewall area after prep work.
 Empty bay — heat shield and remaining hoses tucked for the install.
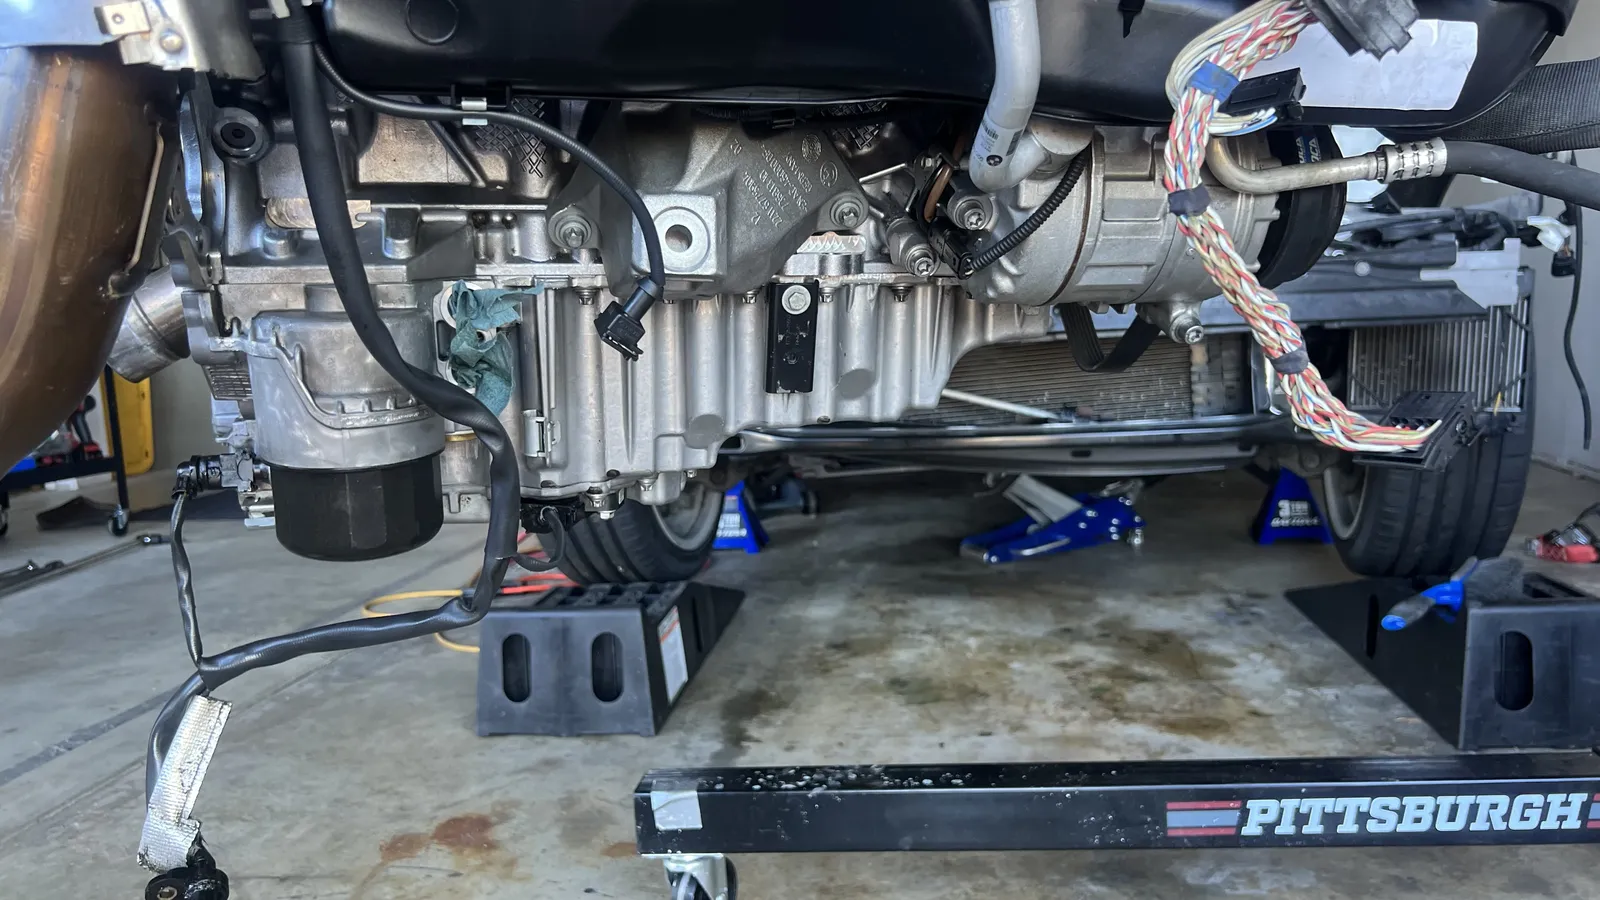
 Starter and nearby harness area — connection reference for reinstall.
 Lower block / starter region — wiring and exhaust proximity.
 Starter install area — loom and connector layout.
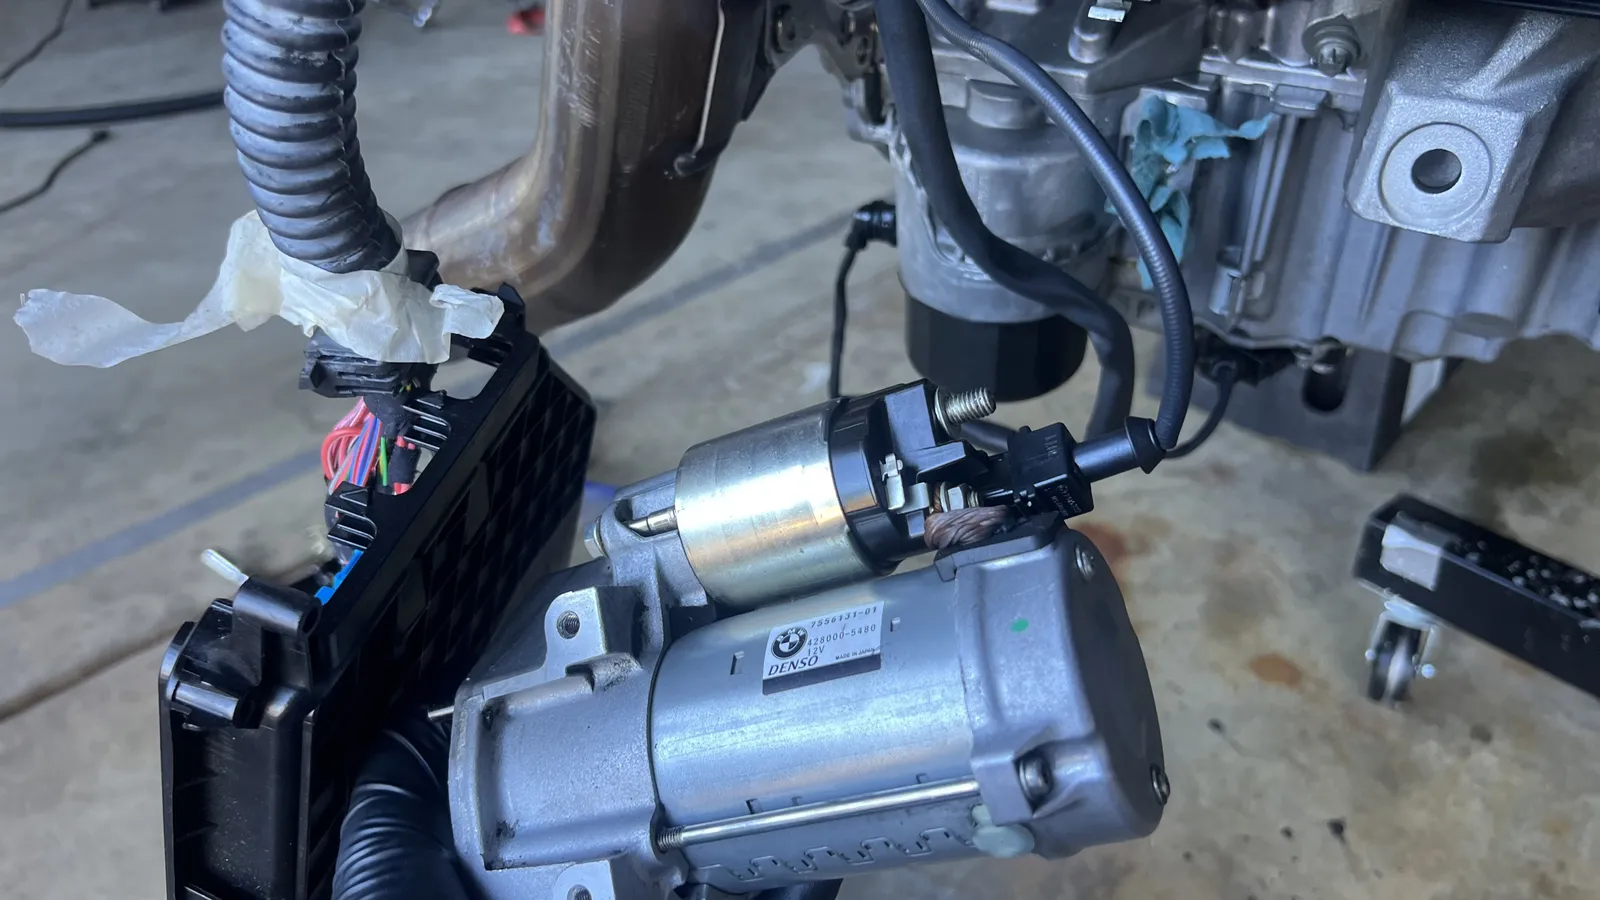
 Denso starter (7596131-01) and solenoid connections — part and plug reference.
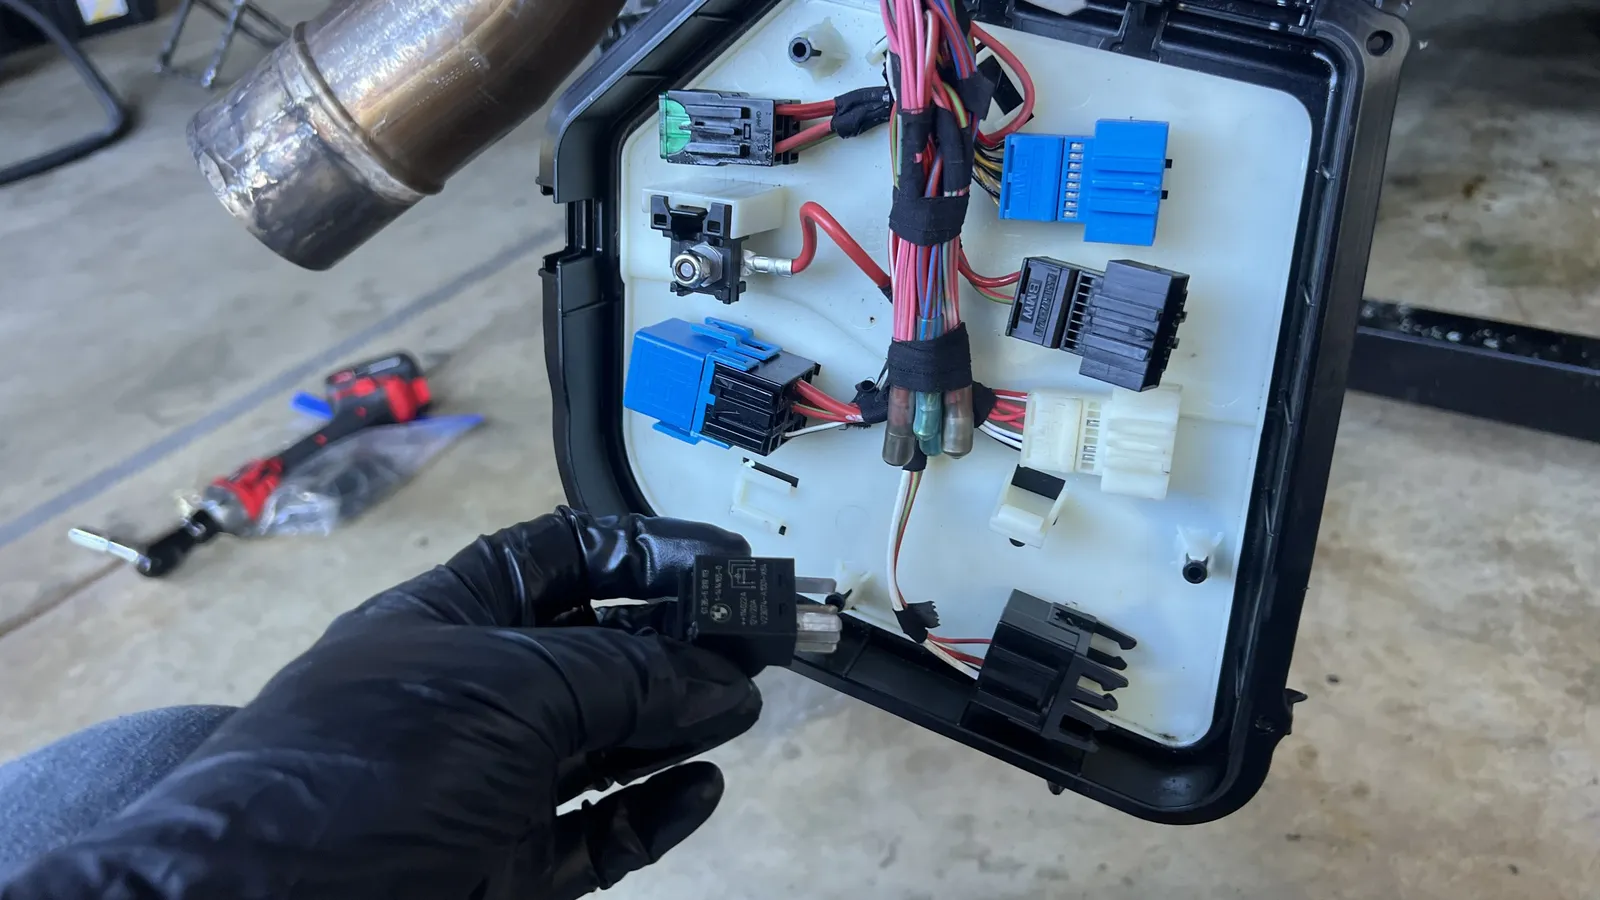
 Denso starter in hand by the junction box — wiring and orientation for reinstall.
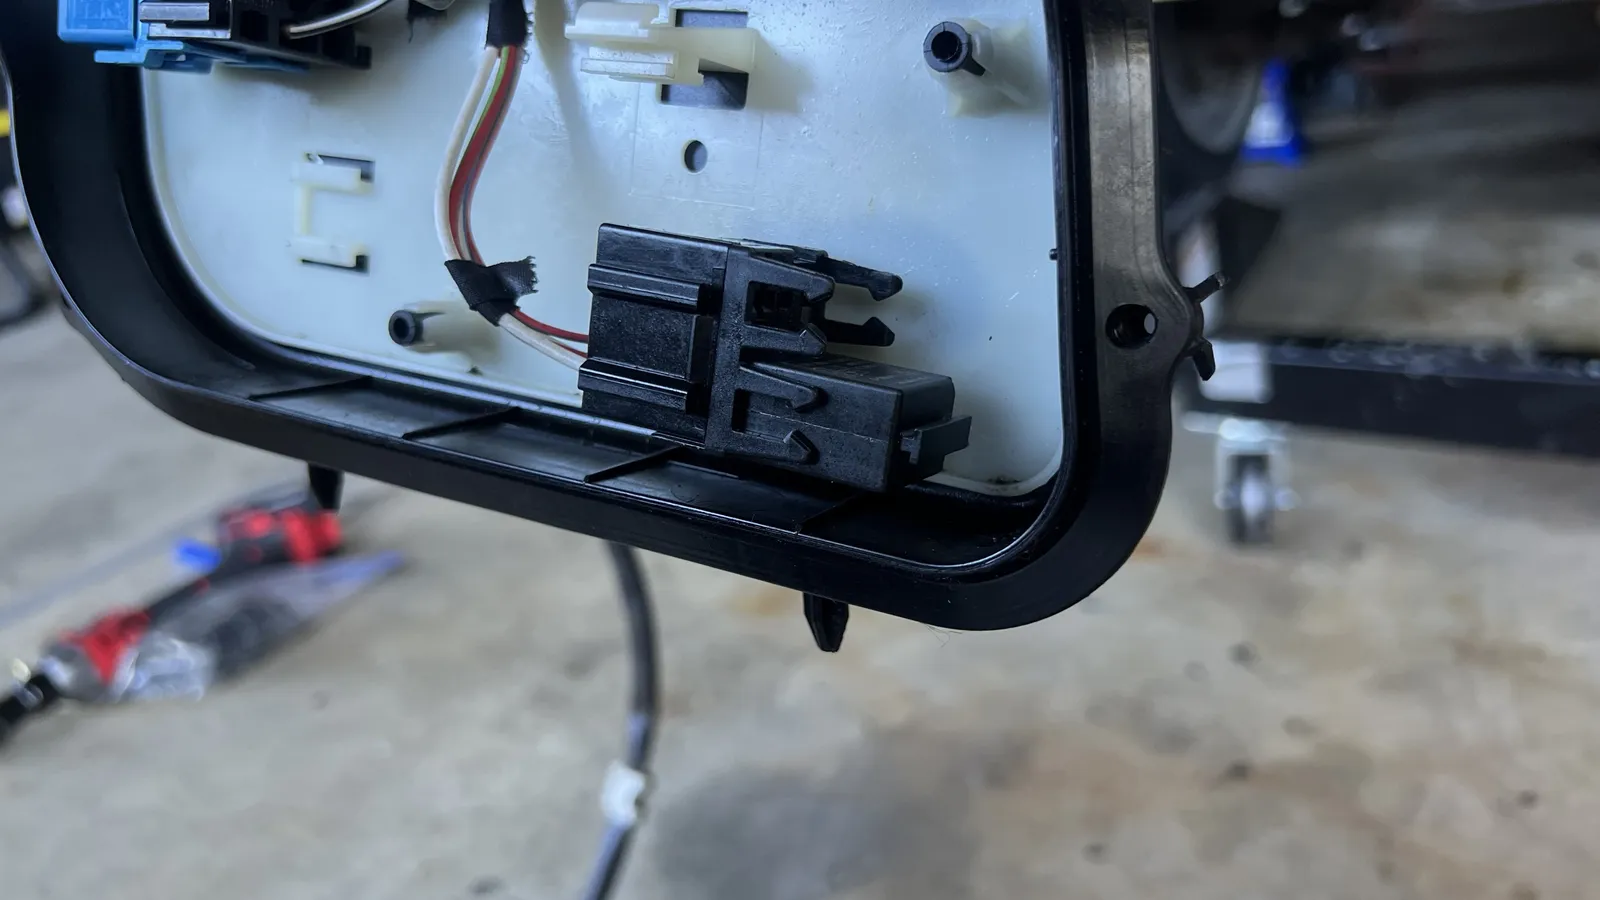
 Starter / junction-box area — tagged loom for later identification.
 Lower engine electrics near the starter mount.
 Starter and oil-filter region — clearances before the engine goes back in.
 Front harmonic balancer / crank pulley close-up after stretch-torque install.
 Crank pulley face — center bolt and surrounding Torx fasteners.
 Harmonic balancer installed — BMW markings visible on the pulley.
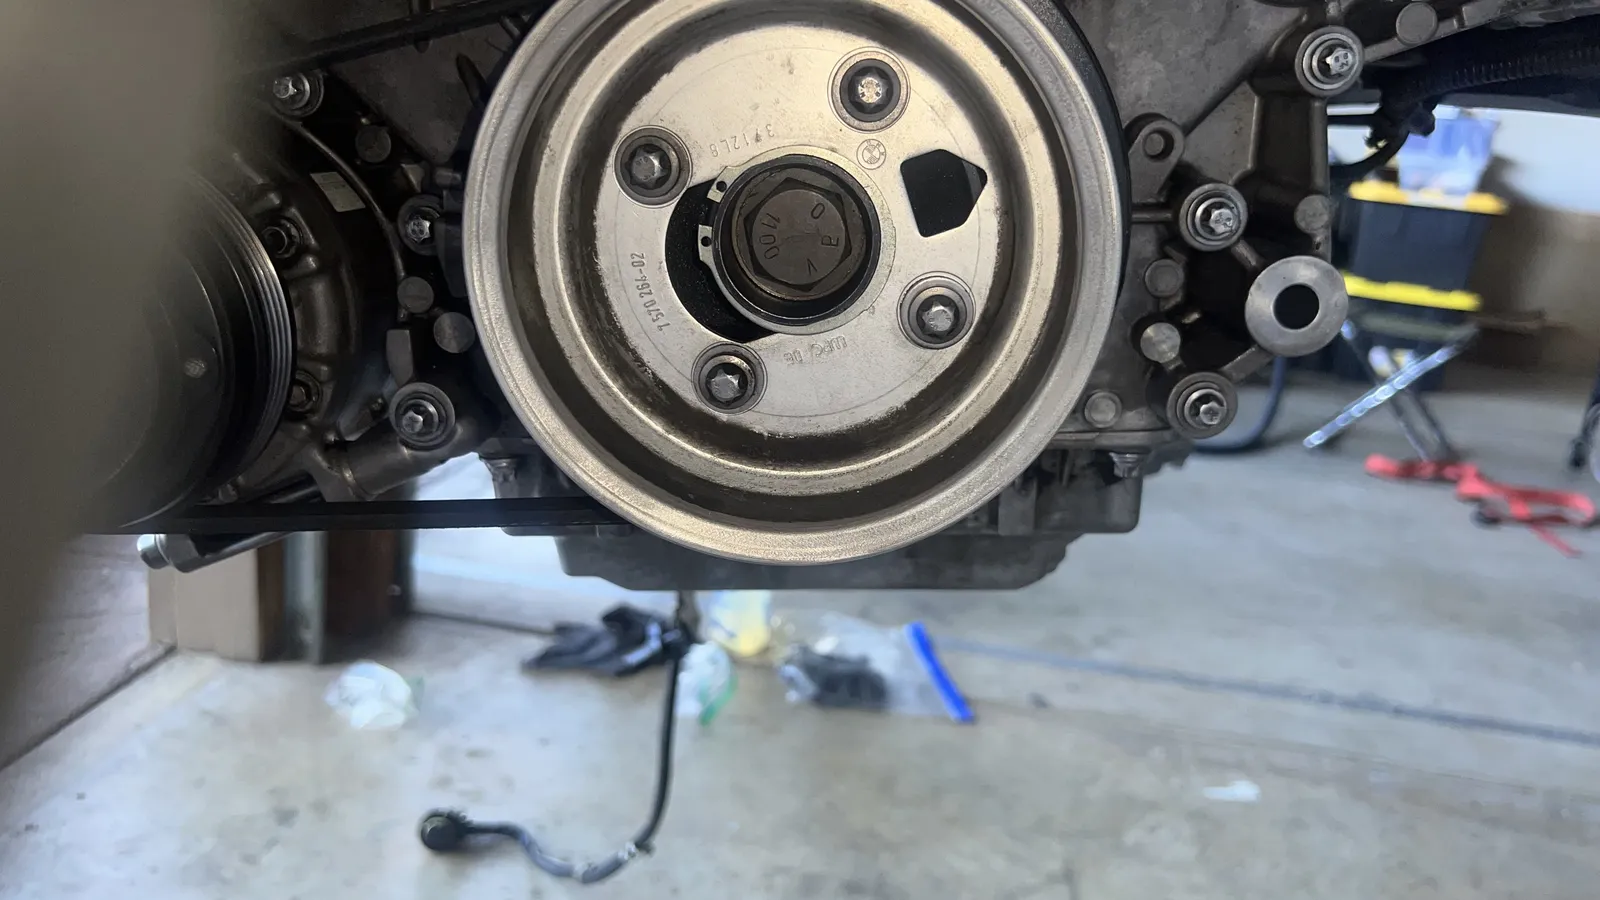 Harmonic balancer close-up — center 10.9 bolt and pulley part stampings.
 Front pulley stack with serpentine belt routed.
 Front of the long block — belt and accessory drive ready for the hoist.
Into the garage
Sep 2026I moved the engine from the extra room where I did the rebuild to the garage, in front of the car. There I did the remaining small items and double-checked that everything was connected and tight. More hoses and connectors went on and were verified before the engine went in.
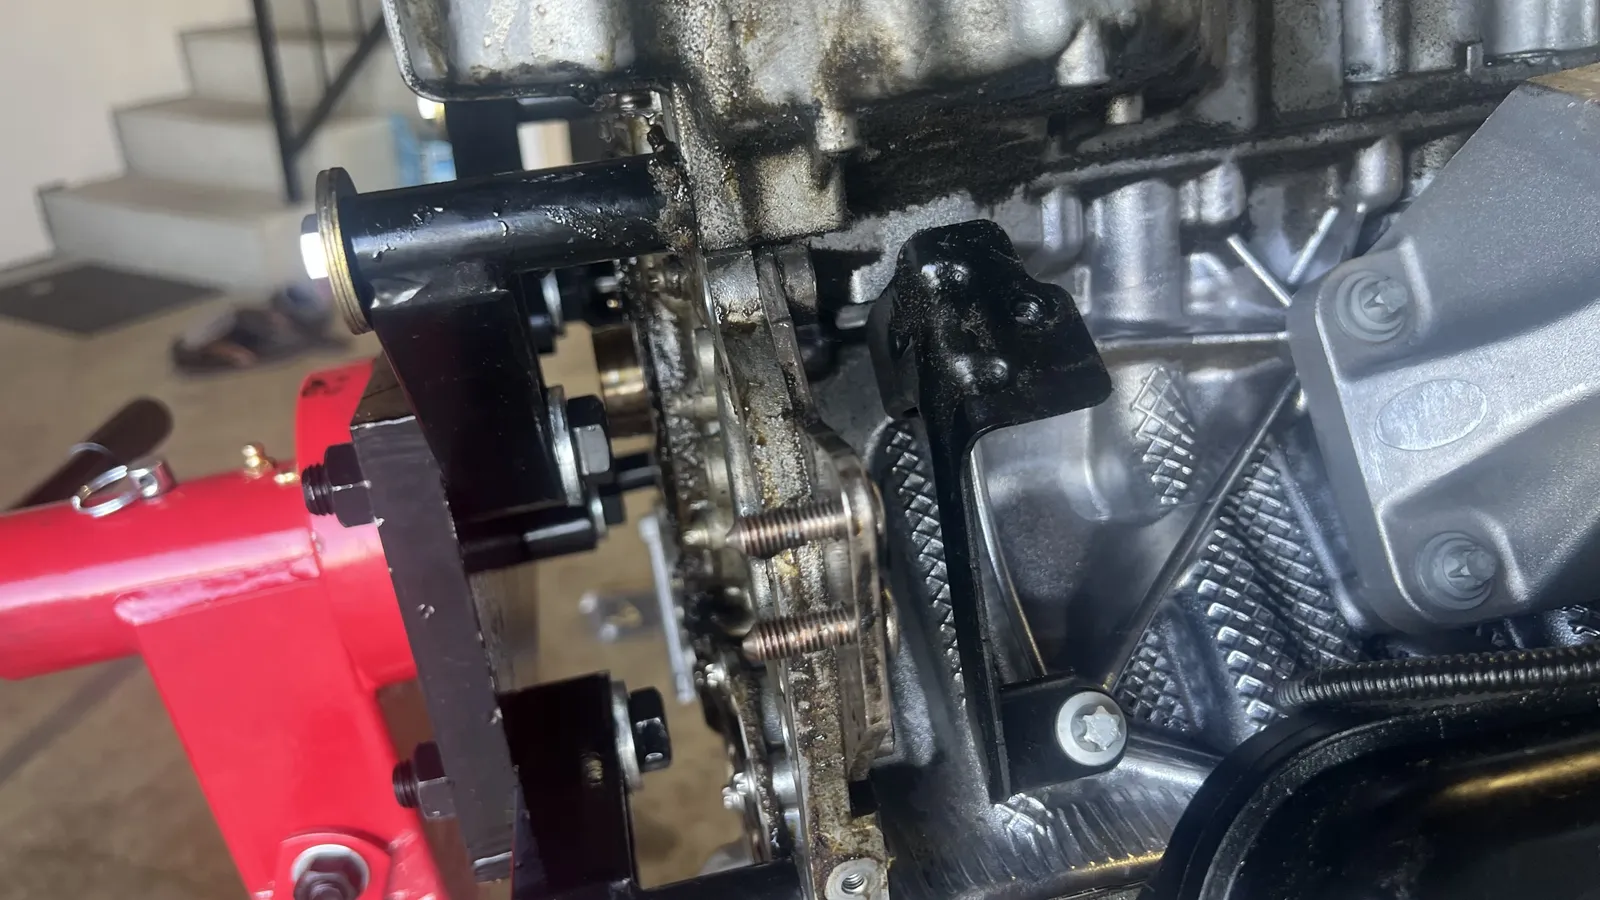
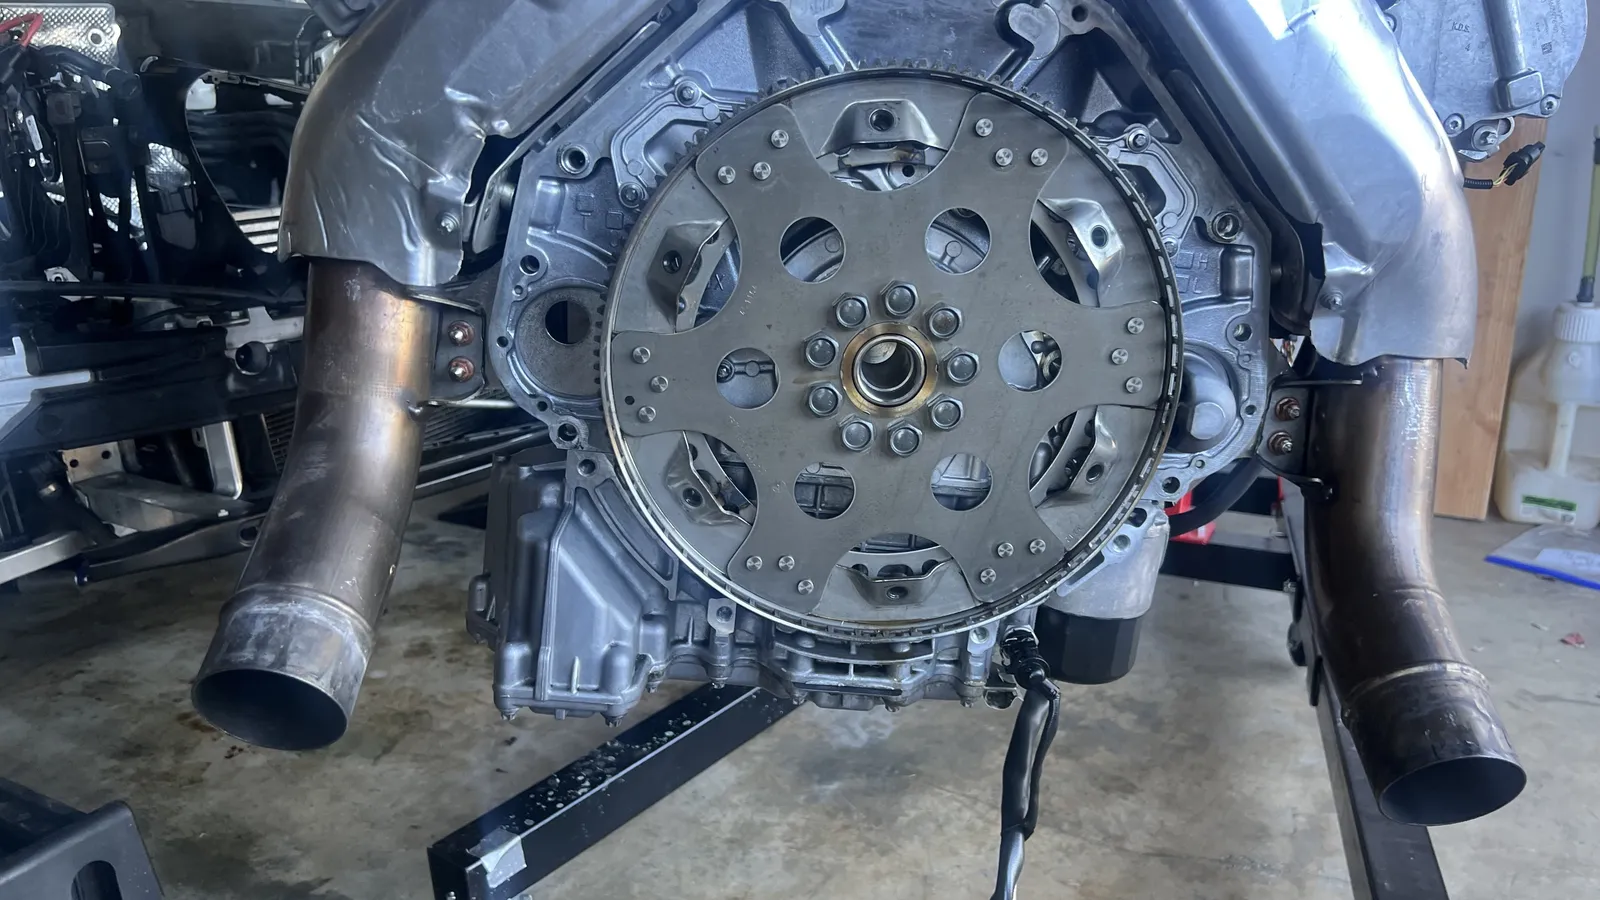
To install the flex plate on the back, I had to hoist the engine. It wasn’t uneventful. On the last bolt holding the engine to the stand there was too much pressure from the hoist, and as I backed the bolt out, the engine lifted and damaged the threads. It’s the passenger-side bellhousing bolt hole — the one with the alignment dowel ring. I didn’t know it was truly stripped until I tried to install the bolt after mating the engine to the transmission (a really bad choice).
It still isn’t tapped. The plan is to work a tap into the hole from underneath to clean up the threads — after I’ve verified the engine is healthy.
Back in the bay
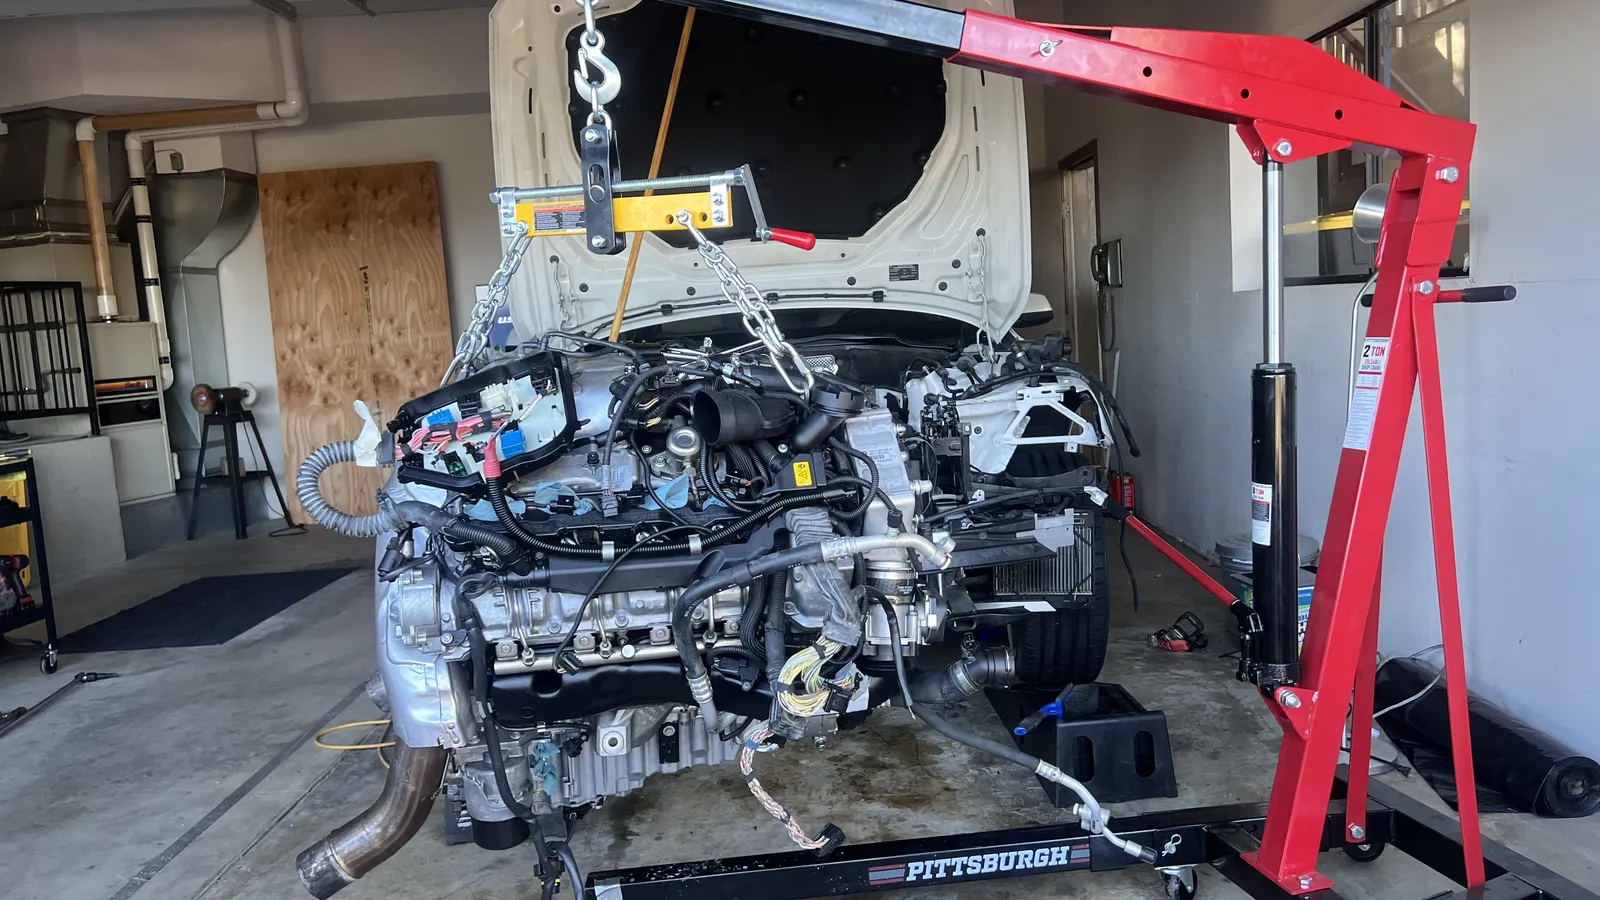
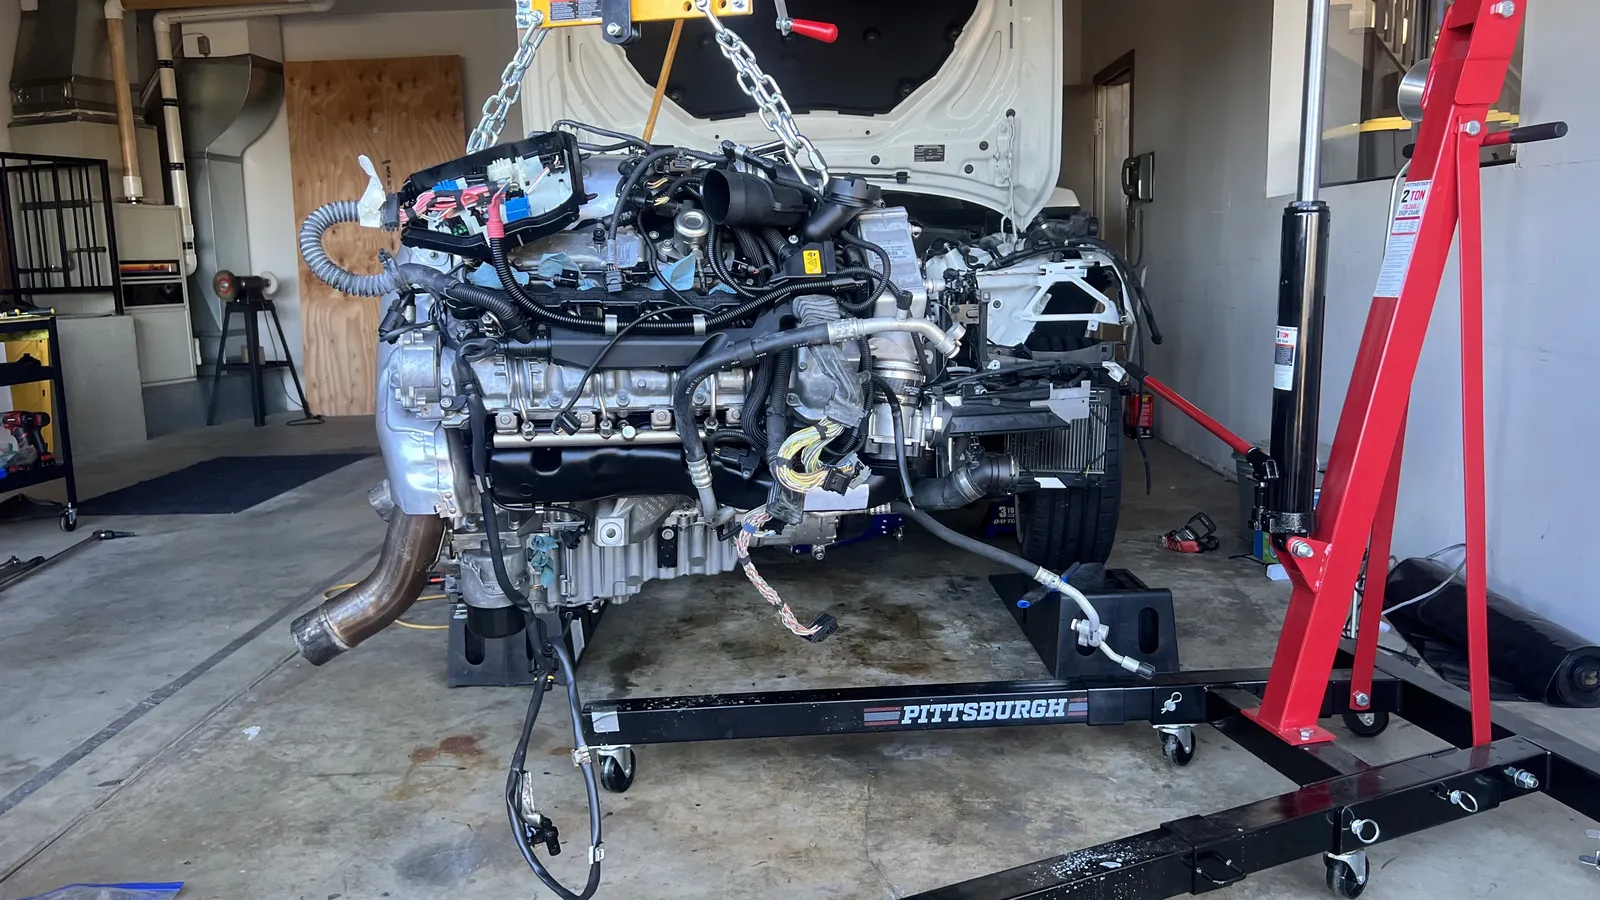
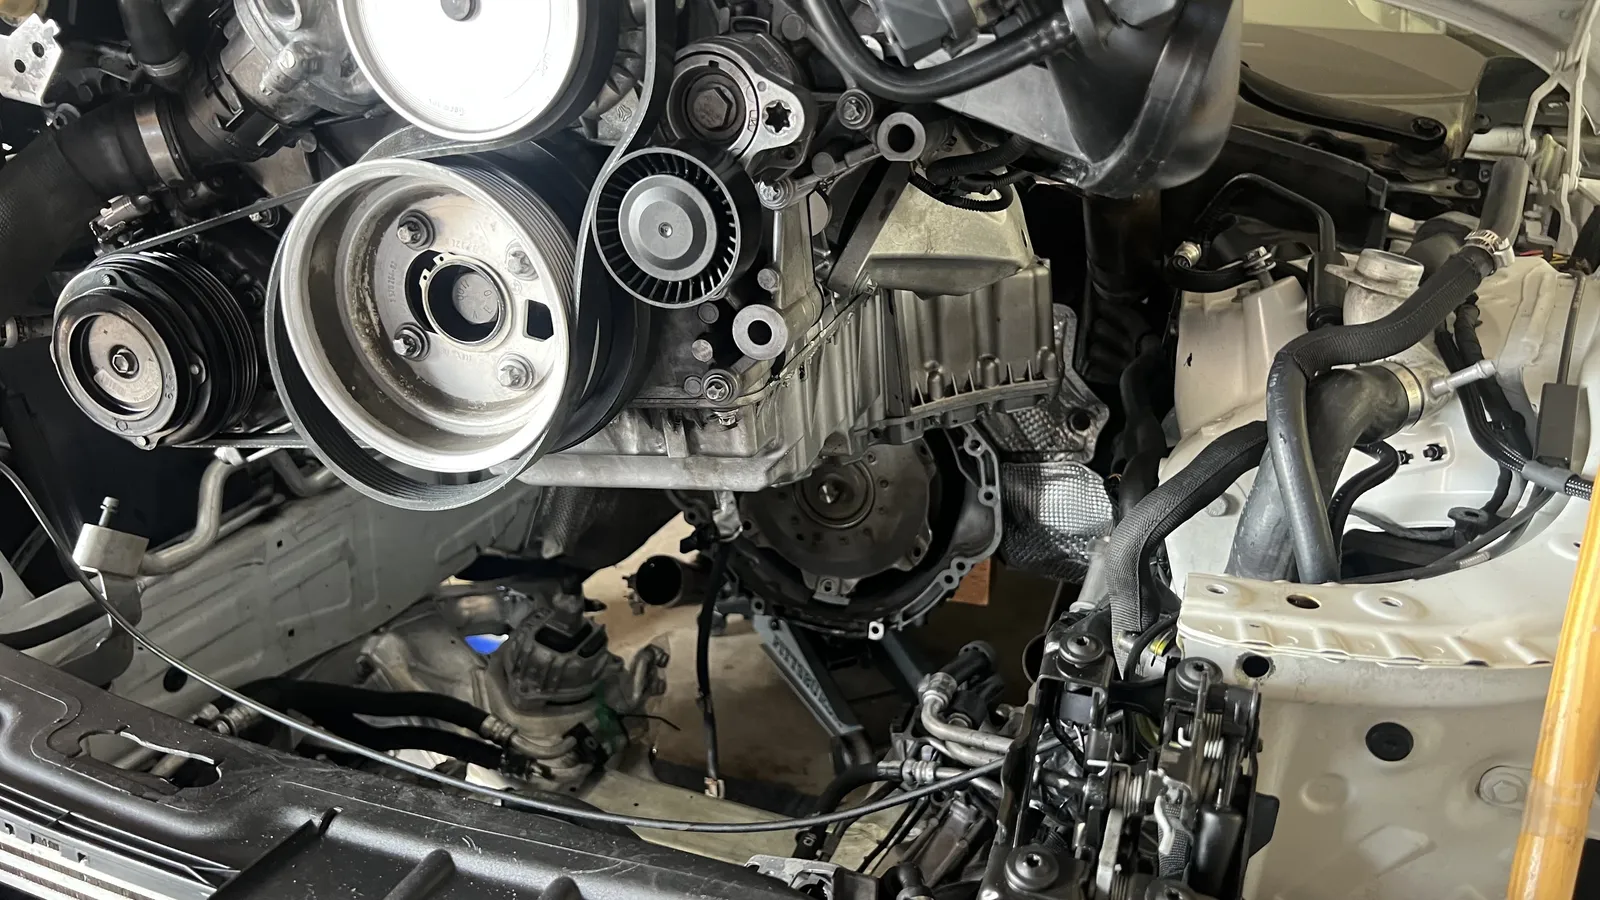
Sep 20 – Sep 22, 2026On September 20 the dressed long block went back on the hoist and leveler, was tilted to clear the radiator support, and was lowered into the bay. By the morning of the 22nd it was seated, and from underneath the oil pan met the bellhousing and the exhaust lined up perfectly.
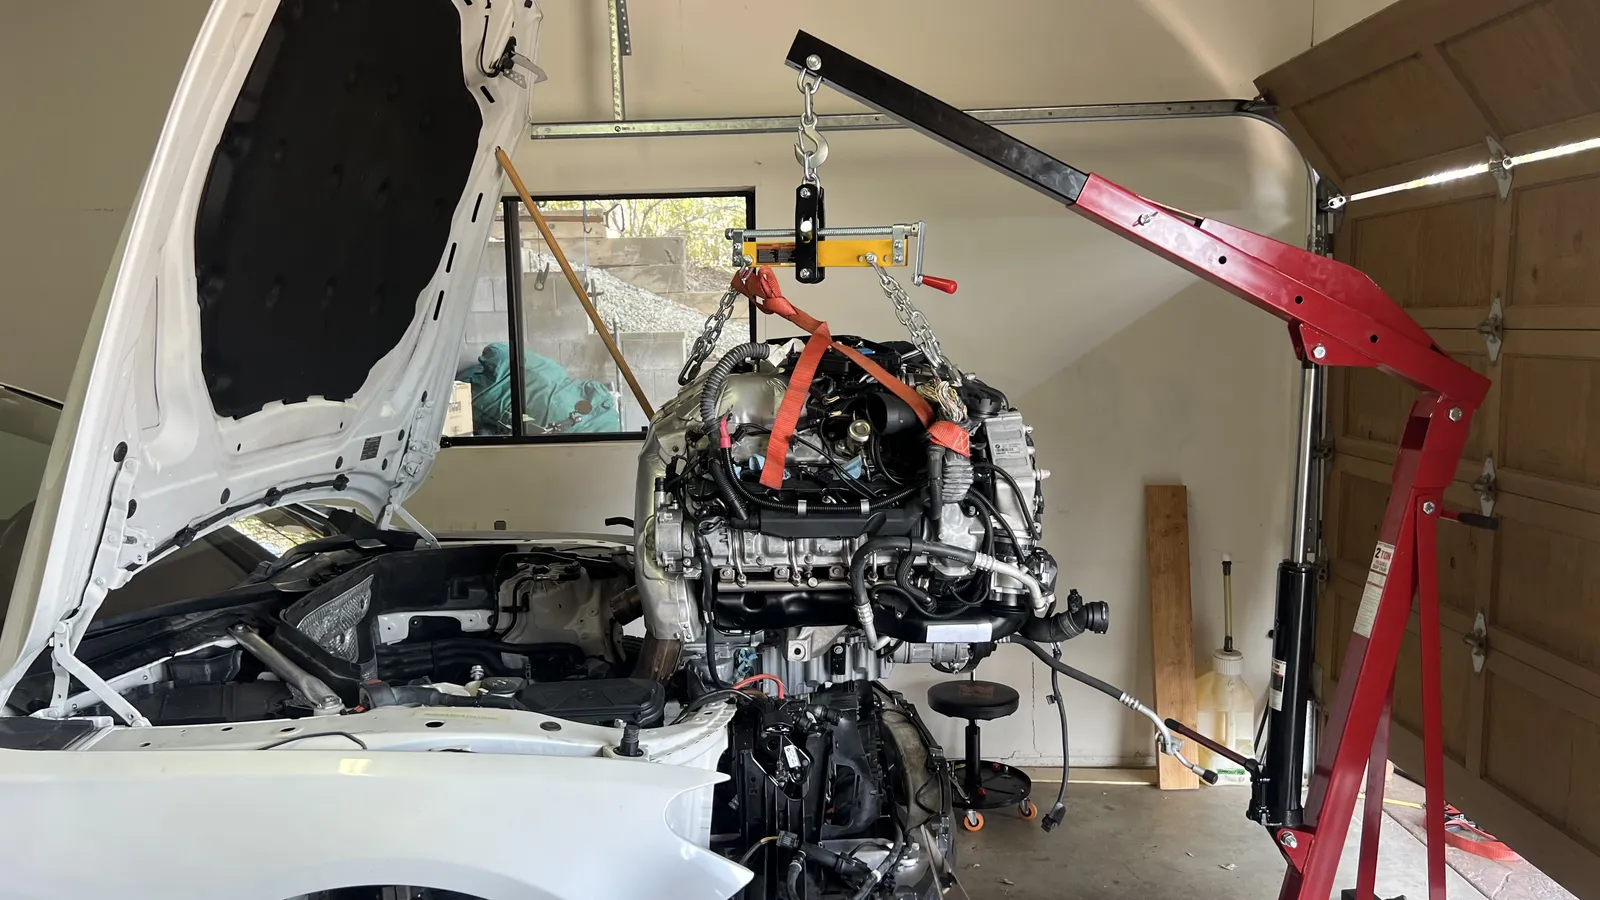
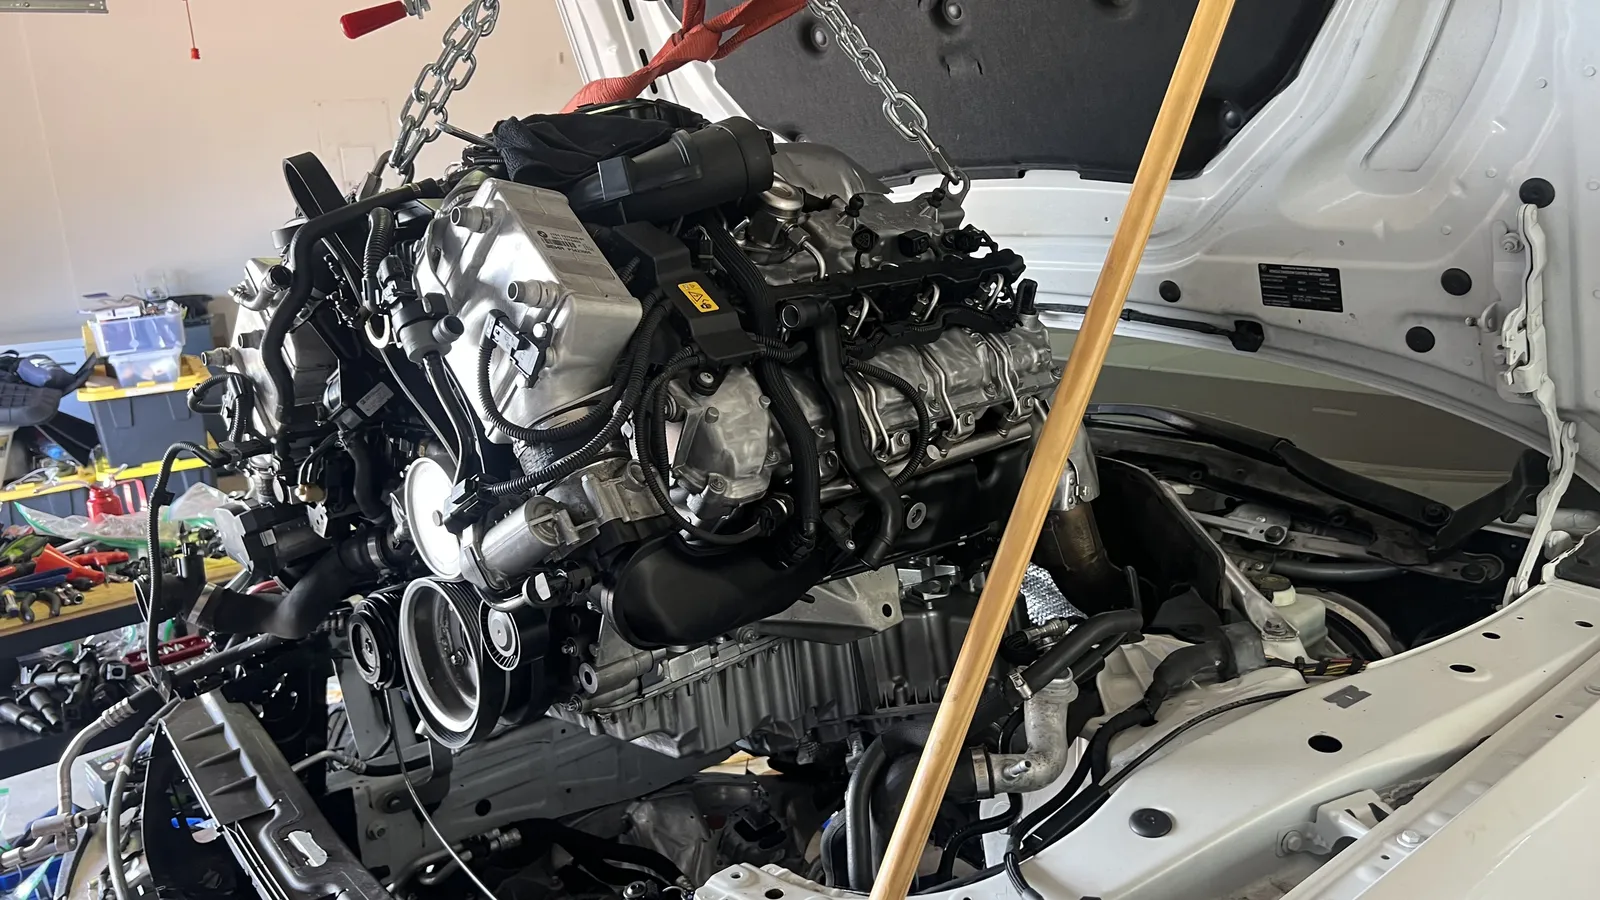
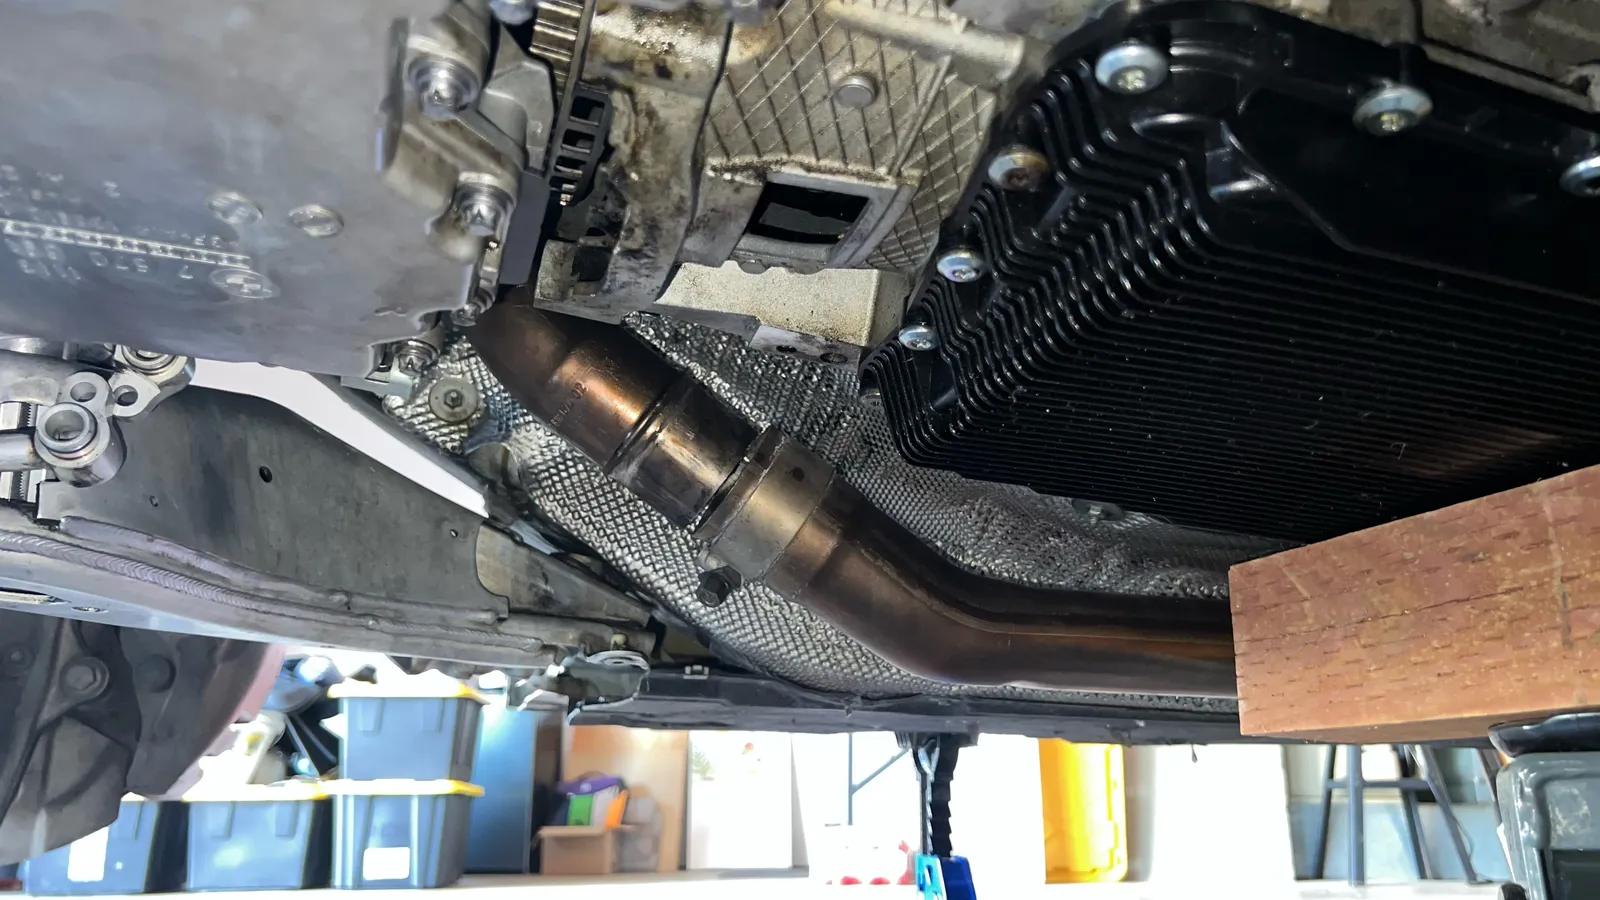
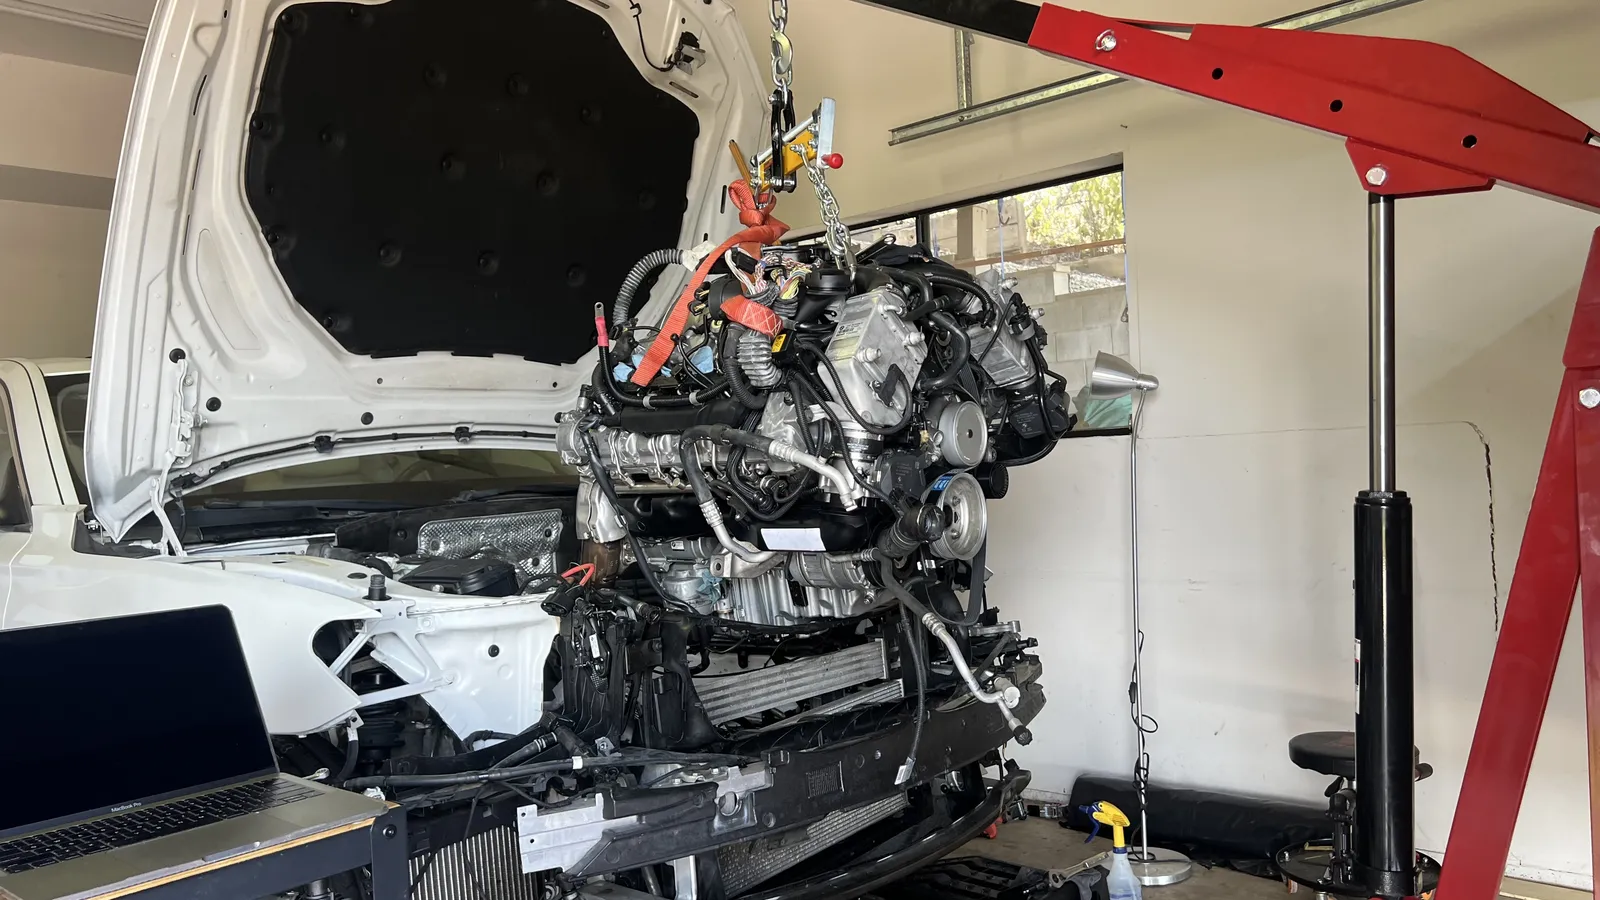 Hoisting the dressed long block toward the empty bay.
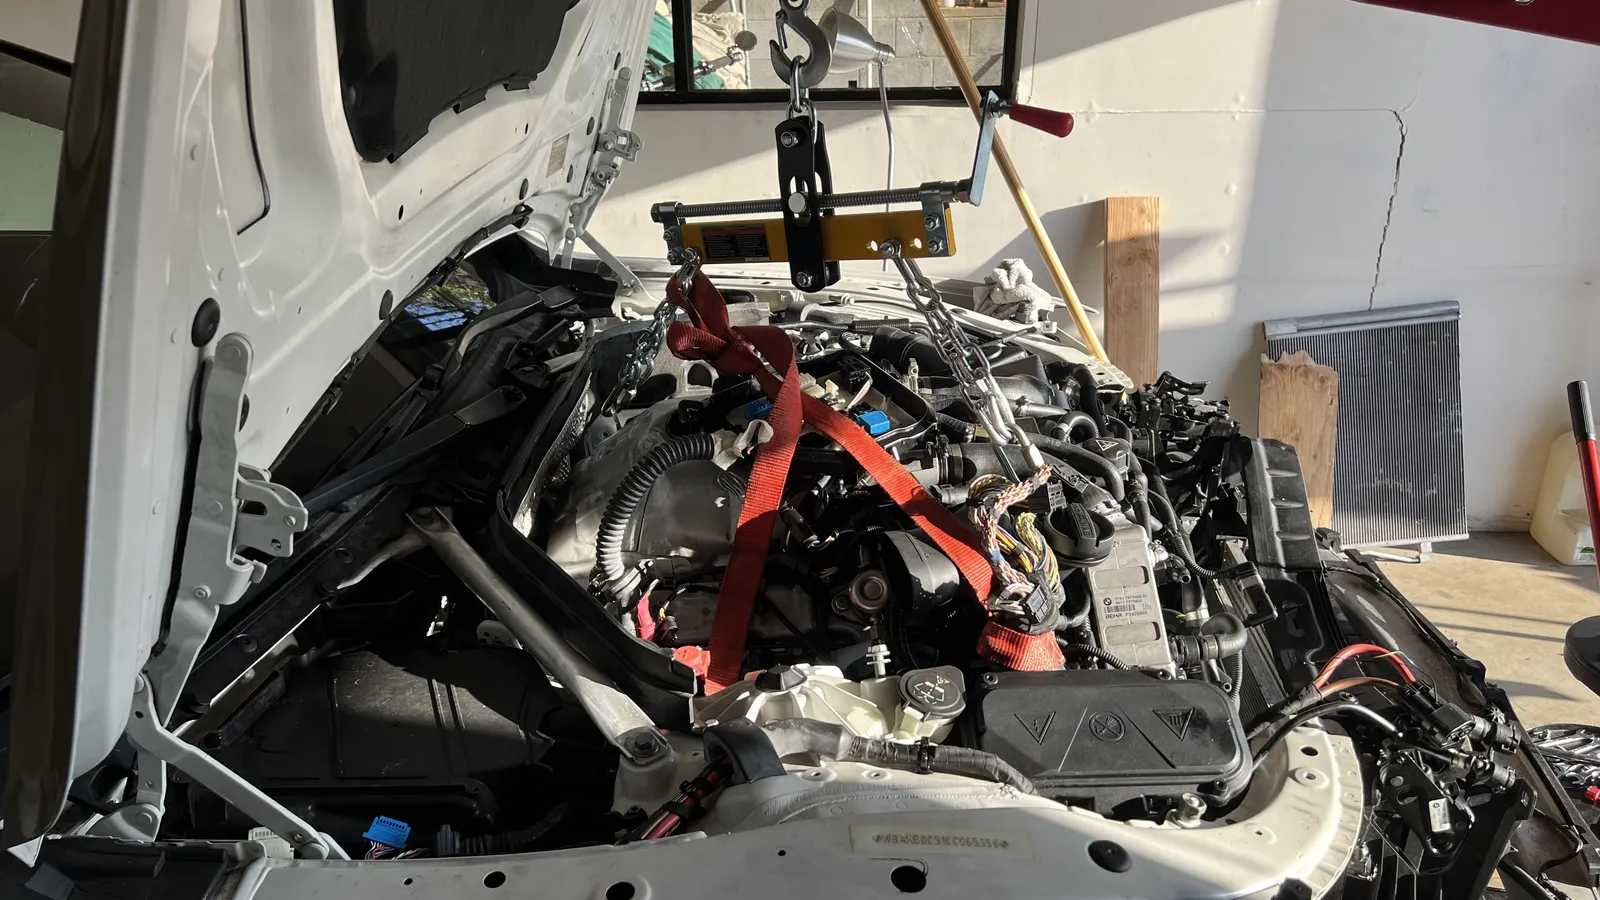
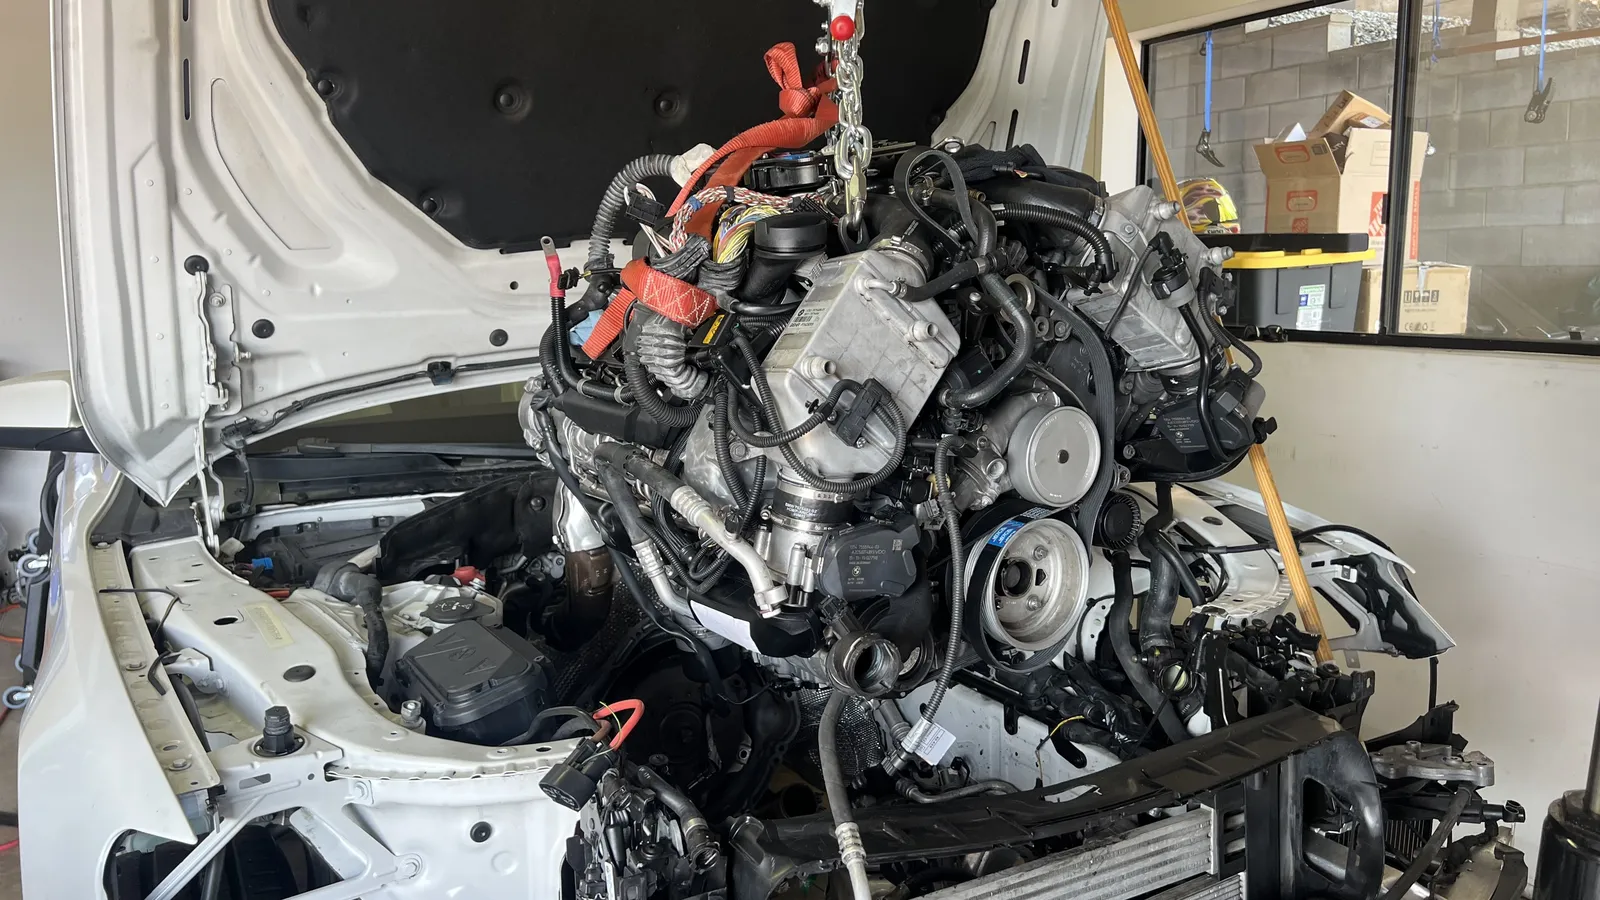 Long block on the hoist over the open bay — chains and leveler attached.
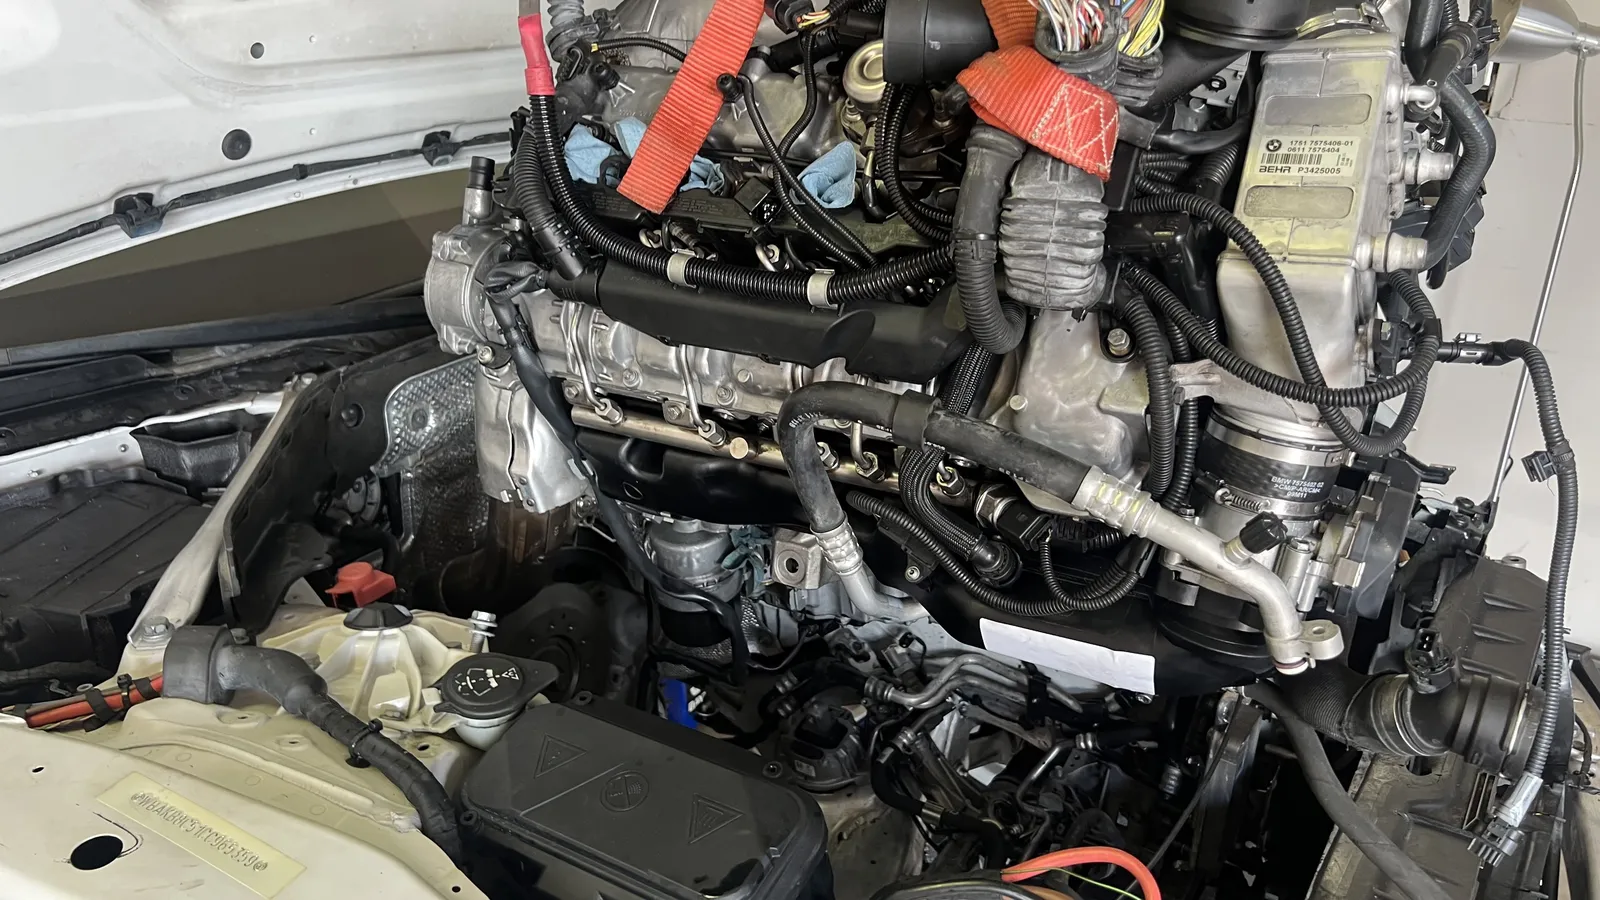 Engine suspended at the bay — tilt and clearance for lowering in.
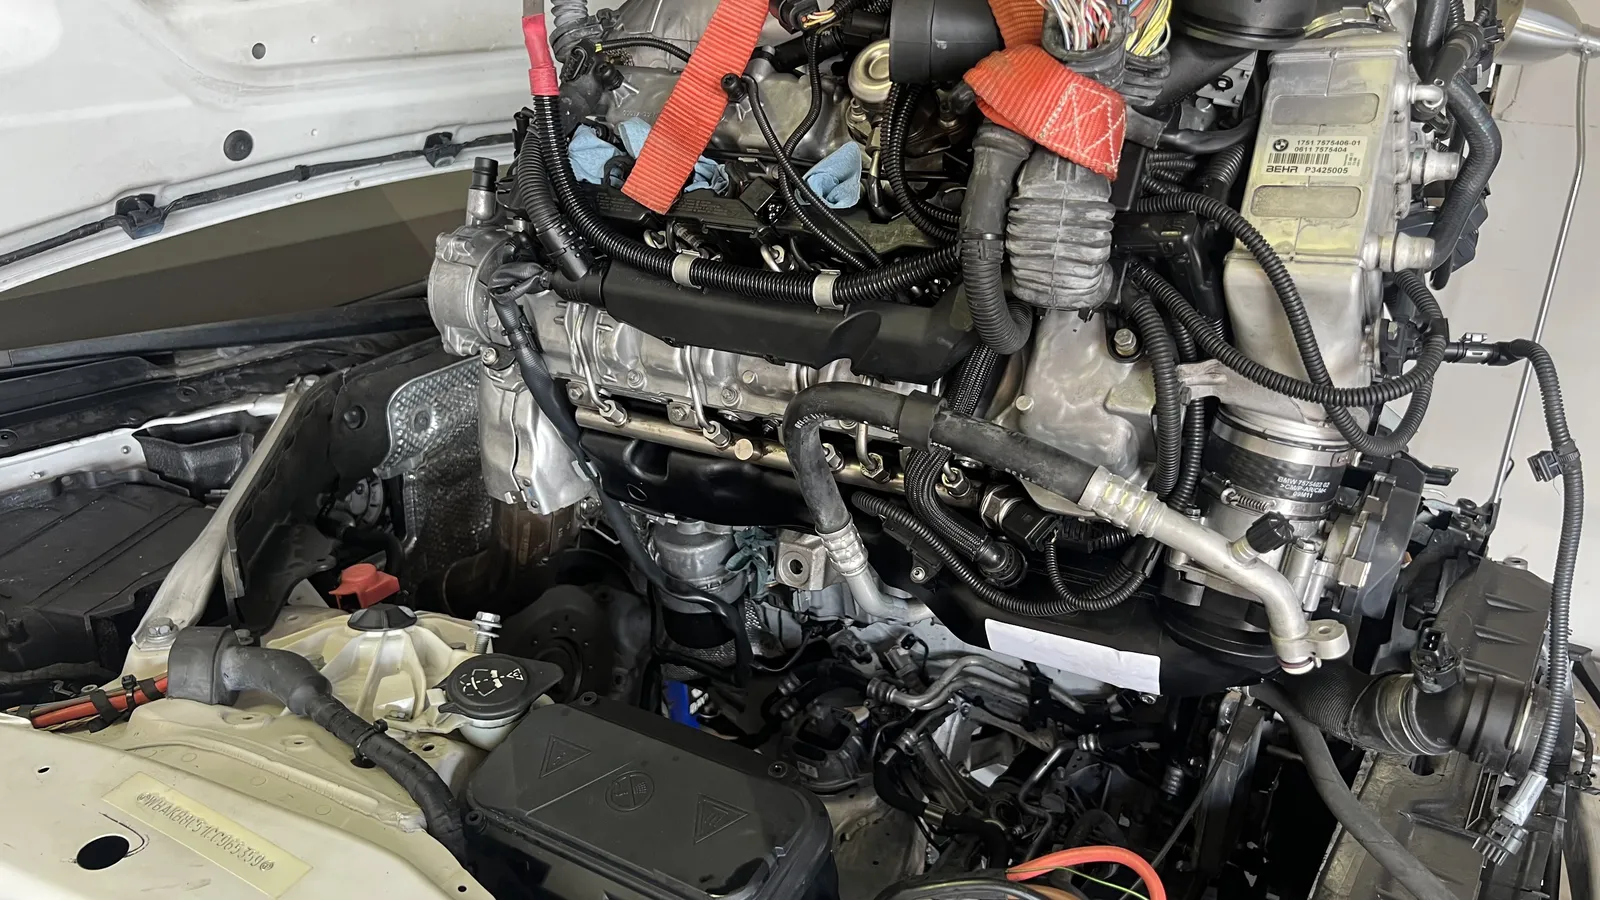 Hoist approach — front of the engine facing the radiator support.
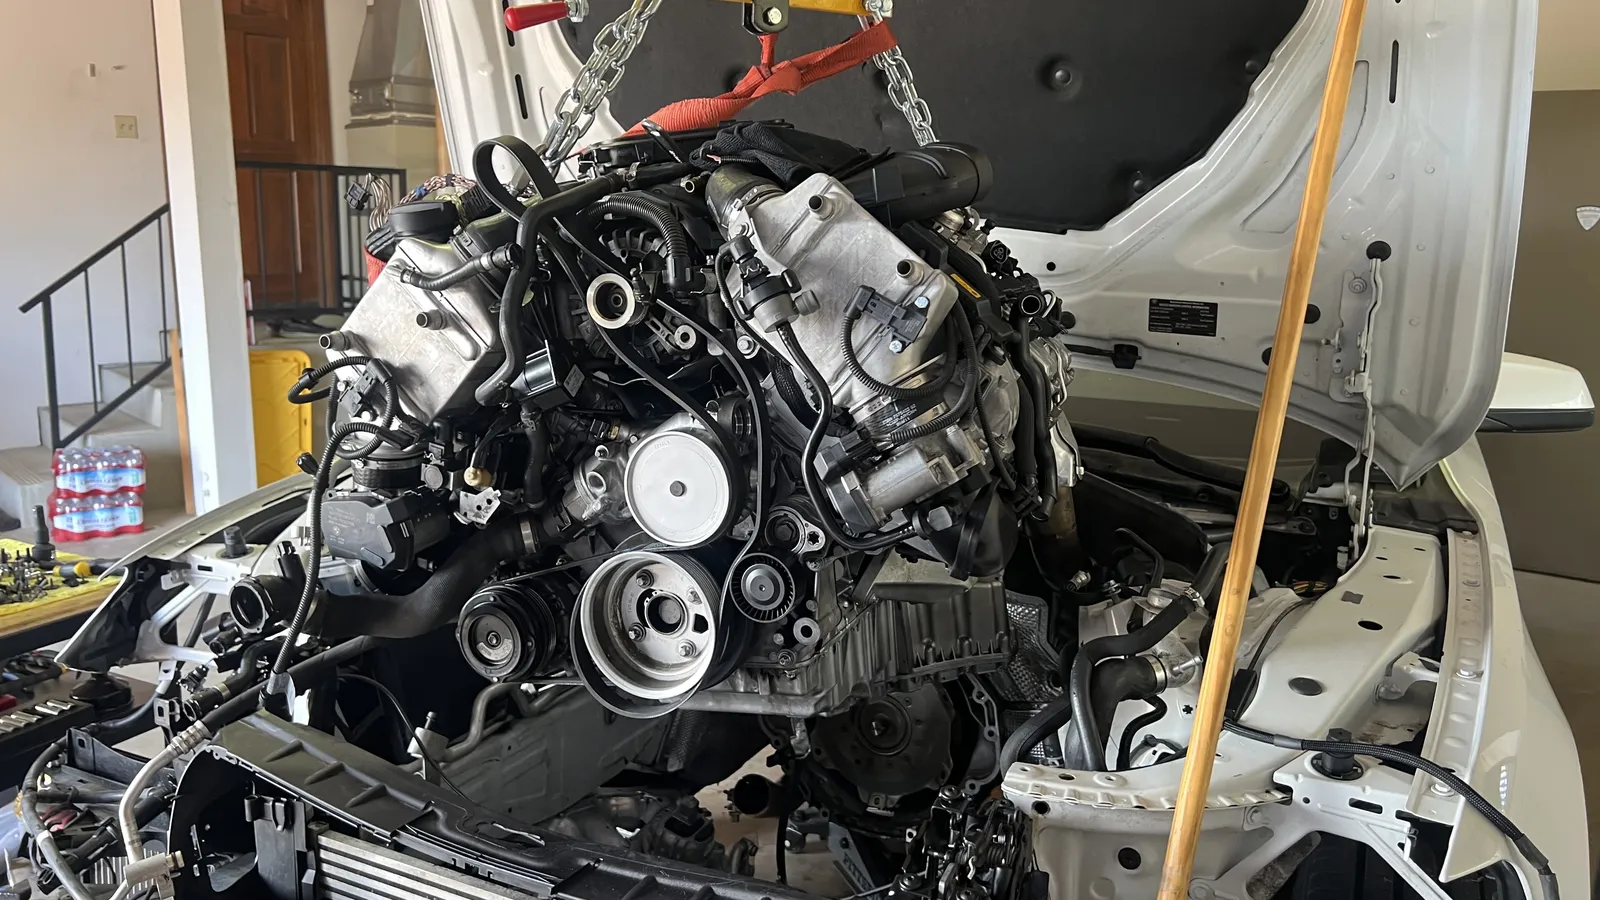 Lowering the long block toward the mounts — bay cleared for entry.
 Guiding the long block into the bay — harnesses and hoses hanging free.
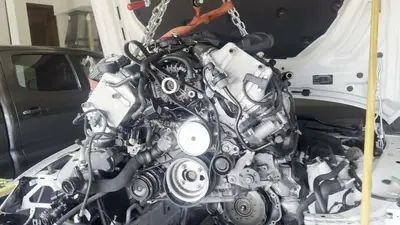 Movie: long block on the hoist / leveler over the open bay during reinstall.
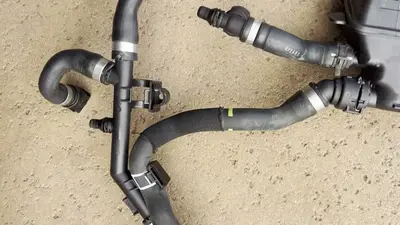 Turbo reservoir hoses
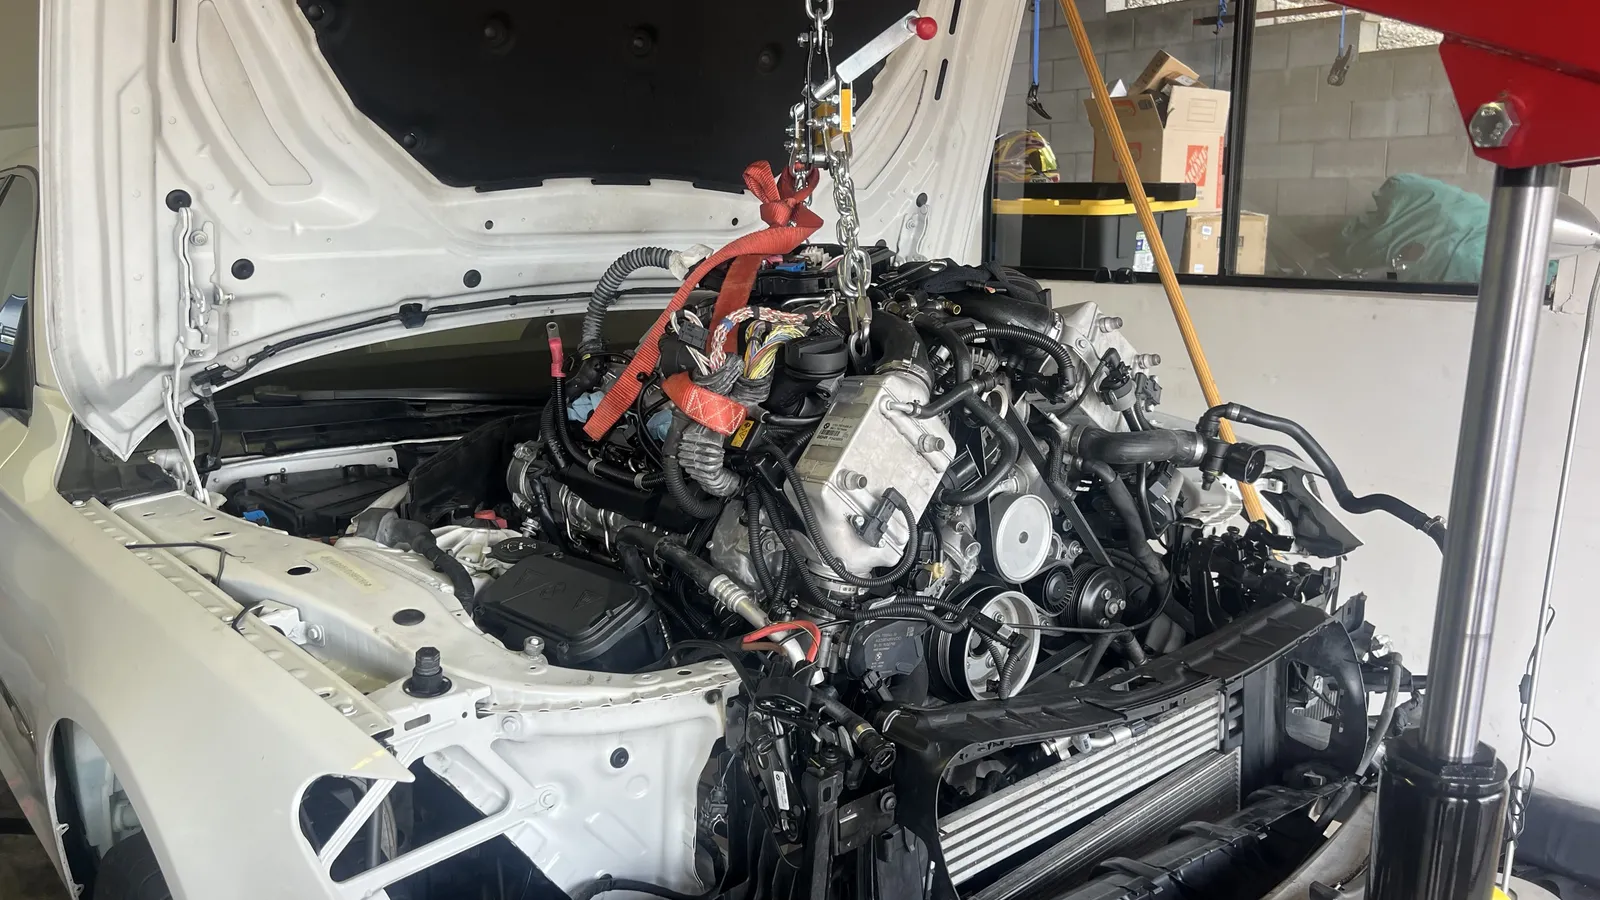 Engine hanging on the hoist — front belt drive and hanging connectors.
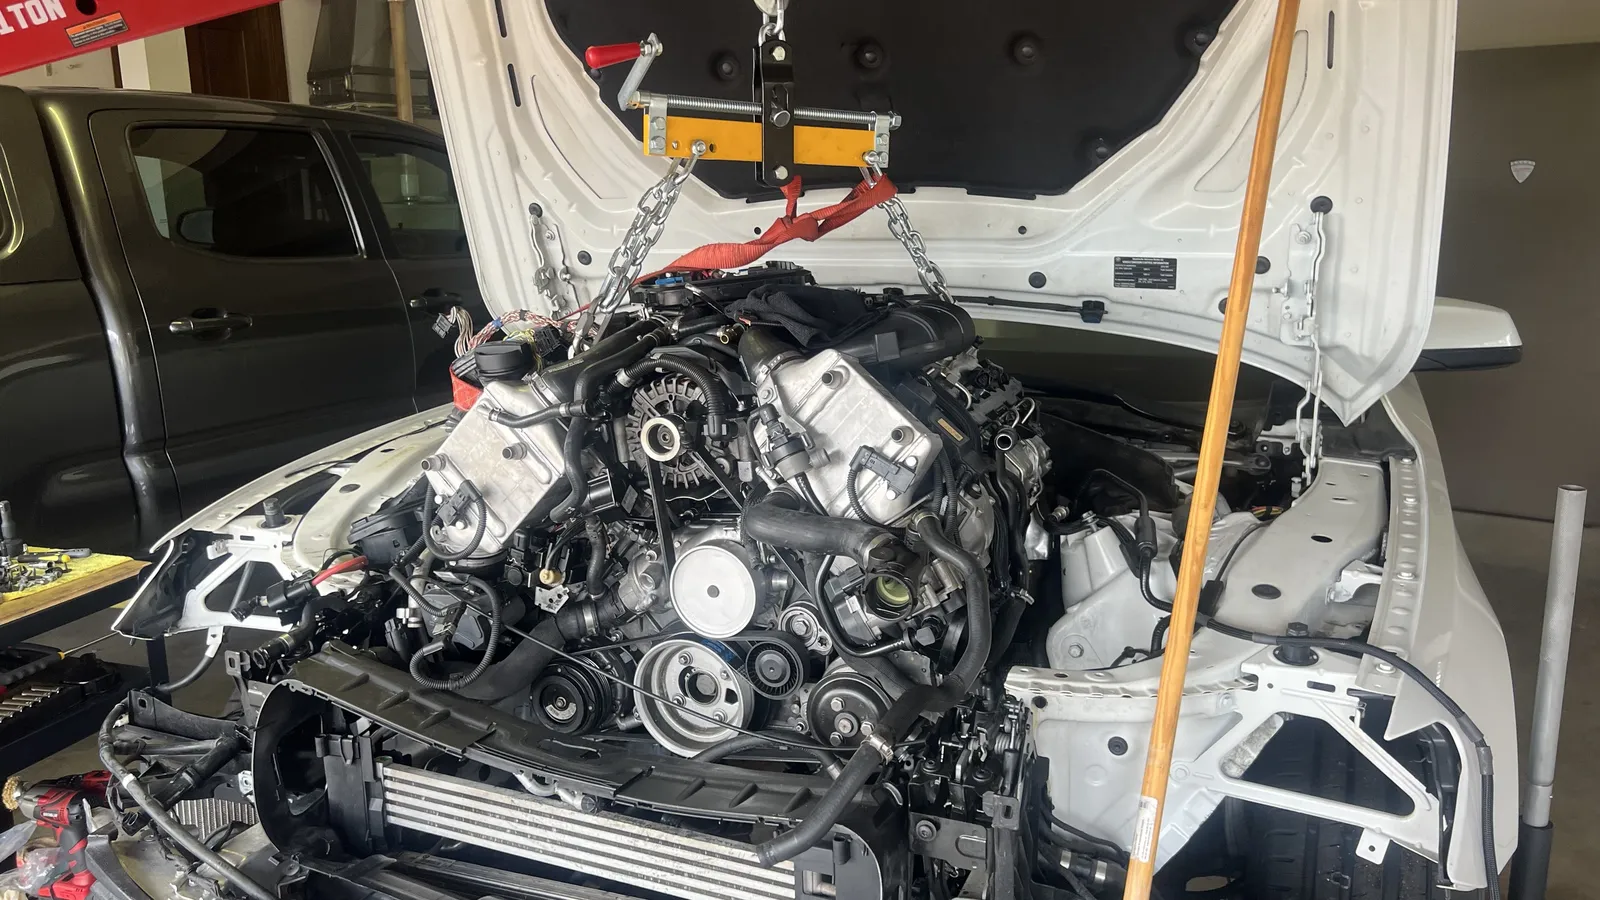 Long block suspended over the bay — passenger-side harness cluster visible.
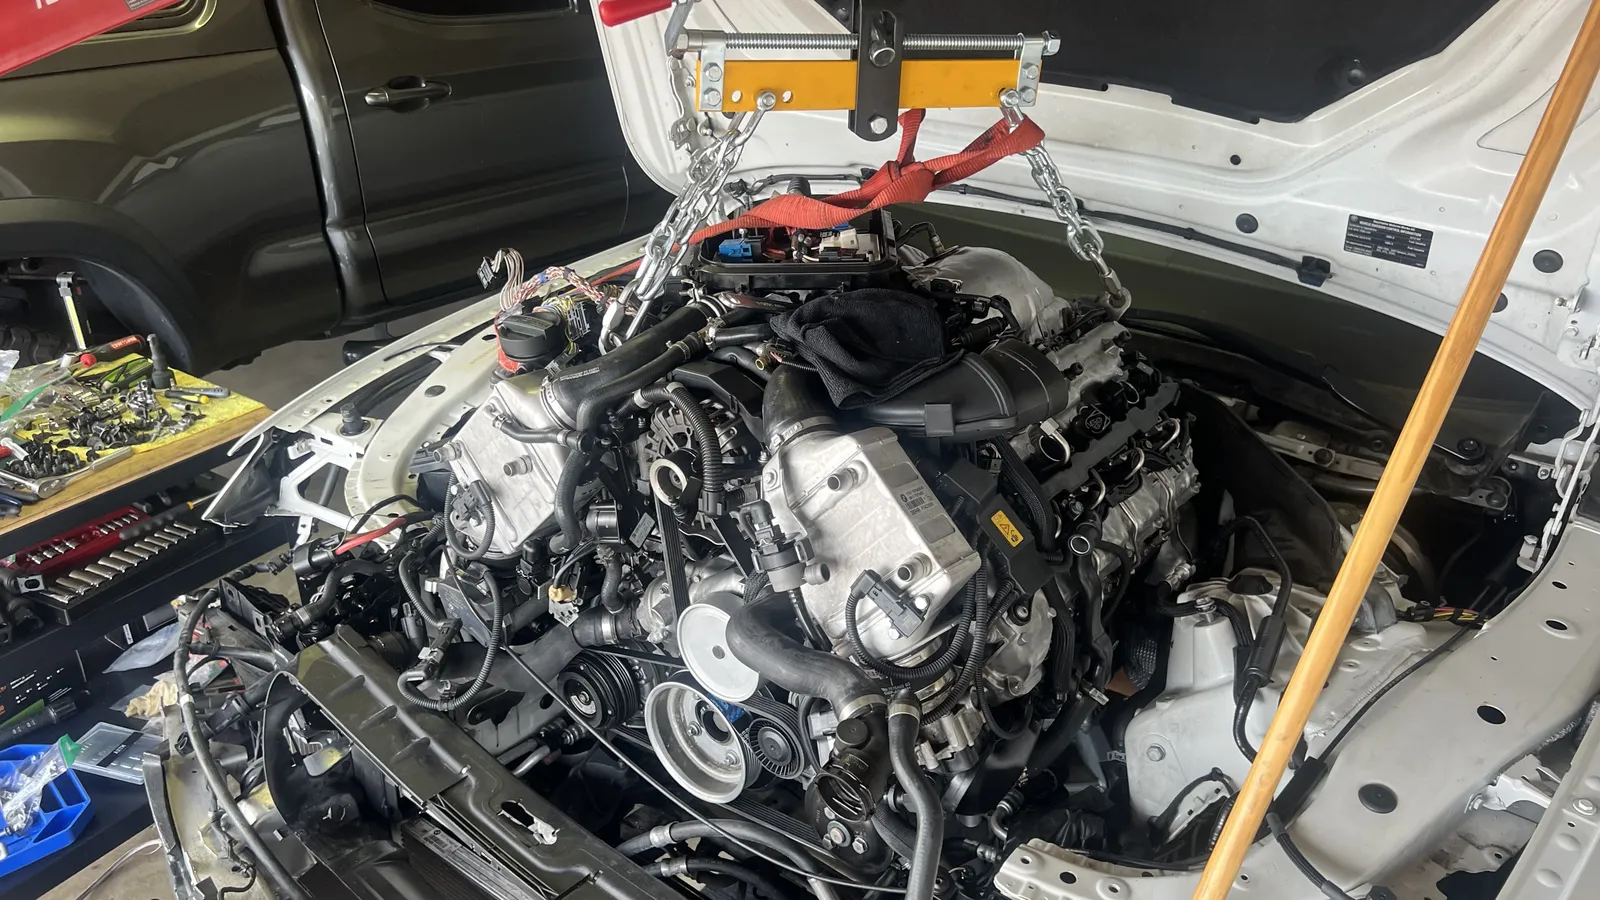 Hoist install progress — engine tilted for radiator-support clearance.
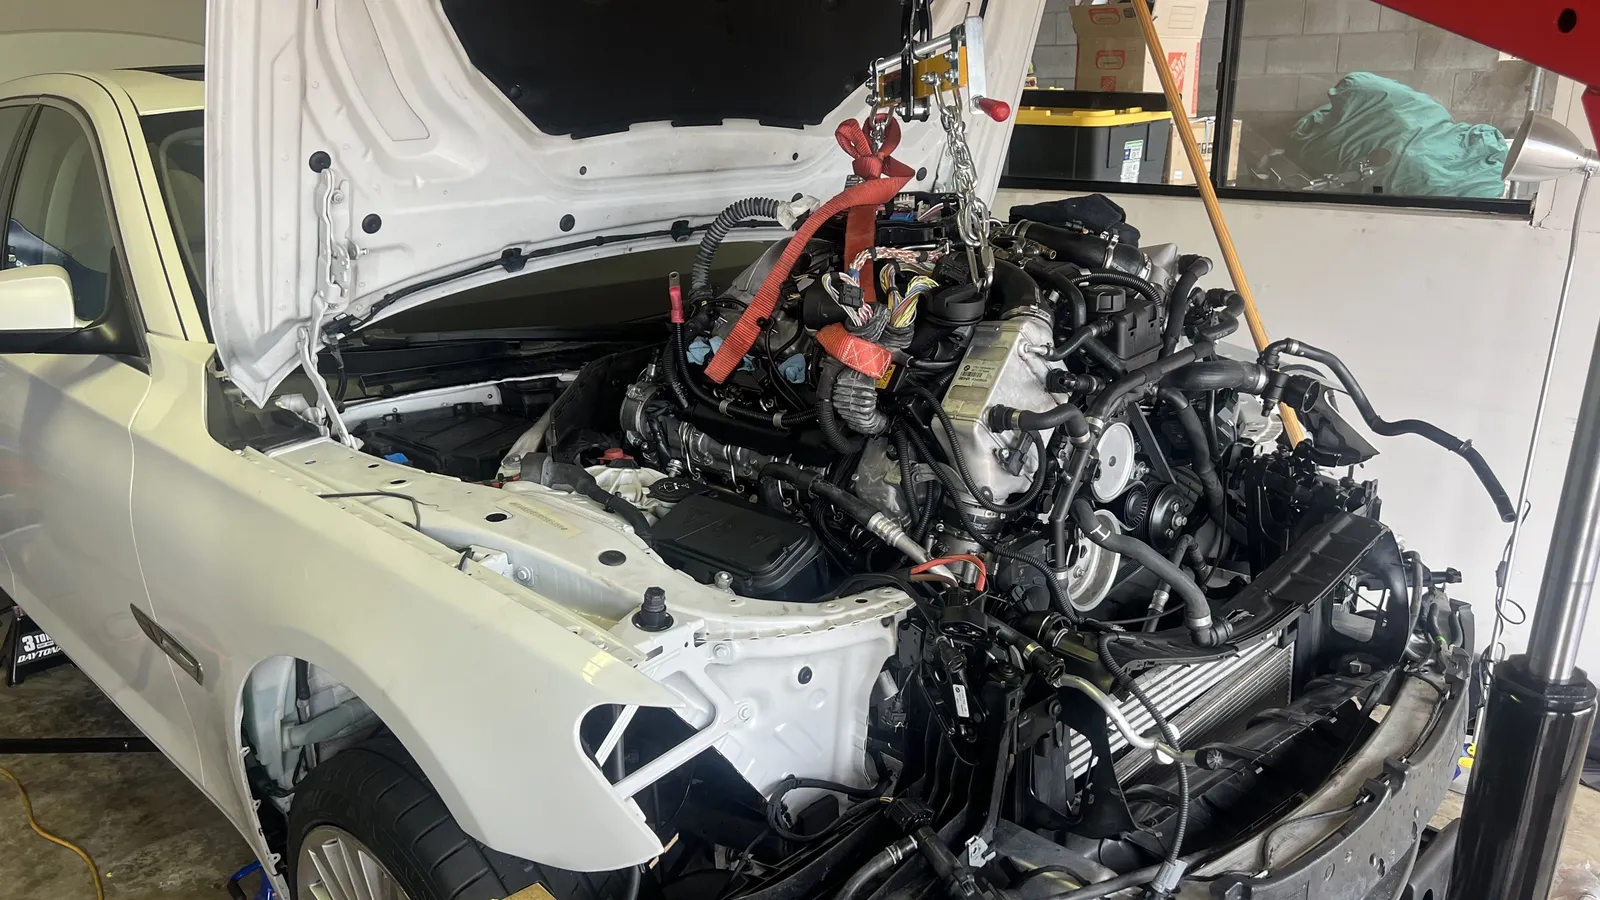 Engine nearly in the bay — front dress and hanging coolant hoses.
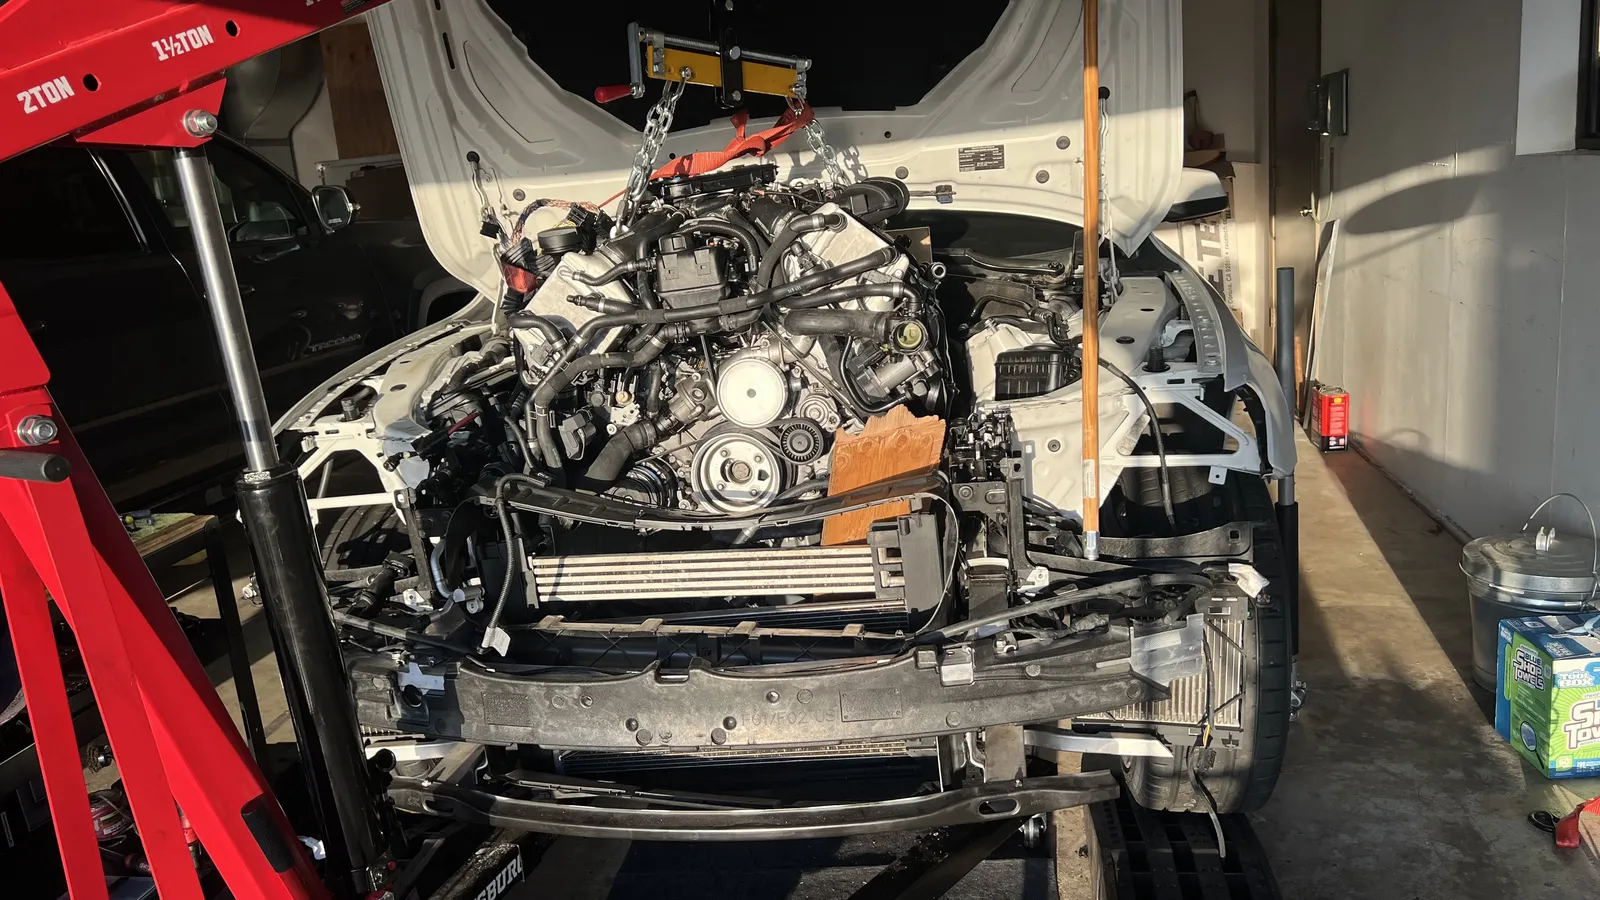 Front of the engine in the bay — serpentine belt and pulley stack.
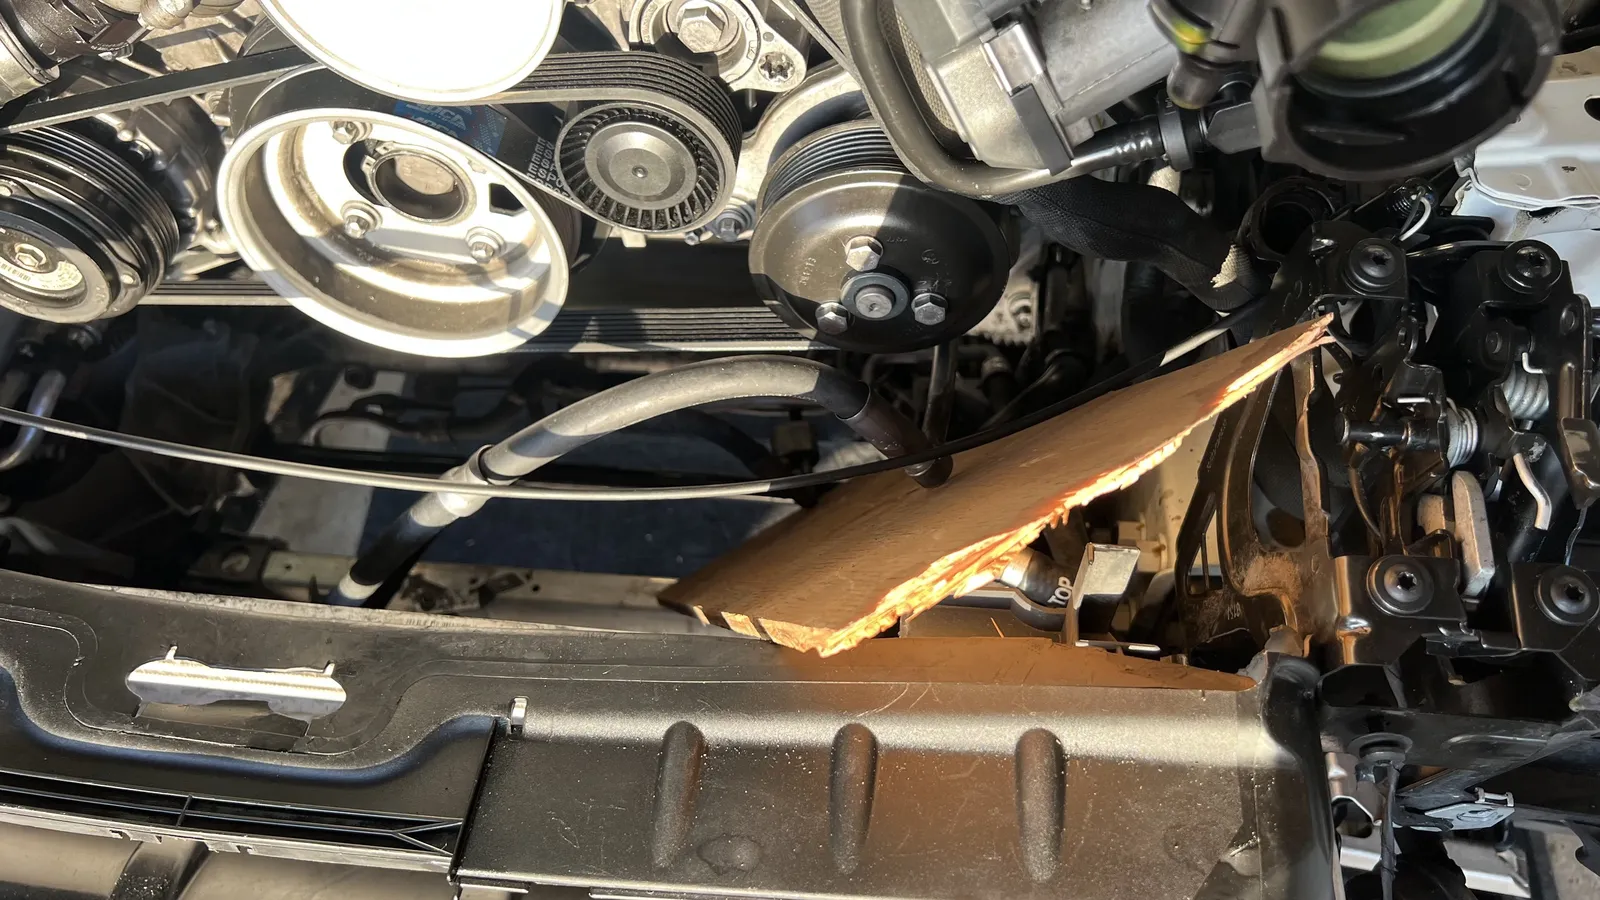 Engine seated in the bay — front accessory drive and hose jungle.
 Front bay view after drop-in — intercooler / cooler fins visible below.
 Front plumbing in the bay — quick-connects and vacuum lines.
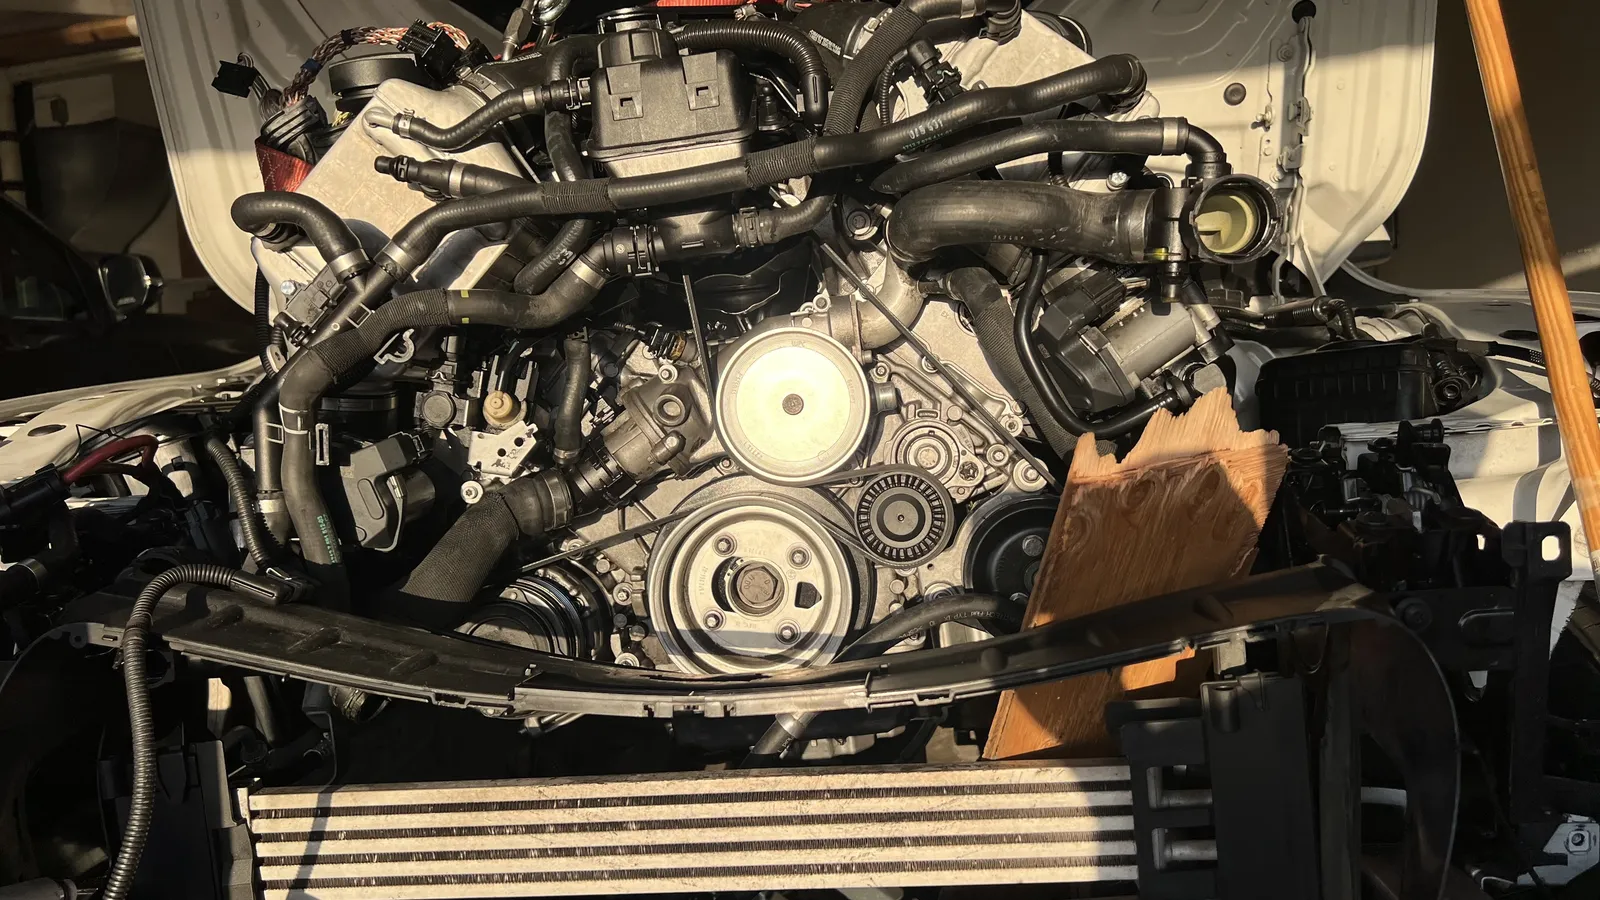 Engine back in the bay — belt, water-pump pulley, and coolant routing.
 Engine going in
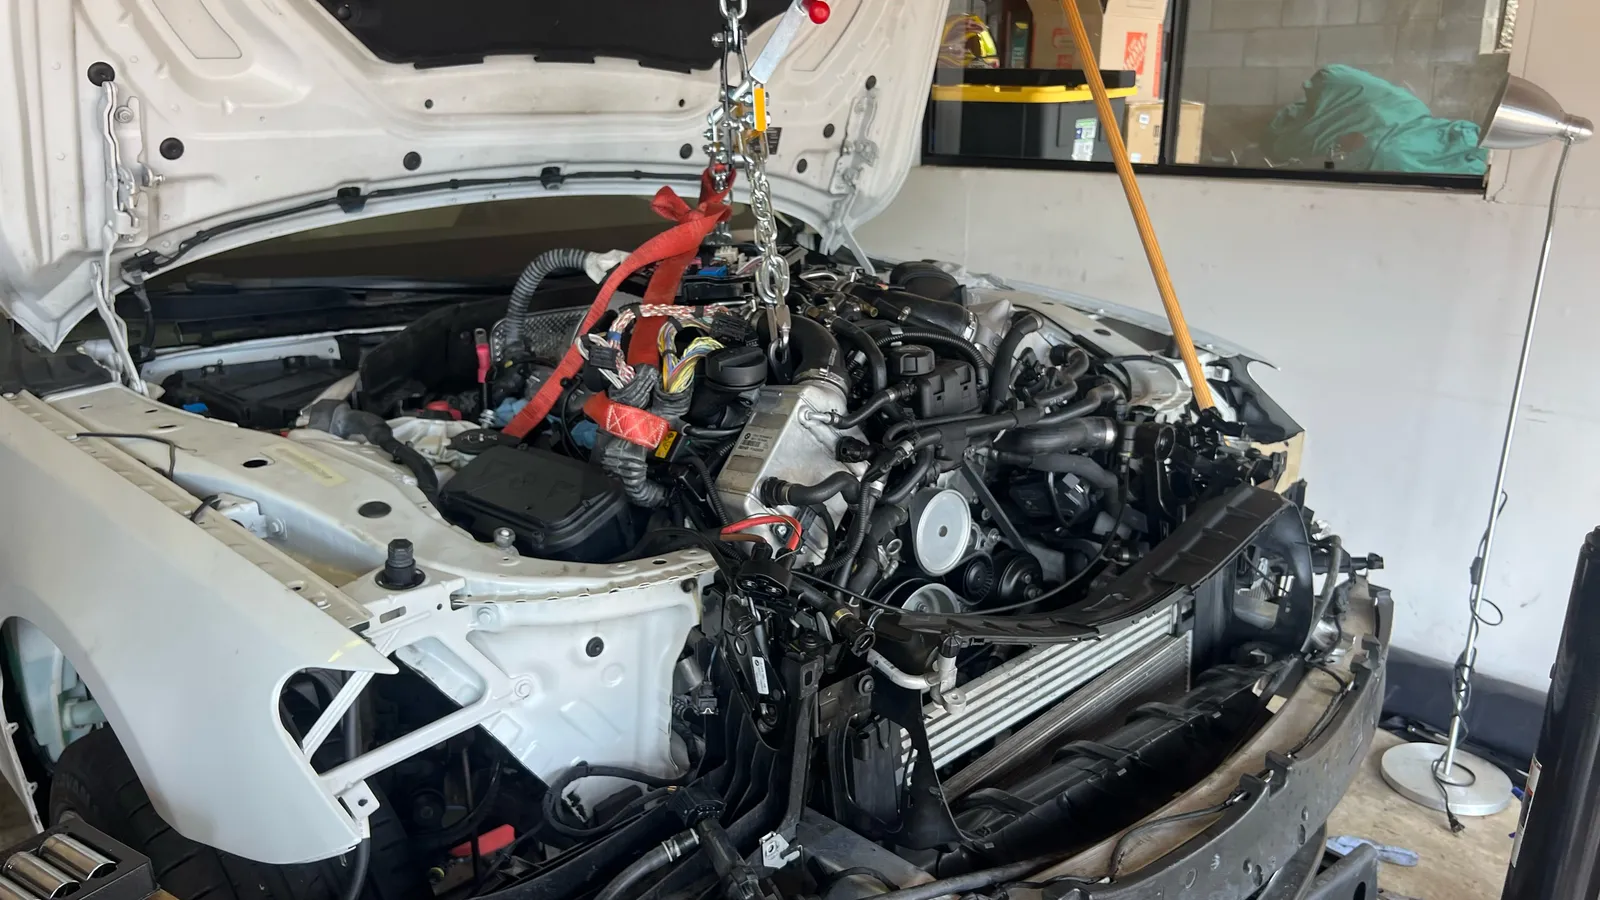 Another angle lowering engine
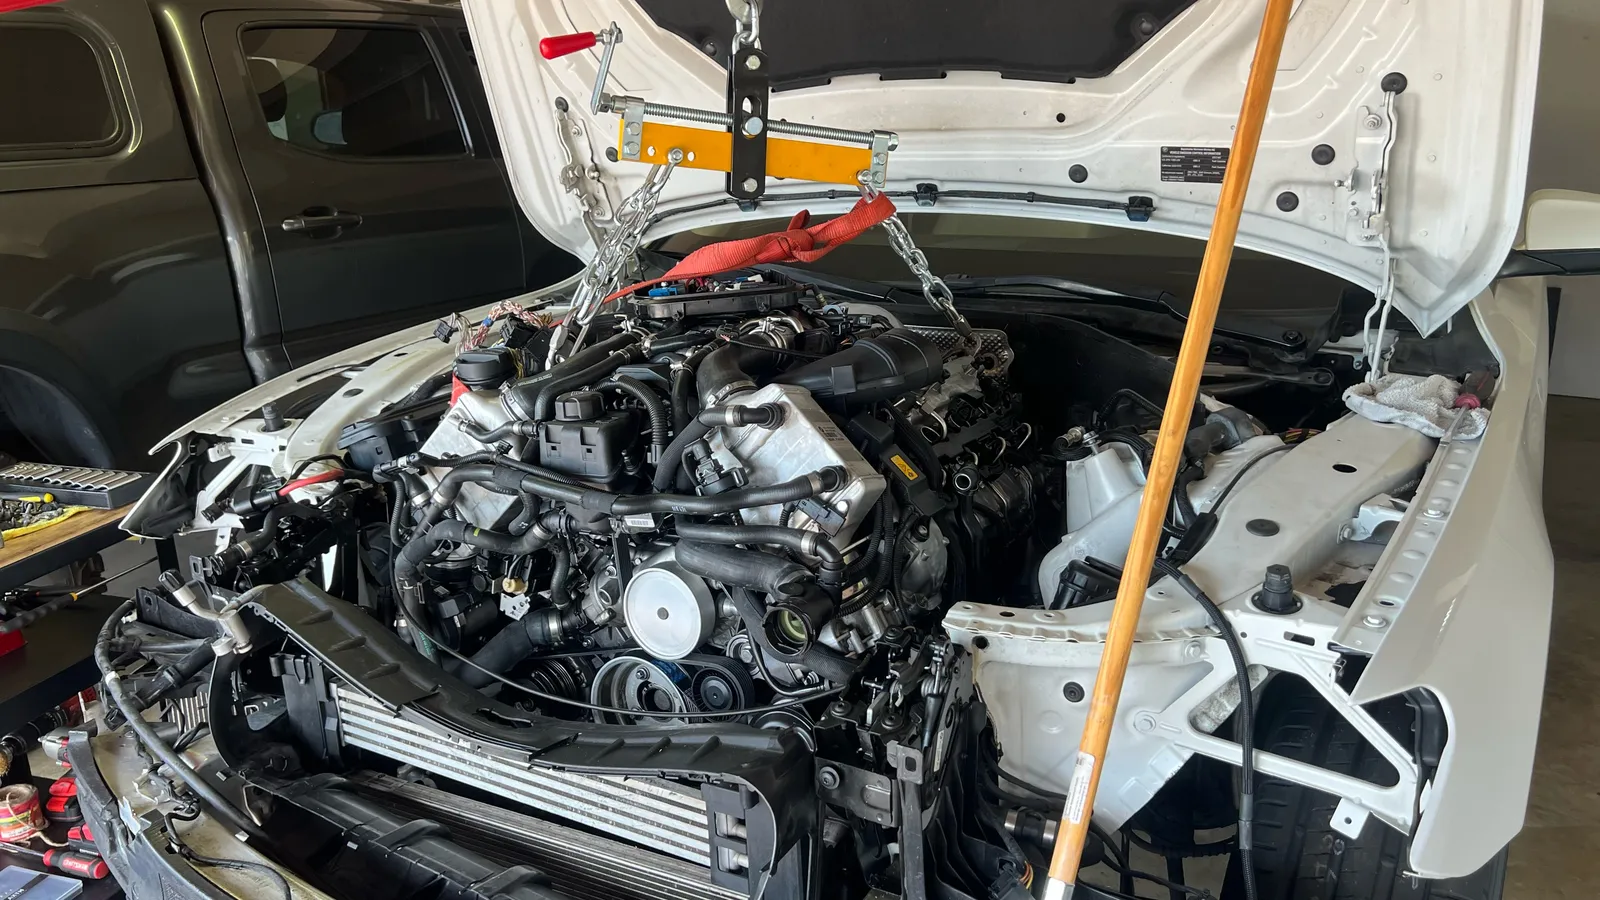 Another angle lowering engine
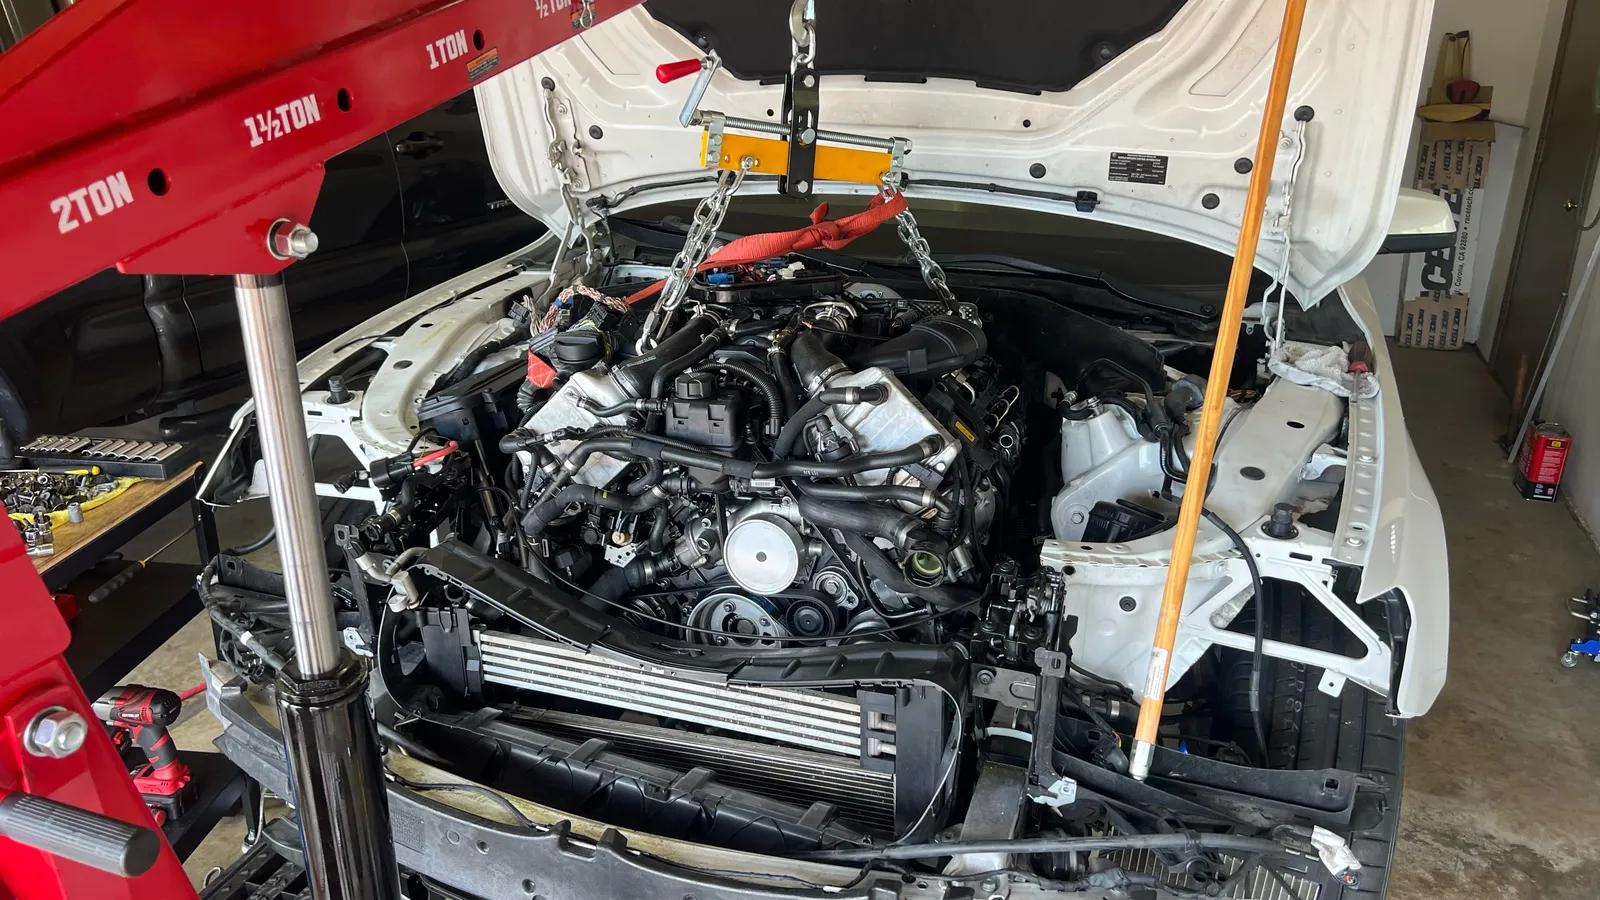 Lowering engine more
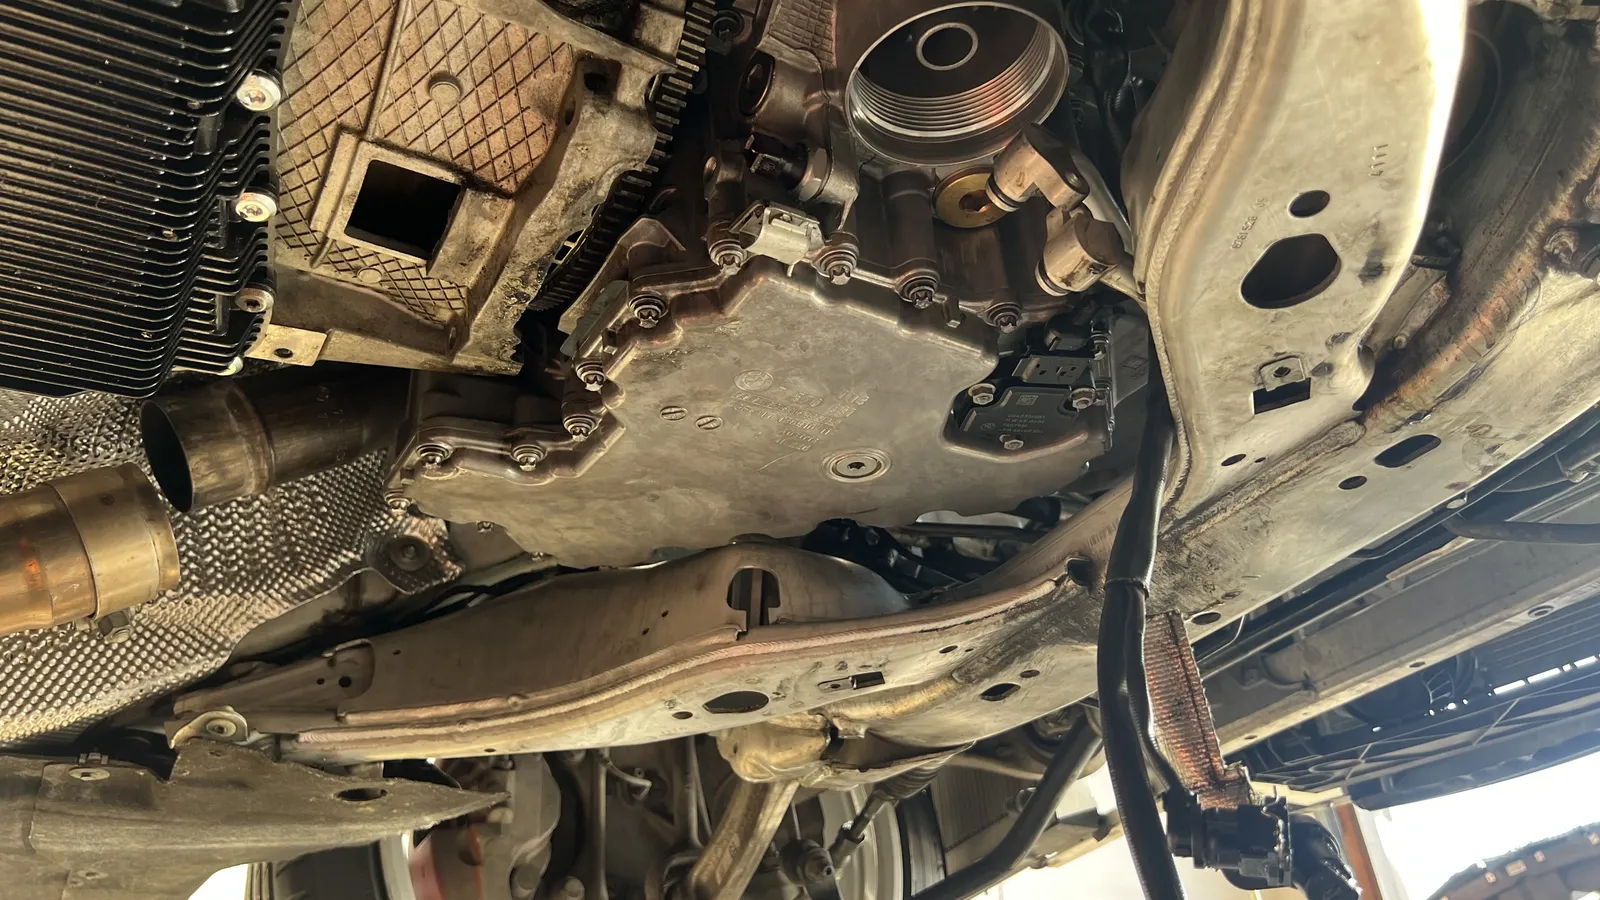
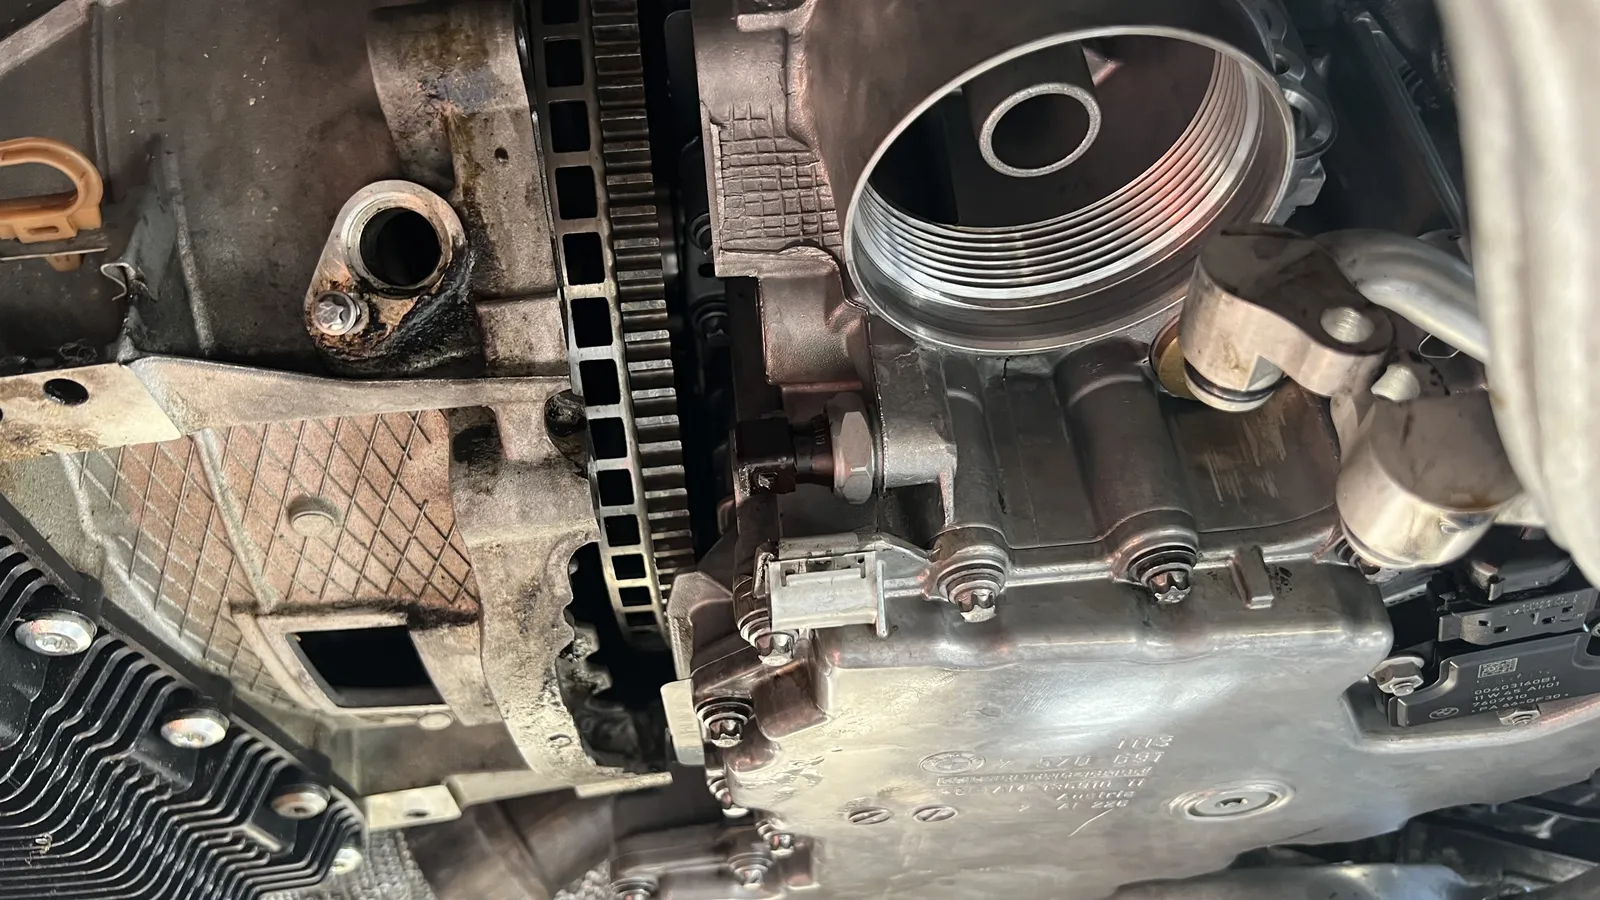
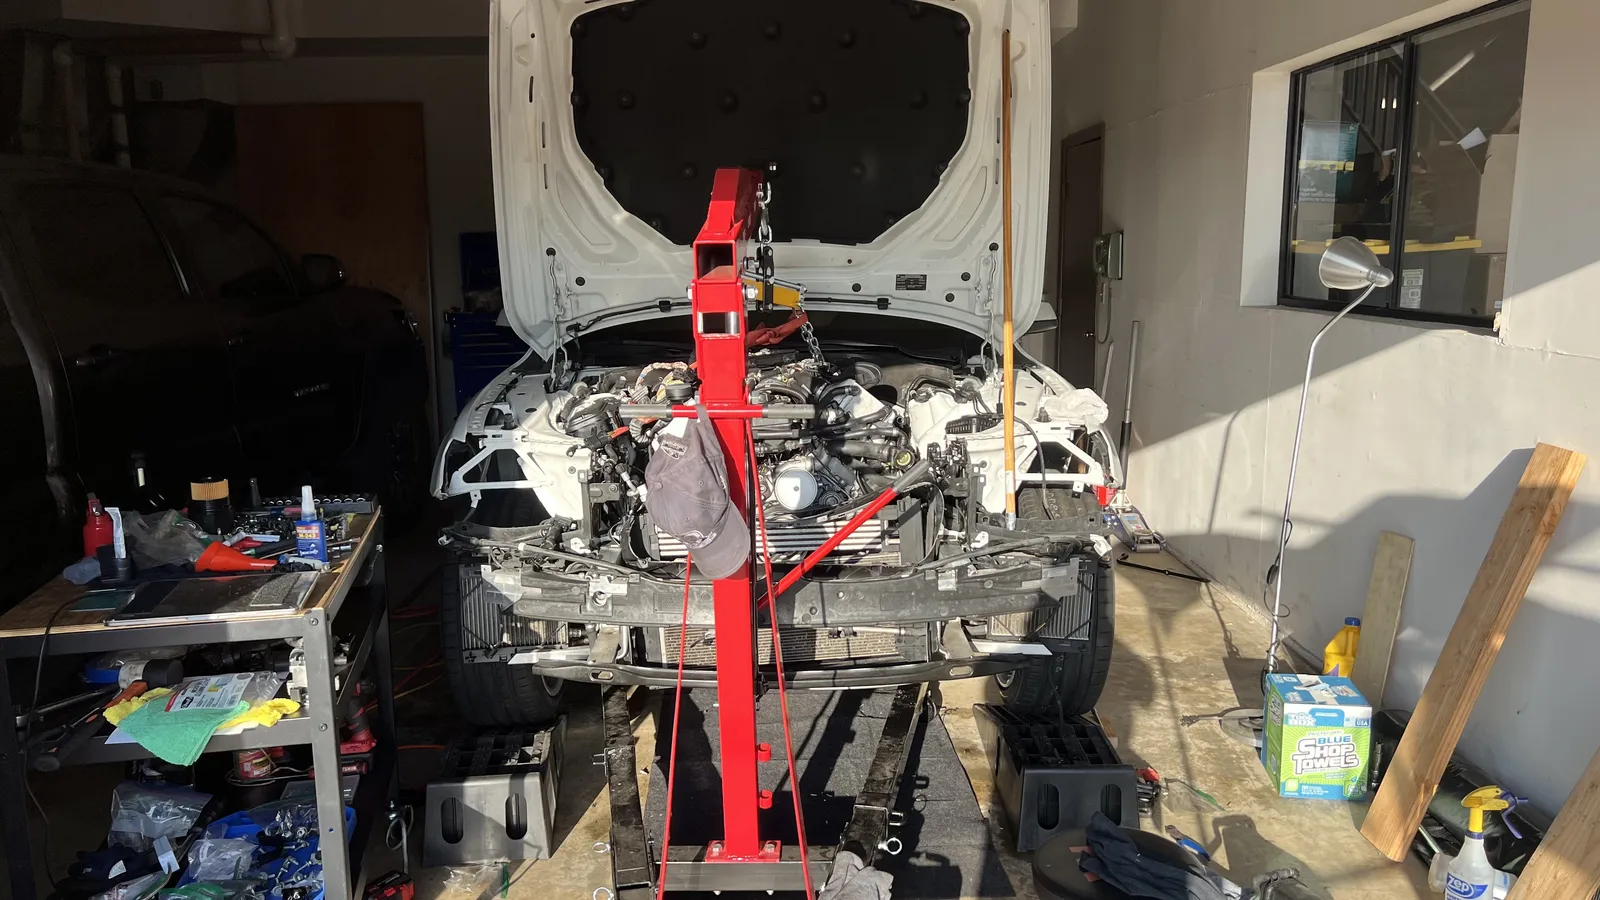 Underside after drop-in — oil pan to transmission junction.
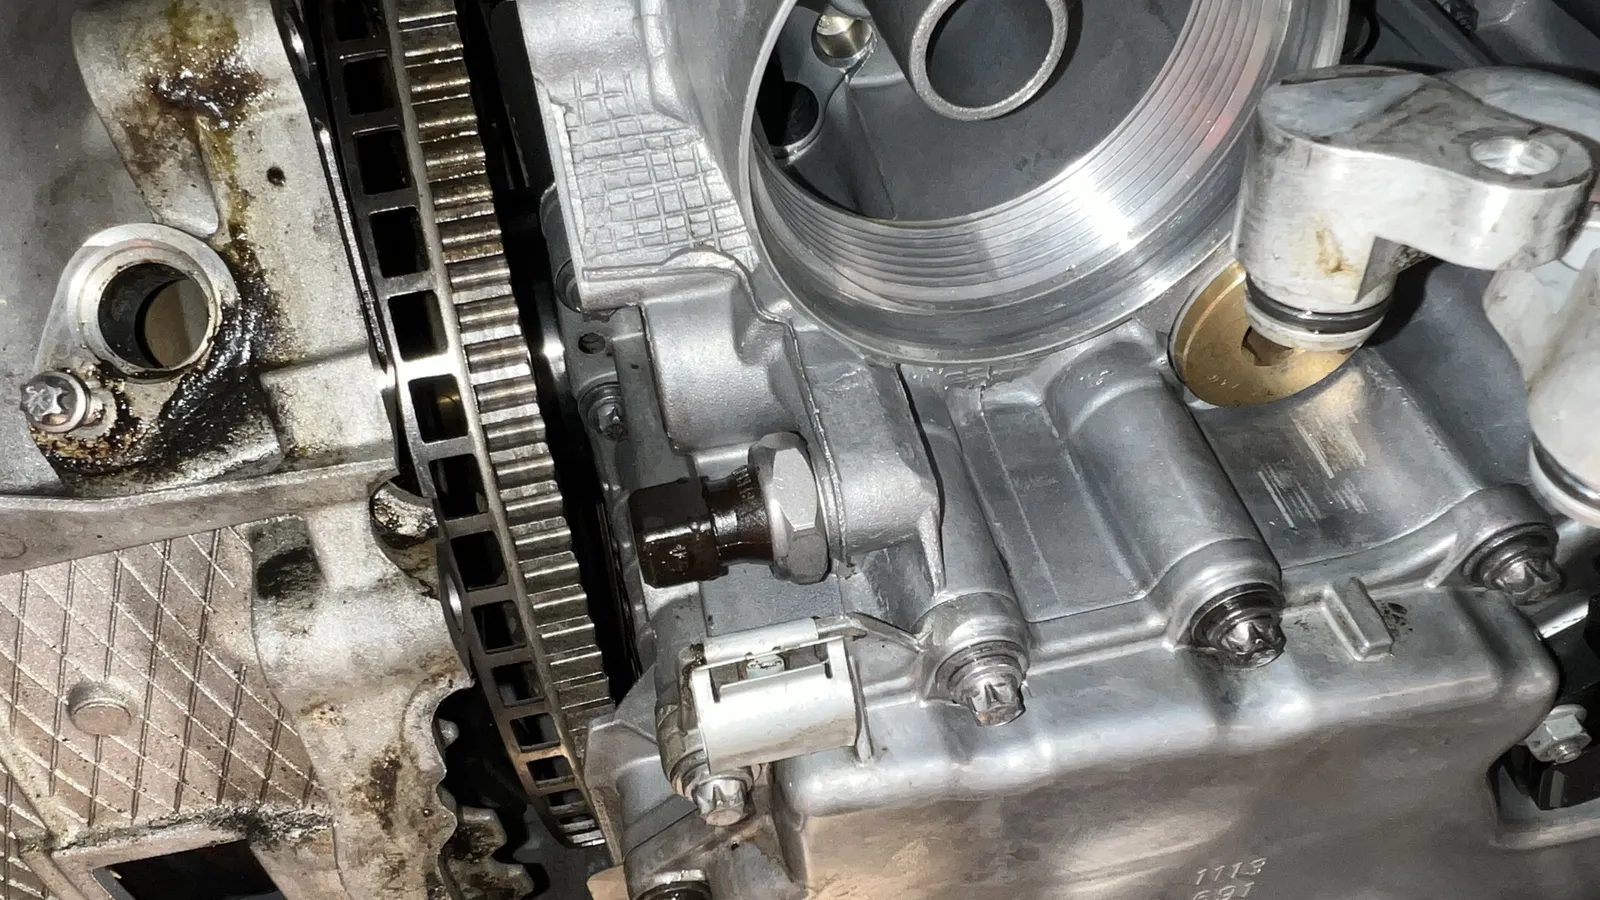
 Oil pan and bellhousing area from below — flywheel teeth visible.
 Underbody view — oil pan fasteners and nearby sensors.
 Oil pan / transmission meeting point — sensor plugs and heat shield.
 Underside reference — oil-pan bolts and electrical connectors.
 From below: magnesium oil pan markings and drain area.
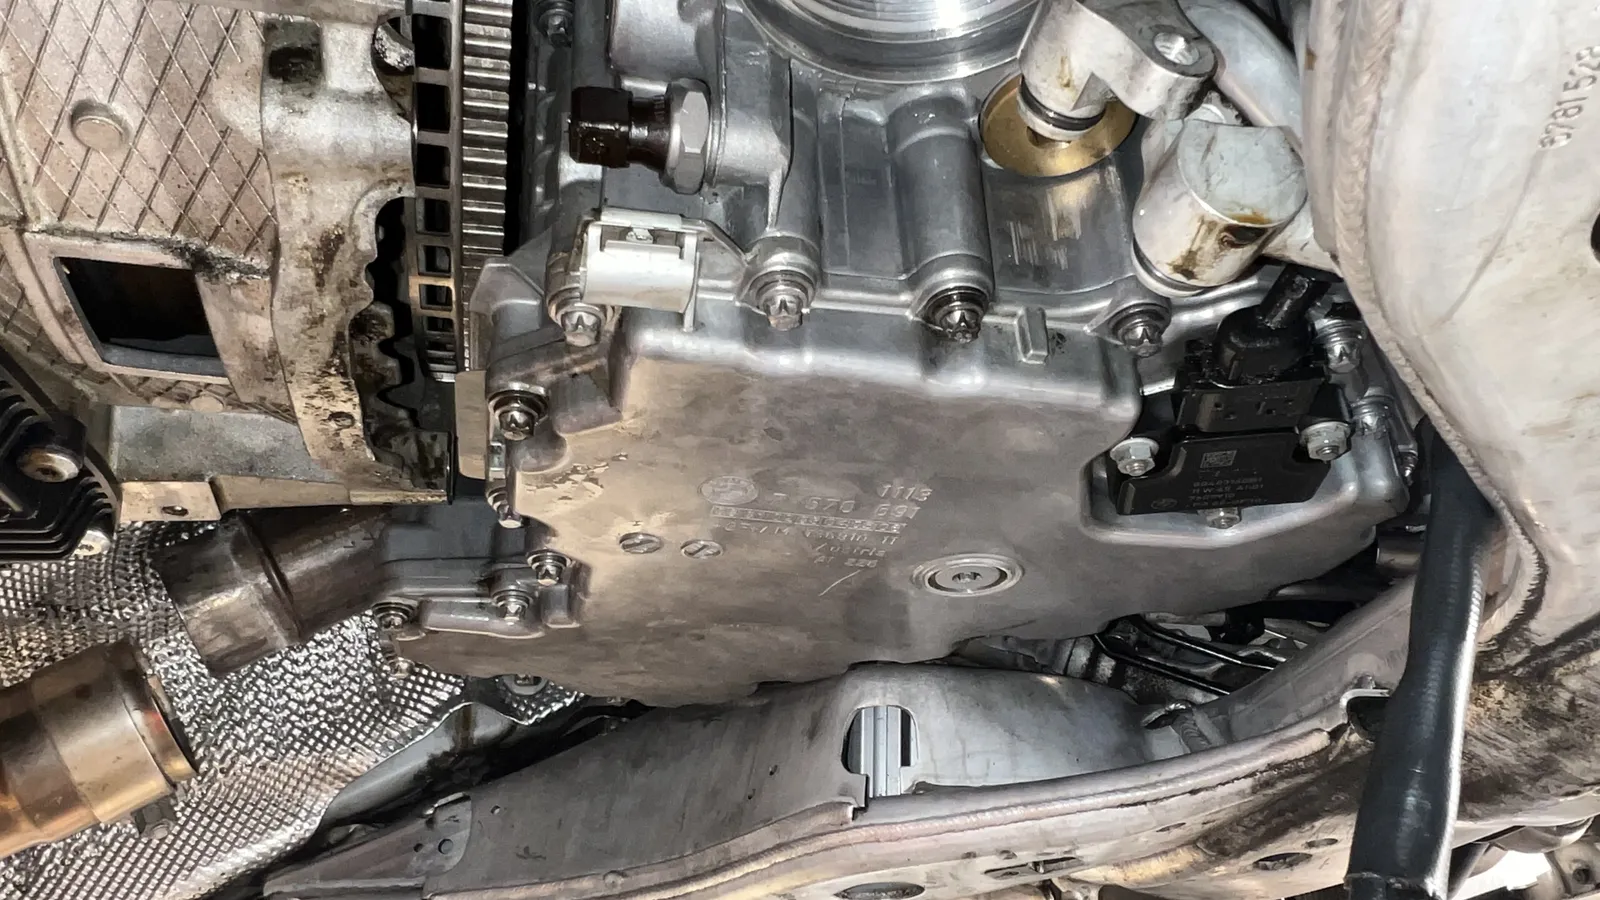 Oil pan from below — level sensor, Torx perimeter, and flywheel edge.
 Underside dress — oil pan and subframe clearance.
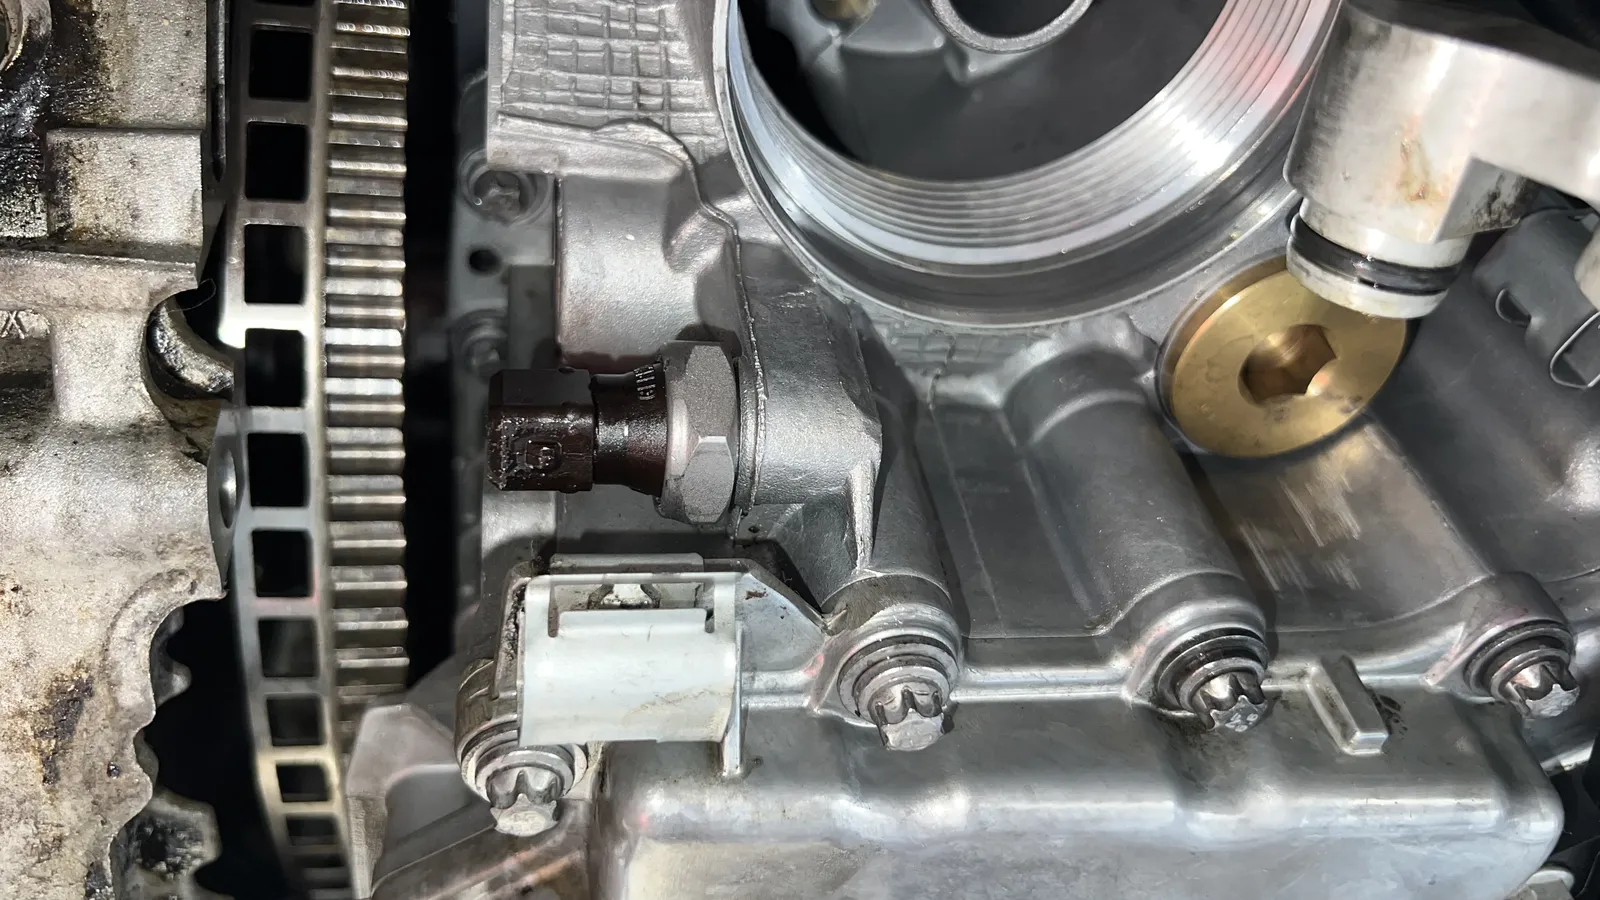 Lower engine / transmission interface from under the car.
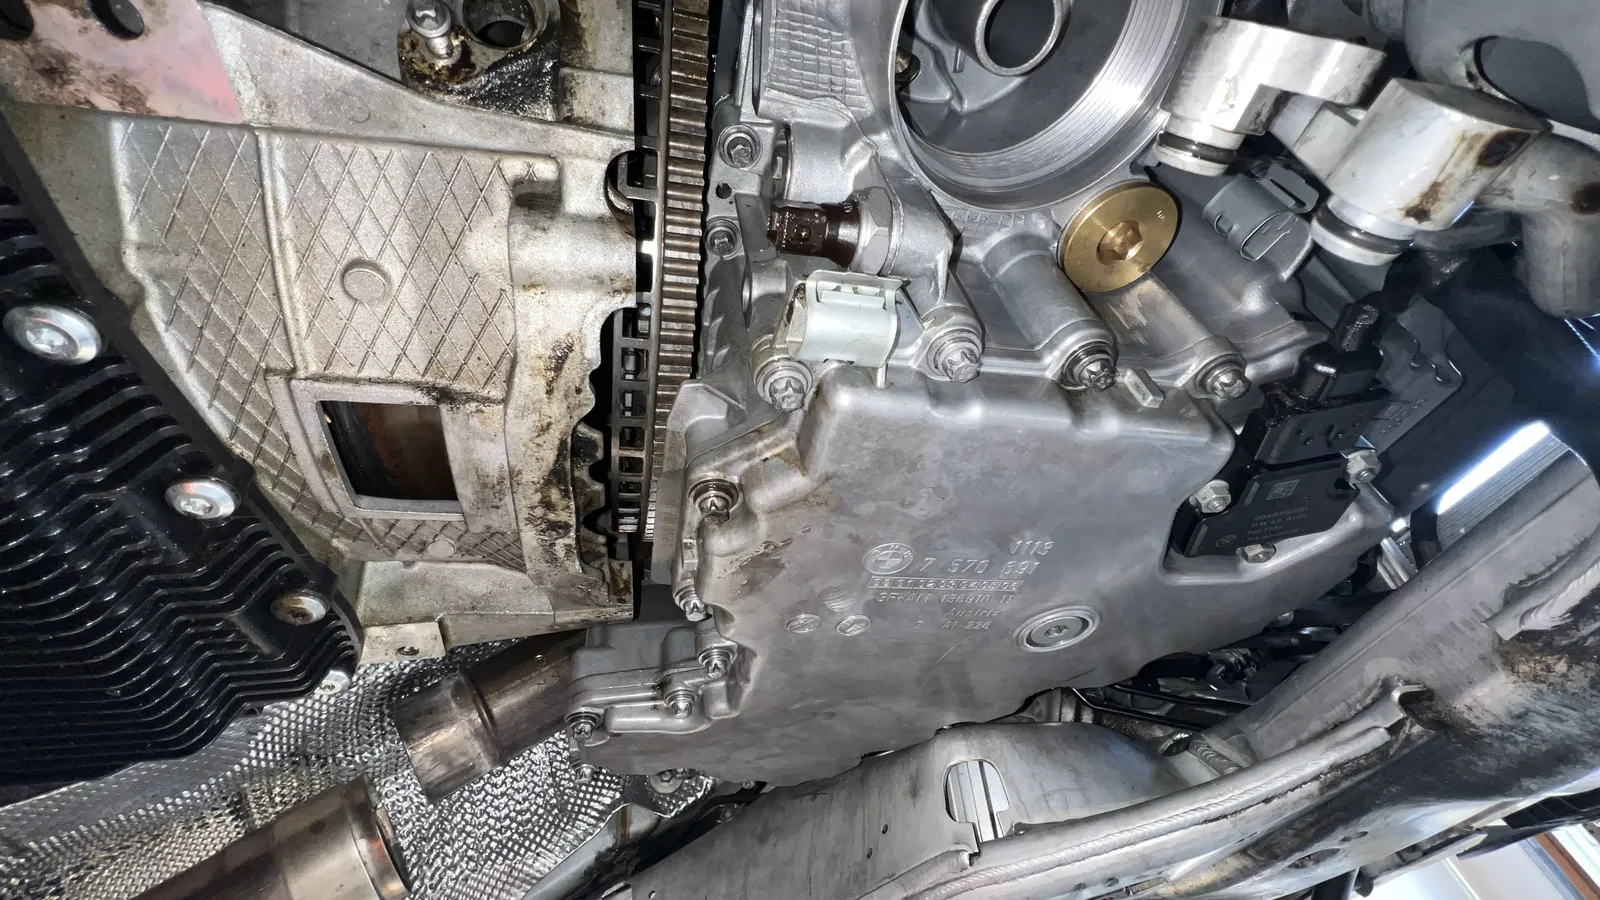 Oil-pan side sensors and harness clips after the engine is in.
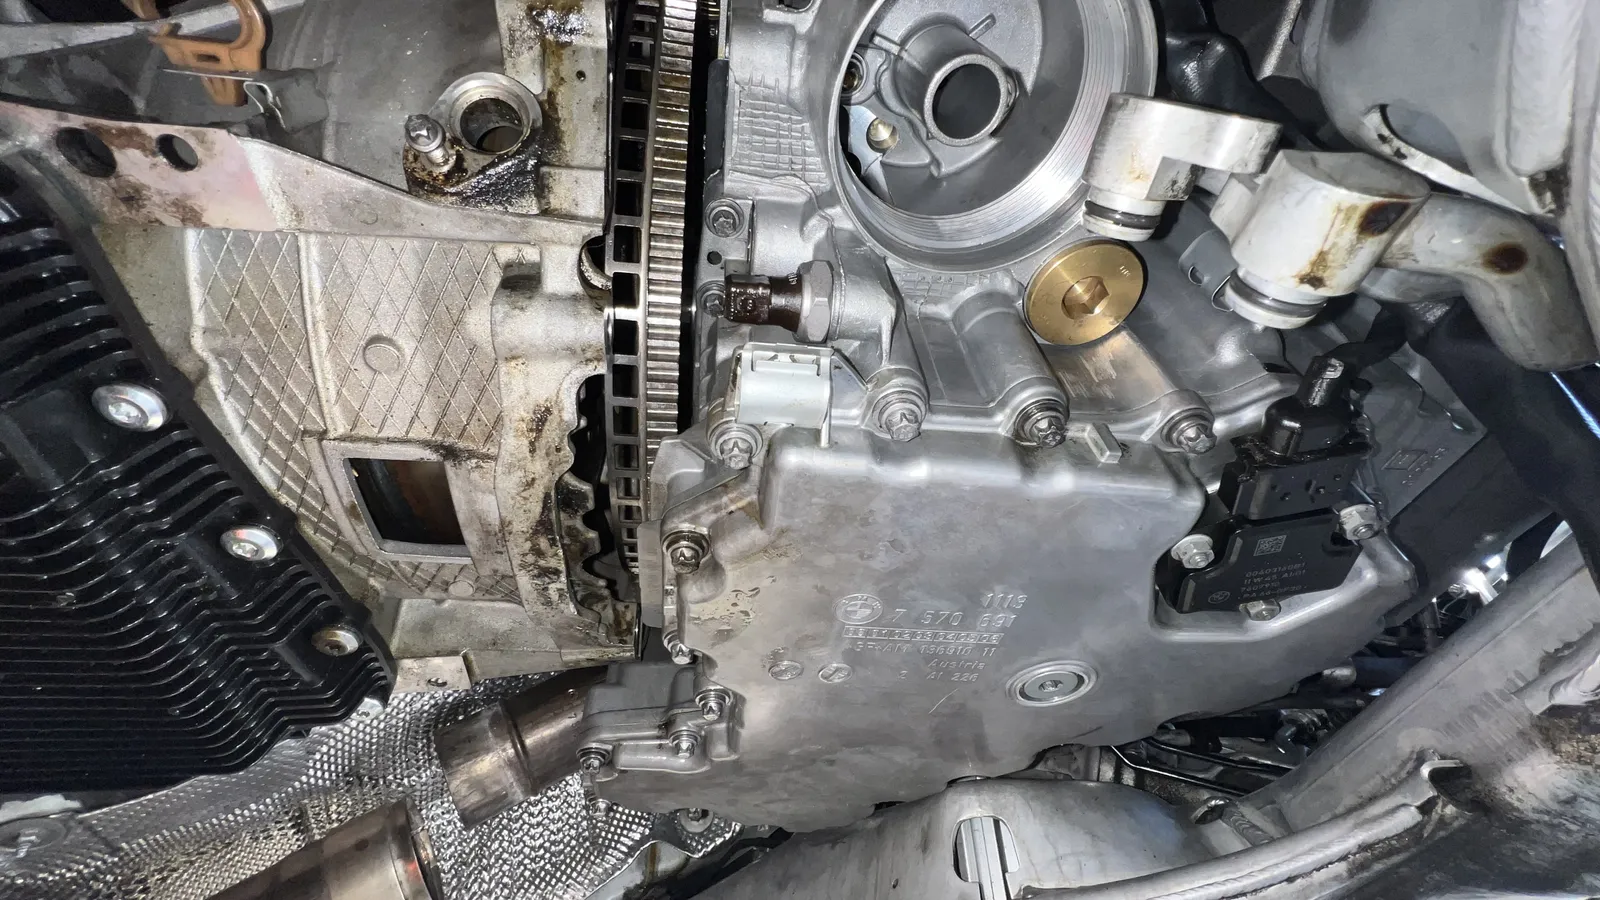 Close-up under the car — oil pan (7 570 091) meeting the bellhousing.
 Movie: continued hoist / bay work with the long block during reinstall.
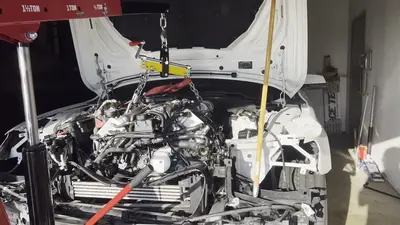 Movie: long block on the 1½-ton hoist and load leveler over the open bay.
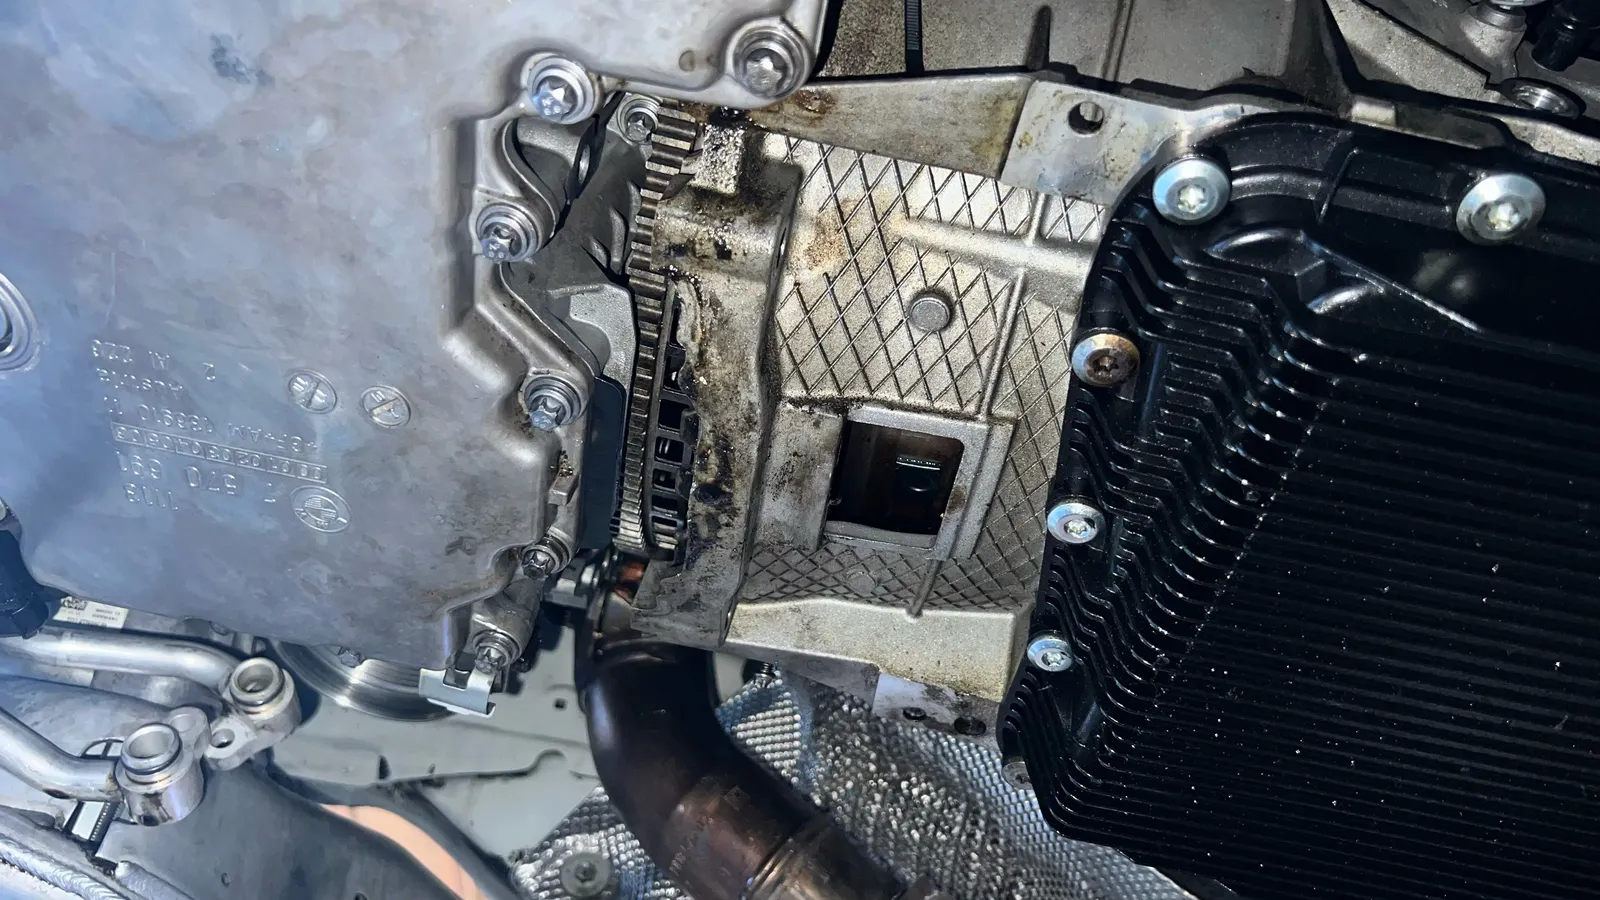 Underneath checking alignment
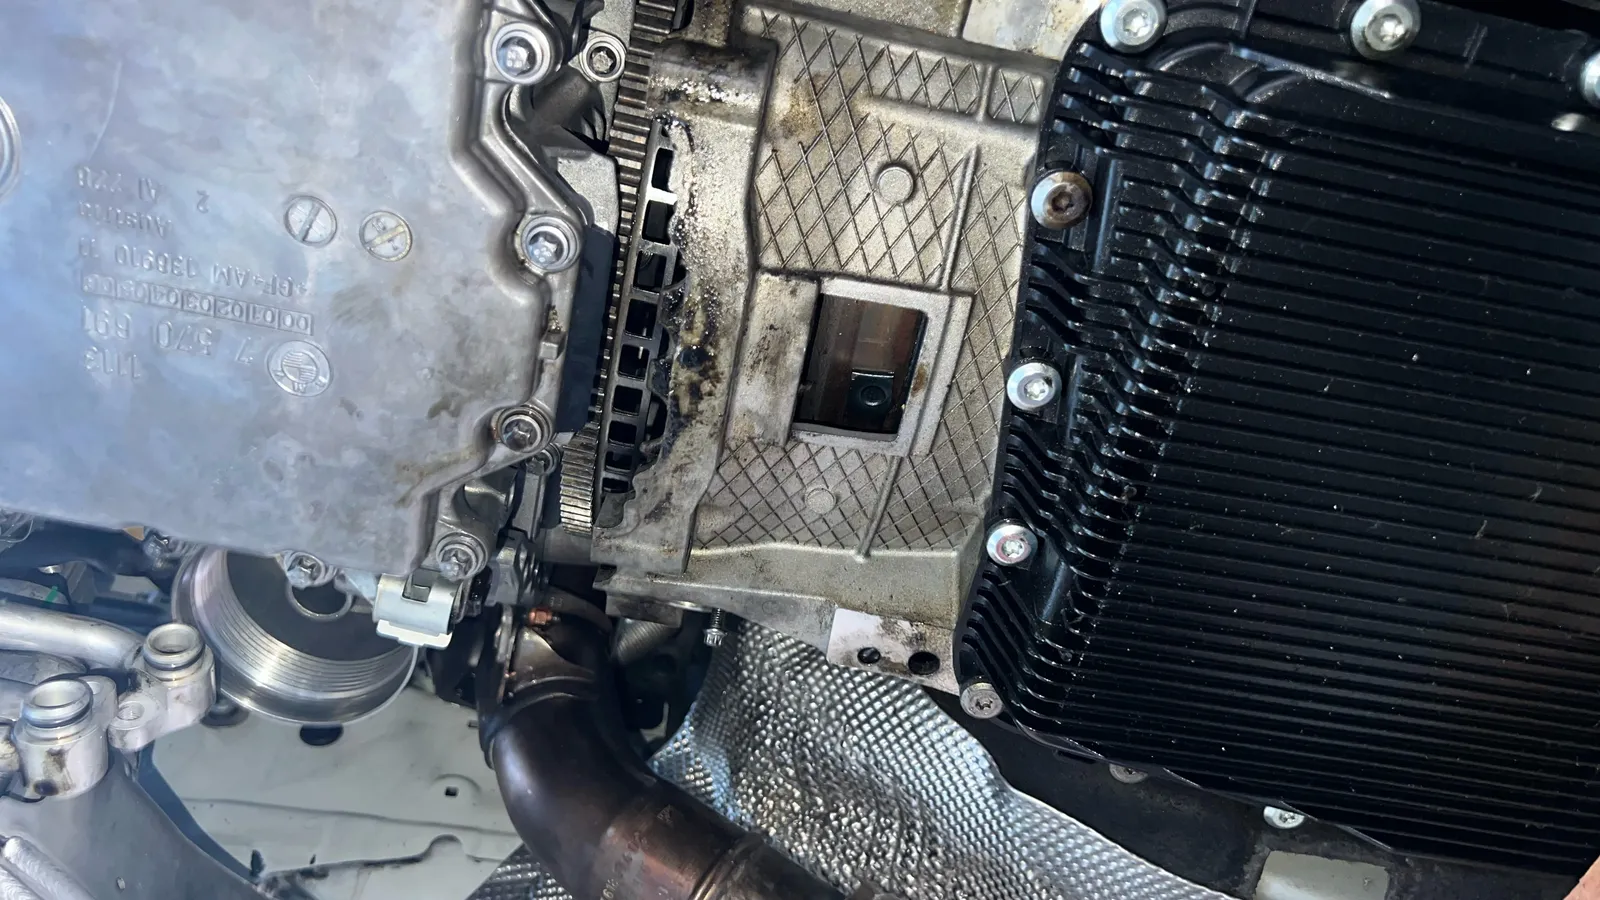 More alignment
Where it stands (Oct 2, 2026)
Oct 2, 2026The engine is in, with the transmission and engine mated together. The two upper bellhousing bolts are extremely challenging to reach: one is in hand-tight, the other is not in yet.
- DoneEngine in, with the transmission and engine mated together
- NextUpper bellhousing bolts: one is in hand-tight, the other is not in yet
- NextStripped passenger-side dowel bellhousing bolt thread: work a tap into the hole from underneath to clean up the threads, after verifying the engine is healthy
- NextTransmission oil: I drained it from the drain plug shortly after removing the engine, so it needs topping off
- NextRadiators in, then coolant and bleeding
- NextRefill the power steering fluid
- NextOnce all the cooling systems and fluids are topped off, turn the engine over: plugs removed, fuel pump fuse still removed, at least 3 or 4 starts of 10–15 seconds using the start button
- NextOnce I’m sure the oil has primed the system: install the plugs, refit the fuel pump fuse, and start it
First-start prep: what I’m following
Oct 2026These are the procedures I’m following for the first start, taken from BMW documents and well-known write-ups. Anything marked confirm is something I still need to verify for this exact car.
Coolant: both loops (pedal routine)
- Fill both loops before bleeding: the main loop at the firewall-side tank, the low-temperature (charge-air/DME) loop at the front-centre tank. A dry loop can damage its electric pump. BMW specifies a vacuum filling unit. 9BMW repair instruction “Bleeding cooling system for charge air cooler (N63 B40/B44 O 0/1)”, posted on 5post: f10.5post.com attachment. 10BMW “17 00 039 Venting and filling cooling system with vacuum filling unit”, 2012 750Li (F02): charm.li.
- Top each tank up to the upper edge; the level should hold for about a minute. Caps stay closed during the bleed.
- Battery charger on, low beams on (otherwise the ignition times out and stops the bleed), ignition on, engine not started.
- Heat to maximum, press AUTO, then blower to the lowest speed.
- Accelerator to the floor for about 15 seconds (write-ups say 10–15). The electric pumps then run a program of about 12 minutes that bleeds both loops at once.
- If the level drops, refill straight away. At the end, set the level to max, check for leaks and close the caps.
- To run it again: key out, let the DME sleep for about 3 minutes, then repeat from step 4. Forum experience says it can take 2–3 runs.
- confirm: whether this original N63 has bleed screws on the turbo coolant feed lines — a later BMW document for newer cars lists them. 11Later BMW version, “17 00 039 Bleeding cooling system and checking for watertightness (N63)”: lemon-manuals.
Transmission: likely ZF GA6HP26Z (confirm by the case tag)
- Fluid: confirm by VIN or the case tag. ZF lists Lifeguard 6 (or an OE-approved fluid) for the 6HP26; a BMW parts catalogue lists 83 22 2 305 396 for this car. 12ZF Services, 6HP26/28 fluid level procedure: PDF. 13GA6HP26Z for the 2012 750Li (F02): bmwpartsdeal.com.
- Engine off, car level, selector in P: fill through the filler plug until it overflows, then fit the plug hand-tight. I only drained the pan, so I’m filling to overflow rather than by volume.
- Once the engine runs: idle in P with the A/C on and the fluid at 30–35 °C (reading it needs a scan tool). Brake firmly, shift briefly into D and R, back to P.
- Open the plug: a small trickle at about 40 °C means the level is right; if nothing comes out, add until it overflows. Above 50 °C the level reads low — let it cool and redo it. New seal on the plug. BMW’s official route is the dealer scan tool’s “oil adjustment” service function. 14BMW “00 11 500 Checking/topping up oil level in automatic transmission (GA6HP26Z) (N63)”, F01/F02: lemon-manuals.
Power steering: Pentosin CHF 11S
- CHF 11S only (BMW 82 11 1 468 041; green marking on the cap), from original containers, no funnels. 15Power steering fluid specification, 2010 750Li (F02): charm.li; fluid notes: Turner Motorsport.
- Clean around the reservoir, start the engine, and turn the wheel lock to lock twice each way, topping up as needed. 16BMW “32 13 006 Bleeding power steering (vehicles with Dynamic Drive)”, F01/F02: lemon-manuals.
- Wheel straight, engine off, then check the level at about 20 °C, between the MIN (20 °C) and MAX (80 °C) marks. Check for leaks.
- confirm: with Dynamic Drive or Integral Active Steering, a dealer scan-tool initialisation may be needed.
Oil priming: BMW SIB 11 02 20
- Oil filter in and the engine filled with the specified oil. The N63 has no dipstick, and the electronic level only reads at full operating temperature.
- Turn the crank by hand 2 revolutions clockwise — never counter-clockwise.
- Battery charger on.
- Unplug the ignition coils and the fuel injectors. That’s BMW’s method; pulling the fuel pump fuse alone isn’t.
- Crank for 10 seconds, rest the starter for 20 seconds — three times.
- Reconnect everything and start it. Check the oil once the engine is fully warm. 17BMW SIB 11 02 20 “Engine replacement and engine repairs” (rev. 4, Sep 2022), which lists the N63: PDF.
- Expect ignition and injector fault codes from the unplugged connectors; clear them after the first start.
- BMW repair instruction “Bleeding cooling system for charge air cooler (N63 B40/B44 O 0/1)”, posted on 5post: f10.5post.com attachment.
- BMW “17 00 039 Venting and filling cooling system with vacuum filling unit”, 2012 750Li (F02): charm.li.
- Later BMW version, “17 00 039 Bleeding cooling system and checking for watertightness (N63)”: lemon-manuals.
- ZF Services, 6HP26/28 fluid level procedure: PDF.
- GA6HP26Z for the 2012 750Li (F02): bmwpartsdeal.com.
- BMW “00 11 500 Checking/topping up oil level in automatic transmission (GA6HP26Z) (N63)”, F01/F02: lemon-manuals.
- Power steering fluid specification, 2010 750Li (F02): charm.li; fluid notes: Turner Motorsport.
- BMW “32 13 006 Bleeding power steering (vehicles with Dynamic Drive)”, F01/F02: lemon-manuals.
- BMW SIB 11 02 20 “Engine replacement and engine repairs” (rev. 4, Sep 2022), which lists the N63: PDF.
Diagnostic Days
Oct 3–4, 2026This chapter has a co-pilot. It started Saturday with getting my Linux laptop set up so my Grok Agent, working from my Mac mini and my iPhone, could help. It turned the laptop into a Linux and Windows machine, pulled open-source code from GitHub that could talk to the car’s computers, and had it reading the codes over an ENETENET The Ethernet diagnostic cable BMW F-series cars use: a plain network connection from the laptop to the car’s OBD port. cable that same day. Today we worked on diagnostics. It walked me through what the codes meant, and set up the dongle and checked its status as we went. Power came from a 200 Ah LiFePO4 battery on the jump posts and a charger to keep the voltage up.
The full vehicle test pulled 22 stored faults. Deep breath: on a car that has had its front end, its engine and half its wiring apart, a lot of that is rebuild noise — the sunroof and sliding visor wanting to be normalised, the LIN headlight modules, undervoltage, and the gateway announcing that its fault memory was full.
The engine faults were the interesting ones. Misfires on cylinders 1–4 — all of bank 1 18On the N63, bank 1 is cylinders 1–4 and bank 2 is cylinders 5–8. In a left-hand-drive F02 bank 1 sits on the passenger side; on the engine itself that’s the left bank as seen from the front, per the left/right gotcha in Chapter 7. Each bank has its own turbo, its own intake and exhaust camshafts with their own VANOS units and cam sensors, and its own DME — which is how one bank can be unhappy while the other is perfectly content. — with injection cut out. A “misfire with low tank level” code, which was fair: the tank was nearly empty, so about 4 gallons of fresh gas went in. 130C01 and 130D01: crankshaft vs intake and exhaust camshaft angle difference outside limit. 19130C01 is the DME saying that where the crankshaft sensor puts the engine and where the intake camshaft sensor puts the intake cam don’t agree — the angle difference between them is outside the allowed limit. 130D01 is the same complaint about the exhaust camshaft. The diagnostic’s own list of causes: incorrect timing, or VANOS maladjusted or sticking; it recommends checking the valve timing and that the sensor increment wheel is fitted correctly. And 115D08, injector quantity compensation, because the injectors’ IMA calibration codes aren’t coded. 20IMA is BMW’s injector quantity adjustment. Each piezo injector is flow-tested at the factory and has a calibration code printed on it; the code is coded into the DME for that cylinder so it can trim each injector’s fuel quantity. With no codes coded, the DME logs a fault like 115D08. My rebuild photos never captured the codes printed on the injectors.
The misfire detection test pointed at the intake camshaft sensor and the bank 1 injectors, so next came the cam sensor tests, worked through one at a time with the agent helping interpret the results. Both exhaust cam sensors and intake 2 passed, no faults. The bank 1 intake cam showed 130C01, and the test’s list of causes was short and pointed: incorrect timing, or VANOSVANOS BMW’s variable cam timing. Solenoids and covers at the front of each head. maladjusted or sticking. 21VANOS is BMW’s variable camshaft timing. On the N63 every camshaft — intake and exhaust, on both banks — has its own VANOS unit, moved by engine oil pressure through a solenoid valve, and the DME checks the result with a camshaft sensor reading a toothed increment wheel on the cam. If a cam isn’t where the DME expects it relative to the crank, you get angle-difference faults like 130C01. It recommends checking the valve timing and that the sensor increment wheel is fitted correctly.
That is not the sentence you want to read after putting the timing together yourself, so before anything else I pulled the coils and plugs on 1–4 and scoped the cylinders. Pistons and valves look fine, with no signs of valve-to-piston contact. Big relief. And the other side of the engine? Bank 2, cylinders 5–8: no misfires, all green.
Then I started BMW’s software VANOS check, which holds the engine at about 1,700 rpm while the coolant comes up to 80 °C. It got as far as the warm-up — right up until smoke started rising out of the hot-Vhot-V The N63 layout with the exhaust and turbos inside the V between the banks. Compact, but very hot, so oil cokes and gaskets bake. on the bank 1 turbo side, and I canceled the check. Engine off. Under the flashlight: thin grey smoke from under the centre heat shield, and a wet patch of oil on the shield. No oil spraying anywhere. The likely suspects were spilled oil or assembly lube cooking off, or a turbo oil-line leak at a banjo bolt or crush washer. Good news: the smoke has since stopped — it was residue burning off, just as I suspected.
I haven’t rerun the VANOS check yet, for two reasons: the engine has a severe rough idle, and the cooling system still needs a proper bleed. The automated coolant bleed — set the temperature to 84 max, fans on low, hold the accelerator for 10–12 seconds until you hear the pumps — wouldn’t start. My suspicion is low voltage: the battery and charger on the jump points can’t hold the rail up the way a 100 A supply can. A 100 A power supply arrives today to keep it at 14 V or better. Once the coolant is bled, the mechanical valve timing check comes first, and the software VANOS check after that.
The biggest surprise of this whole chapter has been having a partner in it. My Grok Agent is linked to my Pop!_OS laptop, which is plugged into the car. It uses open-source diagnostic libraries from GitHub to read codes, pull live data and talk to the engine computers in real time, while I keep my hands on the engine. It documents everything as we go — which matters, because human memory fails, or worse, misremembers, and a rebuild is a thousand small details. And it reads the manuals and online docs instantly, so it’s like having a subject-matter expert standing at the fender. As far as I know this might be one of the first agent-assisted N63 rebuilds — and the best part is that anyone can do this. Here’s how I set up my AI-to-BMW link.
If this is your first rebuild too, expect a day like this. A freshly rebuilt N63 waking up will almost certainly throw something, and half of what the scan tool shouts is just the car noticing it was taken apart. What matters: the cylinders look clean, no valve met a piston, and one whole bank is already doing exactly what it should. What’s left is the cam timing on the cylinder 1–4 side, a rough idle and a cooling system to bleed — specific, findable problems.
- DoneFull vehicle test: 22 stored faults read, rebuild noise sorted from the engine faults
- DoneCylinders 1–4 scoped: pistons and valves look fine, no valve-to-piston contact
- DoneBank 2 (cylinders 5–8): no misfires, all green
- DoneHot-V smoke: stopped — residue burning off, as suspected
- NextBleed the cooling system on a 100 A supply (rail ≥14 V), then the mechanical valve timing check on the cylinder 1–4 side, then the software VANOS check
- NextChase down the severe rough idle
- NextSort out the injector IMA codes (115D08)
We got it started, and we got codes. But we still needed to sort out what was fixable in software and what was mechanical or sensor related. And since bank 2 has no issues at all, that points to a new path: confirm or rule out bank 1’s mechanical timing.
- On the N63, bank 1 is cylinders 1–4 and bank 2 is cylinders 5–8. In a left-hand-drive F02 bank 1 sits on the passenger side; on the engine itself that’s the left bank as seen from the front, per the left/right gotcha in Chapter 7. Each bank has its own turbo, its own intake and exhaust camshafts with their own VANOS units and cam sensors, and its own DME — which is how one bank can be unhappy while the other is perfectly content.
- 130C01 is the DME saying that where the crankshaft sensor puts the engine and where the intake camshaft sensor puts the intake cam don’t agree — the angle difference between them is outside the allowed limit. 130D01 is the same complaint about the exhaust camshaft. The diagnostic’s own list of causes: incorrect timing, or VANOS maladjusted or sticking; it recommends checking the valve timing and that the sensor increment wheel is fitted correctly.
- IMA is BMW’s injector quantity adjustment. Each piezo injector is flow-tested at the factory and has a calibration code printed on it; the code is coded into the DME for that cylinder so it can trim each injector’s fuel quantity. With no codes coded, the DME logs a fault like 115D08.
- VANOS is BMW’s variable camshaft timing. On the N63 every camshaft — intake and exhaust, on both banks — has its own VANOS unit, moved by engine oil pressure through a solenoid valve, and the DME checks the result with a camshaft sensor reading a toothed increment wheel on the cam. If a cam isn’t where the DME expects it relative to the crank, you get angle-difference faults like 130C01.
Bank 1 timing check
Oct 11–14, 2026The car starts right up, but it sets codes: 130C01 (bank 1 crankshaft-to-intake-camshaft angle difference), 130D01 (crankshaft-to-exhaust-camshaft) and 115D08 (injection quantity). Bank 1 reads lean about 5–7 seconds after start — right when VANOSVANOS BMW’s variable cam timing. Solenoids and covers at the front of each head. takes over. Bank 2 is fine.
Some things are already ruled out. The cam sensors: I swapped the bank 1 intake and exhaust sensors, and the codes didn’t move. Fuel pressure is OK at 135–200 bar. The injectors were resealed and went back into their original holes.
This is my first BMW engine rebuild, so I have to be honest about the possibilities: a VANOS gear may have slipped, or a chain may be a tooth off. Time to verify that or rule it out.
Progress so far: the belts and front pulley are off and the crank timing tool is installed. The bank 1 intercooler, the fan and the turbo coolant reservoir are out, and the front sensor connectors are unplugged. Next I need to get some slack in the long transmission harness that runs under the oil lines at the firewall, so the wiring rail can move forward — without draining 9.5 quarts of fresh synthetic oil.
- DoneCam sensors swapped on bank 1: codes didn’t move
- DoneFuel pressure OK (135–200 bar); injectors resealed in their original holes
- DoneBelts and front pulley off, crank timing tool installed
- DoneBank 1 intercooler, fan and turbo coolant reservoir out; front sensor connectors unplugged
- DoneSlack in the transmission harness at the firewall so the wiring rail can move forward (in the end I drained the oil to free it)
- DoneBank 1 harnesses unplugged and labeled, transmission connectors off (Oct 13)
- DoneValve cover off
- DoneBank 1 mechanical timing verified with timing blocks — correct (Oct 14)
- NextSwap bank 1 VANOS solenoid, clear codes, test
Oct 13 progress: clearing the way to the bank 1 valve cover
About 4 hours of steady work today got me to the point where the valve cover is the next thing to come off. If you’re doing bank 1 cam timing with the engine in the car, here’s what worked for me.
Wiring looms. There are two harnesses on bank 1. Don’t take them off the engine. Just unplug everything and remove the bolts and screws that hold them to the valve cover. Label every connector with masking tape as you go. Reassembly happens in the car, where it’s much harder to see which plug goes where.
Transmission connectors. Disconnect them. I did not have to disconnect the big round plug at the very back of the transmission. Once all the other transmission plugs and the starter plug on the same bundle were off, there was enough slack.
The harness under the oil lines. The harness runs under the engine oil in/out lines on the block. I drained the engine oil into a very clean container, disconnected the two lines from the block, freed the cable bundle, reinstalled the lines and refilled the oil. Heads up: the oil from the cooler/radiator in the passenger footwell area drains slowly when it’s cold. I’m not sure this was strictly necessary. For now I’ll run the engine with the cable free, and once things are sorted I’ll drain again and decide how to route it. Tip: a zip tie holding the cable beside the lines, but outside them, looks fine and would make this job much easier next time.
Intercooler and reservoir. I removed the bank 1 intercooler and the small turbo coolant reservoir. I didn’t drain the coolant or disconnect any radiator lines.
Hardware. Every nut and bolt goes into its own labeled ziplock bag.
Fuel rail and lines. These are what stop the valve cover from coming off easily. I’m thinking about leaving the main collector tube bolted down and removing only the individual lines. Right now the collector tube is unbolted and free, but the cover still won’t lift. I suspect the collector tube is hitting the AC compressor line on that side.
Injectors. All four bank 1 injectors came out without a lot of work. They weren’t loose, but they weren’t so tight that I needed a tool either. Wiggling them with some upward pressure brought them out, and they felt well sealed. None was a tighter fit than the others; if anything, cylinder 1 was the most snug. I’m now photographing each injector with its codes visible, plus the condition of the tip and seal, for future reference. Photos to come.
Oct 14: bank 1 timing confirmed correct
With the valve cover off, I set the cam timing blocks on bank 1 with the crank locked at TDC. They dropped right onto the intake and exhaust cam flats with no gaps. The timing is correct, and it has been since I first assembled the engine. I didn’t adjust anything. That rules out the theory that a VANOSVANOS BMW’s variable cam timing. Solenoids and covers at the front of each head. gear slipped because I put the center bolts in dry, without copper paste.
So the bank 1 cam codes (130C01, 130D01 and 115D08) are not a mechanical timing problem, and the swap test already ruled out the cam sensors. The next suspect is the bank 1 VANOS solenoid(s). I have a new Pierburg solenoid on hand. I’ll also check its wiring and connector, and the oil feed and screen.
Injectors. I photographed all four bank 1 injectors (codes, tips and seals) for reference. They’re a matched set of the same index-12 part. One thing to know if you do this: with fresh combustion seals, an injector sits about 5 mm proud until the hold-down clamp is torqued. That’s normal.
I’m putting bank 1 back together today (Oct 14).
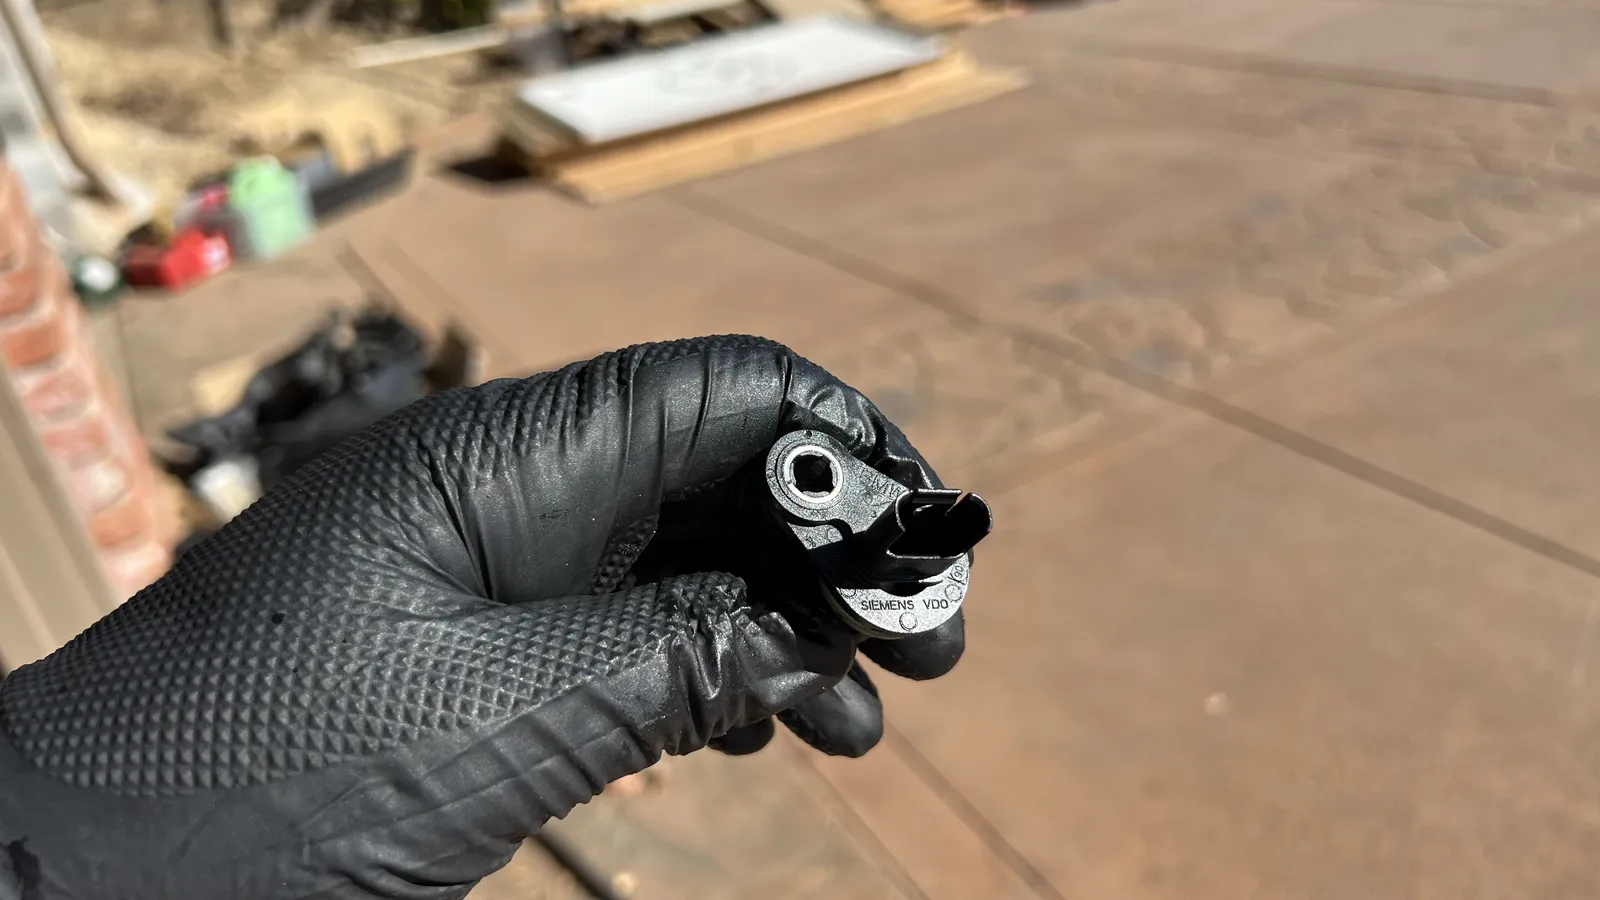 Bank 1 exhaust cam sensor out for the swap test.
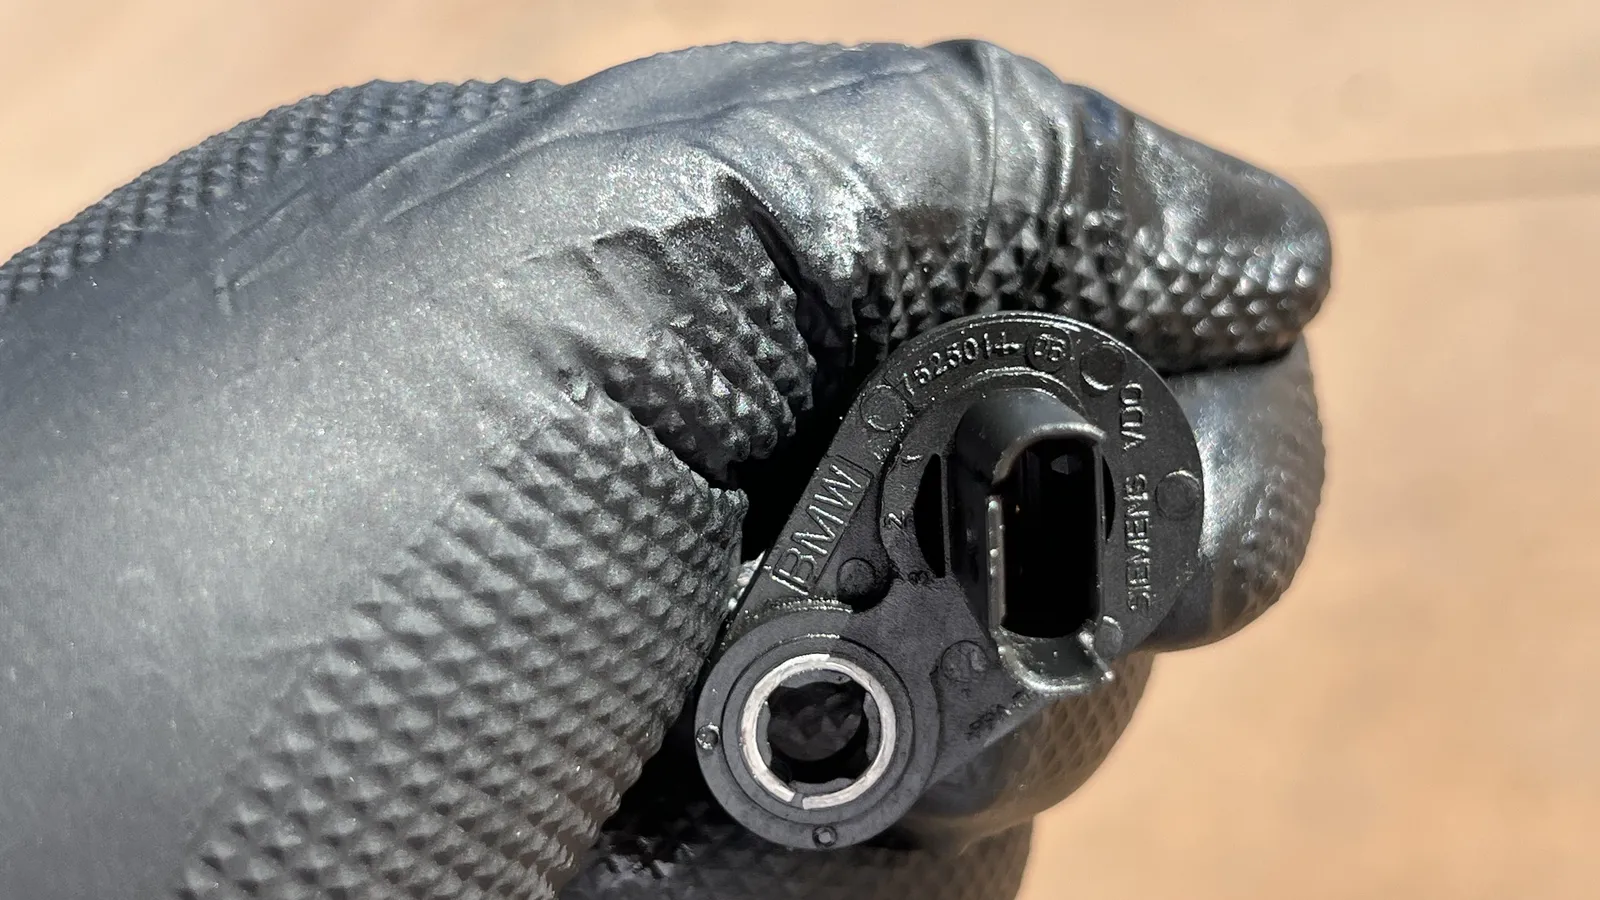 Bank 1 intake cam sensor. Swapped with the exhaust sensor, and the codes didn't move.
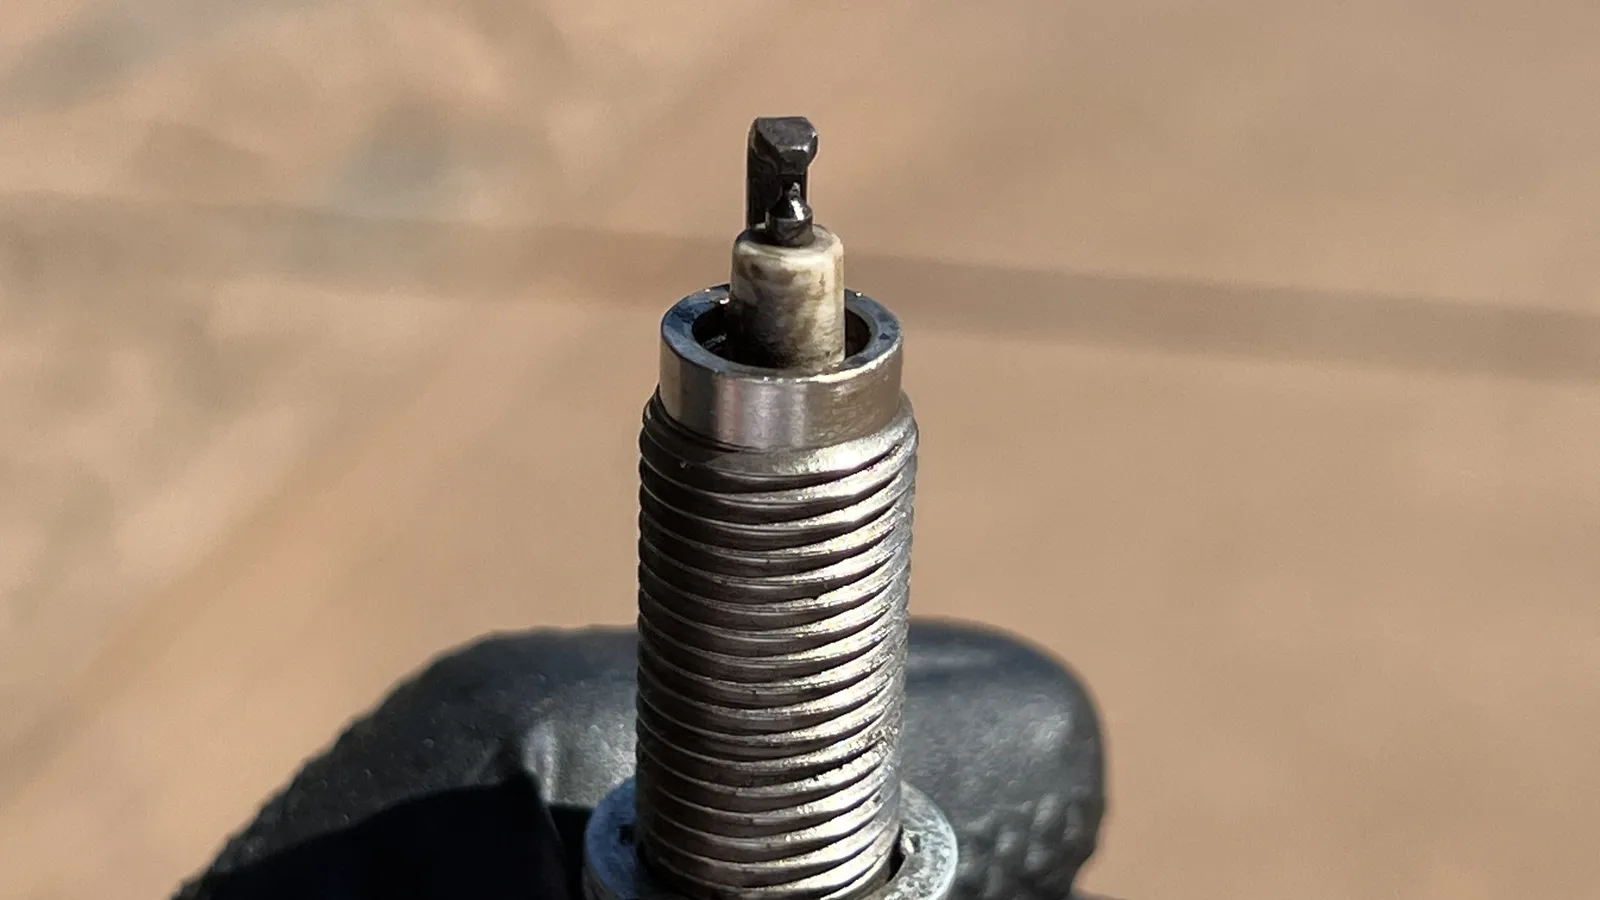 Cylinder 4 spark plug pulled for a look.
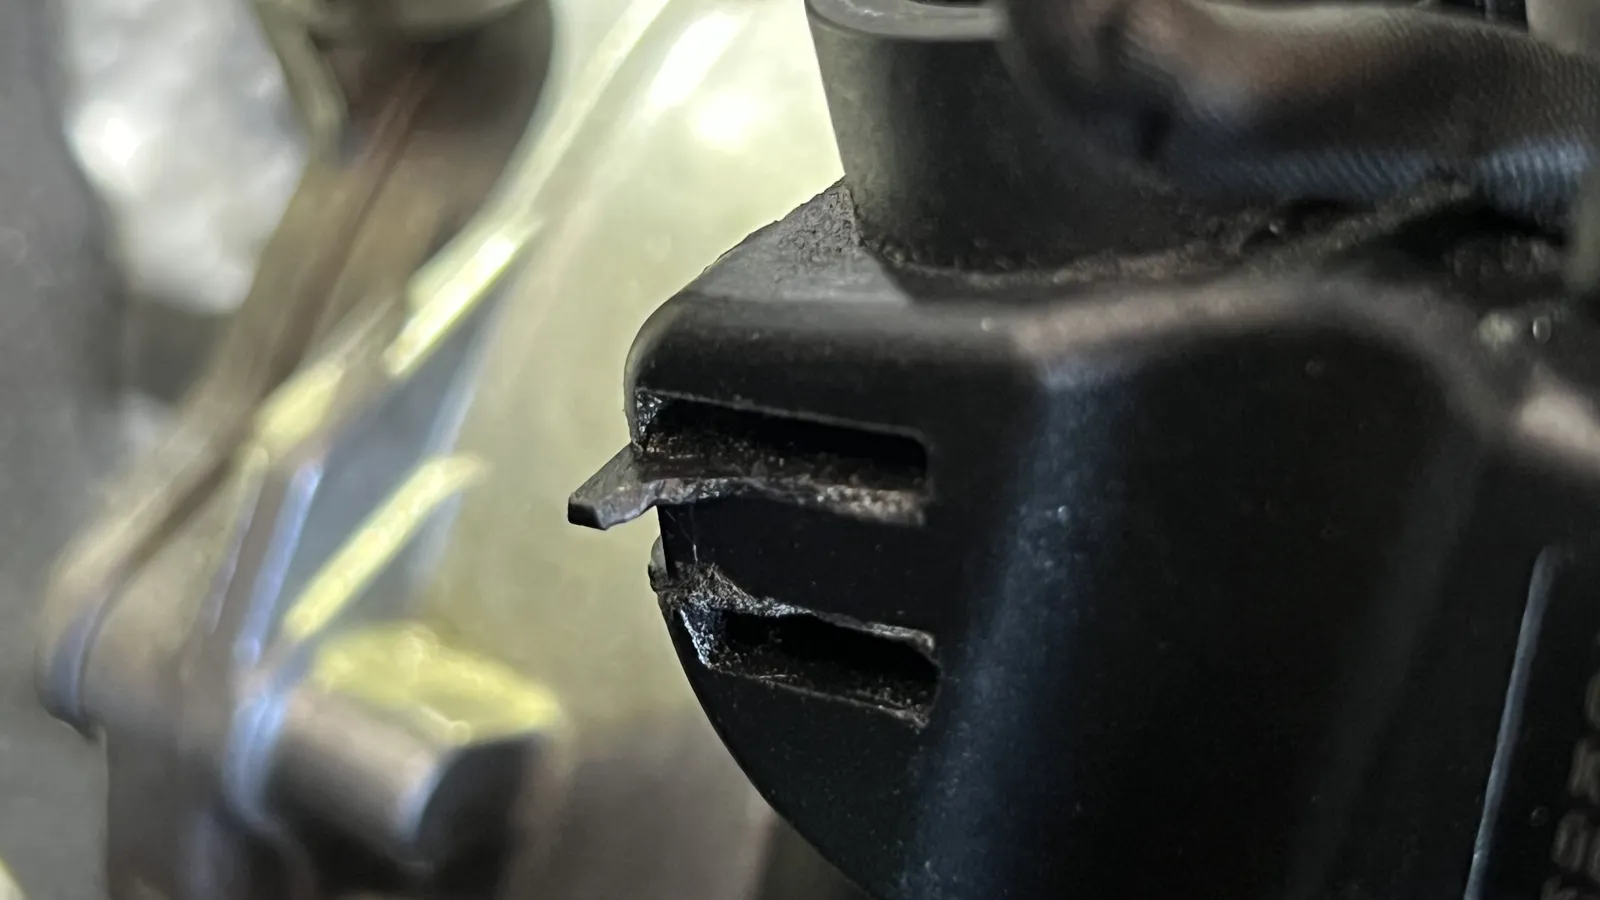 Found a broken tab on the end of the coil wiring harness connector.
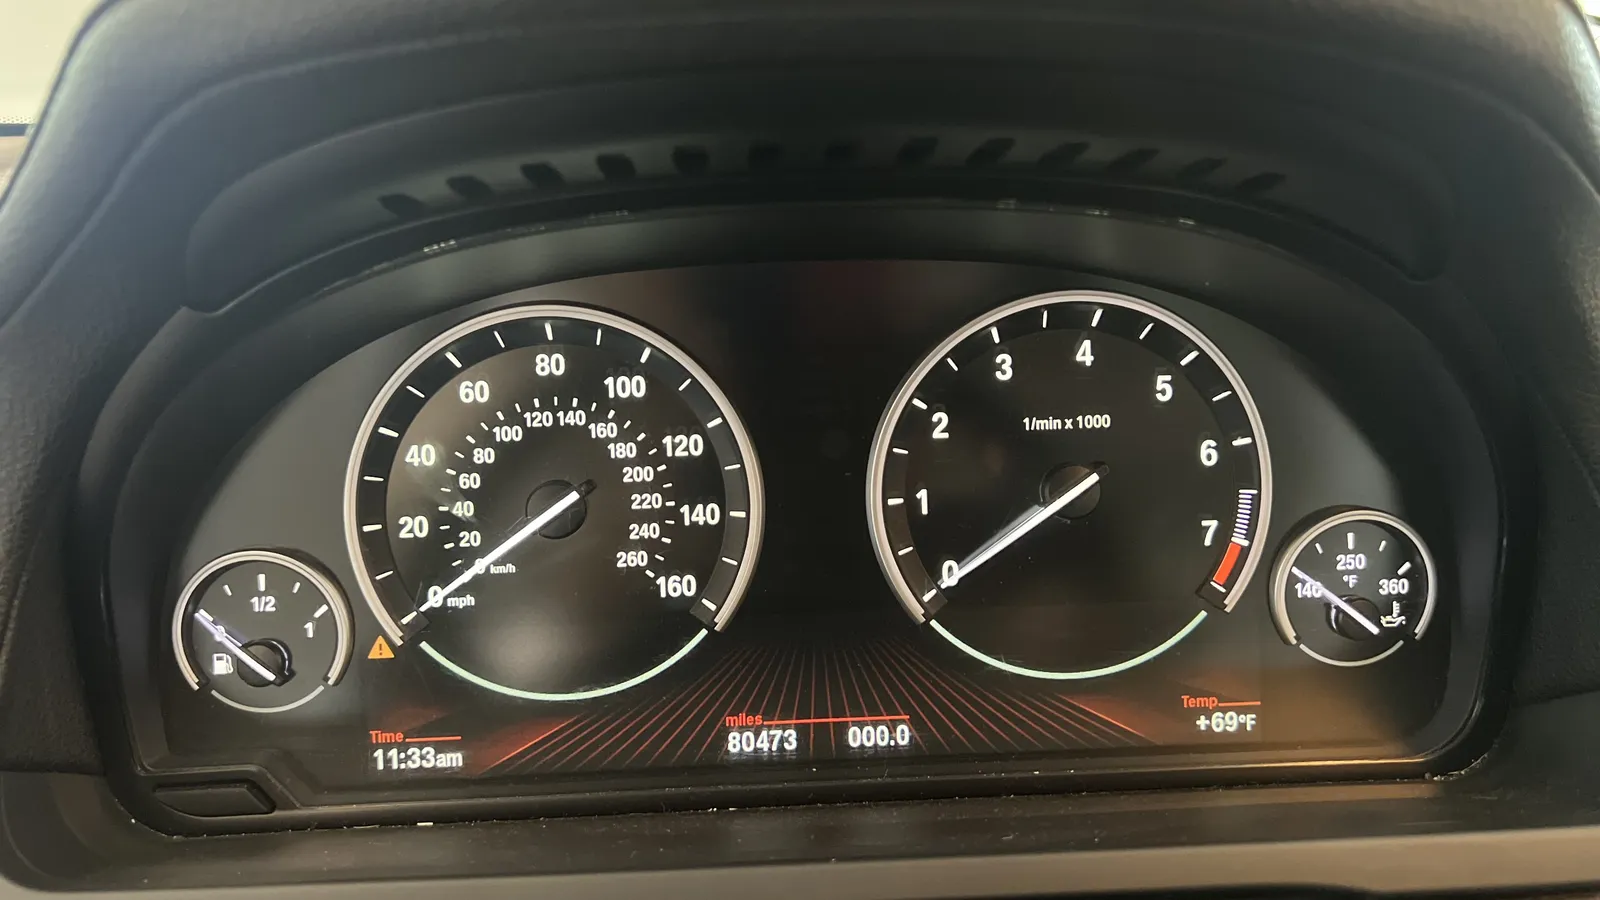 No check engine light, but only because the codes were just cleared.
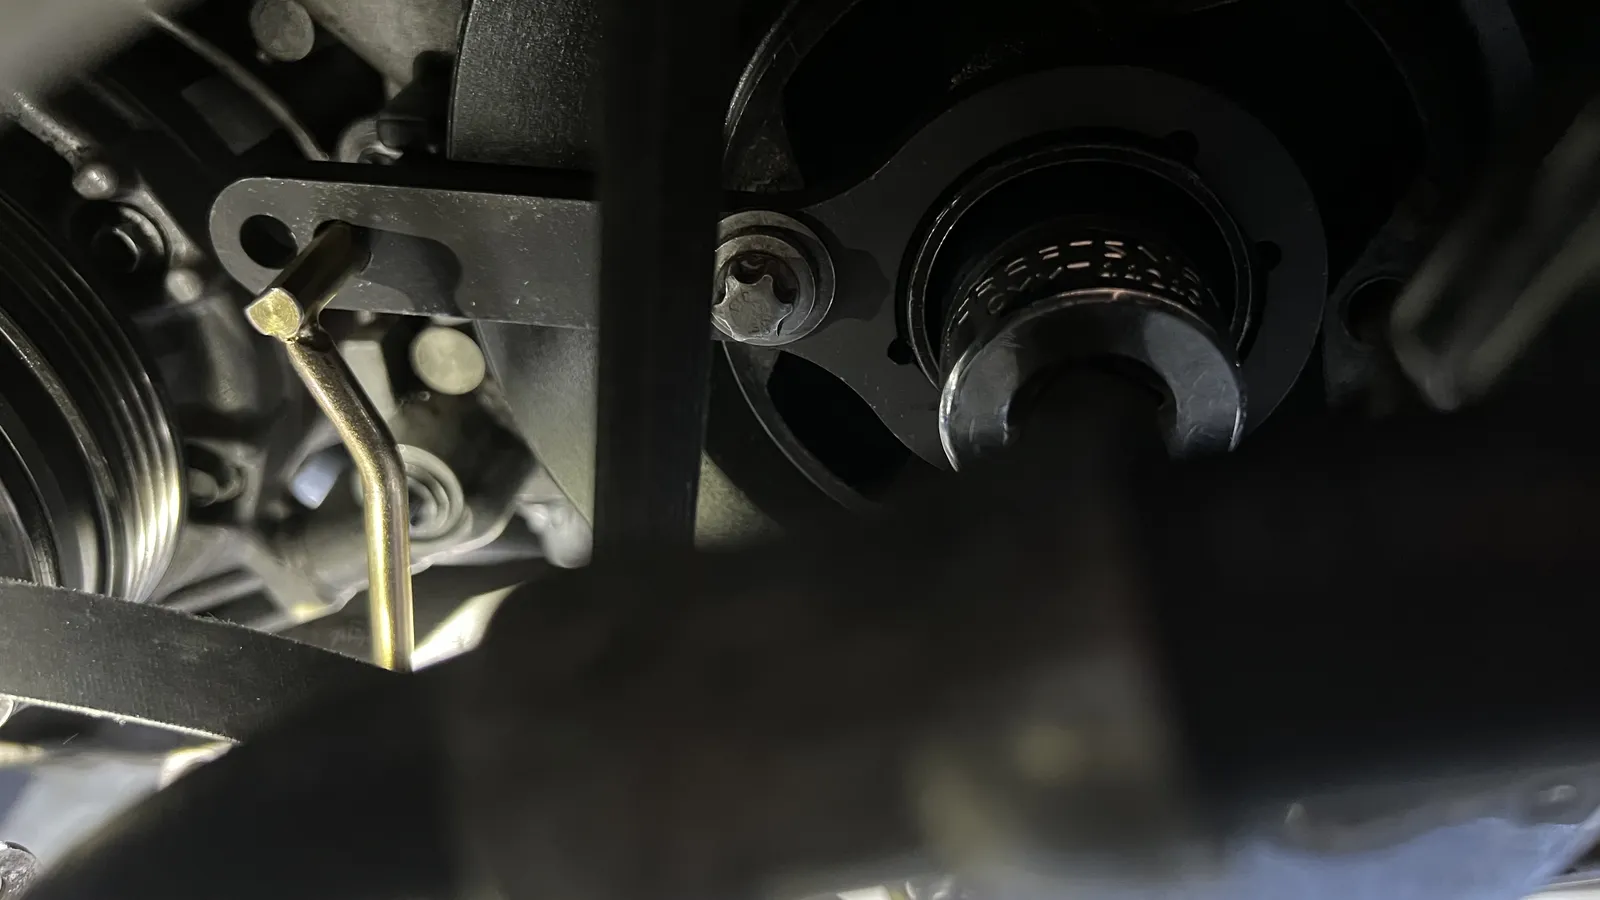 Timing tool installed, crank locked in the correct position.
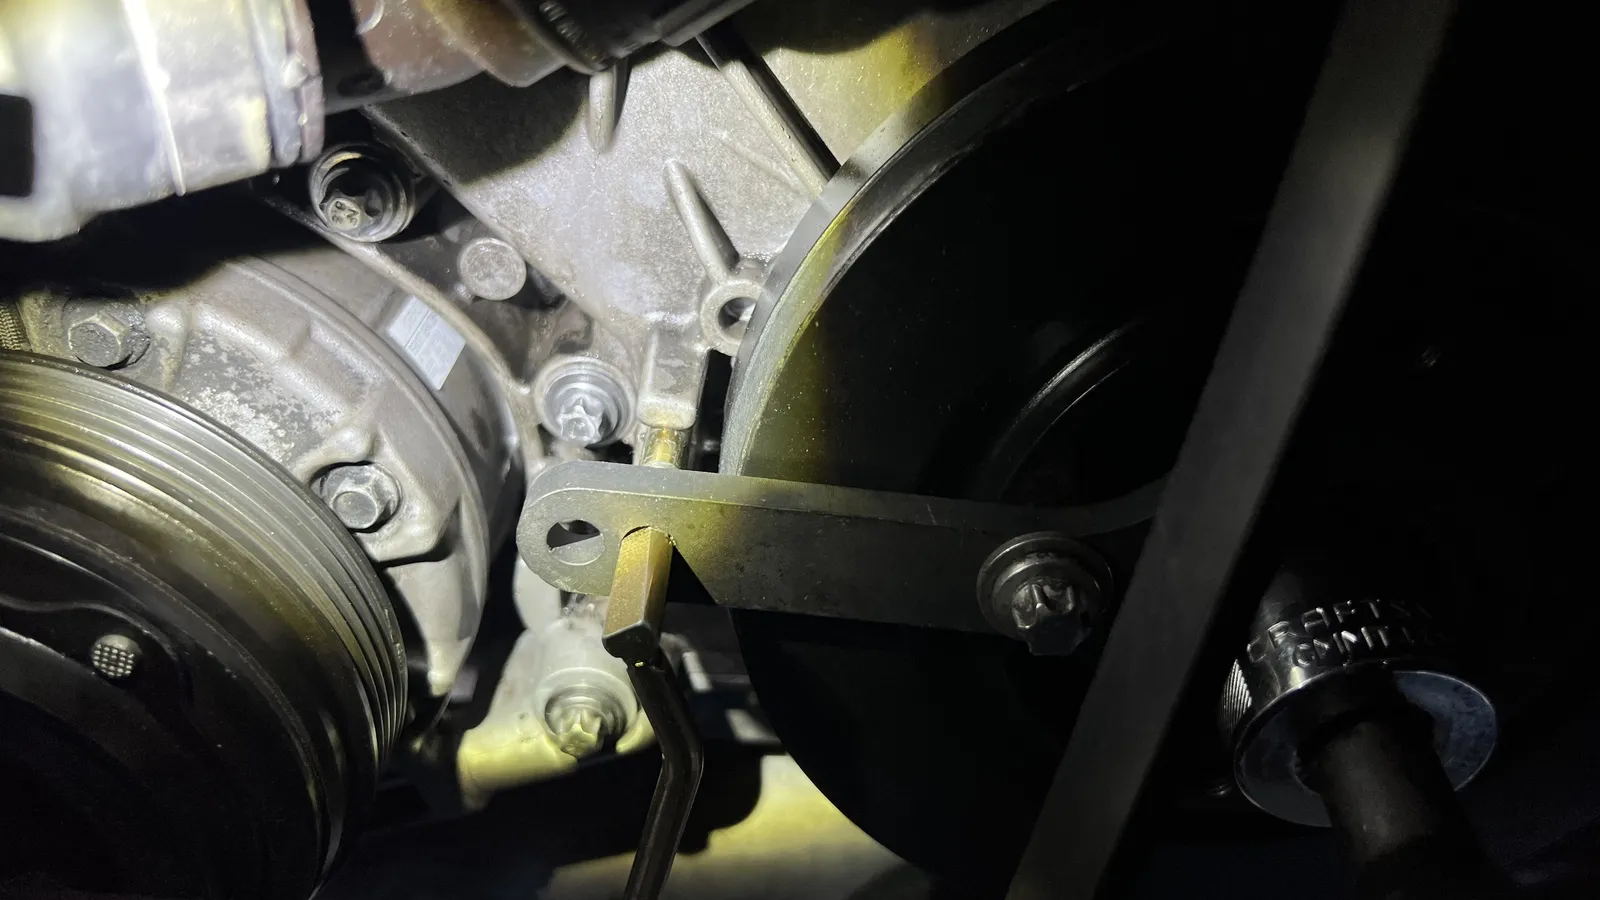 Another angle on the timing tool in place.
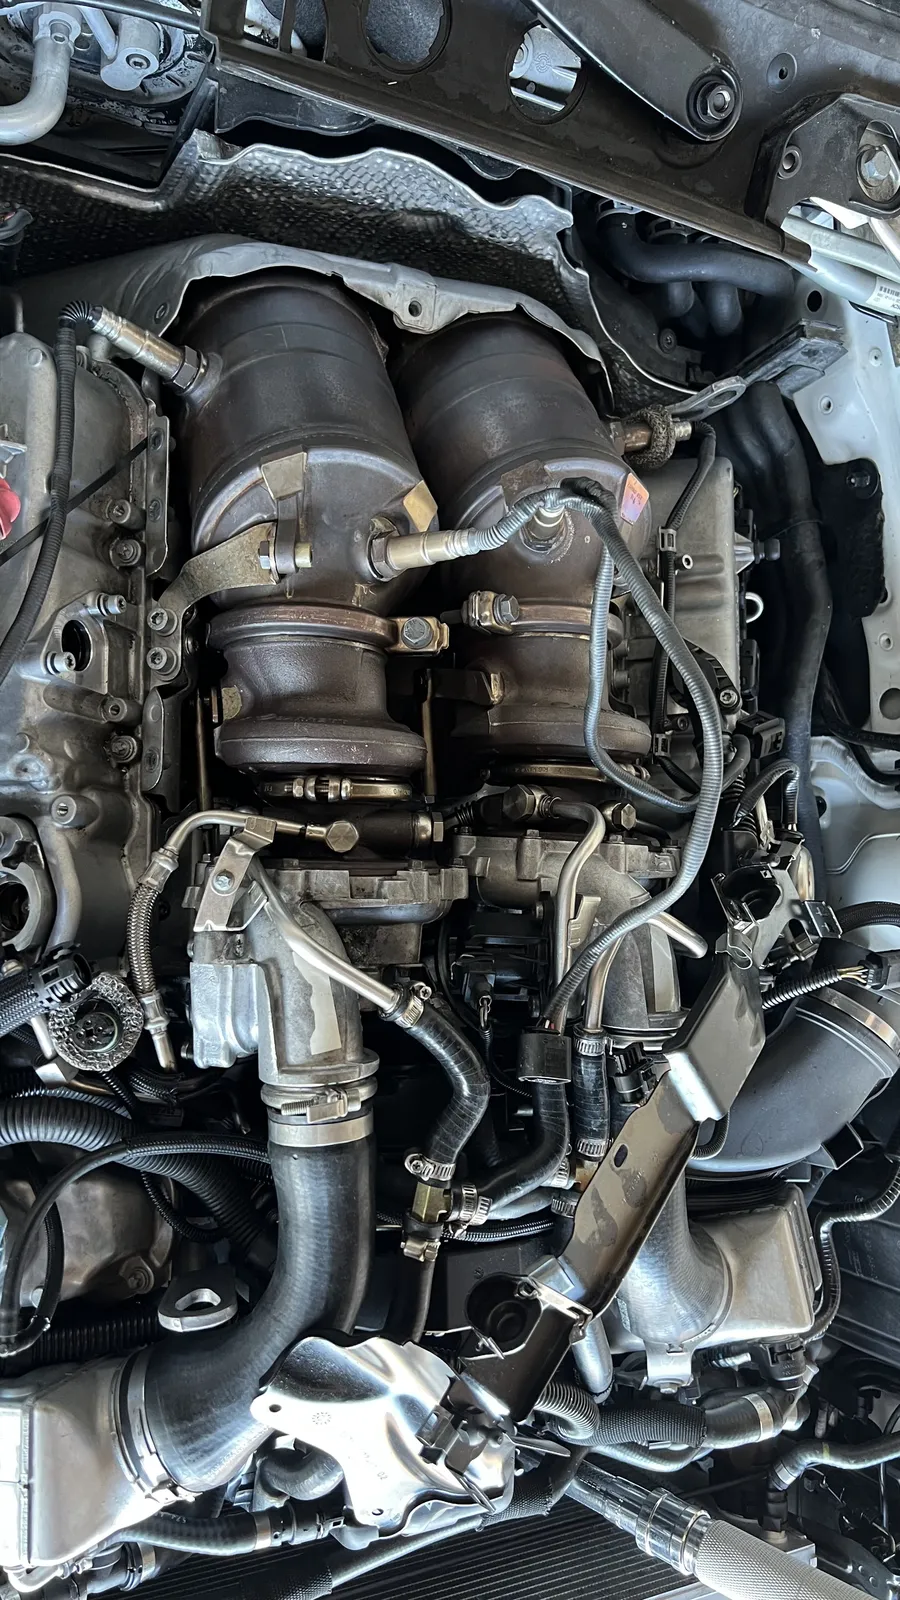 Teardown progress: bank 1 intercooler and fan out to make room up front.
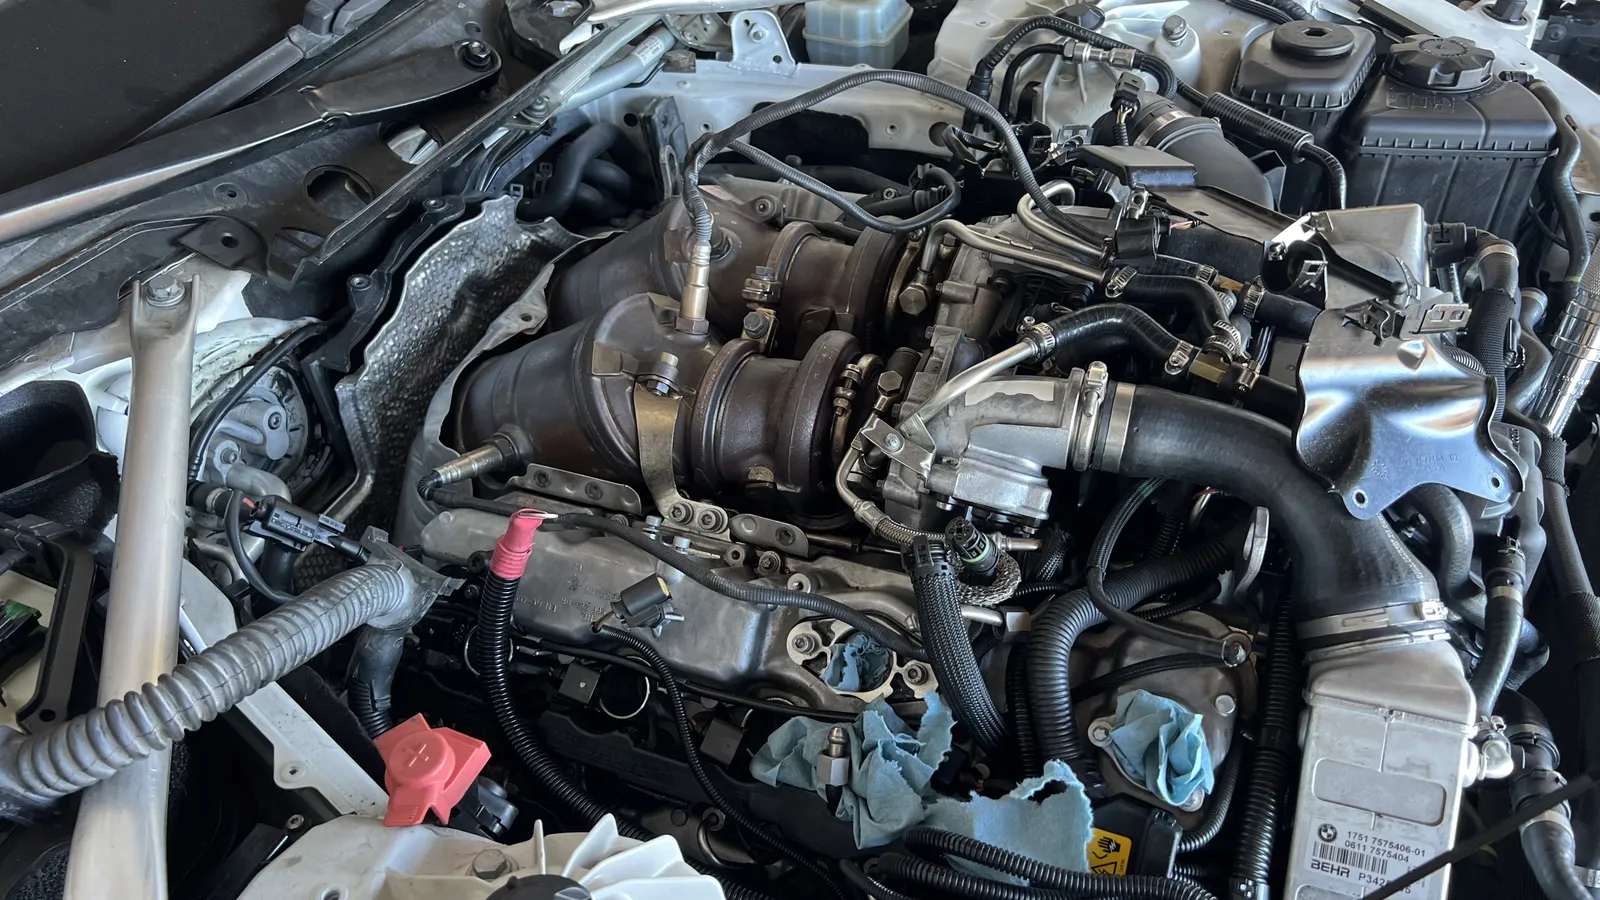 Bank 1 shielding off, ports covered so nothing falls in.
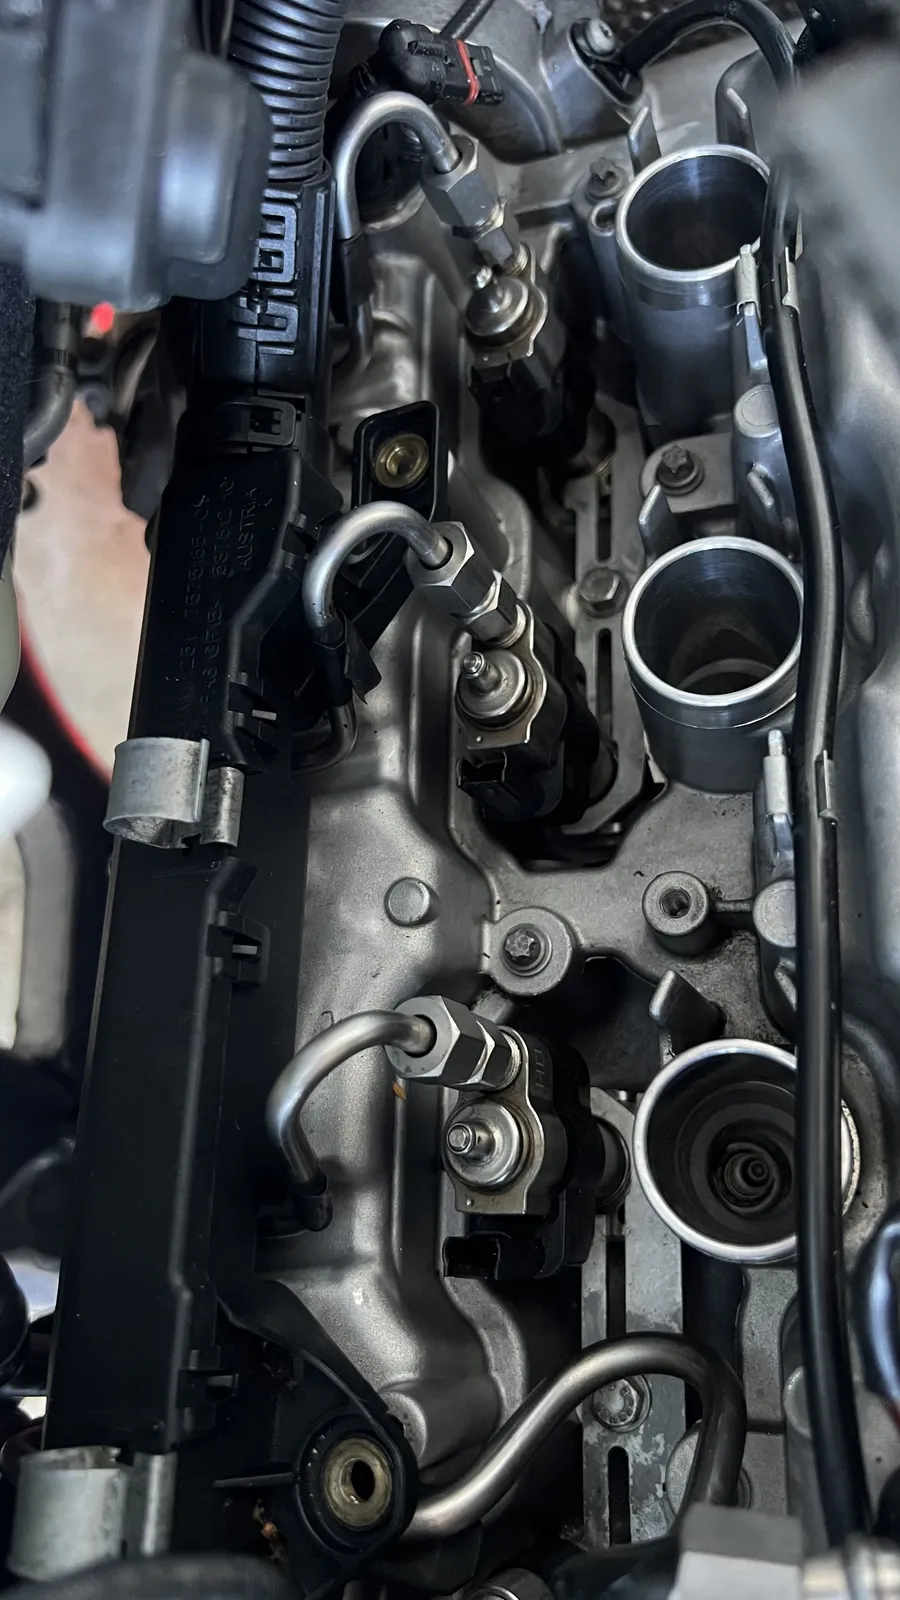 Working toward the bank 1 valve cover.
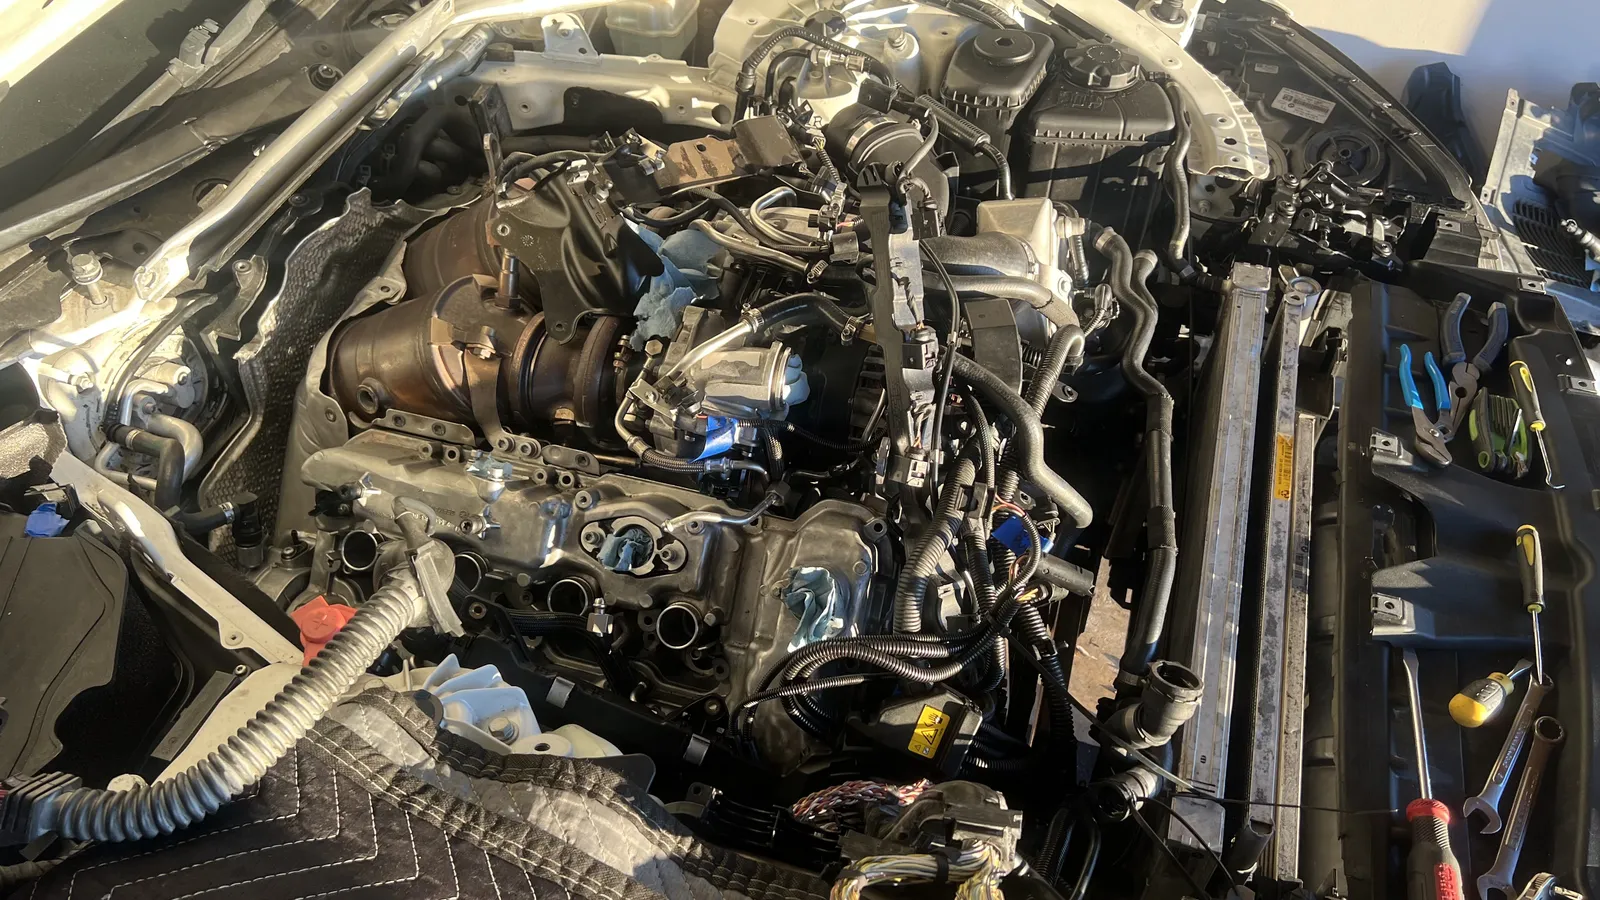 Bank 1 as of Oct 13: harnesses unplugged and tape-labeled, intercooler out, valve cover next.
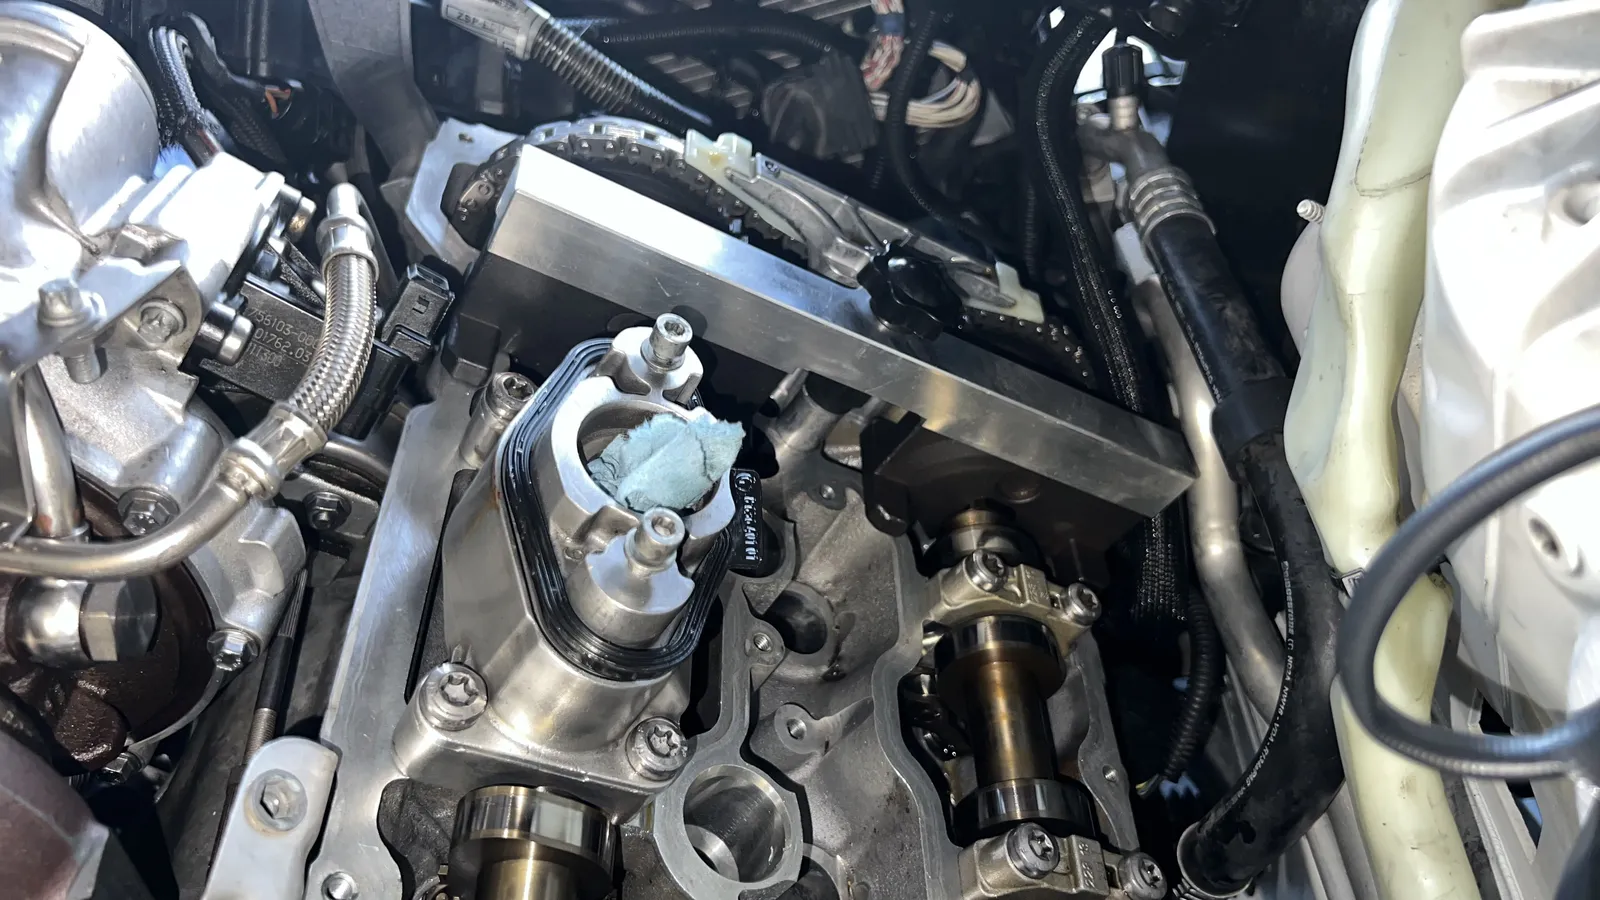 Bank 1 with the valve cover off: cam timing block bolted across the cams, chain and VANOS gears visible.
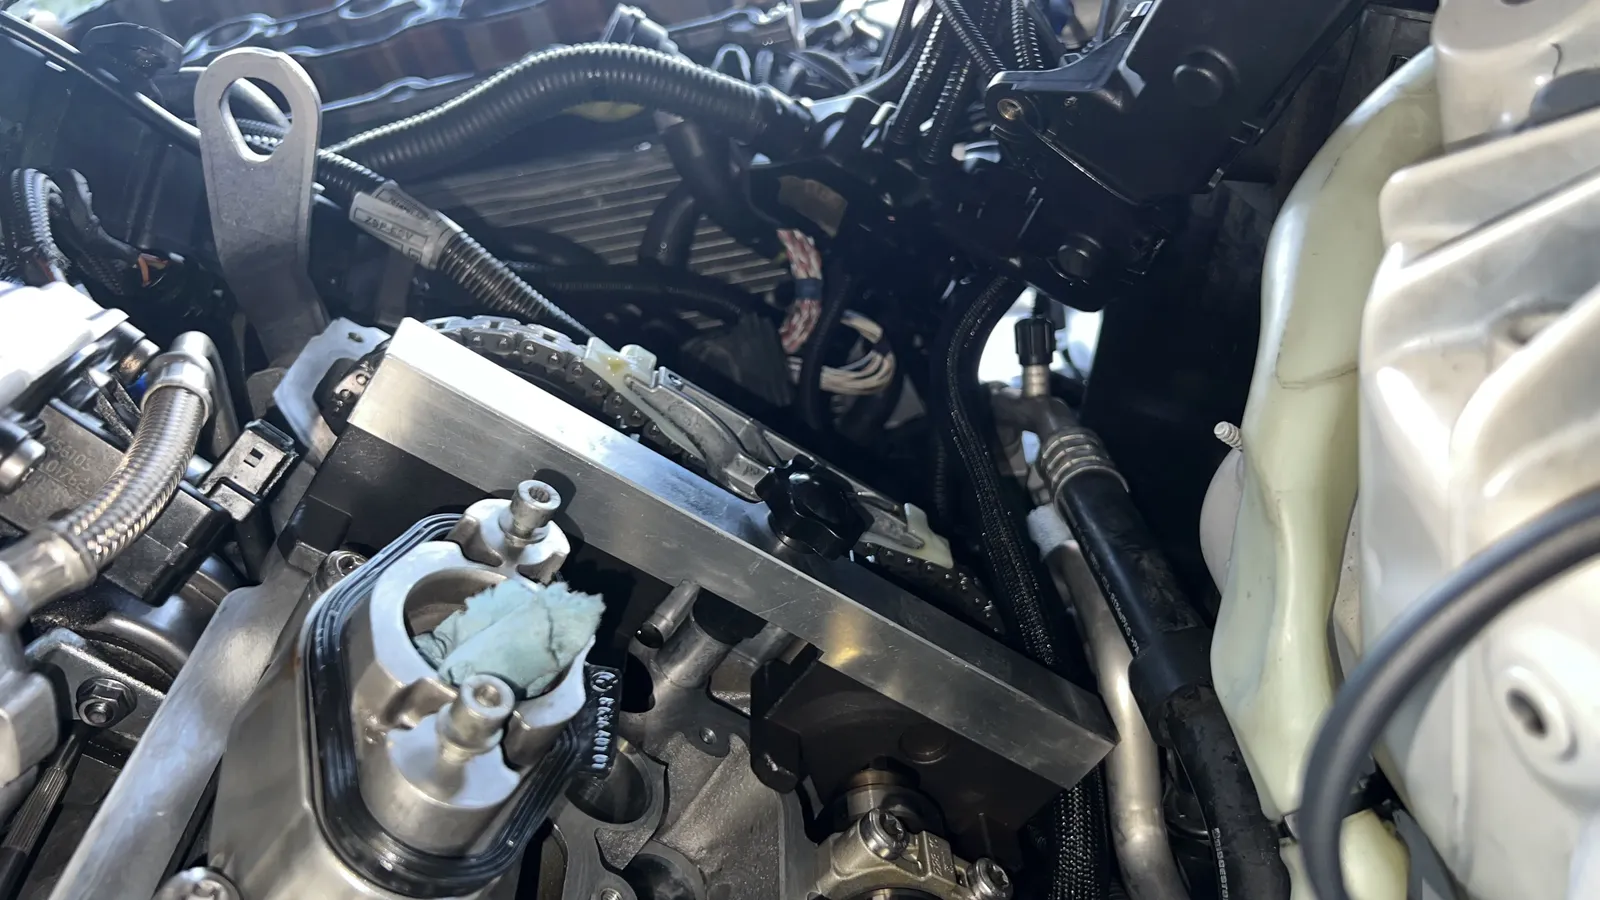 Another angle of the timing block in place on bank 1.
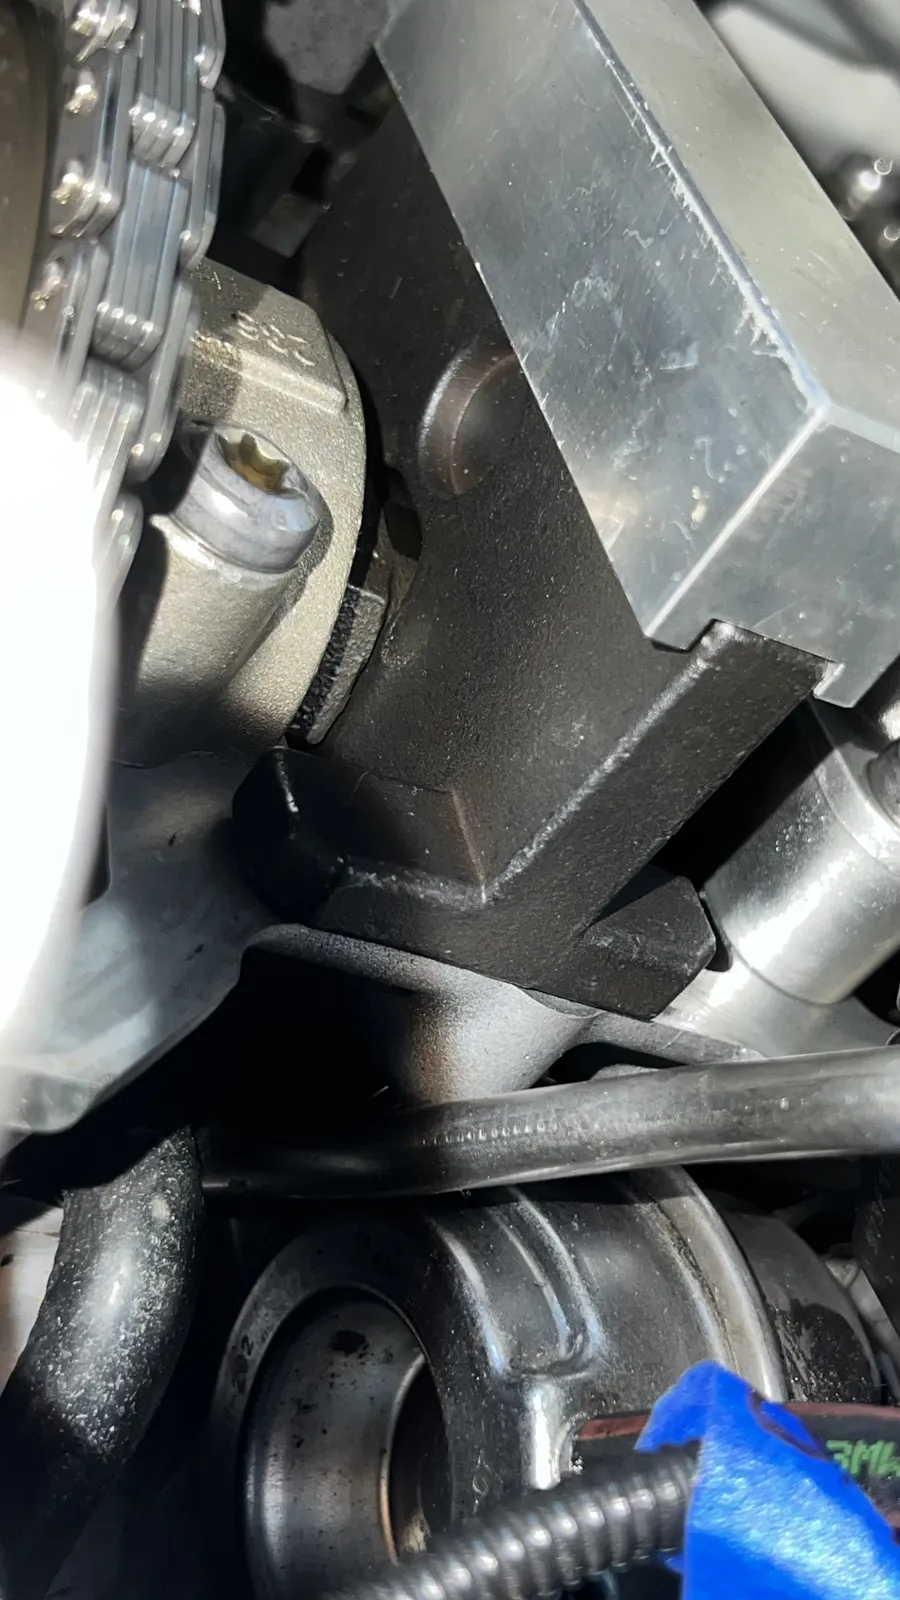 Close-up: the block's foot sits flat on the head with the cam flat engaged — no gap.
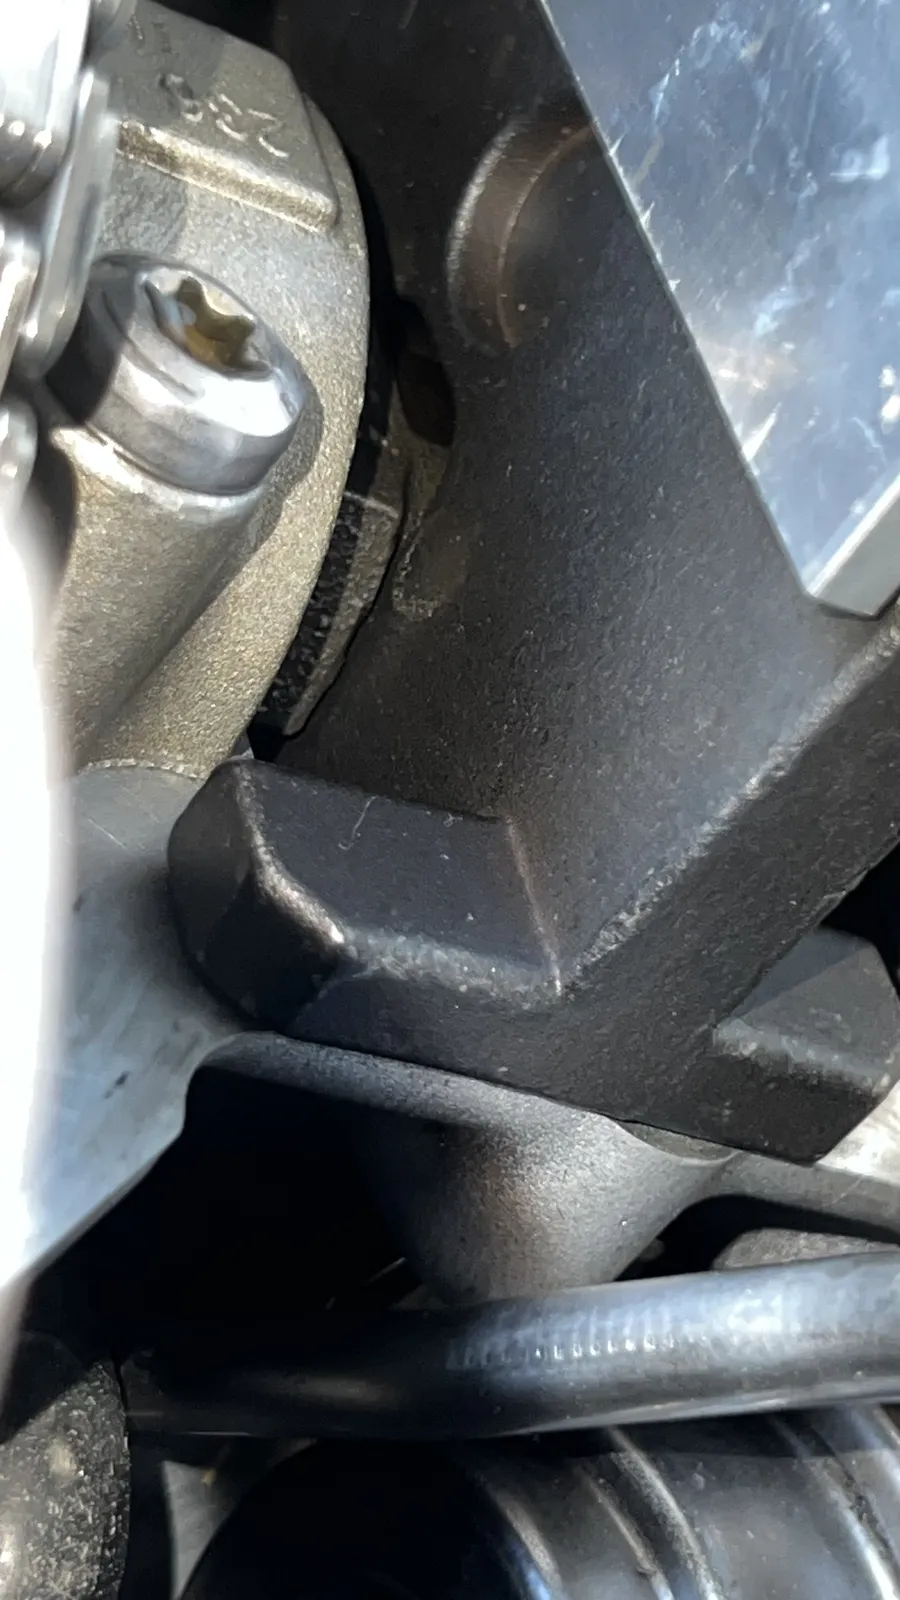 Second cam, same check: block seated flush, timing confirmed correct.
Side note: N63 / MSD85 DME silent and invisible on the diagnostic link — what woke it up
Oct 15–17, 2026BMW F02 750Li N63 MSD85 DME no communication: the symptom
The engine computers went completely silent — the N63 uses two MSD85 DMEs, one per bank (addresses 0x12 and 0x18). It would not answer my scanner over the ENETENET The Ethernet diagnostic cable BMW F-series cars use: a plain network connection from the laptop to the car’s OBD port. cable, or a generic OBD2 reader, while the other modules were visible. The same thing had happened once before, on Oct 3 before the first start, and a full power reset on a strong external battery cured it then.
DME not responding after low voltage or overvoltage: what I think triggered it
On Oct 15–16 the car saw voltage extremes. My 100 A bench power supply sagged to about 11.9 V at the car under load, and in another mode, with no load, it read over 16 V. My theory is that the low voltage, the 16 V+, or both pushed the DME into a protective lock-out state that a normal key cycle wouldn’t clear.
ECU not powering on: what woke it up (Oct 17, about 9:18 AM)
- Two 12 V LiFePO4 batteries in parallel (about 200 Ah together), charged overnight so they were giving 14 V+ (about 14.8 V measured at the relay box input), connected to the engine-bay positive jump post, with ground on the front engine lifting eye.
- The car’s own battery disconnected.
- A full drain: all power removed, and the car’s positive and negative cable ends held together for 2 minutes.
- The strong supply reconnected, ignition on.
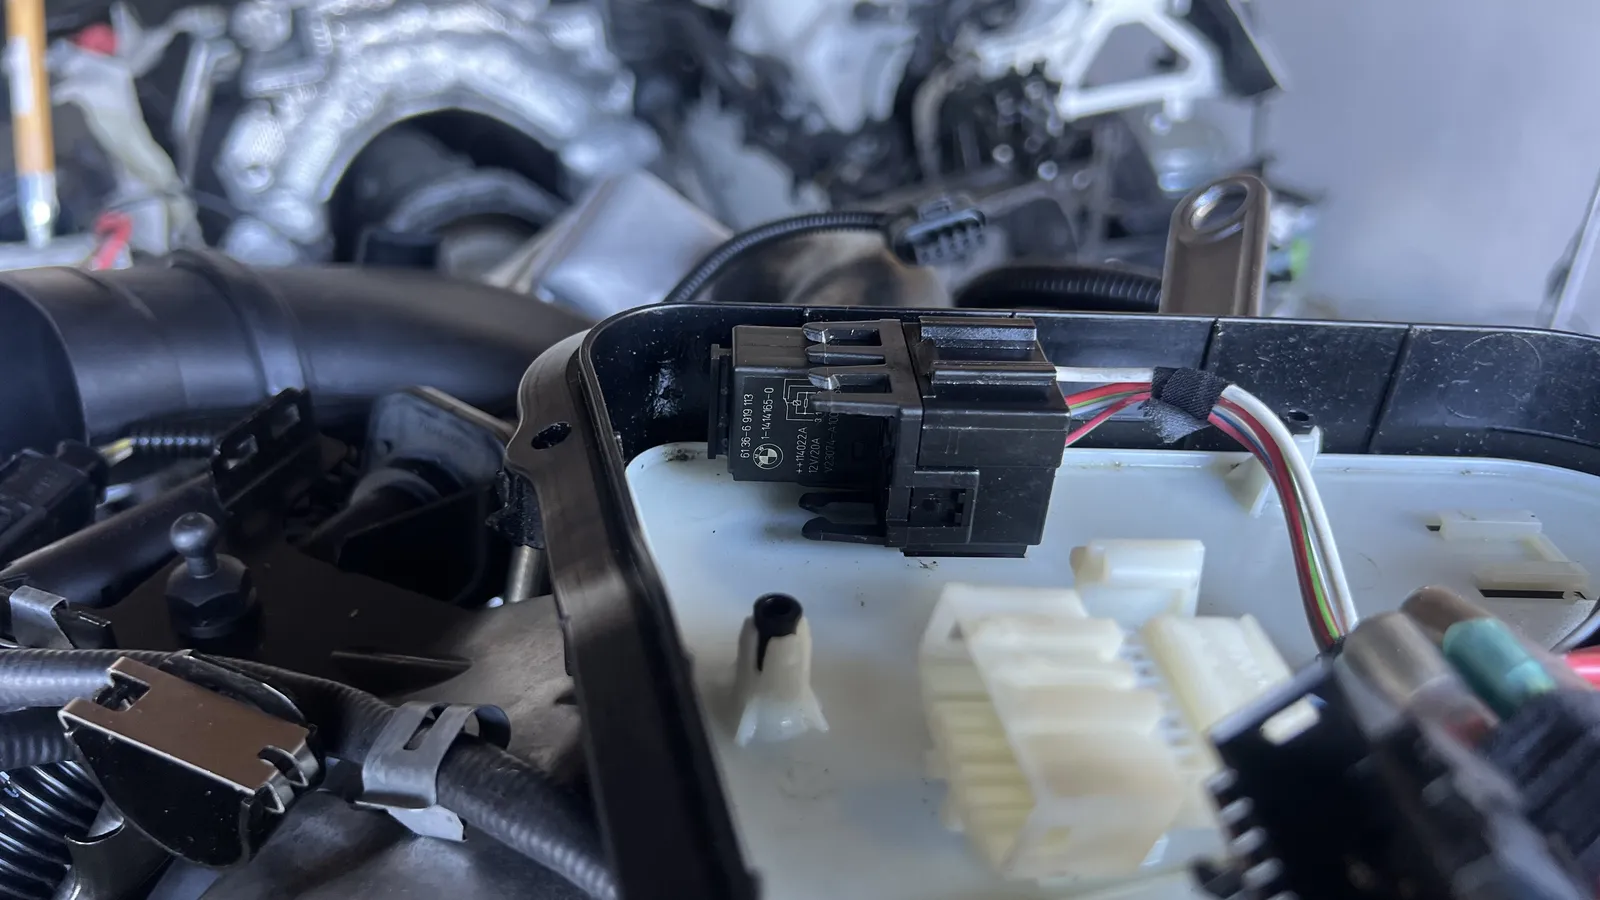
The DME answered immediately. To be honest about it: I had also fitted a brand-new DME relay the night before, so that may have contributed.
With the DME back, the remaining faults pointed to connectors unplugged or damaged during the intake and fuel-rail work: the throttle body sensor, the rail pressure sensor and the high-pressure pump valve. The rail pressure sensor plug won’t latch, either.
The car’s software update went through, but a few codes still point to the bank 1 high-pressure fuel rail pressure sensor. I checked its connector and found the ground open. As a temporary fix I soldered that ground to the air intake sensor’s ground — I found the right wire by ohm-checking which one connects to car ground.
So that neither the sensor nor the connector is left as a suspect, I ordered both: a new sensor from FCP Euro (OE supplier) 13537537319Part 13537537319 BMW high-pressure fuel rail pressure sensor (OE supplier). One ordered from FCP Euro on Oct 17, 2026, $66.99; shipped Oct 18. and a new connector from eBay. Changing the sensor means taking the bank 1 parts off again to get the high-pressure fuel rail out. I’ll probably also research and buy a new air intake sensor: its plastic retaining clip broke off, so right now it’s only press-fit.
Cooling circuits: two systems, two fillers
The N63 has two separate coolant systems. They don’t share coolant, and each has its own filler.
High-temperature loopThe main engine coolant loop: block, heads, turbo bearing housings and the main radiator.
Filler by the firewall. The normal engine coolant: block, heads, the turbochargers and the main radiator.
How to check it: there are no marks. Measure down the filler neck with a clean ruler or a marked straw, and compare with the figure in the service information.
Low-temperature (charge-air) loopThe low-temperature coolant loop that cools the charge-air coolers (intercoolers) — and on the N63, both DMEs too.
Filler at the front centre. Cools the two charge-air coolers (the big silver boxes at the front of the engine) and both engine computers (DMEsDigital Motor Electronics, BMW’s engine computer. The N63 has two (one per bank), and both are liquid-cooled by the low-temperature loop., the thin silver boxes in the front corners).
How to check it: MIN/MAX marks are under the cap. Electric pump: 11517566335Electric coolant pump for the charge-air-cooler (low-temperature) loop — per David..
Diagrams: BMW Group technical training (via 6post.com). These are N63TUN63TU The 2013+ “Technical Update” N63 (N63B44O1), with revised cooling, Valvetronic and other changes. The cooling diagrams on this page are labelled as N63TU drawings. This car’s engine is the original N63B44A, not the TU. drawings — similar to, but not identical to, the original N63B44A in this car.
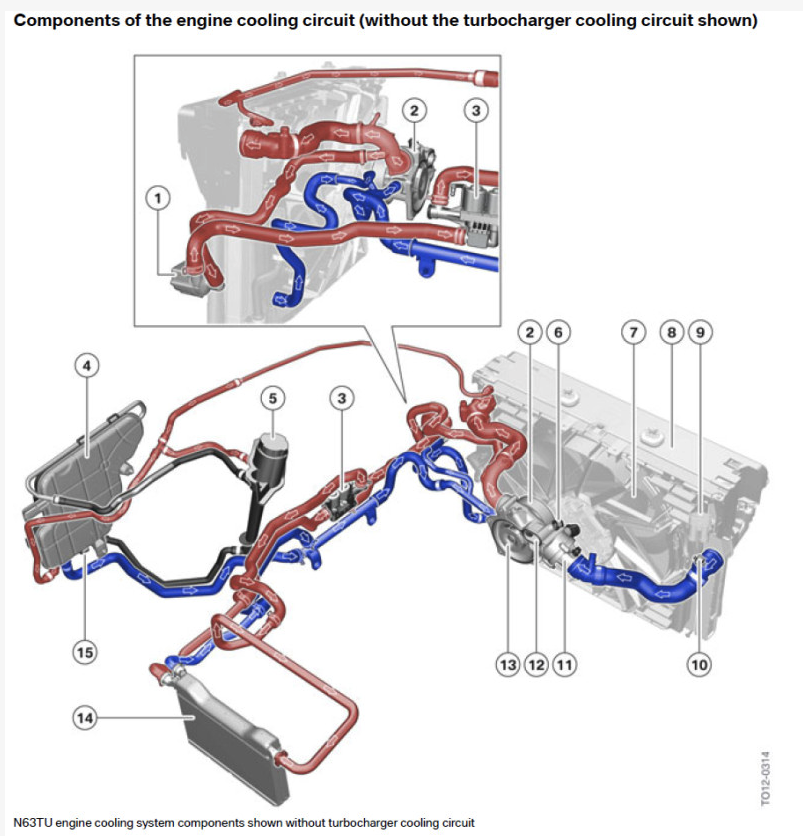
- 1 Electric auxiliary water pump
- 2 Coolant pump
- 3 Duo heater control valve
- 4 Expansion tank
- 5 Filling cup
- 6 Coolant temperature sensor at engine outlet
- 7 Electric fan
- 8 Radiator
- 9 Plug connection for electric fan
- 10 Coolant temperature sensor at radiator outlet
- 11 Map thermostat
- 12 Return of heated coolant from engine housing to coolant pump
- 13 Supply of cooled coolant via impeller to engine housing
- 14 Heater core
- 15 Coolant level sensor
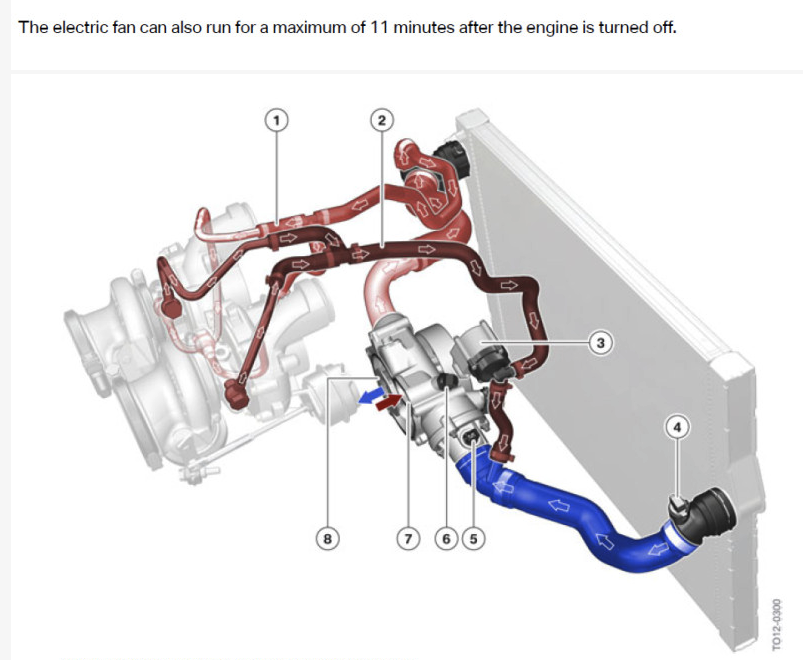
- 1 Supply line to the exhaust turbochargers
- 2 Return line from the turbochargers to the auxiliary water pump
- 3 Electric auxiliary water pump
- 4 Coolant temperature sensor at radiator outlet
- 5 Map thermostat
- 6 Coolant temperature sensor at engine outlet
- 7 Return of heated coolant from engine housing to coolant pump housing
- 8 Supply of cooled coolant to engine housing
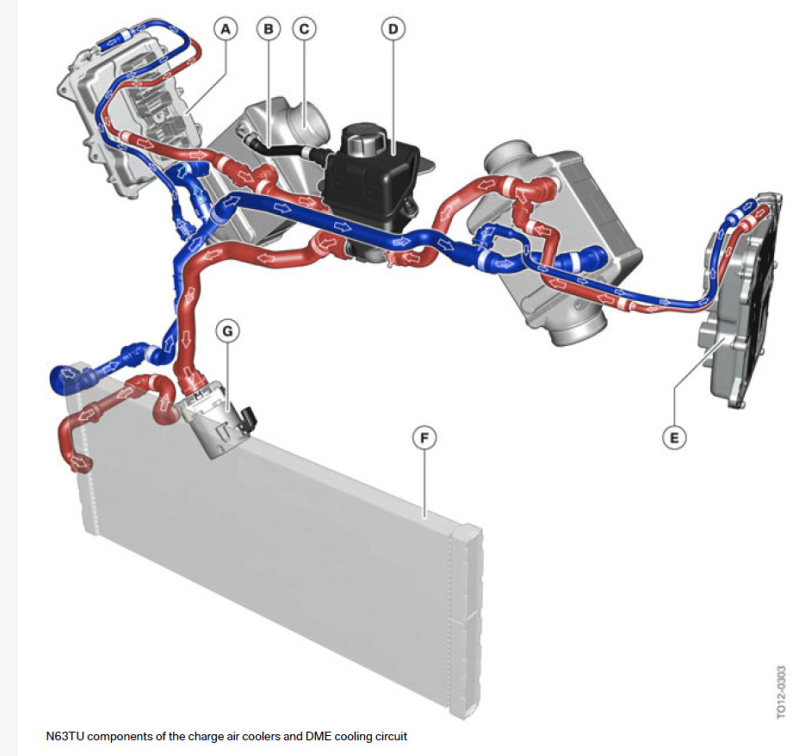
- A DME 1
- B Ventilation line for charge-air cooling
- C Charge-air cooler
- D Expansion tank
- E DME 2
- F Cross-flow heat exchanger for the charge-air coolers and DME circuit
- G Electric coolant pump for this circuit
From the listing to engine-out — and every part since
May 13 – Oct 5, 2026From the listing to engine-out May 10 – Jun 24, 2026 · scroll →
The whole project at a glance May – Oct 5, 2026
Sources: photo dates from camera EXIF / media_assets.taken_at (30 undated photos placed by their position in the camera’s IMG_ sequence), city-level location from photo GPS (rounded, never exact), auction dates from the saved stat.vin page, money dates from the SCA invoice, DMV dates from the statements, order dates from bmwagent and email receipts.
Parts: ordered → received → installed Jul – Oct 5, 2026 · one row per order · hover a row for its items
As of Oct 5, 2026, bmwagent shows ordered parts as installed (except cart/returned/spares). Many were marked installed in bmwagent on Oct 5 and dated ~Sep 7, 2026 (~4 weeks earlier). Earlier recorded install dates (e.g. Aug 28) are kept. Parts bought before tracking began (June) have no order date in the source.
| Status | Item | Part # | Vendor | Qty | Cost | Dates | Source |
|---|---|---|---|---|---|---|---|
| Ordered | Fuel pressure sensor connector (bank 1 rail) eBay ETA Oct 21–23 | | eBay | 1 | ord 10-18 | order (Oct 2026) | |
| Ordered | 12Pcs for BMW 5 6 7 F10 F01 F12 AC Conditioning Control Switch Button Cover Trim Order 26-15287-13833 · eBay item 255265053972 · ETA Oct 21–24 · $21.71 with tax | | eBay | 1 | $20.24 | ord 10-19 | order (Oct 2026) |
| Shipped | BMW High Pressure Fuel Pressure Sensor - OE Supplier (bank 1 rail) Order R022798430 · Shipped Oct 18, 2026 | 13537537319 | FCP Euro | 1 | $66.99 | ord 10-17 | order (Oct 2026) |
| Installed | Oil separator set - N63 4.4L UPS 1Z21W2R8YW90633247 | 11158636540 | eBay | 1 | $215.37 | ord 07-08 → rec 07-25 → inst 08-28 | bmwagent |
| Installed | Crankcase Vent Pipe - Cylinders 1-4 USPS 9434608106245347057479 | 11157575640 | eBay | 1 | $28.96 | ord 07-09 → rec 07-25 → inst 09-07 | bmwagent |
| Installed | Crankcase Vent Pipe - Cylinders 5-8 USPS 9434608106245347057479 | 11157575641 | eBay | 1 | $28.96 | ord 07-09 → rec 07-25 → inst 09-07 | bmwagent |
| Installed | A.I.R Pump O-Ring Vacuum Pump O Ring | 7119906090 | BMW Parts Warehouse | 1 | $2.81 | ord 07-13 → rec 07-25 → inst 09-07 | bmwagent |
| Installed | Automatic Transmission Oil Cooler Hose O-Ring | 17211742636 | BMW Parts Warehouse | 1 | $4.98 | ord 07-13 → rec 07-25 → inst 09-07 | bmwagent |
| Installed | Chain Guide Tensioner side OEM cart from bmw.oempartsonline.com (2012 750Li Base) | 11317574397 | BMW Parts Warehouse | 2 | $90.12 | ord 07-13 → rec 07-25 → inst 09-07 | bmwagent |
| Installed | Crankshaft Gear | 11217571037 | BMW Parts Warehouse | 1 | $40.20 | ord 07-13 → rec 07-25 → inst 08-28 | bmwagent |
| Installed | Engine Coolant Pipe O-Ring (Turbos) Washers for coolant to turbo connector/banjo bolts | 07119963201 | BMW Parts Warehouse | 2 | $1.00 | ord 07-13 → rec 07-25 → inst 09-07 | bmwagent |
| Installed | Engine Cylinder Head Bolt Kit OEM cart from bmw.oempartsonline.com (2012 750Li Base) | 11127607557 | BMW Parts Warehouse | 2 | $182.48 | ord 07-13 → rec 07-25 → inst 09-07 | bmwagent |
| Installed | Engine Oil Pan Gasket Main Main Upper gasket | 11137566644 | BMW Parts Warehouse | 1 | $46.44 | ord 07-13 → rec 07-25 → inst 09-07 | bmwagent |
| Installed | Engine Oil Pump Pickup Tube Gasket OEM cart from bmw.oempartsonline.com (2012 750Li Base) | 11417562090 | BMW Parts Warehouse | 1 | $14.99 | ord 07-13 → rec 07-25 → inst 09-07 | bmwagent |
| Installed | Engine Timing Chain ( Oil Pump Chain) OEM cart from bmw.oempartsonline.com (2012 750Li Base) | 11415a19c97 | BMW Parts Warehouse | 2 | $121.56 | ord 07-13 → rec 07-25 → inst 09-07 | bmwagent |
| Installed | Exhaust Manifold O-Ring ( Turbo Gasket ) Exhaust Manifold to Turbo Base | 11627576991 | BMW Parts Warehouse | 2 | $29.98 | ord 07-13 → rec 07-25 → inst 09-07 | bmwagent |
| Installed | Front Cover Gasket Set OEM cart from bmw.oempartsonline.com (2012 750Li Base) | 11147566411 | BMW Parts Warehouse | 1 | $14.99 | ord 07-13 → rec 07-25 → inst 09-07 | bmwagent |
| Installed | Front Cover Seal - BMW Front seal for crankshaft | 11147647380 | BMW Parts Warehouse | 1 | $36.53 | ord 07-13 → rec 07-25 → inst 09-07 | bmwagent |
| Installed | Head Gasket OEM cart from bmw.oempartsonline.com (2012 750Li Base) | 11127567765 | BMW Parts Warehouse | 2 | $254.60 | ord 07-13 → rec 07-25 → inst 09-07 | bmwagent |
| Installed | Manifold Gasket Exhaust OEM cart from bmw.oempartsonline.com (2012 750Li Base) | 11627614095 | BMW Parts Warehouse | 2 | $173.96 | ord 07-13 → rec 07-25 → inst 09-07 | bmwagent |
| Installed | Manifold Gaskets Intake OEM cart from bmw.oempartsonline.com (2012 750Li Base) | 11617547242 | BMW Parts Warehouse | 2 | $73.06 | ord 07-13 → rec 07-25 → inst 09-07 | bmwagent |
| Installed | Oil Feed Tube O-Ring / Washers OEM cart from bmw.oempartsonline.com (2012 750Li Base) | 07119963072 | BMW Parts Warehouse | 1 | $0.38 | ord 07-13 → rec 07-25 → inst 09-07 | bmwagent |
| Installed | Oil Outlet Tube Gasket Upper OEM cart from bmw.oempartsonline.com (2012 750Li Base) | 11427577017 | BMW Parts Warehouse | 1 | $8.98 | ord 07-13 → rec 07-25 → inst 09-07 | bmwagent |
| Installed | Oil Outlet Tube Lower Seal / Washers | 07119963129 | BMW Parts Warehouse | 2 | $1.02 | ord 07-13 → rec 07-25 → inst 09-07 | bmwagent |
| Installed | Oil Return Tube Seal OEM cart from bmw.oempartsonline.com (2012 750Li Base) | 11427578079 | BMW Parts Warehouse | 2 | $9.96 | ord 07-13 → rec 07-25 → inst 09-07 | bmwagent |
| Installed | Rear Main Seal Retainer OEM cart from bmw.oempartsonline.com (2012 750Li Base) | 11148483798 | BMW Parts Warehouse | 1 | $98.48 | ord 07-13 → rec 07-25 → inst 09-07 | bmwagent |
| Installed | Slide Rails - BMW Need 2 assuming same part both sides | 11317565242 | BMW Parts Warehouse | 2 | $90.12 | ord 07-13 → rec 07-25 → inst 09-07 | bmwagent |
| Installed | Upper Timing (VANOS) Cover Gasket OEM cart from bmw.oempartsonline.com (2012 750Li Base) | 11127566281 | BMW Parts Warehouse | 2 | $29.98 | ord 07-13 → rec 07-25 → inst 09-07 | bmwagent |
| Installed | Valve Cover Gasket 1-4 OEM cart from bmw.oempartsonline.com (2012 750Li Base) | 11127566289 | BMW Parts Warehouse | 1 | $34.07 | ord 07-13 → rec 07-25 → inst 08-28 | bmwagent |
| Installed | Valve Cover Gasket 5-8 OEM cart from bmw.oempartsonline.com (2012 750Li Base) | 11127566288 | BMW Parts Warehouse | 1 | $34.07 | ord 07-13 → rec 07-25 → inst 08-28 | bmwagent |
| Installed | Valve Cover Seal ( coolant ) Above the rear seal coolant cover | 11148483799 | BMW Parts Warehouse | 1 | $62.99 | ord 07-13 → rec 07-25 → inst 09-07 | bmwagent |
| Installed | Valve Cover Seal / HPFP gasket OEM cart from bmw.oempartsonline.com (2012 750Li Base) | 11128636401 | BMW Parts Warehouse | 2 | $17.96 | ord 07-13 → rec 07-25 → inst 09-07 | bmwagent |
| Installed | Valve Seals Single Head OEM cart from bmw.oempartsonline.com (2012 750Li Base) | 11340029751 | BMW Parts Warehouse | 2 | $138.62 | ord 07-13 → rec 07-25 → inst 08-28 | bmwagent |
| Installed | Water Pump Assembly Gasket OEM cart from bmw.oempartsonline.com (2012 750Li Base) | 11517549445 | BMW Parts Warehouse | 1 | $8.98 | ord 07-13 → rec 07-25 → inst 09-07 | bmwagent |
| Installed | Water Pump Assembly O-Ring | 11517572792 | BMW Parts Warehouse | 1 | $6.64 | ord 07-13 → rec 07-25 → inst 09-07 | bmwagent |
| Installed | Genuine BMW Bolt for Timing Chain Sprocket - Intake/Exhaust Camshaft (10 X 1 X 80 mm) - F01 F02 F10 F12 F13 E70 E71 Stretch Bolts for Cam Sprockets | 11367564346 | Turner Motorsport | 4 | $35.96 | ord 07-25 → rec 08-04 → inst 09-07 | bmwagent |
| Installed | Connecting Rod - BMW (11-24-7-843-237) | 11247843237 | BMW Parts Warehouse | 2 | $445.60 | ord 08-28 → inst 09-07 | bmwagent |
| Installed | Valve Spring Retainers - BMW (11-34-7-614-134) Replace Lost one | 11-34-7-614-134 | BMW Parts Warehouse | 1 | $8.55 | ord 08-28 → rec 08-28 → inst 08-28 | bmwagent |
| Installed | Engine oil-pan bolt M8×48 Shipped Sep 2. | 07129909348 | BMW Parts Warehouse | 5 | $28.45 | ord 09-01 | email receipt (order #13609) |
| Installed | Oil-pan bolt M8×25 (listed as “Inter-Cooler Bolt” on the receipt) Full set ordered after one pan bolt snapped; BMW says pan screws are one-time-use (pre-coated). Shipped Sep 2. | 07129909333 | BMW Parts Warehouse | 22 | $41.36 | ord 09-01 | email receipt (order #13609) |
| Installed | Elring Turbocharger Outlet O-Ring Seal - BMW F07/10 F06/12/13 F01/02 N63 4.4L Turner ES# 5339186; order total $67.25 with other lines | 003.520 | Turner Motorsport | 2 | $5.98 | ord 09-17 → inst 09-07 | bmwagent |
| Installed | Genuine BMW Crankshaft Pulley Bolt (18 X 1.5 X 122 mm) - F01 F02 F10 F12 F13 E70 E71 F15 F16 F85 F86 Turner ES# 2911981; shipping/tax remainder to order total $67.25; harmonic balancer bolt Installed 2026-09-18: 100Nm + three x 60 stretch. | 11238648148 | Turner Motorsport | 1 | $19.99 | ord 09-17 → rec 09-18 → inst 09-07 | bmwagent |
| Installed | Genuine BMW Hex Bolt With Washer 07119905400 Turner ES# 14707 | 07119905400 | Turner Motorsport | 2 | $5.98 | ord 09-17 → inst 09-07 | bmwagent |
| Installed | Genuine BMW Torx Bolt - 07129907197 - F06,F10,F12,F13,i3,i8 Turner ES# 2848207 | 07129907197 | Turner Motorsport | 5 | $14.95 | ord 09-17 → inst 09-07 | bmwagent |
| Installed | 09-15 BMW 7 SERIES (F02) LWB REAR RIGHT DOOR WINDOW SUNSHADE SHADE w/ MOTOR Passenger Right Side electric window shade assembly | 263-999905 | eBay | 1 | $264.99 | — | bmwagent |
| Installed | 2-PC Cabin Air Filter with Activated Carbon Cabin Filters | | Amazon | 1 | $16.89 | inst 08-28 | bmwagent |
| Installed | BMW N54 N63 N74 Injector Seal | 13537584315 | Turner Motorsport | 8 | $30.80 | rec 07-31 → inst 09-07 | bmwagent |
| Installed | Castrol EDGE High Mileage 5W-30 Advanced Full Synthetic 6 quarts For Oil changes | | Amazon | 2 | $70.14 | rec 07-12 → inst 08-28 | bmwagent |
| Installed | Connecting Rod 4 good and these 4 should make a full set. | 11247843237 | BMW Parts Warehouse | 1 | $222.80 | rec 07-25 → inst 08-28 | bmwagent |
| Installed | Copper Exhaust Nut | 11627576992 | eBay | 16 | $42.88 | rec 07-25 → inst 09-07 | bmwagent |
| Installed | Crankshaft Main Bearing Cap Bolt | 11117628302 | Turner | 10 | $77.70 | inst 08-28 | bmwagent |
| Installed | Crankshaft Main Bearing Cap Bolt | 11117557325 | Turner | 10 | $99.90 | inst 08-28 | bmwagent |
| Installed | Crankshaft Service Straighten Crankshaft, grind away the bearing material and grind crank journals. New bearing sizes are on the crankshaft | | L&L Grinding | 1 | $280.00 | — | bmwagent |
| Installed | Decoupling Element - Each | 13537577649 | Turner Motorsport | 8 | $103.92 | rec 07-31 → inst 09-07 | bmwagent |
| Installed | Engine Main Bearing Kit - Size 0.25 Oversized | MB5801SM0.25 | Turner Motorsport | 1 | $228.99 | rec 07-25 → inst 08-28 | bmwagent |
| Installed | Engine Timing Chain Guide - BMW (11-14-7-574-373) | 11147574373 | BMW Parts Warehouse | 1 | $37.81 | rec 08-23 → inst 09-07 | bmwagent |
| Installed | Exhaust Manifold Nut | 11627576992 | BMW Parts Warehouse | 16 | $80.16 | rec 07-25 → inst 09-07 | bmwagent |
| Installed | Front OEM BMW 750I 745I 750LI 760I 760LI 745LI Rim 20" 2002-2008 Alloy 59442 This completes the set for a square 20x8.5" all the way around set | 59442 | eBay | 1 | $152.97 | rec 07-25 → inst 09-07 | bmwagent |
| Installed | Genuine BMW Collar Screw For securing outer part of the arches over the crankshaft | 11417508149 | Turner | 7 | $69.93 | inst 09-07 | bmwagent |
| Installed | Genuine BMW Connecting Line 1-4 | 11157646086 | Turner | 1 | $110.00 | inst 09-07 | bmwagent |
| Installed | Genuine BMW Connecting Rod - N63 4.4L S63 4.4L One more to match cylinder 4,5 pair that burned up | 11247843237 | Turner Motorsport | 1 | $277.99 | rec 08-04 → inst 09-07 | bmwagent |
| Installed | Genuine BMW Connecting Rod Bolt | 11247845511 | Turner | 16 | $133.28 | inst 08-28 | bmwagent |
| Installed | Genuine BMW Crankcase Ventilation Connecting Line | 11157646087 | Turner | 1 | $110.00 | inst 09-07 | bmwagent |
| Installed | Genuine BMW O-Ring Test order to see if this fits or matches the BMW one removed turbo down tube to collector seal | 17222245358 | Turner | 1 | $3.99 | inst 09-07 | bmwagent |
| Installed | King Connecting Rod Bearing Set - 0.50mm Oversized | CR8050SV0.5 | Turner Motorsport | 1 | $324.99 | rec 07-25 → inst 08-28 | bmwagent |
| Installed | Lucas Oil 10153 Assembly Lube - 8oz For bearing and other assembly that need lubrication | | Amazon | 1 | $11.32 | inst 08-28 | bmwagent |
| Installed | Marvel Mystery Oil 1 gal Used to try and unseize engine | | Amazon | 1 | $44.96 | inst 08-28 | bmwagent |
| Installed | Oil Return Cover For turbo oil return collection ( source of major leaking in engine ) | 11427935572 | Turner | 1 | $78.47 | inst 09-07 | bmwagent |
| Installed | Rexka 40pcs Bumper Trim Wheelhouse Liner Push-Type Retainer Clip Rivet For the many body panels and covers | 51118174185 | Amazon | 1 | $9.99 | inst 09-07 | bmwagent |
| Installed | Serpentine Belt Set Fit for 2010-2012 For AC and Serpentine | | Amazon | 1 | $21.98 | inst 09-07 | bmwagent |
| Installed | Timing Chain Tensioner, Genuine BMW - N63 and S63 V8 Engines | 11317557741 | Turner Motorsport | 2 | $140.78 | rec 08-04 → inst 09-07 | bmwagent |
| Installed | Timing Chain with Tensioner Rail Same part both sides | 11317567500 | Turner Motorsport | 2 | $155.02 | rec 08-04 → inst 09-07 | bmwagent |
| Installed | Turbo To Downpipe Exhaust Gasket For Turbo to Header / Cats clamp | 18307553601 | Turner | 10 | $105.70 | inst 09-07 | bmwagent |
| Installed | VANOS O-Ring UPS 1Z9549300350685080 O-ring for VANOS not available directly from BMW. | 9263K323 | McMaster | 4 | $16.84 | rec 07-25 → inst 09-07 | bmwagent |
| Installed | VANOS Solenoid Seal Set, BMW - N51/N52, N54, N55, N63, S55 1 set for each VANOS solenoid | 11367548459 | Turner Motorsport | 1 | $14.99 | inst 09-07 | bmwagent |
| Spare / duplicate | Misc. spare hardware Per David: some misc items, in addition to the valve-cover gaskets and the copper header nuts, are spares. | | various | — | David (2026-10-02) | ||
| Spare / duplicate | Valve-cover gaskets — second set Per David: the valve-cover gaskets (1-4 and 5-8) were bought twice; the extra set is a spare. bmwagent records one set from BMW Parts Warehouse (ordered Jul 13); the second purchase is not in bmwagent or the email receipts searched. | 11127566289 / 11127566288 | ? | — | David (2026-10-02) | ||
| Returned | 11+ BMW S63/S63N/N63/N63N Rod Bearing Set (CR8050SV) STD size rod bearing set | | Amazon | 1 | $190.88 | — | bmwagent |
| Returned | XQSMWF N63 Engine Overhaul Head Gasket Set 11127567765 They looked substandard. Worried about quality, so returned. | | Amazon | 1 | $107.43 | — | bmwagent |
| Tool (used) | Piston Ring Compressor | 83-30-0-490-857 | BMW Parts Warehouse | 1 | $23.18 | ord 08-28 → inst 09-07 | bmwagent |
| Tool (used) | 1/2 Torque Wrench, 360° Adjustable Torque Wrench Angle Gauge For the stretch bolts | | Amazon | 1 | $7.99 | inst 08-28 | bmwagent |
| Tool (used) | 120 PCS Polishing Kit for Dremel | | Amazon | 1 | $19.99 | rec 07-12 → inst 08-28 | bmwagent |
| Tool (used) | 14mm&16mm Magnetic Swivel Spark Plug Socket To remove Spark Plugs | | Amazon | 1 | $8.25 | inst 08-28 | bmwagent |
| Tool (used) | 16-Piece Metric Hex Bit Socket Set Lots of Allen bolts on the N63 | | Amazon | 1 | $17.99 | inst 08-28 | bmwagent |
| Tool (used) | 1750 lbs Steel Storage Shelving 5-Tier Utility Shelving Unit For parts organization | | Amazon | 1 | $149.99 | inst 08-28 | bmwagent |
| Tool (used) | 2 Ton Capacity ASME-PASE Certified Foldable Shop Crane Works great | SHOPCRANE | Harbor Freight | 1 | $359.99 | — | bmwagent |
| Tool (used) | 2000 lb. Capacity Foldable Engine Stand Works great but had to buy bolts from Home Depot to mount the engine | PITTSBURGH | Harbor Freight | 1 | $199.99 | — | bmwagent |
| Tool (used) | 2PCS Stretch Belt Mate Kit, Serpentine Belt Tool Install Serpentine Belts | | Amazon | 1 | $8.39 | inst 08-28 | bmwagent |
| Tool (used) | 3/4 Ton Capacity Load Leveler Overkill but worked well Needed C clamps as the built in L brackets just got in the way. | LEVELER | Harbor Freight | 1 | $39.99 | — | bmwagent |
| Tool (used) | 36" x 60" Oil Drip Mat Put under car to protect concrete | | Amazon | 1 | $16.99 | inst 08-28 | bmwagent |
| Tool (used) | 86mm 16 Flutes Oil Filter Wrench For oil filter canister | | Amazon | 1 | $9.99 | inst 08-28 | bmwagent |
| Tool (used) | AXTH 23in1 Right Angle Ratcheting Screwdriver Set For removing tight fit, hard to reach fasteners | | Amazon | 1 | $13.99 | inst 08-28 | bmwagent |
| Tool (used) | BAUER 20V Cordless, 3/8 in. Ratchet Used my existing battery, chargers this tool is indespensible | 20VCORDLESS | Harbor Freight | 1 | $64.99 | — | bmwagent |
| Tool (used) | CTA Tools 2893X05 Crankshaft Holder - Compatible with BMW N63 Holds Crankshaft in place | | Amazon | 1 | $62.67 | inst 08-28 | bmwagent |
| Tool (used) | Car Dolly Set of 4, 6000 LBS Heavy Duty Car Wheel Dolly Used to move Car around in garage | | Amazon | 1 | $156.99 | inst 08-28 | bmwagent |
| Tool (used) | Fuel Injector Remove Tool Injector Slid Hammer Puller Not required but nice to have | | Amazon | 1 | $17.90 | inst 08-28 | bmwagent |
| Tool (used) | GENIUS1: 1A 6V/12V Smart Battery Charger Orig purchased for AGM charging but not enough Amps, will use for other batteries | | Amazon | 1 | $29.87 | inst 08-28 | bmwagent |
| Tool (used) | GENIUS5: 5A 6V/12V Smart Battery Charger For 5A charging of AGM battery | | Amazon | 1 | $69.95 | inst 08-28 | bmwagent |
| Tool (used) | Large Magnetic Fender Covers for Mechanics, Fender Protector Protect paint around engine bay | | Amazon | 1 | $34.99 | inst 08-28 | bmwagent |
| Tool (used) | Microfiber Cleaning Cloths 12 Pack, Premium 16 x 16 For cleaning | | Amazon | 2 | $23.98 | inst 08-28 | bmwagent |
| Tool (used) | Moker Piston Ring Compressor Tool Kit For installing pistons | | Amazon | 1 | $13.99 | inst 08-28 | bmwagent |
| Tool (used) | Orion Motor Tech Valve Spring Compressor For compressing valve springs | | Amazon | 1 | $29.99 | inst 08-28 | bmwagent |
| Tool (used) | Plastigage Set | CTA2450 | Turner Motorsport | 1 | $9.27 | rec 07-25 → inst 08-28 | bmwagent |
| Tool (used) | Two-Way Articulating Borescope with Light Used to scope the cylinders | | Amazon | 1 | $71.99 | inst 08-28 | bmwagent |
| Tool (used) | Zep ZU505128 Fast 505 Cleaner and Degreaser Degreaser works great | | Amazon | 2 | $19.76 | inst 08-28 | bmwagent |
| Tool (used) | maXpeedingrods Engine Timing Locking Tool Kit for BMW N63 Use to lock and remove / install timing chain and put tension on chain | | Amazon | 1 | $85.00 | inst 08-28 | bmwagent |
| In cart — not ordered | Genuine BMW Front Wheel Arch Cover - Right - F02 F01 Right side | 51757898892 | Turner Motorsport | 1 | $63.99 | — | bmwagent |
| In cart — not ordered | Genuine BMW Front Wheel Arch Cover - left - F02, F01 | 51757898891 | Turner Motorsport | 1 | $63.99 | — | bmwagent |
| In cart — not ordered | Genuine Bmw Coolant Hose - 17127595250 Upper Main Coolant Line | 17127595250 | Turner Motorsport | 1 | $243.99 | — | bmwagent |
| In cart — not ordered | OEM Rein Lower Coolant Hose - N63 4.4L Lower radiator coolant line | 17127575427 | Turner Motorsport | 1 | $51.99 | — | bmwagent |